Leaderboard


Popular Content
Showing content with the highest reputation on 01/19/2021 in all areas
-
Come on fellas it can be done!1 point
-
INTEREST LIST POSTED!1 point
-
Thankyou both for helping me offload my buckets...the TFA is Centurion ready, and the TLJ just needed the under chin area resculpted...Im moving away from the New Trilogy FO gear for awhile...CHEERS1 point
-
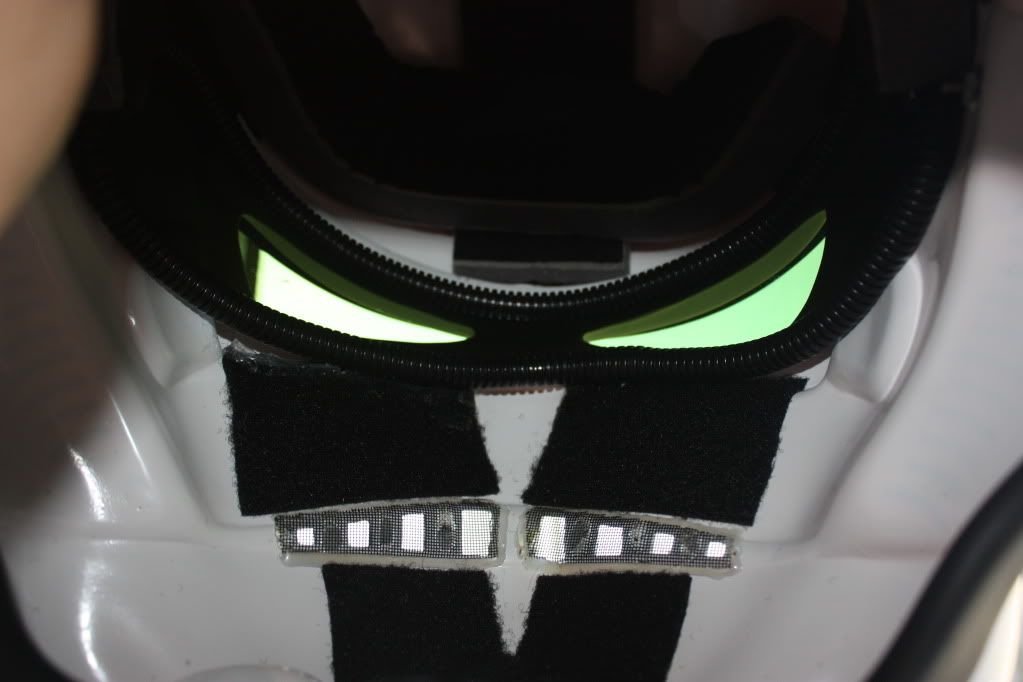
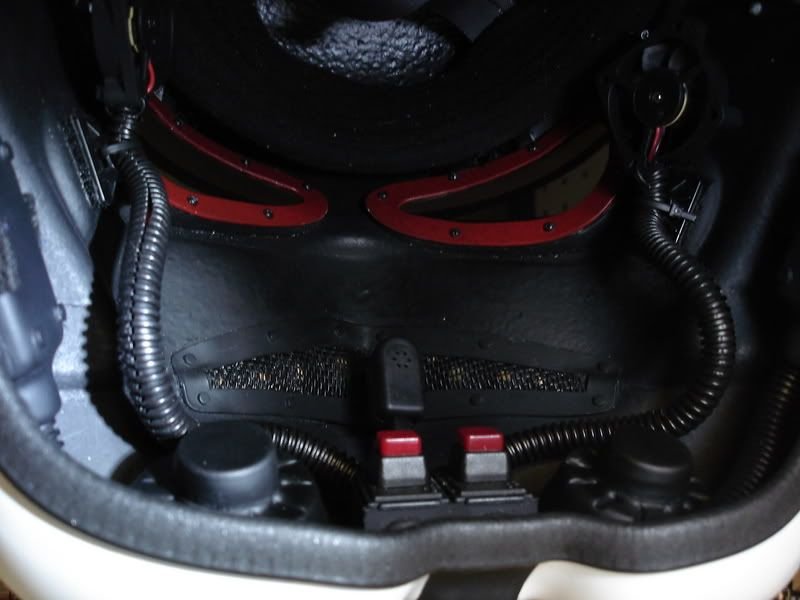
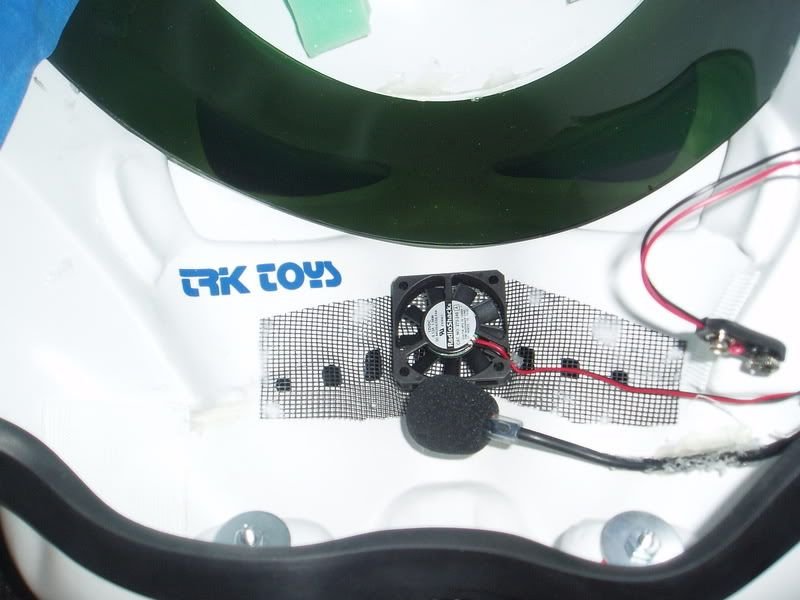
Funny, last week this conversation came up on a FB group I follow. I used the technique Glen outlined on my 3d Print ROTK. The mesh fabric found at most hardware stores is a very flexible plastic that can easily be held in place with a few drops of hot glue. This is a very simple install. Please excuse the sloppy interior and the chips from where I dropped my bucket on the driveway. The only issues I have with it is that all the window screen mesh I've found stateside appears to be square shaped rather than rectangular if that makes sense. Also, the fabric is not "woven" and seems thinner that what's available overseas. I told people that this mesh will hold you over, it's cheap and easily obtainable, but keep looking for something a little more accurate. One of the German members posted a pic of textilene mesh which is commonly used for outdoor furniture and seems to be a great option. Also, someone correct me if I'm wrong, but I just looked at all the TK CRLs and they all simply say "mesh," but don't really specify the type or details. This looks like some amazing work, but someone definitely needs to explain what's going on inside this bucket. Is this a black series conversion? It appears to have a regulated air system and pretty complex electronics, but I can't tell.1 point
-
Imgur is one of the more popular hosting sites and easy to use. Definitely follow Joseph tutorial it is the way to go.1 point
-
Hi Mario, Of course. Please see below: Please let me know if there is anything else you need. :-)1 point
-
There are some plans around for scratch building E-11 parts so you may be able to give that a go I also replaced the front barrel on my Hasbro blaster, added some T-tracks, the light coming through the holes and gaps in the barrel look great. Rest of my build1 point
-
Congratulations Ardeshir, another beautiful build.1 point
-
Alright! Lets get this armor party started. Learn and remember the FISD motto: "Pics or it didn't happen".1 point
-
I think Doopydoos has left the stage on producing E-11's, sad to say. I LOVE their kits and have built a few of them, but I have been on the waiting list for almost 5 months with no reply. I have emailed them several times as well to no avail.1 point
-
Hammer, philips head screwdriver to help split the post, then standard setting tool works for me.
 1 point
 -
Right there with you and following. Got my KB TLJ to start messing with and Jeff’s TLJ Anovos bucket by dumb luck signing posters. Let me know if you need any fiberglass supplies as I have epoxy resin and glass from a different project.1 point
-
I love this weathering. Good luck Scott.1 point
-
Great job on the re-work, good luck with approval.1 point
-
I'd be really interested to see over time if there was any bleed through, some paint and thinners can react with ABS and colors can bleed. I don't use the same paint/covering I normally just use enamel satin spray paint, doesn't reflect light having a dull finish and also doesn't affect the ABS, I made sure I tested that before using it. Just for interests sake I saw this on a recent EIB request, looks like a material not a paint/coating but still very cool, I'm not sure how it will go with sweat though, can get pretty wet in there, I know I've removed my armor after a hot troop to find a waterfall of sweat inside the backplate and chest1 point
-
Oh it definitely gives the armor extra strength. Makes it 100% crack-proof! I can’t recommend people to spray the inside of their armor with it enough!!! Plus it looks really nice with the texture.1 point
-
Here's my ESB bucket - a little strip of black 3M VHB-type tape between each tooth also works well!1 point
-
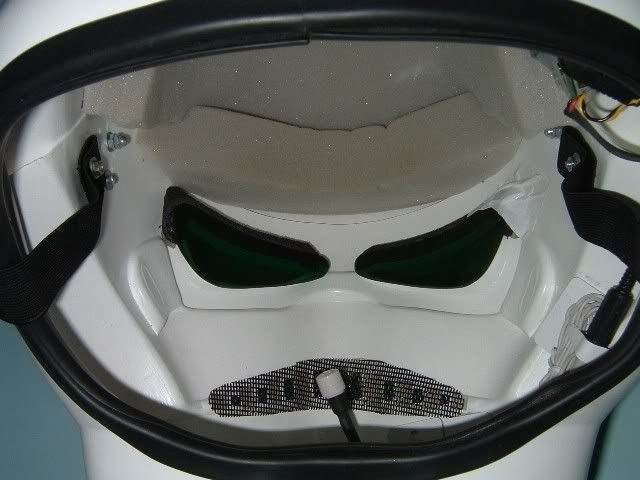
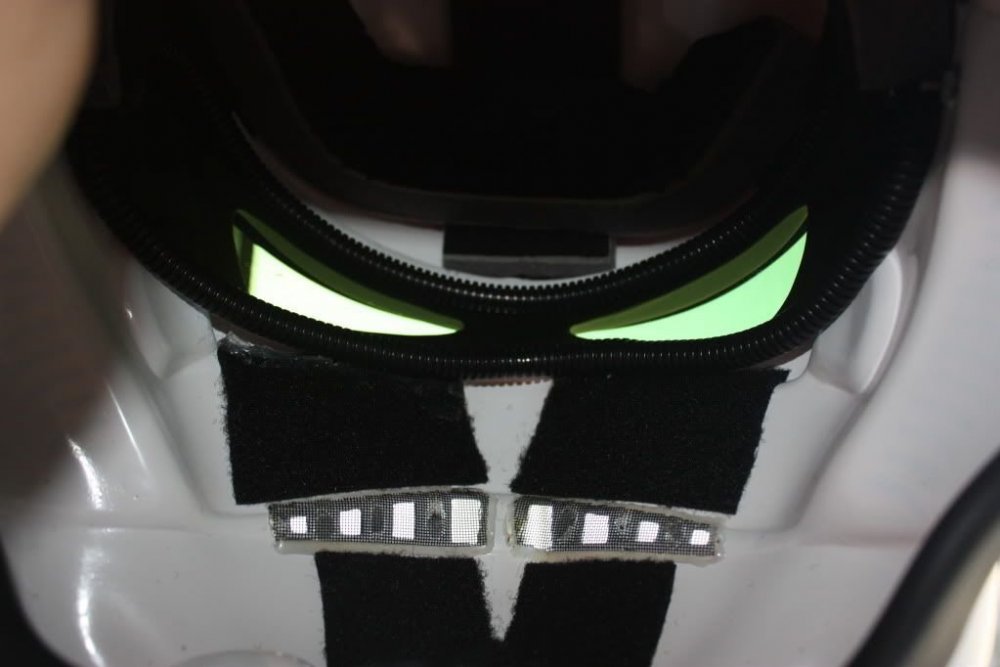
I've seen quite a lot of different ways to add mesh. I use a metal flywire mesh, cut larger than the teeth area so I can fold over, tape in place and add a couple of dabs of black silicon to hold it, normally in both corners then top and bottom in the middle. I've seen tape used, velcro, silicon, hot glue, tabs and screws the list is endless Here are a few examples Even gaffa tape
 1 point
 -
Google search is thy friend https://www.google.com.au/search?q=stormtrooper+holster&source=lnms&tbm=isch&sa=X&ved=0ahUKEwiA8Y6a8IvTAhUK2LwKHeIcCcEQ_AUIBigB&biw=1279&bih=639#spf=1
 1 point