Leaderboard


Popular Content
Showing content with the highest reputation on 09/01/2020 in Posts
-
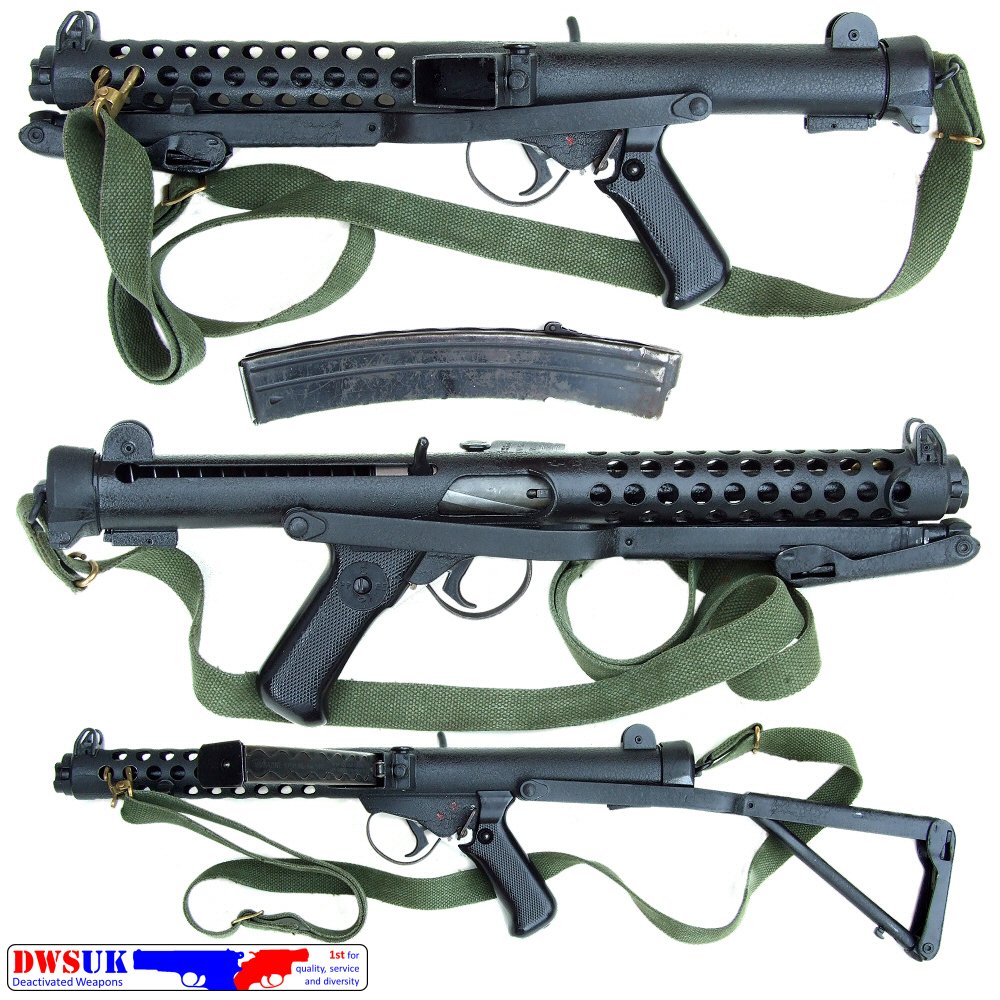
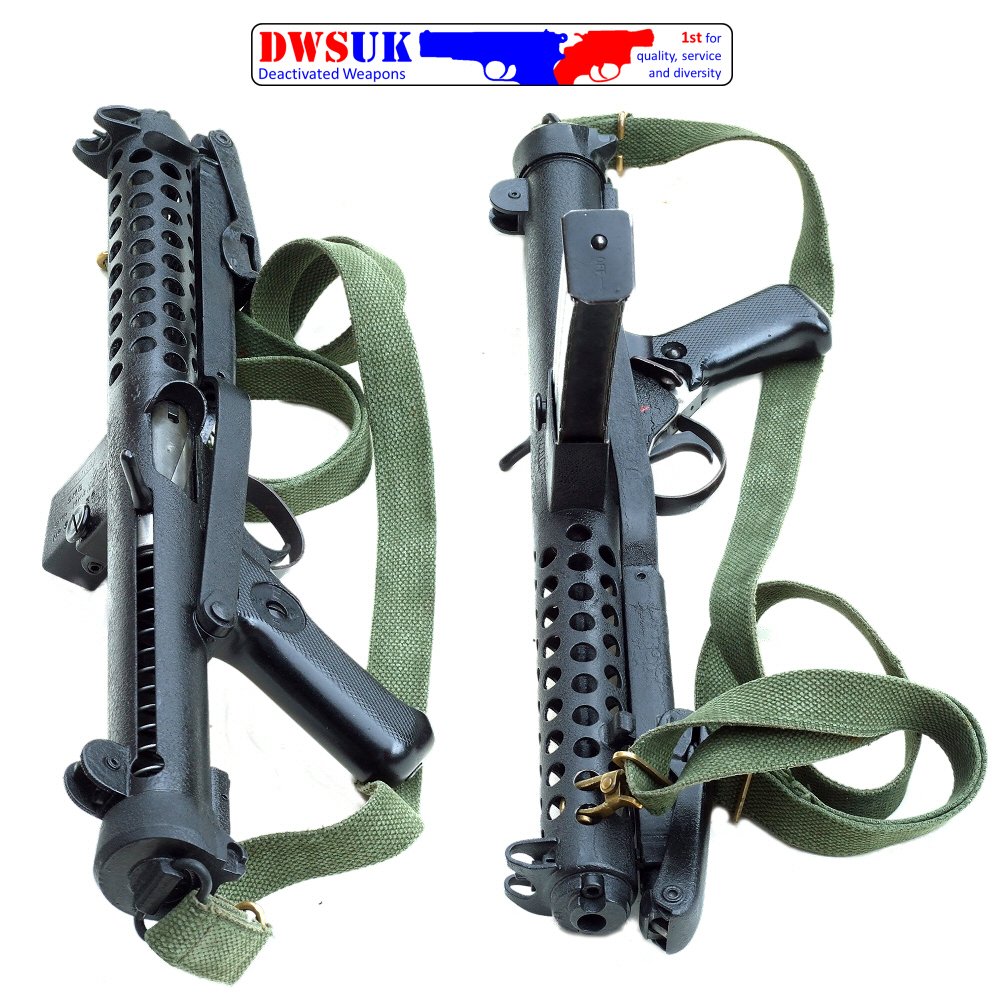
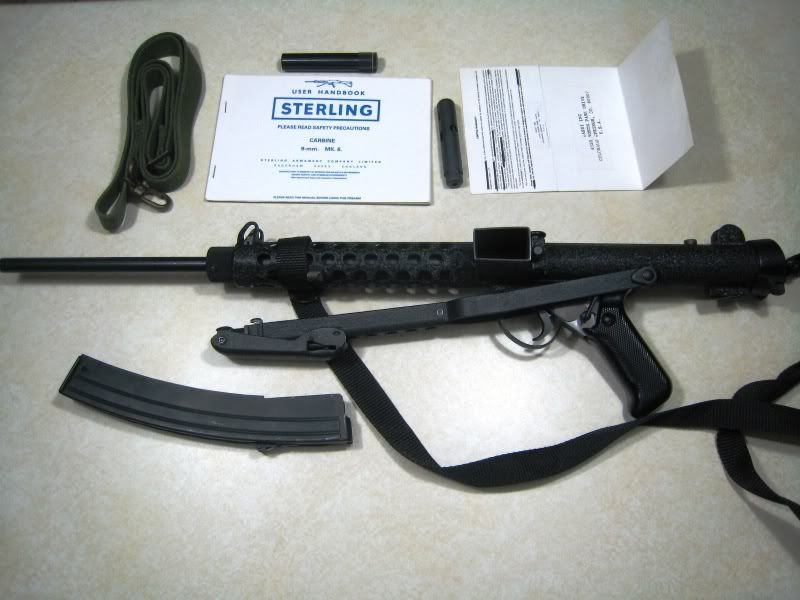
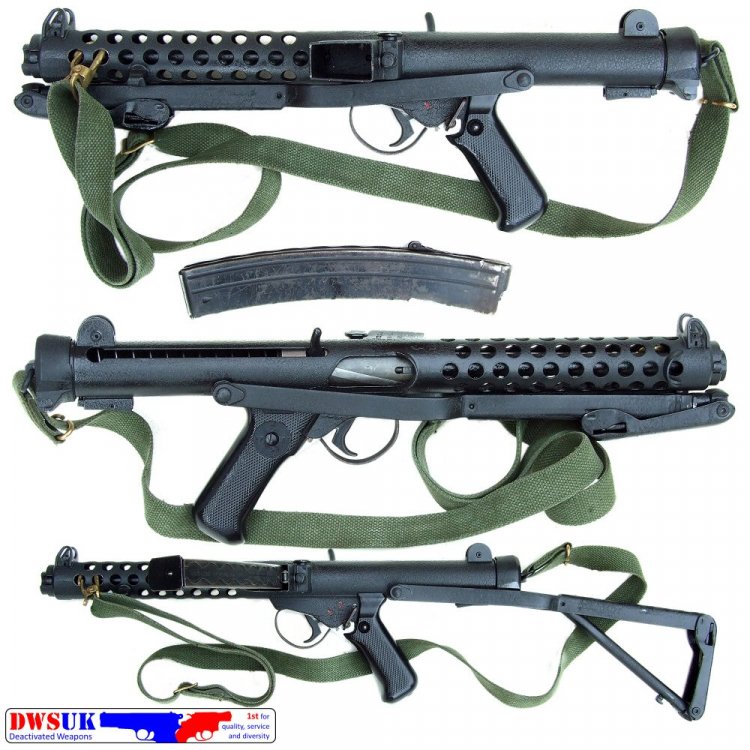
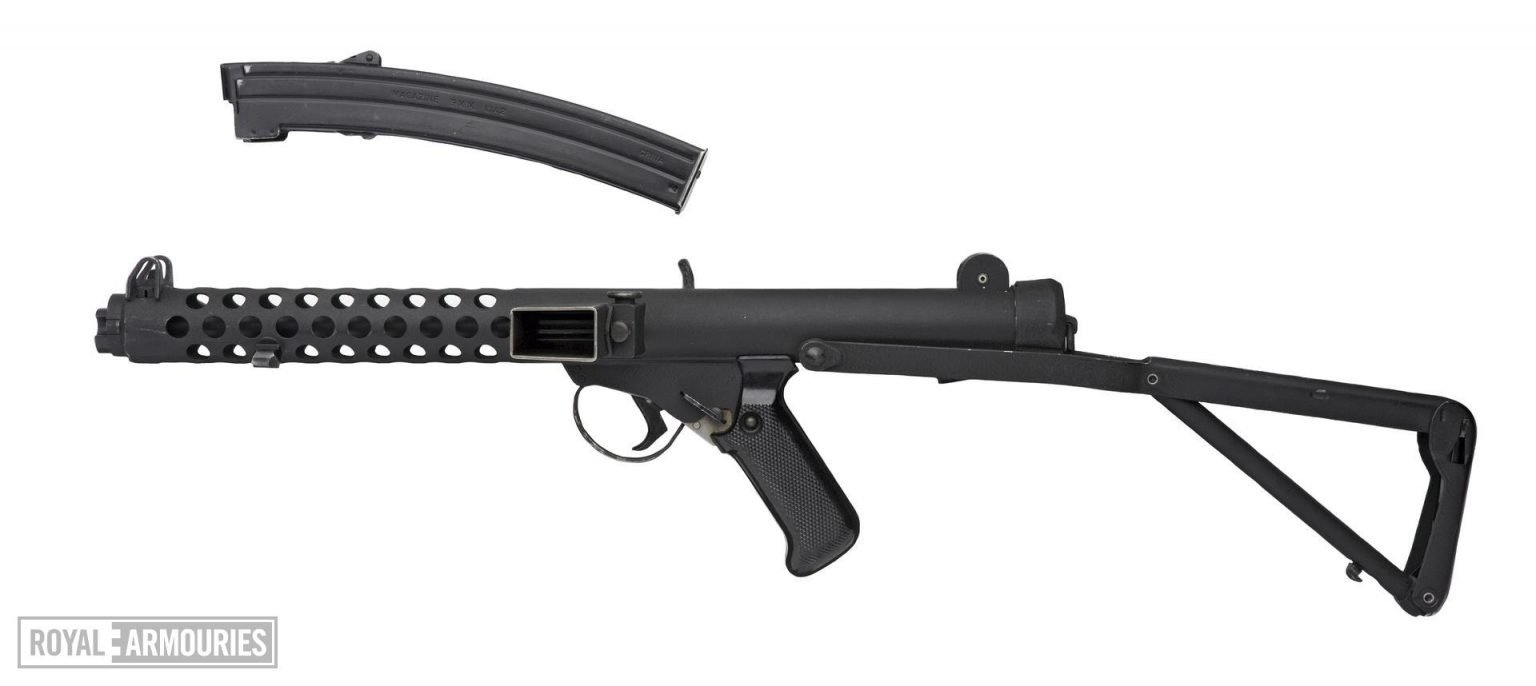
Handbook PDF http://pdf.textfiles.com/manuals/FIREARMS/sterling_mk4_smg.pdf L2A3 Sub Machine Gun PDF http://sterlingl2a3.com/wp-content/uploads/2012/10/KokalisL2A3.pdf STERLING TYPE I, TYPE II & TYPE III SEMI-AUTO RIFLES & COLEFIRE MAGNUM SEMI-AUTO PISTOL Owners Manual PDF https://www.centuryarms.com/media/Rhet/Resources/Post/Attachment/2802744720062.pdf
.jpg.081fe7fe78eff74dc493d36ccfb624b8.jpg)
.thumb.png.fbeefbaf1c9c685a66a202c4ea13a4ed.png)

.thumb.jpg.c0d888b159b4148c4b4c2d0365f900d5.jpg)
.jpg.4a94de38fee519c39f936618e51d66ff.jpg)
.jpg.d82f2310ee196fec8daa3b3d5c9b4a03.jpg)
.thumb.jpg.dd651031008eb2592795e29081368ceb.jpg)
.jpg.1b4a75d4119c595b0f44665985570bb6.jpg)
.thumb.jpg.911c60f37fd6de8c49ce75d8a5ace5dd.jpg)
.thumb.jpg.53532265537be327210b6c72e8d8b13f.jpg)
.jpg.3d427cd125add60e6dd4bd8b55c9060b.jpg)
.jpg.d305c873072ab0c8ea4847e5947ec094.jpg)
.jpg.aa23b55e7846793d8648c12c2b0a8118.jpg)

.jpg.f3b05be3c68dc569b0e2c65a54324ead.jpg)
 3 points
 -
Welcome to FISD, Craig! You’re in the right place for building your very own Stormtrooper kit. You’re also on the right track with an RS Props suit, as they are AS AUTHENTIC as they come. SDS markets themselves as the originators, but if you dig deep in these forums you’ll find more about the infamous AA. I’ll leave it at that. As you’ve already found, most Garrisons and/or Squads have their own web pages or Facebook groups where you can get in touch with local squad members. Some of the staff here might also be able to connect you with squad members who are active on here. I look forward to following along with your progress once you start your own build thread! I have an compilation of TK build resources in my signature which might be helpful to you. Again, welcome!! Sent from my iPhone using Tapatalk3 points
-
Hello everyone. Wow! What a mind shock at reading everything from the 501st, Whitearmor, Garrison Pages, Armor builders.. nuts. I am 44, father of 4 boys, (Future troopers, well maybe one Sith to be honest), and much as many of us, a huge Star Wars fan. Since I saw that you can actually BUY an authentic replica set of armor from SDS, I have been working diligently to get on board. Over the past many months, I have learned that SDS may not work out for me. The thought of signed armor was the highlight, and I may still utilize some help from contacts in Mexico to acquire a set, however in the mean time, I have settled on a full ABS set from RS Props. I do have a few questions, but first I will indicate where I am in the fulfillment of this dream to be a fellow StormTrooper. I have read all the info from the starting posts on the 501st: I have then found several sets of armor, and as mentioned, settled on RS. I have read through.. thoroughly, (many times lol), the path to take which ultimately led to this post, from the new member application guidelines and faq's here: https://databank.501st.com/databank/Join_Us And now I am introducing myself, in hopes to better help me locate the proper Garrison and liaison. Hi! So, now I am down to my questions.. I reside in Winston Salem, NC. USA. Identifying the contact list for the contact looks to be the Carolina Garrison.. http://www.carolinagarrison.net/ Yet, I am unsure exactly whom to contact. There are 21 different contacts there, and unfortunately they've abbreviated their titles/ranks, hence, I am asking for assistance in my intro. Next I will assume, once, I receive my armor, I will be able to submit the photos, links, and hopefully... move into the ranks officially with the rest of the FISD. (Btw, it was at this point I realized my screen name here included a TK number which... was done on accident, and I am happy to change it if necessary.) Nonetheless, So about me: Craig, 44, Father, I work in the medical industry. I travel frequently. Love Star Wars. LOVE. I have a gift from my girlfriend which is an ID bracelet but with Vaders helmet etched into it. I have created a gaming and video room specifically for the boys n I to enjoy movies (star wars themed of course). I am a degree holding engineer. Love to build things, metal, wood, electronic. So.. I am thrilled to begin and get going with realizing this childhood dream. Thanks for taking a min to read. Future Trooper, CB2 points
-
A fellow trooper visited me yesterday and we fixed some rivets on his armor. I hope he starts his thread soon2 points
-
I received my basic approval notification last night l and am awaiting my TK ID...the armor gods are making me sweat this one out.2 points
-
Hi, Thank you for that. I am currently at work but will get that sorted when I get home. They are black on top but as per the image I definitely see they could use a better coverage on the sides.2 points
-
Greetings Troopers, I decided to go ahead and document my process closing the gap between my ab and kidney armor. For my project, my right side had a gap that was about 3” wide at the top and 1.5” wide at the bottom. This was acceptable to be approved as a 501st TK, but in order to achieve level 2 (Expert Infantry), the gap needs to be closed. (Disclaimer: This project is currently a work in progress, I’ll continue to update this thread as I progress through the process. Be sure to read through the tutorial, start to finish, before beginning work on your own armor.) The supplies I used were as follows: 1. ABS plastic 2. Exacto knife 3. 6” ruler/ Measuring tape 4. Small clamps 5. Small super strength magnets 6. E600 glue This project is a work in progress, so if I end up using any other supplies I’ll be sure to annotate them below. With my supplies gathered, I began working. First measure the working edge( the edge you’ll be attaching the shim to) of the kidney armor to prepare to make the first cut. And always remember, measure twice, cut once. Using the Exacto knife, cut a piece of ABS to fit the length of the working edge of the kidney armor. I left a little length on the bottom to be trimmed later. Better too much than not enough. Next, prepare your kidney armor for the shim. You may not need to, but I trimmed away the return edge and removed the nylon strap and snap used to attach the kidney to the ab. I then went over the edge a few times with the exacto knife to ensure the edge was as straight as possible. Prepare your shim and a connecting strip of ABS that will be used to attach the two pieces together. My shim is 7” by 4”, and my strip is 1” by 5”. Yours will be different depending on your kidney armor working edge length and the width of the gap you’re closing. Before gluing, using the clamps, position the shim and the connecting strip on your armor to ensure that: 1. Edges are straight 2. Lengths are correct 3: shim will hold position on its own E6000 glue needs to be left for 24 hours to dry, so you’ll want to ensure your shim will not move during that period. This step is important, ensure the shim will fit exactly how you want it before applying any glue. Apply glue to one side of the the connecting strip. Holding your shim butted against your kidney armor, apply the connecting strip to the inside of your armor. Ensure the connecting strip is evenly placed half on the working edge of your kidney armor and half on the edge of the shim. once I had the shim held in place by the clamps, I used the super strength magnets to keep the shim held tightly during the drying period. And now we play the waiting game. It’s recommended that E6000 be given 24 hours to dry, so make sure your armor is positioned somewhere it will not be disturbed. (As stated above, this is a work in progress, so I’ll provide updates to this project as I continue working. In the mean time, any and all input is very much welcome, I’m by no means an expert and any tips or advice will benefit not only me, but anyone else this tutorial may help in the future. Thanks in advance!) to be continued...1 point
-
ONLY 5, 4, 3 2 1 SPOT LEFT, TROOPERS, SO TIME TO STEP-UP! 1000 Expert Infantry reached! Now that many of us are unfortunately stuck at home and boredom is beginning to take it's toll, it's time to wipe the dust off of that armor bin and become a part of FISD history! Instead of binge-watching re-runs, we are suggesting that you put the D.O. Staff to the test and spend some time on that white armor you miss wearing so much by applying for your Expert Infantry badge! As you may be aware, we are aiming to have #1000 approved by the end of the year. We only have 2 to go, so in order to reach that goal we are asking that you read over the CRLs for your particular armor, (this thread will help) make any necessary adjustments and post up your submission! Photo Checklist- Link here Apply Here Questions: 1. Not sure if I have what it takes to get my EI badge- You don't know until you try, and you have not only the D.O. staff but an entire Detachment to help! 2. I need some repairs/fixes first- This is why we are here! We honestly want you to succeed and are here to help in any way we can. 3. I am happy with the way my armor looks, so why bother?- It not only makes you look more screen accurate, it instills a sense of pride and "esprit de corps"! 4. What if I don't make it? No worries, we will provide detailed suggestions on how to reach your goal! Benefits: 1 Bragging rights for being one of the "Original 1000" 2. You get a cool badge under your name here on the FISD. (Street cred). 3. Access to EI rocker badges (coming soon) to go above your FISD patch (also coming soon)! 4. Access to coin runs for EI awardees only. 5. Certificate for your accomplishment. 6. You will have a more screen accurate looking set of armor, and be one step closer to Centurion!! 7. We are planning a VERY special piece of one-time-only FISD Exclusive merch to honor hitting this milestone! Know that the entire Staff and those who have reached Levels 2 (and 3) are here to help in any way we can, and that you are more than welcome (and encouraged) to ask any and all questions you may have here on this thread, or contact myself or Sha Sha. You can do it, Troopers. Let's turn this "anno horribilis" into a banner year for the FISD!1 point
-
Okay, so I tried repainting the frown with some modelling acrylic paint that I had to hand. Technically it meets requirements now but I am not really happy with the finish. It is quite thick with visible brush strokes if you look closely so I will still be cleaning it off and repainting once the proper enamel paint comes. I plan on going Centurion eventually so it will certainly be rectified before then.1 point
-
Nice looking helmet. Just PM @Sly11 in regards to starting a CRL You will need clear full front, back and both side images for reference so if you can get that together that will be a great start.1 point
-
Hi everyone! If you would have told me I would be joining the 501st as a stormtrooper a few years ago, I would have said you'd need to get your head checked. However, I can't think of anything I'm more excited for right now. What really attracted me was the dedication so many of the fans have to the universe, as well as the community service aspect of the organization. Joining the 501st is an idea that had been brewing in my mind since encountering an event at a VA hospital back in 2018. Now, finally having room in my budget and after months of research, I've gone full throttle and commissioned an ESB suit from RS Propmasters. Of course, with COVID, I expect a longer wait time. Nevertheless, I can't wait to be a part of this tight-knit legion and take a big step into the world of Star Wars. Thanks for reading, Ian1 point
-
Congratulations and welcome to the EI ranks trooper1 point
-
Cheers Firedog , here's a second photo of the snap as it had a bit of residual paint on it, which I've scraped off . Also ...my sniper plate which I keep forgetting to post close up photos of . Sent from my iPad using Tapatalk1 point
-
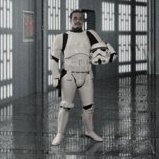
It was a lot of fun building the room with my kids. As an engineer, nerd and lover of games. I have instilled in my kids.. 3 prime directives. 1. Always tell the truth. 2. The definition of Integrity, always do the right thing, even when no ones watching. 3. Responsibilities first, then play.. and Play like you mean it! I have posters, a few mannequin's that need armor (wink wink), the accent lighting for the surround sound.. cause yanno.. Tie Fighters and gravity bombs! And I must admit there is a series of old gaming consoles, including a personal rebuilt custom NES. and ya, that was me when I was not in shape at the end lol. Much has changed since that video. A father and son trooper set. I like the sound of that! Hope to see you around as well!1 point
-
Welcome to FISD! I just finished my first build and it was a ton of fun! I'm in the beginning stages of my son's TK now. One thing that caught my attention was that we are the same age and the fact that you have a Star Wars themed game room. My son is a sophomore in college and I am in the planning phase of converting the very large space that has been his bedroom into a Star Wars themed man cave. This is my next great adventure.1 point
-
Hey Ian! how crazy is this!?! I too just posted today, from WS, and commissioned the exact same armor set from RS. Looking forward to meeting you sometime in the future! Im happy to share any of my experiences with you, and hope you'd be willing to do the same. Regards, -CB1 point
-
Hi Craig welcome to FISD. You did great in search, read first . Looking forward for your first photos when your armor arrives. We are here to Help.1 point
-
Great reference. Many thanks Glen.1 point
-
I have taken the screws out and given them a coat of black paint. They came out nice and definitely adds some contrast against the silver tabs.1 point
-
Excellent question, my armor is made by RS Prop Masters in the UK. I was very much concerned with making sure the additional ABS was the right color and the right thickness, so I went directly to the source, contacted RS, explained my situation, and asked if they would sell me a couple cards of ABS. They were kind enough to send them to me free of charge, their customer service is excellent.1 point
-
More searching on real MG34’s yielded pics of light to medium brown wooden stained butts and very dark reddish brown, almost black Bakelite ones. Kind of like looking through a pint of Guinness. I think I’ll go the Bakelite route. Seems to fit the Empire them more. Just have to find a good tutorial on painting it. So begins another long term project...1 point
-
Glen to the rescue again! Thanks! I googled all sorts of DLT references and never thought to look at that screen grab. It may be the lighting, but they even look like different shades of brown. Cheers!1 point
-
Almost there Trooper!! Your EIB badge is around the corner,1 point
-
I might have to try that. Did you use any sealant or anything? Thank you, I'm happy with it so far1 point
-
Thanks! I needed these!1 point
-
Wow, some great stuff in that post Glen.1 point
-
almost ready for launch !!!1 point
-
Thanks guys! I excited to be EIB and I'll work on those improvements and apply for Centurian.1 point
-
Hi Bryan, Thanks for your application and for the quick fix with your blaster scope. CRL and EIB Application Requirements All required photos are now in and, after review, we are pleased to welcome you to Expert Infantry rank. On behalf of the DO team and myself, many congratulations! Other-Armor Fit/Assembly In this area we review observations made by your fellow troopers and the DO team. Some observations may lead to suggestions to improve the overall look of your armor. Note that we consider both text (CRL) and pictures (screen caps/reference images) when reviewing submissions Starting from the top, this is mostly a matter of personal preference, but in general, the Stunt TKs had their brow trim just a touch higher (while the Hero helmets had it low like yours.) If you're looking for that classic Stunt look, we're suggesting you shift it up a few millimeters. Reference Image: Next, we're suggesting you double check the positioning of your shoulder straps. Ideally they'd be just a little further in, and the right one is hanging a bit lower that the left. Reference Image: Next, a simple dressing issue. For a super clean look, it's nice to have your coverstrips aligned on your limbs. In your case both of your forearms are rotated out a bit. Next time you get suited up, just take a quick look at the positioning for that fresh-off-the-Death star look. Reference Image: Another small detail is that your belt buttons appear to be a bit thick. If I recall, I had to make a small divot in the underside of mine to get them to lay flatter. Definitely not a big deal, but if you ever find yourself needing to disassemble your belt for some reason, you could sand down the covers. Reference Image Moving along, butt plate appears to be sticking out a bit and maybe even overlapping the kidney. Ideally it should sit just below the kidney, but not overlap, so we're suggesting you take a look at the strapping in that area. Reference Image: Moving along, as simple fix. The right rear thigh ridge gap should ideally be filled or at least backed with ABS so you can't see the gap. Also worth mentioning is the small gap you have in your left calf closure. In this case it's a simply dressing issue, so just have a handler give it a once-over the next time you get suited up. Reference Image Reference Image: Finally, on the screen-used suits the sniper knee was trimmed a little straighter, not curved. Reference Image: Centurion Requirements In this section we prepare you for Centurion. More photos may be requested in the future that allow us to make better decisions on possible adjustments. If there are any areas of concern they will be discussed here. Because Centurion photos show much more detail than EIB, items to pertaining to Centurion might be seen there and not here. We try to point out all that we can from what is seen, but the final accuracy is the responsibility of the trooper. Starting from the top, the L3 CRL states: There should be a minimal gap between the shoulder armor and the chest/back plates. You look like you have quite a bit of room to bring them in. This can be accomplished by shortening the strapping holding the shoulder bells on, and in your case I can see you have quite a bit of return edge on the lower bells. If you trimmed this off entirely, that would bring the bells in much closer to your chest and back. Reference Images: Next, it appears your kidney is sized too large, leading to a pretty significant gap between your back and kidney plate. We do allow gaps in armor if, for example, the trooper is extremely tall, but in your case it looks like you have significant room to size down your kidney plate. I think you may need to trim down both sides and re-strap. This isn't something that's explicitly pointed out in the CRL, but we do use reference images to compare with. Reference Image: The L3 CRL states: Drop boxes are vertically aligned with the end of the ammo belt with minimal gap between belt and box. Yours are sitting a bit low so you'll probably need to shorten the white elastic holding them on. Additionally, your right box is wandering a bit, so you might also want to add a drop of glue to the elastic to keep it in place. Reference Image: Next, your 'Han' snap is present, but should be closer to the edge of the ab. Normally this involves drilling out the snap, re-setting it in the proper place, and filling the old hold. Since you do have room to spare in your torso, however, one way to solve this could be to trim off a bit of the edge of the ab, but you'll need to ensure there's still not gap between the ab and kidney. Reference Image: The L3 CRL states: No return edge on the inside of the front of the forearm is allowed. You've done a pretty good job getting rid of a lot of the return edge, but you have a bit of work to do. You can either sand or cut it off, but ensure that there is absolutely no return edge left. As a bonus, it will help your gloves from bunching at the wrist. Reference Image: The L3 CRL states: Ab button paint shall not extend beyond the bottom of the actual raised button. It's possible it's just the photo, but your button paint appears to be a bit large. Looking at the reference photo, you can even err on the side of underpainting the buttons. Reference Image: The L3 CRL states: The top of the ABS ammo belt should sit at or just above the bottom of the central and vertical abdomen button panels. As you can see, your belt is sitting too low. On my own kit I added small strips of velcro to keep the front of my belt from sagging. Reference Image: I see you already have latex hand plates, which is great. However, yours appear to be coming unglued a bit. From experience, I know getting them to stick to the glove is a bear, but you'll need to re-glue them from your Centurion application. Reference Image: Moving on, as was already mentioned, your right calf coverstrip is a bit too long (your left is perfect). A couple minutes with a pair of scissors should do it. Reference Image: Finally a couple more fixes with your blaster. The L3 CRL states: The blaster may have minor weathering or base metal exposure however, T-tracks and grips shall have the appearance of black plastic. It could just be lighting, but it looks like you do have weathering on your grip and t-tracks. In reality these were made of plastic, so they shouldn't have any metallic weathering on them. Reference Image: Finally, as mentioned before, your Hengstler counter is sitting too far back. You did a great job fixing your scope, so hopefully you can also modify the position of the Hengstler counter without too much trouble. Reference Image: And that's it! You do have a few corrections to reach Centurion, but we have full confidence in your ability to get there, and we and many other Troopers are here to assist you as well. Until then, please accept our hearty congratulations in reaching EIB!1 point
-
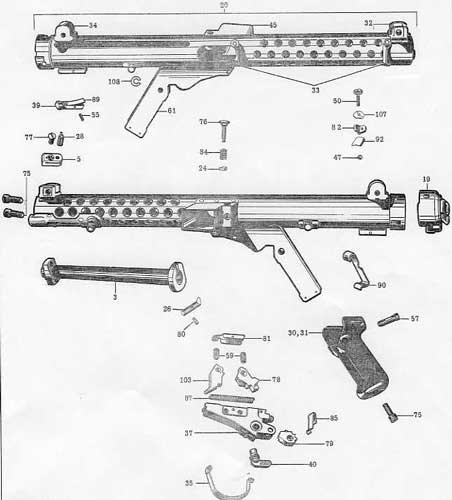
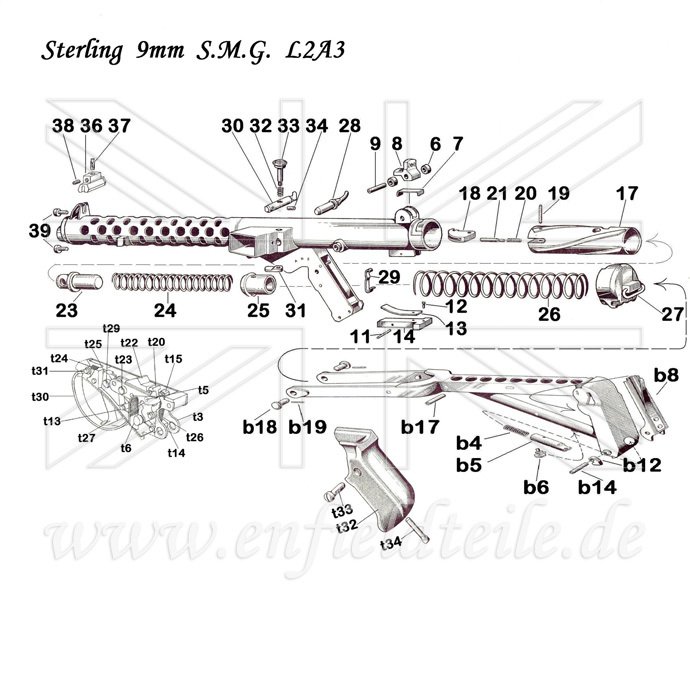
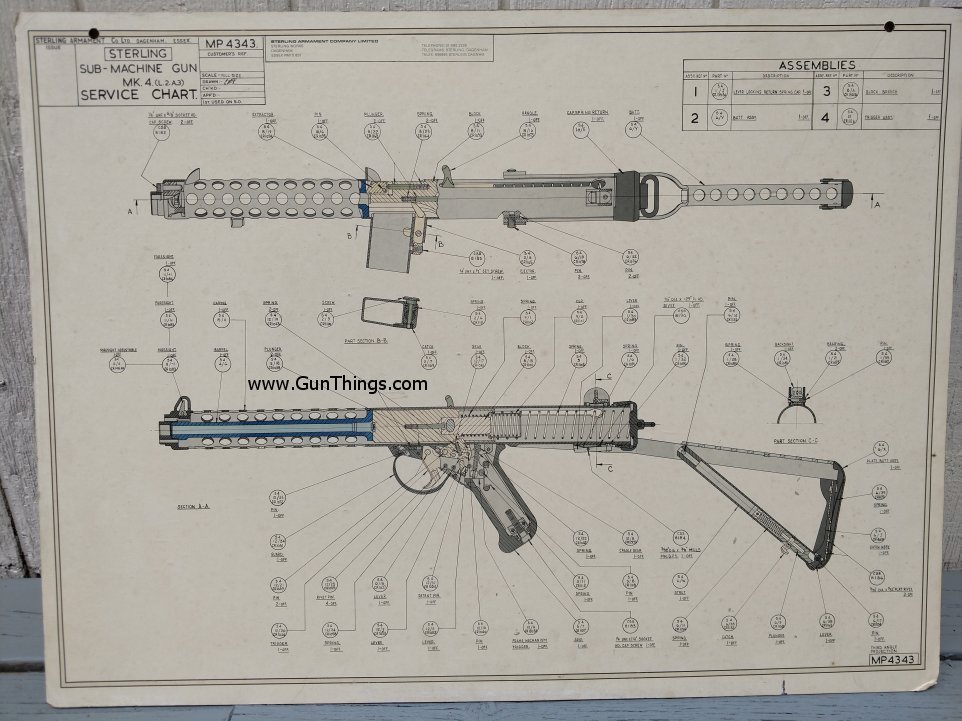
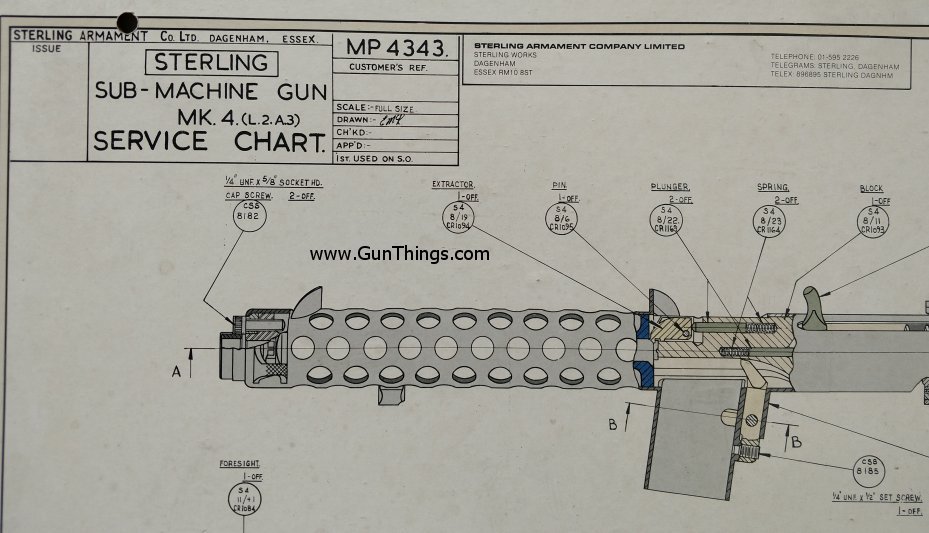
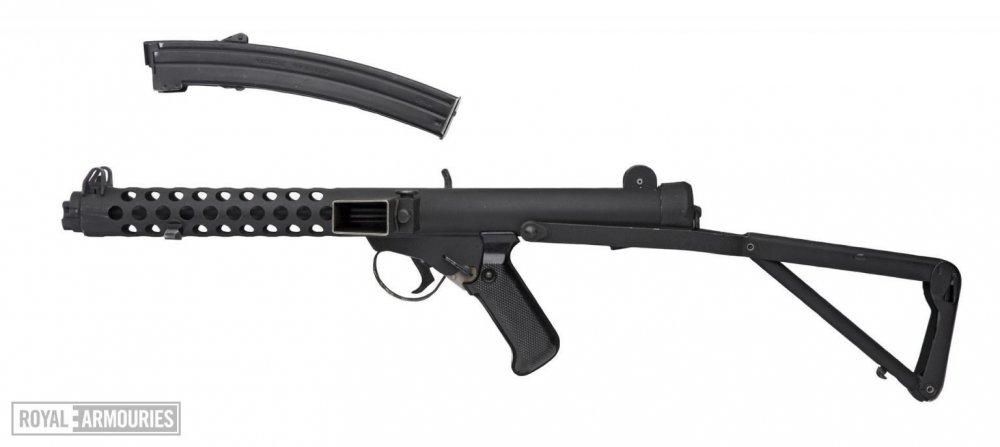
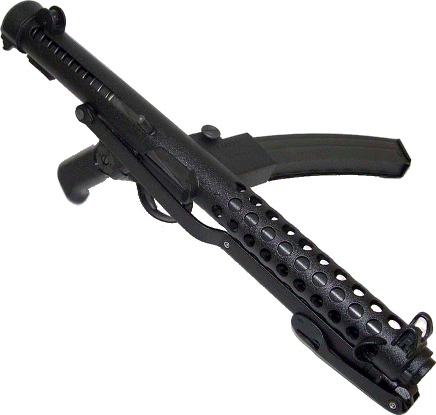
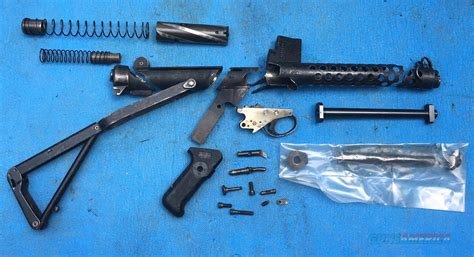
Parts reference may help, appears they are for the inner barrel1 point
-
Moving forward, Once the E6000 had fully dried, I went ahead and did a test wear to ensure that the gap was closed and the lines were correctly, well, aligned. There are different requirements for shims depending on whether you are seeking EIB (Level 2) or Centurion (Level 3) approval, but moving forward, what remains is to create return edges on the top and bottom of the shim to match the kidney armor, and to conceal with ABS paste the line where the working edge of the kidney armor meets the shim. (And that canvas belt could use a little love too.)1 point
-
Oh yeah, I def have been stalking that build while working on mine. She has quite a few pics, but it's an older KB kit than mine so a few differences. I also don't have anyone helping me (other than my husband, who is also new to this) so taking it nice and slow and triple-checking my work before cutting.1 point
-
Nice start. Here is a TFA Phasma build which is also KB f1 point
-
Spent the day marking my cutting areas, and using my new belt sander. I managed to get the pair of shins and foot plates sanded only 9 million parts left to go1 point
-
Good luck with your projects Trooper !!, take your time and make the Empire Proud !!1 point
-
Incinerator trooper plasma canon flamethrower, restored by gmrhodes13 Custom flamethrower, restored by gmrhodes13 flamethrower V2, restored by gmrhodes13 flamethrower, restored by gmrhodes13 My plasma rifle build, restored by gmrhodes13 Plasma rifle rough draft, restored by gmrhodes13 Flamethrower question, restored by gmrhodes13 flamethrower speed build, restored by gmrhodes13 https://www.whitearmor.net/forum/topic/14958-incinerator-trooper-plasma-canon-flamethrower/ https://www.whitearmor.net/forum/topic/12214-custom-flamethrower/ https://www.whitearmor.net/forum/topic/12504-flamethrower-v2/ https://www.whitearmor.net/forum/topic/10547-flamthrower/ https://www.whitearmor.net/forum/topic/32403-my-plasma-rifle-build-0/ https://www.whitearmor.net/forum/topic/10867-plasma-rifle-rough-draft/ https://www.whitearmor.net/forum/topic/15582-flamethrower-question/ https://www.whitearmor.net/forum/topic/15205-flamethrower-speed-build/1 point
-
Here's a helmet thread from Mike (TB) with pb images which might be helpful to restore. The thread is comprised of many posts, so if it ends up being too time-consuming, no worries. At some point I may compile it into PDF myself, at which point I will make sure to grab the images without pb watermarks. https://www.whitearmor.net/forum/topic/2066-te2-stunt-build-upte/1 point
-
Found this. Totally looks b*dass (is cussing allowed here?). I really REALLY want to cosplay as this. The helmet is a tad different here but isn't as skinny as the attempt in this thread, but is still totally a great attempt at converting the essence into realism(which is especially difficult when converting stylized TCW characters and such into Realism). Credit is on the image. What I like about this mod is that it uses the existing armor assets instead of starting from scratch. The only thing about this design is the helmet and that should be the focus when getting this cosplay right. What do you guys think about the helmet? Also when the mod releases you can convert the mod files to 3D printing.. which I hope will be easier than rolling dice and hoping this thread has a complete 3D print file made by OP.
 1 point
.png.3bbb12b25d70c0f1f239c8d4e569cb23.png)
.jpg.3a83d2f7ffcb0e23e4271199601e0c03.jpg)
.jpg.bd88d45e8e838859c82d073a7353f1a9.jpg)
.jpg.0657e864c7e7db3040351331d62e805c.jpg)
.jpg.bfed3c6436539dbf265fc7d409f73bbf.jpg)