Leaderboard


Popular Content
Showing content with the highest reputation on 08/26/2020 in all areas
-
a lot more ventilation and work now besides the vent breaking on that spot i need to sand it a bit more for it to go in better then fill in the sides with some jb weld and back it with some styrene like @11b30b4 suggested4 points
-
Thanks so much for the paint store recommendation! I ended up taking a piece of ABS plastic to home depot and they just color matched it for me. Worked out perfectly for painting the screws and rivet heads! I also fixed the thigh ammo pack as requested.2 points
-
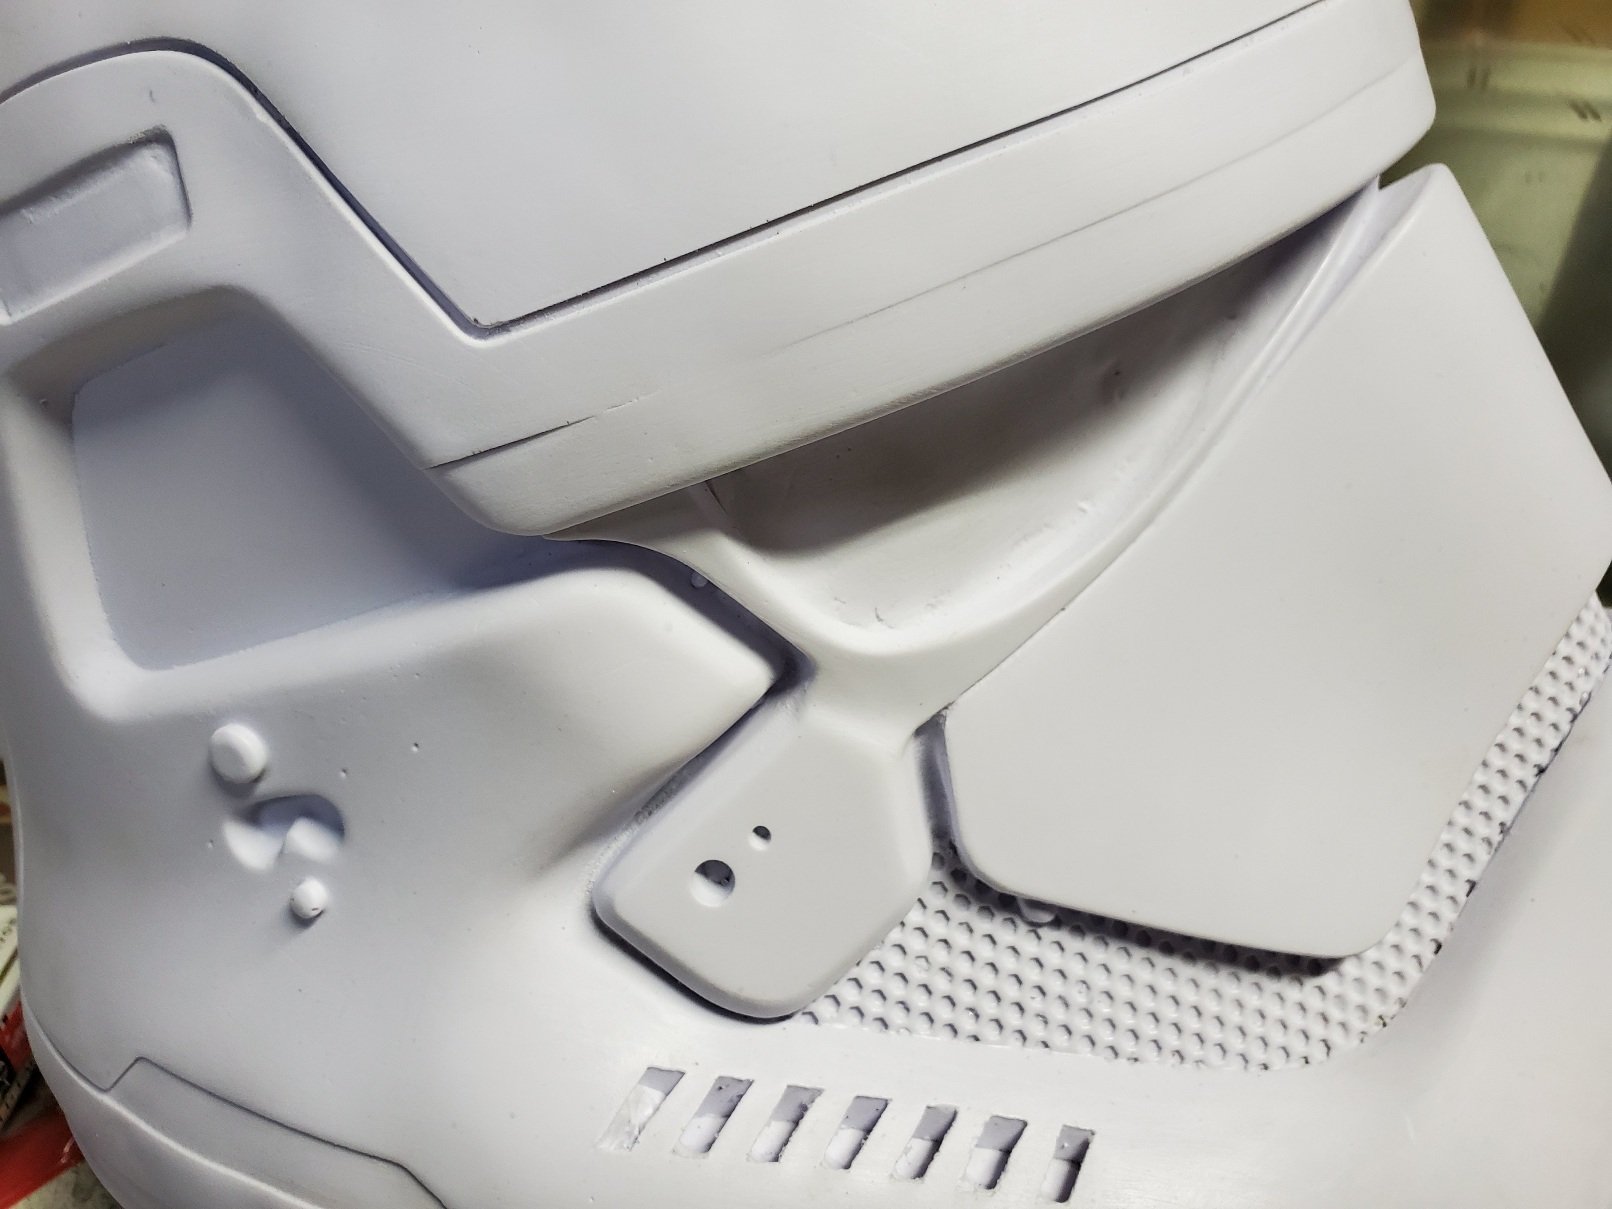
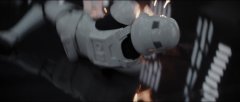
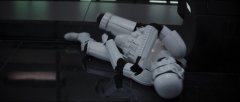
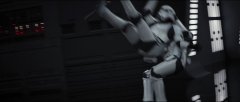
Alright so its been a while since I have updated this... But nonetheless I have made some great progress with this project! I got back all my parts back from my painter. (Also, I don't know why these are links... I tried to get them in this thread.) First thing I did was glue the back cover strips on the thighs again. https://imgur.com/eTt6Dc1 Then I assembled the forearms using the same technique as I did for my calves. https://imgur.com/31jn5F0 https://imgur.com/NVnJQc7 Then got to it on the helmet. I hollowed out the tube strips and placed a cotton under it to help it breathe more. https://imgur.com/cyeDMRy https://imgur.com/xW68blN And the gap on the chin. https://imgur.com/YPmXNQ8 Inside for the lenses i decided to go with the default lenses that Anovos sends in its helmet kits. https://imgur.com/JZtDMBZ And finally it all comes together in a fit test! https://imgur.com/2SgsgpY https://imgur.com/r5JkiMU After this last test, I got a couple of things I need to fix... The sides of my barrel need to be cut down even more, so the tops of the side of the barrel dont peek over the side connectors. And I need to bring mt shoulder bells in a little closer. Other then all of that, I'm so close to done! Thanks for checking this out, looking forward to any comments.2 points
-
America’s next top model right there. Haha. Sorry to sidetrack the thread. I’ll step away now ;-) Sent from my iPhone using Tapatalk2 points
-
I love seeing PRINTED reference folders, as I have four or five of my own! I may be obsessed, as it is an ever-growing collection. Below you'll find some images of my folders from my ANH Stunt and HWT builds. In case you'd like additional print resources, I've been compiling helpful (to me) threads into PDF format, and I have links to them on my All-In-One reference compilation thread. Links to PDF filess are marked in yellow. Keep up the great work with your build!2 points
-
Since I was reprinting larger forearms, I decided to also print out a larger set of shins while I was at it. The current shins fit fine for now, but I can tell that those are going to be the next parts that the boy will eventually grow out of. My plan is to have a batch of parts ready to paint so I can maximize use of the expensive 2K Gloss. I also printed out a new cod that reflects the TLJ cod much better. Here is some of that batch of parts, all spot puttied up. I love how nicely spot putty wet-sands, so I coat it all over when I can. Ignore the Sandtrooper backpack greeblies. I'm working on that as well (it's for my eternally slow RS Sandtrooper conversion!). This morning I remembered that Germain mentioned something about the TLJ forearm cut (TLJ pic on the right). I figured that now's the time to take care of that detail! I penciled in the cut line at the top of the forearm where it looked like the cut should go. Then lopped it off with a cutoff wheel and smoothed out the edge with some sandpaper. Pretty easy mod to add a little accuracy. It's raining today, so no painting. Tomorrow looks like the sun will be out though... fingers crossed that I can get everything painted soon.2 points
-
Hi all, Introducing myself as per instructions. Been a 14th century re-enactor for years but my kids are way more into Star Wars and I've been a fan my whole life so I feel trooping will be more my thing now. Looking forward to doing troops with my kids when they're old enough and building a suit of my own. Leaning towards a TM or RS ANH stunt suit so far. Been reading the forums for about a week getting my head around the lingo and requirements. Made contact with my local garrison now so I guess it's just a waiting game for the armor to be delivered I guess. Can't wait.1 point
-
AND, actually trooping tomorrow as one of 6 TK's in a fan film being shot here in the ATL area. TK-714681 point
-
So I have jumped right in on my KB First Order TK build. Happy with the kit, fresh out of the box. As the bucket is gonna take the most time, as an individual component, I'm starting there.
 1 point
 -
So, you are tackling that ROTK and you hit a snag. How to do this or how is everyone doing that. Well this is the place to ask and respond to others so that we can all share knowledge with out having to read every build thread to find that answer you need right now. Let’s keep it productive and if someone has a different method to do something, please keep in mind that there is more than one way to skin that cat. Further, it is still a good idea to read through the build threads. We need to support each other and keep everyone motivated. This thread is simply meant to be a quick reference. I will start it off with a few tips. Masking tape- Although you will need a lot of standard blue painters’ tape, when painting the smaller detailed areas on the helmet and abdomen, I recommend you mask these areas off with smaller width and higher quality masking tape. Tamiya is what I use. Tamiya is model masking tape and comes in small rolls with widths between 2mm through 18mm. You can get Tamiya masking tape from Amazon and most hobby model shops. I normally use the Tamiya to mask off the detailed areas like the teeth, tears, traps, and ear bars then use the blue masking tape to bridge between the Tamiya tape and whatever you use to cover the larger areas (plastic bags, paper, etc…) https://www.amazon.com/s?k=tamyia+masking+tape&ref=nb_sb_noss_2 Needle Files- If you going to cut out your vents on your helmet, most of us will use a Dremel to do most of this but then you need to clean up these cuts to make them uniform and smooth. Needle files are the way to go. You can get a set of these small files from Amazon, Harbor Freight, and hobby stores. https://www.amazon.com/Hardened-Strength-Barrette-Crossing-Equaling/dp/B07PPYWSCY/ref=sr_1_10?dchild=1&keywords=needle+files+set&qid=1598290682&sr=8-10 Adhesives- For those of us new to cosplay, you will see people mention CA and E6000. So what the heck are these? CA Glue CA is short for CA glue or commonly known as Super Glue. The CA is the chemical abbreviation for Cyanoacrylate Acid. So yes, that stuff that will make you fingers stick to each other and tear off skin is what a lot of us use for building costumes. In addition to basic CA glue, it also comes in a variety of thickness formulas and you can also get an aerosol can of CA glue accelerator to make the glue instantly set. Another trick to use with CA glue is to apply a bead of the CA glue to a crack in plastic then drizzle some baking soda on the wet CA glue. The baking soda with cause the glue to instantly cure and the baking soda creates a plastic that will fill the crack. You can sand it and paint over it. We use this method to fill gaps and fix broken parts of costumes. Obviously, you can find CA glue everywhere, but the accelerator may be a bit more difficult. Try searching on Amazon or google for Name brands like 2p-10, Zip Kicker, Loctite, and Stick Fast. E6000 E6000 is a perchloroethylene adhesive. Its application is very similar to silicone adhesive and provides a few characteristics over CA glue. This is from the product data sheet and can explain it better than I can. E6000® is a unique SELF-LEVELING, non-flammable industrial adhesive formulated to meet high-performance requirements. It permanently adheres to more surfaces than virtually any other adhesive, providing exceptional adhesion to wood, metal, glass, fiberglass, ceramics, masonry, concrete, asphalt, leather, rubber, PVC, neoprene, vinyl and many plastics. E6000 maintains its flexible bond in extreme cold temperatures, will not crack or become brittle and is excellent for bonding items subject to vibration. For applications that are exposed to direct sunlight, paint over E6000 after curing or use E6800 UV formula. So, the big thing here is that it is flexible, that means you can use it on armor in places you want to flex and where Ca glue would crack or cause the armor to crack. Its also safer to use on plastics than CA glue which may weaken or melt the plastic. The trade off here is that E6000 needs time to cure and must be clamped in place while curing. When you look at someone’s build thread and you see several round silver things suspended on the armor, almost always they are rare earth magnets that are on the inside and outside of the armor holding things together while the E6000 is curing (normally 24 hours). So, with adhesives, there are a lot of options, but these are just two examples of what most of us use. One type of adhesive may not be the most ideal for aspects of your armor and you may want to consider using different adhesives for different parts of the armor. Ok that’s what I have for now. Toss out your suggestions and questions and lets find those answers.1 point
-
So I taped off the barrel stripes. I used a pro tip from @gmrhodes13and sprayed gloss white first, so if there's bleed, then it's white! I did just a couple passes with gloss black, gave it 30 minutes to dry, and peeled off the tape. The right looks great! As I peeled the left, some paint from the tape stretched with it. I decided to leave it and will try to touch it up after it fully dries. No bleed though! Then I wet sanded the putty to 400 on my bells and biceps. THAT took a while. Hopefully the gloss comes out smooth... Tomorrow I'll spray satin white inside the bells and biceps. I'll also finish taping the barrel buttons and spray gray.1 point
-
Sorry mate couldn't resist. Paid my deposit to Trooper Master last night. I'm totally going for centurion. Can't wait for my BBB.1 point
-
Ralph McQuarrie's Concept Stormtrooper, restored by gmrhodes13 Force Unleashed high resolution images, restored by gmrhodes13 Force Unleashed Stormtrooper, restored by gmrhodes13 Kashyyyk Stormtrooper, restored by gmrhodes13 https://www.whitearmor.net/forum/topic/22683-ralph-mcquarries-concept-stormtrooper-armor/ https://www.whitearmor.net/forum/topic/18647-high-resolution-phase-iii-tk-images-7-images/ https://www.whitearmor.net/forum/topic/18643-force-unleashed-stormtrooper/ https://www.whitearmor.net/forum/topic/18339-high-resolution-kashyyyk-stormtrooper-images-35-images/1 point
-
Oh awesome cheers mate. Gonna need about 10 of em in my bucket I reckon. I'll be sweating like crazy my first troop. Just a waiting game for my BBB now1 point
-
Little Stormie had a visit at the dentist. Scratched the paint away with a toothpick and with the help of Sonax Schleifpaste (sanding paste) on a cotton swab. André from IronMotion recommended that product. Works great for Humbrol colors. (I'm just posting this if anyone in the future has the same problem and finds this thread in the search results ;D ) Anyway, Results: The first two pics are after I removed the color. The teeth in the middle had some ugly borders after that. So I painted them with a layer of Humbrol 05. Picture Nr. 3 is the final result. The color isn't fully dry yet. Better now?1 point
-
Aw man. This is why I'm perpetually broke. I'm so getting a field marshal now. Cheers for setting me straight fellas!1 point
-
I’ve got to be honest, it wouldn’t be on my list. It appears to be a 3D printed blaster and the print lines are clearly visible in certain areas. It’s also not overly accurate. Areas such as the scope rail, the front hole near the flash guard is wrong, wrong wire type near the Hengstler etc. Also, the glossy paint job wouldn’t be to my taste. The only gloss black area should be the grip. Just my thoughts, however, I’d be tempted to look elsewhere. As always, try to compare your prospective purchase with screen used examples. Best wishes Dan1 point
-
Great job, Ueli! You're almost there.1 point
-
.jpg.7b4164edafd2aa04c79a9ffbe12316f4.jpg)
From the album: Legacy Stormtrooper - Jes Gistang
1 point -
fisd achievement award winners, restored by gmrhodes13 fisd achievement award, restored by gmrhodes13 - Also added multiple awards fisd user awards, restored by gmrhodes13 - Also added multiple awards https://www.whitearmor.net/forum/topic/8568-fisd-achievement-award-winners/ https://www.whitearmor.net/forum/topic/7551-fisd-achievement-awards/ https://www.whitearmor.net/forum/topic/43879-fisd-user-ranks-awards/ TE stunt build updated, restored by gmrhodes131 point
-
I’m very impatiently waiting on basic approval. Some minor things have been addressed and I’m chomping at the bits to post my application.1 point
-
Hi Stephanie! Although under (compression) suits are readily available at most major sporting good stores, they can be pretty pricey so I would try Amazon. Just search "Ladies black long sleeve compression shirts" and "Ladies black compression suit pants".1 point
-
I sprayed some gloss black on the side plates again. They look better, but still have some imperfections. I'll see how they look while wearing, maybe it's isn't noticeable. The bells and biceps required a bit of filling... The E6000 and snaps worked great! I snapped the suspenders on and stepped in to pull the barrel up. I started taping off the buttons and used a paint marker for the blue. They look pretty good with 2 coats, but I'll do another coat or 2. I'll finish taping tomorrow and spray the gray.1 point
-
I'll do that tomorrow as it's midnight over here. And first I have to get paint remover without acetone. Thanks for your patience so far1 point
-
In regards to your last suggestion, since COVID hit the States in early March I've rewatched the Mandalorian series a second and third time, Gallery (Mando) for the first time, the Galaxy's Edge Special and Empire of Dreams on Disney+, the Prequel Trilogy, and now I'm continuing with the OT. I might have even squeaked in RO somewhere in there. All while working on build or FISD stuff in the early hours of the morning. I really should get back to my real life new job search...1 point
-
Many thanks, Caleb. I’m really pleased that these sorts of posts are useful. :-)1 point
-
Good news everyone I redid the Ammo pack with double cap rivets. Now the other good news: I was in this leather shop, looking for single cap rivets and I asked him "You don't have split rivets, do you?" and he said "Of course I have" which was totally unexpected as I didn't believe a leather shop would have such things. Switzerland ¯\_(ツ)_/¯ The bad thing is, they're golden. The good thing is, it's only a coating. After I sanded it with 400 and 5000 sanding paper, it looked like in the picture below. Now I can mirror myself in them So, the question is: What do you think, should I redo the cod rivet and replace it with the split rivet? On one hand, it'll look better and the rebels can see themselves when they lie dying on the battlefield and we march over them. On the other hand, I never worked with such rivets before and I feel a bit weird to have pointy things in that region In theory I could also redo the ammo pack with those, but I believe that the double cap rivets are more stable and according to the CRL they're okay too.1 point
-
Art, the 3D printed parts look amazing. I recommend you cut out the depressed parts of the helmet, then glue some styrene on the inside (at least to make a stepped down lip) then glue in the 3D printed parts. This method should have them sitting almost flush and provide that rogue one look. I also recommend you go ahead and make the changes to the abdomen with the 3D printed parts. If you don't it will always bother you and now is the time to make the change rather than a month down the road.1 point
-
thinking about replacing the main abb greeblie however im close to being done and dont want to mess it up my removing the original i downloaded the stls that @BigJasoni has been working on to replace my abb armor and some other pieces in the future much more detail with the 3d printed piece1 point
-
I'm sorry to hear you're having a not good time with the rivets, we really appreciate your efforts and believe me ,all that effort is worth it when you see your EIB badge under your name, your certificate and the extra bonus, "Being part of the EIB 1000. " Thanks Trooper !!1 point
-
Cod rivet done after a lot of swearing because those rivets are the worst. (The bronze part didn't split properly. Wasted ~5 rivets for this part) It also was a real pain to remove the ammo pack rivets only to find out, that these darn rivets are to short to re-attach the pack. Anyway, tomorrow I visit the capital city. There should be a store with the right rivets. Maybe I'll redo the cod rivet too. Anyway... time for something relaxing before I go real mad. See ya tomorrow.1 point
-
Some of the tools I find essential:1 point
-
Ok never mind the Rubies. If it can't make Centurion I don't want to bother with it.1 point
-
R1 Blueray Screen Captures1 point
-
-
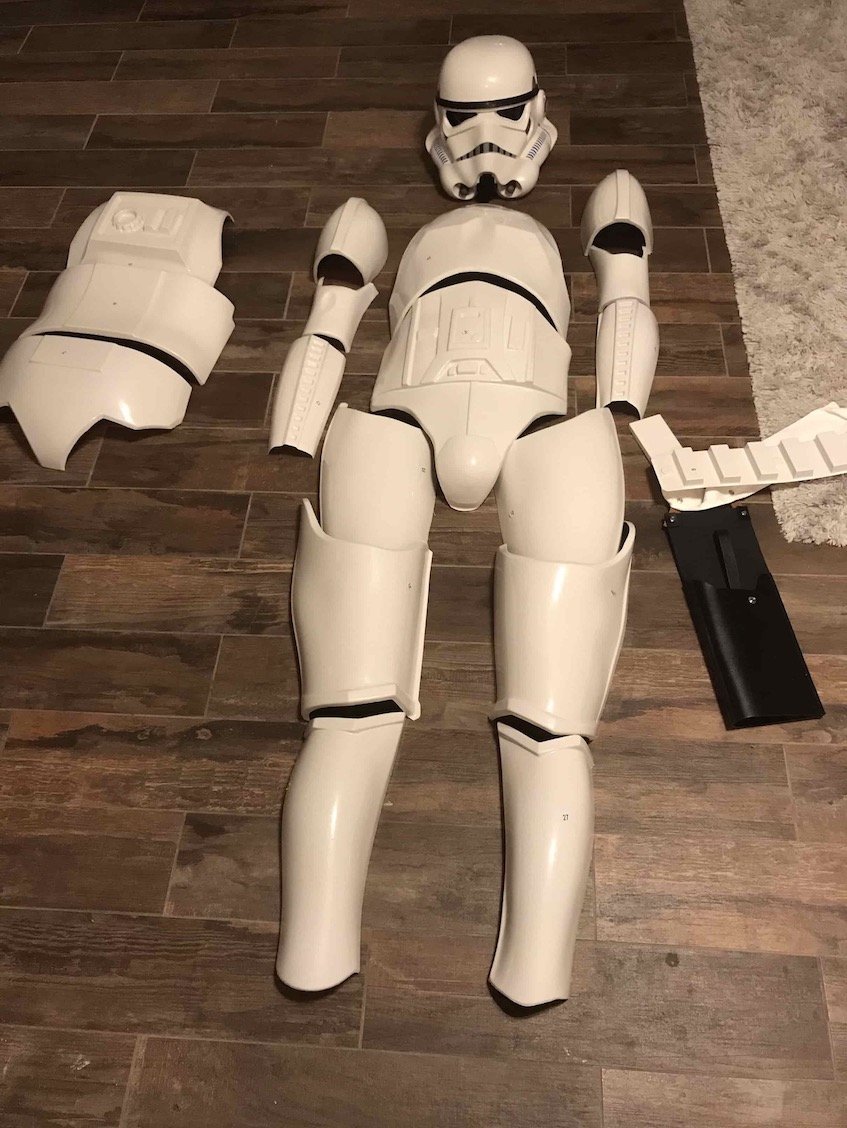
And here's the full armor layout! (Well, minus the smaller pieces )
 1 point
 -
Hello there! My painter sent back some more parts to me. Using the Zap-a-gap I glued together the front halves of the biceps and put Velcro on the back sides since I’ll be going for Lvl 3 on this suit. Next thing was to get the calves together. After doing some chatting with our SCG group a while back talked about stress cracks from opening and closing the calves to put them on and take them off. After talking with Jeff here on the forums and watching his build thread I decided to put them together the way he said he was thinking of doing it. With glueing down elastic in the front part of the calves so it has the room to move around and help reduce stress. Using zap-a-gap, I glued down the 2” wide elastic inside. I put 3 strips inside. Top, middle, and bottom. The results came out well and I am happy with it. Test fit went very well and it has 0 stress cracks from all the taking it off and on. Last thing I did today was get some of the strapping done for the shoulder bells and biceps. And that’s all I’ve gone so far! Definitely glad to see it coming along and I can’t wait to get the rest to actually make some good progress. They even sent me a little preview of the helmet. That’s all for now. Thank you for the interest!1 point
-
Great to hear that you are upgrading your Anovos strapping, Andy! There are a few options you can go with... one is the "classic" system, which uses brackets, elastic and nylon webbing, but you can also opt for the snap (or double snap) method. If you choose the classic system, Tony (ukswrath) has an incredible tutorial located here: https://www.whitearmor.net/forum/topic/35086-ukswraths-anovos-tk-build/ Here is a link to Mr.NoStripes' sales thread for the brackets: https://www.whitearmor.net/forum/topic/20859-accurate-anh-stormtrooper-strapping-brackets-v-20-now-available/ If you choose the snap method (most of us use this) you can follow his instructions as well for mounting the snaps, and here is a diagram (below) my buddy Jeff (wingnut65) came up with that may help. Please note that he uses the "double snap" system on it. Using two snaps in the areas shown will eliminate any chance of anything falling off during a troop. It costs a bit more in the beginning and takes a bit more time, but the results are well worth it, I assure you. Either way I would invest in a wood burning (soldering) tool. They are less than $20.00, and will make your life MUCH easier. You use it to make holes and seal the ends of the nylon webbing/elastic. https://www.lowes.com/pd/Weller-Electric-15-Piece-Wood-Burning-Kit/34029841 point