Leaderboard


Popular Content
Showing content with the highest reputation on 07/02/2020 in Posts
-
Okay, Cameron must be super excited today, because he let me take a few more pics while trying on the armor. And he looks happy in them, too. Bonus! I think I've worked out a good harness system for the most part. He says it's comfortable, and it's sturdy, so, yay! It all snaps out as well as being adjustable. I'll still be adding a cross strap in the front for support (when I attach the shoulder bell straps to the suspenders). I love how in the front view pic, it looks like Cameron is carrying Baby Yoda in a front facing baby carrier.3 points
-
After my R1 was ready, my son also wanted to be a part of the Empire. Due to his hair colour he wanted to become Armitage Hux. I ordered a cosplay uniform for him, as he is just 16 years old. Later, when he is old enough, we either go futher with this costume or he will get a TK armor. It needs some ironing and little tweaking. But he wanted to wear it right away.2 points
-
More busy work...the Darman's Props holster and Hyperfirm E-11. Firstly, the holster was a might bit too snug on the E-11. I debated on options on how to soften/loosen it up. I finally settled on shoving a plastic drink cup in the top end of the holster, and tossing it in that wonderful greenhouse my car turns into in the summer time. It actually worked pretty well, although a second round wouldn't be such a bad idea. I did flip the cup around and let it spend a couple of hours sitting in the bottom end as well. On to the Hyperfirm... My understanding of the CRL and requirements for Centurion (the ultimate goal of this build), the Hyperfirm's are passable with the addition of the D-ring on the end cap. So, D-ring ordered from Trooperbay. I laid it against the end cap to figure out how much to cut out of it (the Sharpie marks) so I could attach it. Next, drill out the holes in the end caps: Cutting wheel attached to Dremel, and pliers to hold the D-ring (that sucker gets HOT!): With both cuts made, time for a test fit: I wasn't entirely happy with the weathering on the Hyperfirm, and especially the weathering on what should be plastic Hengslter counter...so rattle can time! Also, the D-ring required painting, anyway...sooooo. After a bit of research, I settled upon the Krylon Fusion as it should adhere to the rubber and metal. One coat done, and hung to dry for a couple of hours before the next coat. And...finished product. Came out pretty good, if you ask me. Pro tip...don't forget the underside of the D-ring. For a bit of fun, I added a "sight" sticker. And, in a moment of "what the heck"... So, hopefully, I can cross this part of the build off the list.2 points
-
Hi Shawn, like Scimitar mentioned, the glue holds the snaps very well. I too used nylon with my snaps and I've had no issues with things coming apart. For the E-6000 reacting with ABS - I am one of the people who had this happen. I have narrowed it down to a bad tube of E-6000. I have gone through a lot of E-6000 in the last few years and I only had issues with that one tube of the stuff. Also, I no longer tend to apply a lot of pressure when waiting for the glue to set as this was suspected as being one of the issues. That said, I have been a bit braver with applying a lot of pressure when the glue is setting and have not had the issue return... yet.2 points
-
Working in my nerd room today, and Cameron decided to wander in, pick up some armor bits and try things on. And he let me take photos of him!!! He is typically shy when it comes to photos, except when he's got a helmet or mask on. So, yeah, it's a big deal today. I don't have the chest and back plates strapped in yet, so he's holding things together loosely on his own. I even got the boy to crack a smile for me!!! He adores that blaster. Question for those of you who have strapped the FOTK... does the waist belt inside simply cinch around the waist? Or is it attached to the inside of the ab? I'm trying to wrap my mind around how it fits. I get the suspenders part, but I'm seeing that the suspenders are attached to the ab and a belt. Any tips or guidance is appreciated! EDIT: nevermind about the belt question. I think I figured it out.2 points
-
I got a piece attached!!!! Yay!!! All right, it's not a lot, but it's progress. I had no idea as to how to attach the cod to the ab, then I referred back to Tony's FOTK build thread, and voila- there was everything I needed to get me going. This 3D print isn't the same as the Anovos armor, so I had to wrap my mind around what mods I needed to make. First, I realized that I needed to make some cuts at the belt line to accommodate the cod snaps. I still haven't lost my fear of cutting this armor yet. But it went a lot faster than expected. Next, I installed the male snaps into the cod piece and verified that they would fit into the holes I just made in the ab. All good! I also drilled holes for rivets to attach the webbing inside. Installed the female snaps and webbing together. This was my first attempt on this part. I remade it later with a bit of ABS sandwiched in the snap for easier removal. Here is everything all assembled together, rivets and snaps with ABS. I was pleasantly surprised with how well this all attaches together. It looks like it'll allow for some great mobility- much more comfortable than the OTTK suit. All apart so you can see how things look... And inside view, looking down at the bottom of the ab. This is yet another reason why I'm really glad I haven't done the final paint yet! I have my sights set on rigging up Cameron's suspenders next. I had started work on them earlier, then got distracted with putting the cod together today.2 points
-
To keep myself entertained () while I wait for the BBB to arrive, I've committed to do as much prep/busy work as I can to speed the build along. First up, how do I want to strap the armor together? I used the bracket system for my Sandy, and that was a bit of a pain, if I'm being honest. So, I decided to use a snap plate/strapping system using @justjoseph63's thread on Snap Setting as a guide: To give my armor a bit of flexibility, I'll be using 2" wide elastic (since I have it on hand), rather than the webbing in the thread above. But I won't start that part until the armor arrives and I know exactly how long to cut the elastic. In the meantime, I've made all the "plates" for the torso using 1.25” webbing (also had it on hand). First, sort all the snap parts : Then, cut the webbing, using the lighter to seal the ends from fraying. I made a cardboard template to make production a bit quicker : Finally, add the male side of the snaps : And you wind up with a bunch! Up next...fixing up my Hyperfirm E-11 and holster!2 points
-
Torso Assembly Continued-Continued Progress-to-date and changes made with torso assembly and improved pictures Additions and changes: Non-functional rivet in cod installed Removed AM butt tab and reinstalled poppers (Mostly) finalized strapping First informal fitting Items for this that remain to be done: Snap attachment for shoulder bells; pictures of shoulder straps show new version with Tandy Line 24 snaps and I doubled the thickness. Will mark for shoulder bell snaps at next fitting. Key resources consulted: AJ's AM ANH Stunt build (https://www.whitearmor.net/forum/topic/40831-ajs-of-am-20-build/) LTM's AM TK ANH Stunt build (LTM's AM TK ANH build) TK-32568 EIB Submission (https://www.whitearmor.net/forum/topic/46507-tk-32568-requesting-anh-stunt-eib-status-am-892/) TK-32568 Centurion Submission (https://www.whitearmor.net/forum/topic/46815-tk-32568-requesting-anh-stunt-centurion-status-am-432/) Andrew H, TK-14023, who has helped directly with advice and fittings and material components. Chest and back plates Strapping and shoulder bridges: Collar reinforcement: Edge reinforcement: Back strapping: Ab and cod Ab-cod with button plates and belt snaps: Button plates close up: Ab and cod-kidney-butt closures Rivets, left side: Han snap, right side inner: Han snap, right side outer: Kidney-butt strapping: Left tab: Right tab: Right slot: Left slot: Cod and butt closures Overview: Brass rivet, outside: Brass rivet inside: Poppers, outside (tab removed): Poppers, inside (tab removed): First test fit! Coming soon: can't skip leg day!2 points
-
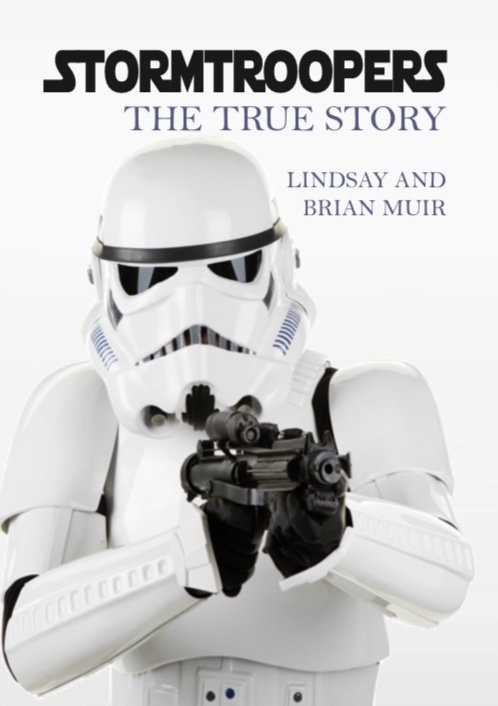
Hot off the press this week! The true story of how the iconic Stormtroopers were created , which subsequently led to a high profile multimillion pound court case. With the endless controversy and conflicting stories reported in the media and on the internet, this book reveals the facts from the crew on the production in 1976 Hit the link for your signed preorder https://www.brianmuirvadersculptor.com/store/c1/Featured_Products.html
 1 point
 -
So after almost 5 months of waiting for BBB day, it still hasn’t arrived yet. My vendor says it should be another week or so until is ships. Decided to bust out a project I meant to have done months ago, which is a Doopydoo kit. I’ll get pictures posted as soon as I can figure out how on Tapatalk. I keep getting errors. I have most of the parts primed, and will begin gluing the parts together before I add one last primer coat (My coats aren’t exactly thorough) Edit: Pictures are working now.1 point
-
Ok...my first official build thread...so here goes nothing! Currently waiting for the BBB to arrive. In the meantime, I've collected many (if not all) of the other parts I'll need. Some will transfer from my AM2.0 Sandy (Police Officer/Level 2) that I built a couple of years ago (Undersuit and neckseal, primarily...along with sound system). I've got the undersuit from Stormtrooper Undersuits; neck seal from Veedox; belt (measured using my Sandy armor) from Imperial Issue; boots from IB; paint stencils (which I may or may not use...to be decided) from Trooperbay; holster from Darman; flexible hand guards and nuts/bolts from JustJoseph63; non-audio mic tips from ukswrath (not shown are his TD brackets), and various bits of elastic and velcro. And here is where the magic happens (will happen)... Spent the last week or so cleaning it up, organizing it, and getting ready for the build. This is the lap of luxury compared to my previous builds (Sandy and Scout), which were done in a one bedroom apartment using the coffee table or kitchen counter as work surfaces. More to come...1 point
-
Name : Fernando baro 501st ID : 29415 FISD forun name : Bareta Garrison : Spanish garrison Armor : Armour Factory (kit) Helmet : Armour Factory(kit) Blaster : Armour Factory Height : 177cm Weight : 82kg Boots : Armour Factory Canvas Belt : Armour Factory Hand Plates : Armour Factory Neck Seal : Armour Factory Holster : Armour Factor https://501st.com/members/displaymemberdetails.php?userID=325931 point
-
Just heard KB is also making some updates to his molds to take them to Centurion level1 point
-
1 point
-
Thanks! And that's my jersey from Shark-for-a-Day (Shark's Fantasy Camp) 2018. My girlfriend and I are big fans (she lived in San Jose for 10 years before moving to Philly for me). The canvas was won in one of the Shark's Foundation auctions a couple of years ago. Hertl and Jones are the reason for my TKID...14831.1 point
-
Great work so far Chris! Love seeing the Hertl poster and jersey on your wall (I'm a Sharks fan)1 point
-
Yes! I've done exactly that. Easy to do - and fits much better afterwards.1 point
-
First forearm closed! However the shape is a bit off. It is more of and oval and is causing pinch points and the arm wants to shift the wrong way. Is it possible to do a hot water bath to ease this tension and make the shape a little more round?1 point
-
Both my ANH TK and Shadow TK are double snapped with nylon plates and I've had no issues with unsnapping so far (24 troops plus other events in the ANH, probably half that in the Shadow), E6000 is quite strong once it's cured. One plate did have a corner lifting but that was probably my fault during the gluing process.1 point
-
Thanks. Time will tell if my son maybe changes his mind. You know how kids are1 point
-
My son is 14 years old and He has a Jawa costume , He's is a Galactic Academy cadet and for some events, (Not all) I have asked our Garrison CO for an authorization an he granted for Trooping with no problem. You may want to ask to your local CO . And Yes, the FOTK armor build looks intimidating but as you have confirmed, FISD is plenty of info and help.1 point
-
Your son is the perfect Hux, even if he does a TK he definitely needs to continue with Hux as well. Sent from my iPhone using Tapatalk1 point
-
Congratulations ! both looks Great !! (I think you're going to need a FOTK )1 point
-
I agree. The 20mm looks better. I will test 17/18mm for fun but I’m leaning towards 20mm.1 point
-
Ideally, you want to cover as much as the ridge as you can. Because of the sizing, I would say the 20mm coverstrips look better. You could cheat a few mm on them (17 or 18 mm), but the 15mm shows too much of ridge IMO.1 point
-
Hey troopers, With RS Prop Masters now offering completed HDPE lids for their 10th anniversary celebrations, I'm guessing that the desire for painted, screen accurate helmets will like rise in the coming weeks and months. RS are only offering them as complete helmets, but I know many troppers/artists would rather build and paint their own. As such, I wanted to bump this thread for anyone looking to build a super replica helmet. :-) Stay safe, Dan1 point
-
Here is a better picture of where the 20mm cover strips sit compared to a 15mm strip.1 point
-
Trooper Bay doesn't elaborate on much of his gear. Darman's and Teresa have very nice seals1 point
-
Whoo Hoo! From the dirt to the shine! Looking forward to the build.1 point
-
Excelente Dani, esta perfecto y muchas gracias por tu rápida respuesta. Excellent Dani. Perfect!! Thanks for your fast response.1 point
-
Hello, I am attaching photographs below, I have masked my mouth and I have removed the paint, I hope it is okay. Thanks and greetings !!1 point
-
I joined the forum 2 years ago but didn’t have the info and cash to get my armor then. A few things came up here and there along the way that had priority over the armor suit but finally I have the money to get one. I’m getting a fully commissioned ANH armor from RS Prop Masters, I’m looking for tips if I need to do anything extra to get 501 approval. What are the next steps to join my local Garrison. Do you guys have a suggestion if this is a good purchase or is there a place I should check out. I really want a fully commissioned set, as I’m not great in DIY projects. hope to read some of the comments and looking forward to joining my local Garrison.1 point
-
This is a retail item so really shouldn't be in ongoing sales in my mind1 point
-
Just based on what I've seen and learned over the past year, I would avoid getting any 501st related items from eBay like the plague. Unless you know the seller is reputable and is using eBay as a platform to drive some sales, I would check on the approved vendors list here on whitearmor that Mario provided and hit one of them up. The helmets is tough enough with two parts and two ears, I don't think I'd want to add a third part. personally. Good luck in your endeavors.1 point