Leaderboard


Popular Content
Showing content with the highest reputation on 10/28/2019 in Posts
-
Well said Chris and I would advise anyone if they are aware of recasted armor and have proof/examples to forward that to the CS, hopefully more can be done, it's not up to CS to go through every build thread and application to make sure that each set of armor is from a vetted seller list, recasted or even 501st approvable, but we are here to help.2 points
-
Procrastination and bad weather have slowed down the build. Masked up my biceps yesterday, ready to paint in the next few days. Hoping to get a bit done this coming weekend. Sent from my SM-G960F using Tapatalk2 points
-
We don't punish a new trooper for buying a recast armour, that wouldn't be fair on them. We will not however condone recasting, allow sellers of recasts to sell here, and will heavily recommend away from them. This hasn't changed. Do people come here with recast armour? Yes, we help them get the most of that armour with the goal of joining the 501st and being the best trooper they can. Will we recommend seller? No. There have been a number of recast incidents recently, but for the most part none of them have become a large seller which is a small victory and probably due to the effort put in by members here to direct new recruits to reliable vendors.2 points
-
If you are an approved 501st member you have been issued with a TKID, you pick 5 variants of numbers when you first apply to become a member, the first number is issued to you when your first costume is approved. If you are not an approved member have a read through this https://www.501st.com/members/join_form.php If you are an approved member and want to find your profile link to join detachments you can go to the 501st forum, on the side menu their is a search function for TKID, type it in and search and your profile will be shown https://www.501st.com/forum/index.php2 points
-
WARNING: The following content may be controversial! DISCLAIMER: These are my opinions from years of experience, pure and simple. Over the years I have noticed many future Troopers doing an OT (Original Trilogy) TK ask about return edges before, during (and after) their build... If this is a subject that you are curious about, grab a cup of coffee or a tall glass of frosty blue milk (this is a long post, lol) and read on.... QUESTION: "What are they, what do they do, and should I leave them, trim them down some or remove them"? ANSWER: Return edges are part of the molding process and provide strength in certain areas on the edges of your armor. They also provide a heftier look to some pieces. To help you decide whether or not to keep them is why I started this thread. Here I will attempt to go into a few details about them. Know in advance that as mentioned I personally am NOT a fan of them in many areas for several reasons (listed below). Some people love them and some may disagree with my opinions... many of you may trooped for years with no problems which is AWESOME, but many folks have had issues and questions. 1. In most areas they are not screen accurate- In looking at the screen caps and film used armor photos below you will notice their scarcity. 2. They can (and in many cases will) get very uncomfortable- Many folks like the "thicker" look it gives their armor, but they can cut into you, especially in the area where your arm bends ("armor bite") and the groin area (chafing). As Troopers we do a lot of walking and arm bending carrying a weapon, so keep this in mind. 3. If aiming for higher levels they can cause fitting issues- Examples: A. If you leave them on your forearm openings and glue on the cover strips, they will need to be completely removed at the wrists for Centurion level, making the opening too wide. This can lead to you having to remove the cover strips, reduce the sides of the forearms and re-attach the strips. Quite a pain in the posterior plate to say the least. *** See EXAMPLE 1 below. B. If they are overly thick on the bottoms of your shoulder bells, they can prevent them from lying snug against the biceps. 4. They can cause splits/cracks- Especially on some armor areas. ABS is designed to flex, and in some cases a small amount of return edge is fine, but too much can cause stress on those areas. *** See EXAMPLE 2 below Over time that stress will take it's toll somewhere, and that is usually the return edge. Anovos armor is especially prone to this on the sides of the chest/back plates and neck openings. I suggest shimming these on the rear with ABS strips and E-6000 to prevent it. Let's start with the chest plate: Note how the ones below (including the back plate) have either no or minimal edges with no cracks or splits. Now here is a screen used one with a pretty prominent edge, Notice the stress crack. Now, onto the ab/kidney/back plate: To keep them in line and prevent them from overlapping, it is suggested that you LEAVE a fair amount of the edges on the top/bottoms of the kidney and bottom of the back plate, especially if using the "classic" strapping method. Yes, these can split/crack as well but not normally. Shoulder Bells Trimming off the entire edge on the bottoms is not only screen accurate (first two photos), it allows them to rest close to the bicep (bottom photo). Third photo shows "suggested" trim lines (red) of an untrimmed bicep. My recommendation is the blue line. Biceps/forearms For sheer comfort and a sleeker look, I recommend removing ALL of the top and bottom edges before fitting/gluing them. First, no one sees the tops (covered by the shoulder bell) and the bottoms can cut into your arms (armor bite). Suggested cut lines in red. Again, if you do get armor bite you will have to take them both completely apart, remove the edge and re-fit. Better to think ahead. Some (myself included) like to leave a bit of the return edge on the outside of the top of the forearm for a thicker look. However, I highly suggest removing all from the inside part (the "scoop") where your arm bends. Again, an armor bite issue. This should also be done BEFORE final fitting. Here are some screen used examples: For level 3 (Centurion) all of the return edge on the wrist opening must be removed, including the area inside the "hump" as seen below: Posterior (butt) plate: Again, it is suggested that you leave some of the return edge on the top (and bottom in most cases) to keep it from riding under/over the kidney. Now, the BOTTOM of the posterior plate is where we often find splitting issues. Should you leave some return edge? Sure! BUT(T), when trimming the corners, (see below) be SURE not to give it a sharp angle... this is where the trouble usually starts. Instead, give it a slightly rounded angle (as shown in green). Thigh tops The tops of the thighs are where we see a lot of questions. I recommend removing all the return edges from the entire upper parts, and here is why: As mentioned above, you will be doing a lot of walking. If you have the edges (or at least a large portion of them) intact, the friction and inside facing angles can really chafe the heck out of you, especially on the inside of the groin area. (Ouch). If there are sharp edges/points on the tops (below) these will poke into you. When trimming these, just follow the existing line. Also, if you do your final fitting, glue everything together and find this out afterward, you will have to take the entire thing apart, remove the return edges, trim down the sides and then re-build/glue them back together. The reason is that afterward the opening will be entirely too large and you will have a giant gap all the way around. Not a good look. Easier to do it beforehand, trust me. As seen below, there were no return edges (or at least minimal ones) used in the films. Sniper knee plate The bottom of this piece is an area often not trimmed enough. To allow it to sit flat (or very close to flat) against the top of the calf enough for the glue to adhere properly I suggest removing most if not all of the bottom edge. Note how in the first and third photos how the sniper knee is parallel to the front of the calf. Last up, a photo that best illustrates my point about return edges and how they were not really present in many places on ANH armor. *** Example 1. of what happens when you have to reduce the return edge(s) after attaching cover strips. NOTE: For the example below I am using an ATA bicep (first 3 photos). Be aware that ATA makes the "suggested" cut line on their return edges pretty slim (a GREAT thing in my opinion). As seen on the armor in the 4th photo, if followed, the "suggested" cut line makes the return edges much wider (red line). Top view Bottom view For the purposes of this tutorial, we will assume that the ATA has those wider suggested return edges. Okay, let's say you really like the thicker look the return edges give your armor, so you left them pretty wide during fitting and then glued on the cover strips. Enough to get your arm through with a little extra room. Should be good to go, correct? BUT, you find that after having your arm bent for a while they cut into you (armor bite), so you find you have to reduce or remove most or all of it. No biggie, right? Just break out the Lexan scissors or Dremel and cut away, leaving the cover strips attached. Easy! So you remove it and then you run into the fact that the opening is now enormous. This is not a good look, and can result in the piece(s) jangling around and not being approvable at higher levels (or even Basic depending on your GML). What I am getting at with the above info. is that if you decide to remove them, it's better to do it before final fitting/gluing. Side note: Many biceps have an unusual shape at the tops (in red, below) normally located on the inside. This can be completely removed. Doing this will not affect approval at any level, and is screen accurate. It sits under the shoulder bell so no one sees it anyway! Screen used bicep USELESS TRIVIA: Many have asked about the "thumbprint" that many armorers have on the left bicep (screen used example below). Some think it is so you can tell them apart, but I was speaking with Brian Muir a few years ago (he sculpted the original armor used in ANH) and asked him about it: "To be honest, I have no idea... it was not in my original sculpt, and must have been a mistake in casting". There you have it. *** EXAMPLE 2: What causes cracks/splits: ABS bends pretty well, just as it's designed to. BUT, when there are return edges involved that changes the game. For the below example I used a 2 inch wide strip of ABS with a 1/2 inch "return edge". Looks pretty solid, right? That's because the edge provides stability. Now I am bending it up/in to simulate use over time. (More than it normally gets bent in many cases, but only to prove a point). That stress has got to go somewhere, and it's the return edge that takes it all and gives way, again causing cracks/splits. The red arrow shows a weak area where the stress in concentrated and cracks can form. Even if trimmed off afterward that area will be prone to splitting, so a small shim behind it is suggested. To sum it up, return edges are not meant to bend a lot. I suggest inspecting your armor occasionally to spot any existing/potential cracks/splits so that you can catch them before they get worse. I hope this helps answer any basic questions you may have, and always feel free to ask more detailed ones here or offer differing opinions.1 point
-
Hello! My Anovos ANH Stunt Trooper armor was approved on 10/23/2019 and it's my first costume for the 501st! I'm very excited to join the ranks of the 501st Legion and my local Dune Sea Garrison in Arizona. I ordered my Anovos kit on 12/27/2016 and my BB Day was 01/11/2018. I was slow going on getting my armor put together and it spent months at a time sitting on the back burner to life. I was finally able to get my armor completed September of this year and submit my application to the 501st. It is my intention to apply for EIB and Centurion status. A few thank yous: Thank you @TK1636for inviting me into your home and helping me build my armor. Thank you @ukswrath for your amazingly detailed build thread which I tried to follow closely as possible. Thank you @justjoseph63for the flexible hand plates. Thank you @T-Jayfor the E-11 Completion kit. (I still haven't finished my Doopy Doo's blaster kit however) Thank you @TKittellfor the canvas belt. Thank you @Darman for the neck seal and holster. Thank you @FISD E-11 Reference Teamfor the fantastic E-11 build guide. Thank you @gmrhodes13for the suggestions on how to get my armor up to EIB and Centurion standards. Before: After:1 point
-
So these just came in today (Monday).. I ordered them Saturday. These guys at Endorfinders don’t play around with shipping! I measured my hands as stated on their website and they fit.. well, like a glove lol Sent from my iPhone using Tapatalk1 point
-
At the end of the day it's entirely up to your GML as they will be the one ultimately approving the costume. I would have a look with gaskets on as well, can make a big difference, I do have some room in mine and I added some foam in a few places to fill the gaps, gaskets fill the excess areas The don't need to be snug on your arms. Clips are pretty close the top plate1 point
-
Every little bit adds up in the end, nice work on painting1 point
-
This is the vinyl film I use... https://rover.ebay.com/rover/0/0/0?mpre=https%3A%2F%2Fwww.ebay.com.au%2Fulk%2Fitm%2F264062066887 Sent from my iPhone using Tapatalk Pro1 point
-
Thanks, Eric! If you have any pics of the reinforcements please feel free to post em' up here!1 point
-
Very helpful thread that I wish I had encountered during construction. I have removed many of my return edges specifically to prevent cracking since I have Anovos armor. That being said, Joseph hit the nail on the head when he said the Anovos armor is prone to cracks in the neck and sides of the back/chest plates. My largest crack is in the neck area as of very recently. I have reinforced it with E6000 on the outside/exterior part of the armor since it is covered from view by the bottom of my helmet and on the interior side with E6000 and a cut bathroom cloth. That being said, would you recommend that I simply remove the return edge altogether to prevent the crack from leaving the return edge and venturing onto the anterior portion of the chest itself (i.e. where it would be much more visible) or do you all think it will hold as is with the abundance of E6000 on both sides? Like I said, I wish I had this thread at my disposal during the build; excellent resource as usual, Joseph!1 point
-
Hi Martyn Sure - I’ve just received the latest ones from RWA Creations (on Facebook) and they’re nice. Here’s an example (from my latest helmet build) with these templates. Helmet not complete yet but you get the idea. They’re easy to apply and are similar in design to screen used examples. The tubestripes should be approximately a pencil width from the cheek and the front fee stripes should lean forwards, towards the frown, with a template like these. See around 3:20 for a brief look at how they are positioned for painting; https://youtu.be/8c4vs-VfTRw As you’ll be clearing through the UK Garrison, I’d still suggest you get your thread started over there. I’ll happily help you with your build. :-) Dan1 point
-
Yup, Mario's given you good advice. Great Start!1 point
-
So, I took JAFO’s suggestion and checked out 3-D Props. Comparing his stuff to everyone else’s it seems he has some great pieces, good reviews, and was quick to respond to my questions. I went with both pistol and rifle kits. The rifle I ordered along with the BlastFX kit and the M300 light. Everything with shipping came up to $676.08 So expect lots of questions once it arrives In other news, my bucket arrives today! I’m eagerly checking shipping updates as we have like 4” of snow outside this morning here near Denver, Colorado.. Sent from my iPhone using Tapatalk1 point
-
I just wanted to thank you for posting these patterns up on the forum. I made both of my two little ones their own TK armour and they both trooped with us this past weekend.1 point
-
I don't see this return edge in the shoulder lip on any of the CRL shoulder images. I'm not convinced it needs to exist. I'm honestly surprised that this part isn't included on the shoulder bell in the mold. There's not a whole lot of sense in adding this one as the seam would look much better if it was included on the mold. It is what it is and I'll be corrected my mistake tonight either by reattaching the trapezoid with ABS paste or just cutting out a new one.
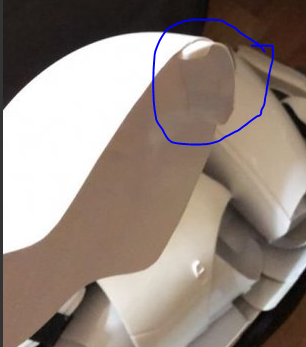 1 point
 -
Just on the Anovos RS thing, yes there was some discussion of this down to the parts comparison to prove it, but in the end that was an agreement between Anovos and RS so in that case its not recasting without permission and then attempting to profit from it in a dishonest fashion. FWIW they also did something very similar with their AT-AT driver helmet, then lied openly about the source and how they got the colour match etc. They are unscrupulous in their own ways sadly, Germain, you are correct, we need to keep this forum on topic and about Episode IX Stormtrooper. Any more recast discussion should take place here https://www.whitearmor.net/forum/forum/50-recast-discussion/1 point
-
Recasting of Anovos is still recasting and will be treated in the same manor as anything else.1 point
-
doesn't that mean I'll miss? Also, I start a post regarding injury catalogue...1 point
-
Not kids and fur baby specifically but in the world of roller derby there are numerous SW inspired derby names; Darth Brawl, Princess Slaya, and Juke Skywalker to name a few. (A juke is a dynamic move enabling a skater to be in two places simultaneously. Or so it seems if you’re the blocker.)1 point
-
Leaps and bounds, looking great, "stay on target"1 point
-
Nothing better than lights and sound the public love it, locally we add an amp jack to the blaster so you can run a cable up your arm and to the amp, we can be heard in a busy convention There are many options, some go the full hog and purchase expensive kits but as you have shown they can be very expensive, many of us take the cheaper route, find a children's toy gun which sounds similar, gut it and modify to fit. Adding a few lights to an on/off switch or direct to the trigger is not that hard, perhaps have a chat to members in your local garrison, there's usually a few that have great electronics experience.1 point
-
Progress is progress...no matter how little! You’re heading in the right direction Pat. Great job [emoji1305] Sent from my iPhone using Tapatalk Pro1 point
-
Two wrongs don't make a right Germain1 point
-
Updated pics showing seams between abdomen and kidney plates. Just needed to tighten things up a bit. Glued the drop boxes in place too.1 point
-
ok thank you Joseph, sorry to be a pain but wanted to understand how this works. i'm hoping to try for Centurian once i get through EIB, fingers crossed. Sorry for the slight delay, based on the feedback i had i'm currently re-attaching my sniper knee which will take a few days to cure properly so toward the end of this coming week i'll re-kit up and take some new pictures. i'll post them on my request EIB status thread on the EIB status request forum and drop you a note once i've done that. thanks for coming back to me so quickly.1 point
-
Home stretch! Helmet I forgot to detail that I had completed the helmet, it was relatively easy. Three pieces, front over back, and then the top. The face screen was a nightmare though, my trusty kitchen sheers weren't too happy with it, and the rotary tool made many many many scary noises when cutting. So I basically ended up using the cutting tool to roughly score it, and then used the scissors to cut it. Held in place with the hooks provided in the kit. Glued the top first, and then realized the bottom was very removed from the helmet, and then glued that in place too. Decided to leave gluing down the cheeks for a different time if I get more powerful magnets. Purchased a basic helmet padding kit from Prime (ugh), with focused padding on the upper forehead to keep the front of the helmet away from my face. Shins I thought these would be easy to do since we've basically been doing the same thing everywhere, but apparantly not. The shins were the curviest pieces I had to do, and it was obvious. Even now they kind of threaten to come apart, and I think post-Halloween it'll be amongst the ones I'd think about ABS pasting solidly and then painting. Decals There really wasn't much of a guide on the decals, I just kinda eyeballed it. Also, found that if you remove the decal, and then lay it on the long side it helps with placement. Fit I did a few fit walks, and found that the biceps keep sliding down. I added a layer of some of the leftover elastic I had, and it seems to have done the trick. Still figuring out what to do about the forearms, plus whenever I pull those up, they pull up my sleeve and reveal the green line of my glove. Thinking about cutting the end of the glove off, or sewing it inside. Here's what I look like as of right now, minus biceps and knees. Forearm greeblies not attached yet, and I forgot the hand guards for the photo.1 point
-
Don't see why everyone hates on portrait mode all the time lol. In Asia, due to WeChat and Line, it's our preferred video mode. And I probably just gave away where my fam is from lol Sounds good!1 point
-
Also as advised, with my TD I moved out each bracket by 5mm and trimmed the caps down to 20mm. Let me know what you think. Sent from my SM-G920F using Tapatalk1 point
-
I've decided to leave the armour for a bit and work on the thermal detonator after reading and taking notes from other TK build threads on the forums. I still need to trim the panel and glue. The great thing about the RS kit is they have already attached the correct size clips and level 3 centurion black screws. Before I trim the panel could one of our troopers confirm the dimensions of the panel? Width and length? Many thanks in advance! Sent from my SM-G920F using Tapatalk1 point
-
Where to start? I decided to use the RS Propmasters youtube video and started with the biceps (apparently the easiest parts to build). Please comment on my progress so far as I have never taken on a build this nerve wracking before. Apologies, for not taking pics of all my trimming stages. I get caught up in the build and forget to document. This is something I will improve on as I progress through my build. Sent from my SM-G920F using Tapatalk1 point