Leaderboard


Popular Content
Showing content with the highest reputation on 09/09/2019 in Posts
-
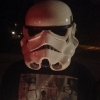
Head on over to the 3D Depository for a direct link to the files to print my blaster.2 points
-
Hello Florian, Looks like you've gotten some great advise from your fellow troopers. Please upload the following photos, Once I get these we can continue. * Front and both sides of the knee sniper plate * Thigh ammo strip rivets outside and inside * TD showing front panel * D ring on rear of blaster * Closeup of shoulder straps (front and back) * Closeup of your ab buttons * Closeup of your hand plates * Closeup of belt * Closeup of boots2 points
-
I got the armor last week and am still waiting on the helmet. First impressions are that it’ll need a lot of trimming. My ANH TK was AM2.0 so I’m a bit spoilt with the thickness of that plastic. This seems a lot thinner so I’ll be reinforcing as I go. A couple of parts look different to the KB threads I’m following. The back-yoke is a 2 piece not 3. The firearms are 2 piece opposed to 4 and the torso back is shorter than the front. If anyone has put one of these together recently I’d love to hear how it went. My last TK took 18 months, hopefully this’ll be around 6.1 point
-
1 point
-
Nice progress! Have you figured out strapping yet? I'd work on that before you attach anything to the oil pan. Everything gets a lot more awkward once there are fragile things sticking out in multiple directions.1 point
-
Thanks Dan. Thanks Luc! Hopefully won't disappoint Really looking forward to the Oct Air and Space event and finally meeting you.1 point
-
yeah, the KB kit comes with TLJ fingers. I've also now picked up a blaster kit which should be here in a couple weeks. Got some basic supplies I was missing over the weekend (tin snips, drill attachment for sanding) now just waiting for Big Box day1 point
-
Well...that...just...sucks... I contacted ATA and he did send me pics of an untrimmed bell with measurements. Hard to determine from that if they would work. It just sucks that the bells may be the only thing holding me back from Centurion. I will try and remold my bells with hot water. I even thought of building the bells larger using ABS strips along the edging, like what is done to shim the ab and kidney armour. That process may ruin them though, so I'm hesitant to try. I know ATA matches my SDS colour pretty closely because of the thigh ammo strip, but not sure about any other manufacturers. It would look silly to have my shoulders stand out. I did a troop yesterday and the other TK there Armour was bright white compared to mine. It wan interesting to see the difference.1 point
-
Most of the time rivets pop because the ammo belt and canvas belt have been connected laid out flat, causing the plastic ammo belt to bend more than the canvas, creating tnesion on the rivets and ultimately pop. There are two ways to correctly install the ammo belt without creating tension on the rivets and with both ways you have to start with the middle rivet. 1. Snap your canvas belt to the abdomen and place the ammo belt on, bending it to form around your abdomen plate and marking the holes. When laid flat, the marks will be short of the holes by a few mm's or 1/8". Your ammo belt will be bent slightly like a Mcdonalds 'M' with tension on the ammo belt. This is not a problem for flexible ABS like 1.5mm that the original armour was made from. 2. Lay the ammo belt on top of the canvas belt and mark out the holes, then add a few mm's or 1/8" outwards of the marks and rivet. This will make the canvas belt under the ammo belt slightly longer but it takes away the tension once the belt is snapped to your abdomen plate. Both ways work extremely well, whether you rivet the ammo belt short or long of the marks when laid out flat.1 point
-
Great Trooper Welcome to EIB, now there's no way back, go for Centurion. Cheers1 point
-
Hola rodrigo Muchas gracias por su paciencia en su revisión, como decía que Darth Real Life se interpuso en el camino, pero todo está claro y estamos listos para continuar. Solo un par de días y tendremos esto terminado.1 point
-
Q, Thanks for all your help and suggestions over my build. Much appreciated. As I stated above: D#*m freaking bells!!! And I just noticed my Expert badge has appeared. YAY!!!1 point
-
I used snaps just so I could swap belts for ESB or ANH. I managed to find Chicago screws on eBay, one of the few times I use it1 point
-
Hi Dave, Thanks for your application for EIB, and for helping us get that much closer to our 1000th EIB trooper! CRL and EIB Application Requirements All required photos are now in and, after review, we are pleased to welcome you to Expert Infantry rank. On behalf of the DO team and myself, many congratulations! Other-Armor Fit/Assembly In this area we review observations made by your fellow troopers and the DO team. Some observations may lead to suggestions to improve the overall look of your armor. Note that we consider both text (CRL) and pictures (screen caps/reference images) when reviewing submissions. As with all reviews we like to start from the top and work our ways down. Remember everything in this section is a suggestion that we feel make your armor that much closer to screen accurate.Some use it as a check list to complete while some do not. The choice is your. With that said, you ready? The first thing I'll call attention to the bottom screw on the right ear. The correct screws are used but I think you could countersink the bottom. Using a larger drill bit and ream by hand so you don't go through the original hole and have complete control and help set that a little flatter. The third photo I've attached is what I use to countersink on all my builds. Its really a great kit to have in your tool box to help get rid of all those nasty pinch points and armor bites. I got mine from mcmaster carr but amazon carries them as well. Reference Image Next I'll move onto your ab section and as your fellow troopers pointed out your ab buttons could use a trim. Reference Photo Onto your Kidney/Butt plate, again your fellow Troopers pointed out that you could adjust your strap a little.(Troopers helping Troopers)... On the back I used doubled over elastic as opposed to nylon just to give it the ability to go back into place after a bit of movement. . Reference Photo Also be sure to check the alignment when fastening your shins and try to keep that clean line. Reference Image Centurion Requirements In this section we prepare you for Centurion. More photos may be requested in the future that allow us to make better decisions on possible adjustments. If there are any areas of concern they will be discussed here. Because Centurion photos show much more detail than EIB, items to pertaining to Centurion might be seen there and not here. We try to point out all that we can from what is seen, but the final accuracy is the responsibility of the trooper. Just like EIB we'll work from the top down with the difference being requirement vs suggestion. Everything called out will be required fix's. Per the CRL: "There should be a minimal gap between the shoulder armor and the chest/back plates." The front look good but I would like to see the gap closed up on the back side. Reference Photo Reference Photo We're going to go back and address your ab details mainly the buttons. Per the CRL: "Ab button paint shall not extend beyond the bottom of the actual raised button." "No separate buttons are allowed." Looking at your ab buttons most of them are good to go (circled in green) but I will require that the ones circled red be addressed. This can be taken care of with a toothpick & mineral spirits. Dip the toothpick and use it as a eraser to shrink the painted buttons I will ask for a side detail shot of the buttons as well. Next up will be your abdomen section. Per the CRL; "Ideally there no gap between the abdomen and kidney armor. Abdominal and Kidney Plate align horizontally at top. A single visible seam line is present." Your so close to getting that gap closed up, great job on the weight loss. I don't believe you need to shim it either but I would highly suggest you follow the advise of your fellow troopers with the doubled over elastic strap as it helps pull the two together. I lost over 80 lbs to get into my armor so I know what your going through with that one. This is a top notch build just a couple minor adjustment and we'll get you on to the next level - congrats, see you at Centurion!!1 point
-
Great job with the cleanup, and good tip about the Humbrol paint! My parents are in town this weekend so I probably won't be able to do your review this weekend, but I'll be with you soon. Thanks for the quick fix!1 point
-
Congratulations José, welcome to the rank. Sent from my iPhone using Tapatalk1 point
-
Congratulations trooper and welcome to EI1 point
-
Ok @shashachu, I got to work today. Here is the frown, let me know if it is cleaned up enough please. HOVI Tips And Shoulder bells. And for future TK reference, nothing would touch the Umbrol Gray frown paint. I tired alcohol, mineral spirits and lacquer thinner and it didn't even take the shine off. I had to use an X-acto knife and dental pick to actually scrape the paint off.1 point
-
Finally got some work done! It was already 85 degrees by 9 am, and warmer in the garage, but we did a mini build party anyway. I helped a friend start working on upgrading his TK strapping, and an other friend came over and we looked over some of his Clone parts. We just had to quit by noon because it was going to be 104 that day and it was pretty close by that time. Ah, gotta love Central Valley summers... The shin spats were wonky and needed to be trimmed to make the V shape to the floor, so I did that by eyeballing it and just going for it. Then I sized them. I had to cut them down to line up and fit, but I purposefully trimmed the main shape before sizing because then I knew I was working with excess material- so if it got screwed up, I still had wiggle room. I forgot to take a picture of the finished piece, but I also trimmed the right inner thigh to actually have a curve shape and be wearable. I basically lined up the other thigh against it, and slowly rolled it around to trace the curve shape. The guys asked me how I had the confidence to just wing it and make the cuts by eyeballing and hoping for the best. The answer? Basically, you just do it- you can't think too hard, you can't worry, you just have to do it. I've officially reached the point in this build where I just can't care anymore about it, and just do stuff. I just want it done, so I'm going to make that happen. It's not like I recommend letting yourself get to that point, but I think it is a very real experience and possibility for long builds, might as well use it to your advantage. I also have done a lot of work with ABS parts and had to eyeball cuts before, so I have some experience in that area. This certainly helps, as well. I'm over this build- I'm not over this costume, I'm still in love with her and it. But I am very much over the building of it. I just want to send it off to the chromers and wear it. New Jimmy helmet came in! I am in love! It's... far superior in my opinion. It need some basic clean up and a fine sanding and then it's ready to go out of the box. I think I'll even paint in the inside black before I send it off to the chromers- I don't care about chrome over-spray on the inside, but I will care very much about black over-spray on the chrome. Finishing finesse and fine sanding needed: Chest plate Back/yoke Biceps Forearms Boot spats Shoulder bells Cod piece Butt plate Knee plates Hand plates Up next: Secondary hand plates- a few minutes with the belt sander and they'll be done. Attach all greeblies/boxes (forearms, thighs, shins) - a few more minutes with the belt sander and some E6000 fumes Clean up 3D print lines from blasters - hoping the acetone wipe down the Mandos use will work. More fumes! 1st Helmet/now prop- more sanding and clean up - but this is kind of last on the list, and maybe even on hold. A prop is cool, but the costume takes precedence. 2nd Helmet- minor sanding, clean up, spray paint inside Finish/assemble thermal detonator - Yeah no, it's optional and I'm done. For now. Maybe I'll Al Clad it at a later date for the hell of it. Or maybe it will be like my temp lens mount with velcro in my TK that's lasted almost four years, or my temp TIE bucket padding that's lasted about two years. Work up connections so they’re ready to install - You'd think this would be the easiest, but have I even thought about it? Nope. Even if I wait until she's back chromed this won't take but an afternoon, maybe two. And I can do it indoors. Where there's AC. The good news, the to do list is slowly dwindling down. The bad news, we're booked with troops for basically every weekend except two or three (so far) for the rest of 2019, and the heat will linger for a while yet. It's not uncommon for us to have warm Halloweens. But sometimes we get freakishly cold Halloweens, too. Fingers crossed!1 point
-
Congratulations, welcome to the rank of EIB.1 point
-
Thank you Tino. I have to study the weathering technics Weight of the baby : 2 kg !1 point