Leaderboard


Popular Content
Showing content with the highest reputation on 06/17/2018 in all areas
-
Alright, Troopers, it's time for another contest! What we are looking for is a short story about your favorite troop. It could be one that was unusual, heartfelt, funny, etc. and should be at least one paragraph in length Photos of the event would be a bonus! The contest will run until Midnight, July 15th, and the winner will be announced on July 20th. So what is the prize, you ask?! Randy (magni) and myself are supplying the First prize, which will be a new hardcover copy of the latest book by NY Times bestselling author Ryder Windham "STORMTROOPERS: BEHIND THE ARMOR". Mr. Windham is also the author of over 60 SW related books and comics. ---------- Second prize will be an official 501st Legion decal. So, one more time, here are the rules: 1. Should be at least one paragraph in length. 2. Must be submitted ON THIS THREAD by midnight, July 10th, 2018. 3. Judging by Imperial Attaches/Staff. 4. Winner will be notified on July 15th, 2018. 5. Any questions should be asked here. GOOD LUCK!4 points
-
Hi everyone. So, around 1 year ago (June 2017) I started a project to revive my 12 year old Shepperton Design Studios Stunt lid. The years has taken their toll on my once beloved TK lid so I did my research, ended up finding the videos of TK4510/ Mike / Trooperbay and decided to strip down, spray and hand paint my old lid. Well, this REALLY got me interested in Stormtroopers again and, thanks to doing plenty of research on FISD on how to respray my lid, got me hooked on the whole armour idea. Right, back to the subject at hand.... I came across Mike’s videos again on YouTube, one of which was weathering a Sandie helmet. Based upon this I ordered some Fullers Earth and a Revell weathering set. Following Mike’s excellent video, essentially the process is done with hairspray > earth flicked on with paintbrush > brush off excess earth > repeat. This, mixed with brush dabbing, sponge dabbing, sandpaper in places etc hopefully leading to a realistic, dirty/used look. Firstly, I started by painting over the vertical black stripes in the traps and tears, then improving the frown paint by extending it beyond the un-drilled 5th hole. I also took the opportunity to raise the brow. As this isn’t my trooping lid, I simply cut an additional upward curve in the cap. Time to throw some dirt at this thing!! After fogging the front of the lid with hairspray, I started to flick Fullers Earth at the lid to give a general covering. After letting the hairspray dry for a bit, it was then time to brush of the loose earth. Essentially, the process is then repeated and repeated, mixing in different shades of earth at different times, and focusing in areas where dirt would naturally build up over time. Next round: Now, at this stage I decided to do another round of hairspray and darker earth, then attempted some wet sponge dabbing..... I went a bit heavy!!! Well - as it was heavier than I had planned, and my first attempt, I decided to have another go. I took the lid out to the garden and literally washed off all of the weathering with the hose! I started the process again and was a lot more careful with damp paper towels his time. Here’s some picture from along the way. And now for the finished lid. Overall, I’m really pleased with how it turned out. I set out to make a naturally dirty looking sandie, hence using Fullers Earth and weathering powder, to get a textured look, and am pleased with the results. Hopefully to photos do it justice. Enough from me - thanks for reading. Dan :-)2 points
-
Hello everybody, more updates ... I gathered up the courage to carve into the receiver tube today. I carved out only enough to make the grip and magazine housing sit flush on the tube. This way, there's more surface area for glue. In dremeling out the resin I would hit the inner black hard plastic. I felt it to be pretty malleable so not too bad to take away. It was really encouraging to see the individual parts fitted together - resembling a blaster!!! Still keeping to safety on the project: respirator, protective glasses, vacuum, and ear plugs. Wanna stay healthy by the end of it. Now, I decided to undo some mods for my magazine housing - now have it hallowed through! Though I originally decided to stop short of hollowing and install magnets to keep the magazine in place, decided to install my Lipo battery in the housing instead so simply removing the magazine would reveal the battery to access charging. It took some undoing to get the magnets out but finally did it. For the magazine, still managed for keeping the magazine roller spring but cut the spring short and installed a platform inside the magazine to hold the base. Pretty happy to retain this mod. Oh.....and one other CRAZY thing I managed to pull off - dremeled out the exposed bolt! I needed to do so to install the BlastFX mother board and also allow me to I stall the LED and speakers good. I tried my best to retain the bolt as I had already modified it ... I will see how much I need to redo with green stuff. Now, I mind as well redo the extractor and plunger. Also did a test install of my trigger lever component- at a later stage, will have to add CA glue to secure the armature wire holding the component in place. Thanks for taking the time; have a great day!2 points
-
Being a cold, wet weekend I've spent it powering through the chest armour upgrade, and modded the mask a little bit. The chest armour has now been sprayed with black and gunmetal gloss. But the process to get there looked something like this. Spraying a coat of primer like in the above pic helps to pick out big areas that need attention. Then after some further filling and sanding it starts to look more like the final piece... I used some 120, 240 and 1200 grit wet paper to get it ready for the first coat of primer, then a coat of spray putty, then a coat of black Rustoleum (primer is incorporated into that paint)... The next day, I masked it off and sprayed two thin coats of gunmetal. I wanted a bit of a brushed look so painting the black first, then thinly with the gunmetal, helps to get the look similar to the finish of the ANH chest piece, which is the finish I prefer. It's not finished yet, I need to hand paint along the edges to improve the finish, then I'll give it a week or so for the black to harden, wet sand the black areas with 1200 grit, and hand paint the black areas, as the masking tape left some minor residue. Also, I modded the neck line of the mask by cutting it with a dremel. Basically I cut about an inch up at the back of the neck, then tapered it down towards the bottom of the chin, so that it angles more sharply into the helmet more like the screen used ones.2 points
-
On to snaps and belt. First off - Belt: I used the standard measurements (various builds and the Billhags diagrams) for placing the snaps on the ab on my first build - the left side of the ab calls for 59mm from the return edge as shown below. this is way too much for this armor. I went with 40mm instead and it worked perfect. The right side stays the same - 28mm. Usual measurements By the way, taping the anvil to the back side of the armor works great for setting these snaps. Also reaming out the holes helps the snaps (male base) to sit flush. The left belt snap (tandy line 24) and two snaps for the posterior. Right ab to kidney connection snap and the right belt snap. Once I've centered by belt to the armor, I taped it in place. I took a sharpie marker and marked up the snaps on the armor - then I pressed the belt to the snaps to leave an impression of the marker on the belt. The belt is level and placed just below (but touching) the center button panel. This leaves nice marks where the snaps should go. I did this process twice - just to be sure. Belt in place. I still need to trim and glue on the rivet covers. I used Tandy small single cap rivets to attach canvas belt to ABS ammo pack. The docking bay 94 captain actually has a low fitting belt - it looks like is has fallen down post-weathering. I will need to reposition this belt for SWAT application - but I am told that I need to have the belt here for basic approval. I find it weird that something good enough for L3 approval is not good enough for basic. Oh well. anyway, I was going to install another set of snaps to allow me to easily adjust this in the future - but I forgot and put on the ammo pack before adding the snaps. Sent from my iPhone using Tapatalk2 points
-
Been a while. Been too long. Between life getting In the way, working on my kid’s Biker Scout, and trooping in my ATA, hasn’t been much time to work on the AM. But here’s a gratuitous pic during our recent troop at Legoland California for Star Wars days. But back to the task at hand. I finished up the return edge on the top of the Ab plate. Feels much better now. Since that was done, it’s time to add some snap plates. I’m using the standard Tand Line 24 and attaching them to the armor using nylon webbing instead of spare ABS. It conforms to the shape of the plastic better and without the need to heat the plates to shape. And the same with the back. I did add the extra clamps to the front. Just to make sure it gets on there solid. Hopefully more progress in the future. We’ll see how it goes. Sent from my iPhone using Tapatalk2 points
-
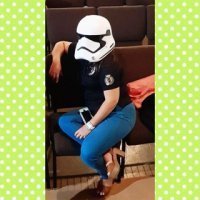
Hi bros I did this. I hope you like it!! Imperial cheers from Barcelona!!1 point
-
Those are nice Sent from my iPhone using Tapatalk1 point
-
@CableGuyThe helmet need some more work, the "burn-mark" on the forehead and som other bits and the splash over the pauldron and chest and some touching-ups in general1 point
-
Kinda makes me want to do a sandy Sent from my iPhone using Tapatalk1 point
-
Hi Chris, Nice work so far. If you haven’t seen these already, TK4510 has some brilliant videos on lid painting. Here’s one that I followed for the vocoder paint. Having the right brush shape plays a big part in this. Best wishes Dan1 point
-
Haha! Definitely! He could quite easily become Britannia Patrols recruitment officer! [emoji23] Sent from my iPhone using Tapatalk1 point
-
You’re making a cracking job of that so far. You mentioned more weathering - what’s next on he agenda?1 point
-
Cheers mate. Steve D would be SOOO proud!! Lol1 point
-
Well...the plan for today was to work more with the weathering but I forgot the weathering stuff so instead I took the submission pics and sent them to my GML so the trip amounted to something (I´m working on the kit at my workplace) Also had planned to make a video among the sands of the ruined beach-volleball field but there was heavy raining so decided not to1 point
-
Cheers! Can't wait to put the thing together, that's always the best part! Sent from my SM-G925F using Tapatalk1 point
-
Cheers, Tom. That’s very kind. :-) Sent from my iPhone using Tapatalk1 point
-
Coming on really nicely, Tom. :-)1 point
-
Paint work coming along nicely! In places anyway haha. Gloss black on the grips, real screws fitted. Gloss aluminium on the rest. For some reason I got a few little bubbles on the main blaster body when I painted it. Not quite sure why this happened, was nice and smooth beforehand. Perhaps I held the can too close. Anyway, another blast of sanding and repaint and it's looking better. Any thing left over will hopefully add to the weathered effect. Assembly soon! Sent from my SM-G925F using Tapatalk1 point
-
What can I say, I couldn't help myself. I did a little bit more work tonight. I removed the return edge on at the wrist of the forearms and taped them together for a test fit. Now, I know what you're saying, the wrist is uneven, You should even it up at the most visible end and leave it off behind. Normally I'd agree. Except here, since there's no return edge on the wrist, I can trim the wrist down since it's the inside piece that's too long, and still have everything look nice and purdy. And here it is for the test fit. Yes, entirely too big wearing it and I need to trim it some. I'll get there. But first, some thoughts on the AM kit. I said it before, and I'll say it again, this kit is SMOOTH. Looking at it you can see how it's been CAD designed and not just hand sculpted or casted. Look close at the detail on the ridge on the outside of the forearm. HUGE difference between the AM and ATA. On another note, I almost cried this forearm is so big! I had to shim the backside of the ATA. I'm certain the AM will be using standard cover strips front and back. However, unlike the ATA (and other kits) it doesn't have the ridge that the cover strip glues on to. That's a good thing and a bad thing. Good, because I don't have to worry about it for sizing. Bad because I'm used to it, and it's more screen accurate with it. What matters most at this point, is that it shouldn't be something that will prevent me from EIB or Centurion. That really is all for tonight. Father's Day tomorrow (Happy Father's Day to all you Dads out there!) so how much I get done depends on how much the family had planned for me. Until the next update!1 point
-
First outing will be to the Japanese Premier of SOLO - Yep I know almost a damn month after world premier. Sucks being garrisoned in the outer rim!1 point
-
Excellent suggestions! Thank you!1 point
-
Great news, looking forward to seeing you with numbers soon, well done1 point
-
I had held off painting/glueing that smaller ab button plate because I had a gut feeling it wasn’t right. This reference photo is exactly what I needed! Thank you! Sent from my iPhone using Tapatalk1 point
-
My garrison GML has already approved the build and asked for a couple more photos for my legion profile photos!! I will suit up again tomorrow and ballance our the bicep, forearm gap and post those here too.1 point
-
Great Video Terry. Interesting points you made on the eyes. I am surprised that they trimmed the eyes. Not much experience with TKUK, so not sure if that is the norm.1 point
-
I think you're right on as far as the degree of weathering. Less is more. There's a few pics where it looks like these guys were engaged in a mud wrestling which I can't see as realistic. A professional soldier, such as an Imperial Stormtrooper, is not going to walk around for long with a a huge amount of mud splotches on his armor. Either he or is peers/superior are going to remark on his sloven appearance and demand that he police that *%#*.1 point
-
Thank you for this!1 point
-
There are people on here with a LOT more expertise than I have! However, I did get there and I want to just give a tip synopsis of things that are valuable to me. These are tips for those just starting. Much of it can be found on here, but here’s what I wish I knew at the start, with my own personal spin on it, from experience or from a lot of digging in the forums. Of course, some things you’ll still have to figure out for yourself…I wouldn’t take that from you! A million thanks to the FISD community. I owe realizing the dream of proper TK armour to you all! Helmet: Don’t rush it. Everyone’s been looking at this helmet for 40 years, and when it’s not perfect it doesn’t look completely right to people, even though they can't peg quite why. The look and consistency of the original costumes was really quite amazing, overall. Things to hyper focus on … the eye holes and the teeth. Eye holes…I often see people not taking enough out, or crooked lines. Slightly crooked can be cannon I guess, in some examples, as some of those eye holes were a bit messier than others. Sand and look. Sand and look. Teeth…people often make them too long and too square. I initially used a dremel, and then refined with hobby files. Compare them constantly to the movie worn helmets. If you make your teeth right, your helmet will likely stand out as an amazing example! Return Edges: People seem to have a desire to keep return edges. This can create fit, shape, and wearability issues…plus it just doesn’t look “cannon.” Again, look for the screen references. The return edges are often much much smaller than we’d all first think, and often there aren’t any at all. For instance, people often want to have too much return edge on the top of the butt plate, or any at all on the other edges of it. This will give you “trooper dumpy butt” I call it. Again, screen reference and look at the best Centurion submissions. Bending ABS: I know some people use a heat gun. This is outside of my comfort zone. Too many horror stories. I did a lot of bending to get things where I wanted them to be. FYI, I was able to accomplish this by pouring boiling water from a kettle on the parts I needed to bend, and applying a plastic clamp for the weight to apply the bend force. When it was where it needed to be, or just past actually (it goes back slightly), I'd immediately put it under cold running tap water. Sometimes I had to repeat this process. This worked perfectly, on 1.5mm ABS. My Favourite Build Resource: Centurion submissions! The build threads were cool, of course. For me, the single biggest help were the Centurion Submissions. So much detail, and real life scrutiny of what you eventually want to have. Specifically, and this is really important, find submissions of your armour make (RS, ATA, etc.) with someone who is approximately your height and weight. That’s a huge help. Glue: I read a lot about E6000. I was unsure about it, as I heard about how bad it smelled and how long it took to cure. The smell does go away quickly. I couldn’t recommend it more. When you wear your armour, it will flex, and there will be times where it may be called up to really flex. CA glue does not allow for any flex at some points on your armour that have a LOT of tension. E6000 is a way safer route to go. Plus, if you make a mistake you’re not hooped. I can’t imagine using anything else. Also, people talk of 12 hour cure times. On anything that has a bit of tension in it you'll need to go 24 hours. Even then, I put it over a forced air heat register (in cold months). If you push short cure times you'll eventually get some separation. Not fun to go backwards! Cover Strips: I did not use interior strips. I’m not saying you shouldn’t do it. It’s all about preference and comfort level. In my experience, if you do your outside cover strips properly, your armour will absolutely be strong enough, and you’ve just saved yourself an incalculable amount of work and curing time, in what is already a long and arduous process. When using E6000, it is VERY important that you glue right to the very edge of the cover strip where it touches your armour. You want some bleeding out. Most of the force is at the edges. When you clean the glue that has pressed out, if you happen to peel even a fraction of a mm from underneath the cover strip, you can expect your cover strip to come away at the edge at some point. For some people that’s not an issue...lots of people with cover strips that aren't consistently flush and in full contact. For me, I need to have my cover strip in complete flush contact. Better to leave a tiny bead of E6000 at the side edges of the strip, than to completely remove it and have separation. Strapping: Tandy snaps are the best. Reading other's horror stories, I'd go as far as to say essential. To keep gaps very minimal, keep the snaps very close to the edge of each piece of armour, and make the strapping tight. It will stretch and it’ll always seem like you’re making the strap to short at first. In fact, even then you’ll likely eventually make them shorter. I tried elastic strapping and I hated it. It flexed better, but the gaps were a mess. So, for back to kidney plate to butt, I changed to nylon/no stretch strapping. Nice and tight with almost no gap! I just used flexible straps from the chest to ab. Even those, make them shorter then you think you need them, or you’ll have issues with your chest plat ending up under your ab plate on troops. They’re expensive, but buy lots of extra snaps. Don’t be afraid to scrap and start again on strapping for bits that aren’t cutting it. Likely will be shortening at some point. Don’t use velcro for anything that has a lot of force, torsion, or will do any pulling away. The only place I have velcro is for my wide white elastic at the shoulder, from my bicep to forearm connection and for my shins. They work great in those applications only. Even then, use the industrial strength velcro and E6000 it to the ABS or to the strap. Don’t rely on the adhesive that’s already on there, especially on the strapping. Armour ABS Thickness: I have 1.5mm ABS. It’s extremely durable. I don’t worry about it cracking or breaking. I’ve felt others' 1mm ABS armour, and I'd be very nervous with it. Cutting your ABS: Score and snap is your friend! Again, it’s comfort level with how close your willing to go to the final line. Take your time (can’t stress this enough). A dremel to clean up a line and shape a little I think is very necessary. Then, I use a 180 grit sand paper to smooth, and finish up with an 800 grit to make the edge shiny and smooth. Boots: You can research and research, and the conclusion that you’ll come to is that Imperial Boots is pretty much it if you want proper high quality boots at the time I’m writing this. The good news is that they are really really good guys and they do an amazing job, and they’re worth the money and wait. On the wait … plan on getting your boots early. You could end up waiting almost a month for an ordering wave, and then another month for processing and shipping. Don’t be sidelined like I was for 2 months because I wasn’t proactive with this. On fitment ... I did the prescribed, order a size bigger. Out of the box they were a tiny bit loose. However, I put in gel insoles, still leaving the original insoles in, and they're absolutely perfect! Wouldn't have them any other way at all. Check out your local fabric store: You’ll be surprised how much of what you’ll need you’ll find there, and for cheap!! Neck Seal: Do not buy one that has rigid metal wire running through it. They’re a nightmare and you won’t even be able to look down while putting your armour on without breaking your neck. Buy a completely soft ribbed one only. Learn from my pain. Literally. On another note, does anyone want to buy a wire ribbed neck seal? Special price! Helmet Cooling: For helmet, like others, I highly recommend dual 5 volt blowers and a usb battery. You can get all of this super cheap on eBay from China. Will last hours on one battery. When the battery is new, charge and discharge it a couple times to make sure it’s not defective. You don’t want a lithium-ion battery lighting on fire when it’s next to your head! Seriously. Audio: Whatever audio solution you choose, it’s imperative that you have sound dampening in your helmet. All plastic surfaces should be covered. I used sticky back 1/4 inch thick x 3/4 inch wide foam. This should almost completely eliminate most feedback for most setups. If you still have issues, put a bit of foam inside your chest plate at the top, to prevent sound from coming up into your helmet (thank you BDWC for this tip!). Lastly, whatever audio solution your pick, it needs to have the static burst after you talk, at a bare minimum. FYI, I use an Aker amp and mic, and the TrooperTalk iPhone app. Blaster: You’ve spent all this time, effort and money on your armour. Amazing! Now don’t fall short on your blaster! The idea of doing your blaster right can be a bit scary, but you can do it. Actually, if you do it right it can be the most fun part of your custume to make! I did DoopyDoos. It’s an amazing resin casting, it’s cheap, the shipping is fast. They have horrible communication but they get it done. The FISD E-11 Blaster Reference thread is amazing and the build threads by Cable Guy and T-Jay were very important to me too. If you do your blaster right, then you really do feel like you’re back on the movie set in ’77…you’ve gone that last mile on your costume! Thermal Detonator Screws: What a freaking pain! Did you know that the planet earth pretty much stopped making slotted screws? And for good reason! If you do find a slotted pan-head screw, it’ll likely be a threaded screw—which means the only way to make it hold in the PVC is to glue it. So, after much much searching, I found a slotted wood/metal screw, but it had a domed head—not CRL Lvl 3 kosher. Again, dremel is your friend! I just dremel’d off the dome and made it into a pan-head. You can do this, or you can order 4 screws from somewhere in the UK and wait a month. Start to build with Centurion as the end goal! If you have Lvl 3 on your mind right from the start, you’ll easily get there. I notice that people who don’t start their builds this way, have a harder journey and seem to be a lot less likely to get there. Furthermore, their armour at the basic approval level can tend to be a little bit of a mess, because they've been lone ranger-ing it, and haven't been using Centurion submission photos as their go to. I'm guessing that those who start this way, most often have far better looking armour right from the start...even if they never progress to EIB or Centurion. Hope that something in here helps someone on their journey!1 point
-
I've trooped my "custom" build doopydoo about 10/11 times now with no issues. It's been knocked a few times, kids have handled it a couple of times, but not dropped. I am sure if it was dropped it would be a sad day but I don't goof about to that point, I am a soldier of the Imperial Army after all!1 point
-
After a long time out, I've been able to get some help and will again start offering the ANH E11 kits based on castings of my expertly cleaned (thanks @usaeatt2 !!!) parts. Casting is currently ongoing. The kit is all based on a CNC machined 38.1OD Aluminium tube made especially to be as accurate as possible while taking into account this is for replica, and not a real functioning Sterling. My original sales thread is now archived but if you want to see some history: Many molds needed to be redone as they were showing their age and this is still ongoing and I expect to have these finished in the next few weeks. Straight from the casting floor. Once I"m ready I will reopen a new sales thread and let people access a sign up link. Kits will be shipping within 2 weeks of order and orders will go out in waves, so there will be no long waiting list or line between payment and shipment. MTFBWY1 point
-
I'm sure you've already seen it, but this thread will be a great help in your DD build: https://www.whitearmor.net/forum/topic/32111-fisd-e-11-blaster-reference/ Also, if you want to take it to the next levels of realism/accuracy, I highly suggest picking up one of Tino's E-11 finishing kits: https://www.whitearmor.net/forum/topic/28444-fs-completion-sets-for-e-11-resin-kits-with-worldwide-tracked-shipping-and-paypal/1 point