

Gaanon
-
Posts
51 -
Joined
-
Last visited
About Gaanon

Recent Profile Visitors
1,273 profile views


-
Looking good so far. Just a couple of things for you to keep in mind: Return edge: Keep about 1/8" return edge all around except for the wrist and ankles. They're not allowed in those two spots, otherwise, it helps your armor look thicker. Cover Strips: 1) Anovos only gives you precut (width) outer cover strips. These are for decoration and to cover the seams. I'd strongly recommend inner cover strips as well. Since you're local to San Diego, I'd recommend checking out ePlastics in Kearney Mesa for some thin sheeting to use as inner cover strip material. 2) Sizing is important. Not knowing your body type, you may need larger cover strips than the standard. If that's the case (and your GML will confirm) put the correct size in the front and put the larger cover strips, or shims, in the back. This is also where those inner cover strips come in handy. Holster: The standard Anovos holster, if I remember right, is a hero version. Not a big deal it can be modified for stunt. Other than that, have fun with the build. When we're out of quarrantine I'd be happy to talk to you at our Armor Party and help out any way I can.
-
What can I say, I couldn't help myself. I did a little bit more work tonight. I removed the return edge on at the wrist of the forearms and taped them together for a test fit. Now, I know what you're saying, the wrist is uneven, You should even it up at the most visible end and leave it off behind. Normally I'd agree. Except here, since there's no return edge on the wrist, I can trim the wrist down since it's the inside piece that's too long, and still have everything look nice and purdy. And here it is for the test fit. Yes, entirely too big wearing it and I need to trim it some. I'll get there. But first, some thoughts on the AM kit. I said it before, and I'll say it again, this kit is SMOOTH. Looking at it you can see how it's been CAD designed and not just hand sculpted or casted. Look close at the detail on the ridge on the outside of the forearm. HUGE difference between the AM and ATA. On another note, I almost cried this forearm is so big! I had to shim the backside of the ATA. I'm certain the AM will be using standard cover strips front and back. However, unlike the ATA (and other kits) it doesn't have the ridge that the cover strip glues on to. That's a good thing and a bad thing. Good, because I don't have to worry about it for sizing. Bad because I'm used to it, and it's more screen accurate with it. What matters most at this point, is that it shouldn't be something that will prevent me from EIB or Centurion. That really is all for tonight. Father's Day tomorrow (Happy Father's Day to all you Dads out there!) so how much I get done depends on how much the family had planned for me. Until the next update!
-
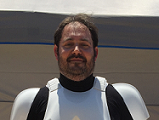
Been a while. Been too long. Between life getting In the way, working on my kid’s Biker Scout, and trooping in my ATA, hasn’t been much time to work on the AM. But here’s a gratuitous pic during our recent troop at Legoland California for Star Wars days. But back to the task at hand. I finished up the return edge on the top of the Ab plate. Feels much better now. Since that was done, it’s time to add some snap plates. I’m using the standard Tand Line 24 and attaching them to the armor using nylon webbing instead of spare ABS. It conforms to the shape of the plastic better and without the need to heat the plates to shape. And the same with the back. I did add the extra clamps to the front. Just to make sure it gets on there solid. Hopefully more progress in the future. We’ll see how it goes. Sent from my iPhone using Tapatalk
-
Finally some time for a little progress! It's just difficult to get stuff done during the week and well...there's some new movie release this weekend. I started off working on the Ab and cod. Following @ukswrath I trimmed back a bit of the cod and curved it off. I also trimmed back some of the return edge on the sides (where the legs will go). I didn't take a before pic (I'll try to in the future) but if you look at it in the right light, you can see a small dip and I used that for my guide on the return edge. I can always trim more later if I like. Yes, that's my workbench. It's in the garage. Pardon the absolute mess around it. Lots going on. Next is the start of the trim on top. Ya got two choices (well more than two, but two real ones) to connect the chest to the ab plate as well as connecting the back pieces together. Either snap plates or brackets. Yes, brackets are more accurate, but I prefer snap plates. I did snap on my ATA and they worked fine. I've seen velcro on an Anovos build and I'll pass on that all together. I know the brackets can work great, and there are a great many troopers out there with them. But when they break, it can be a real problem. So, since I'm going with snap plates, and since this part will never be seen there's no reason for so much return edge, so I'm trimming it down by about half. Plus, on the sides, it kinda digs into me. And being the larger guy that I am, I can use all the extra room I can get. You can see the difference in width. The very top is what I've trimmed so far. The rest...not so much. Yet. But I'll get there. My plan is to trim up the torso section first and get that sized to me. Once that's done I can figure out how to situate the arms, legs, and shoulder bells. That said, I've got a troop tomorrow for Solo. Hopefully, I can get to watch the movie Sunday with one of the kids, then Deadpool on Monday with another. Somewhere in between I'll get more work done.
-

Hydraken’s ANH stunt build AM 2.0
Gaanon replied to Hydraken's topic in Build Threads Requireing Maintenance
Congrats! I’ll be building right along side you. Same exact kit. Let the fun begin! Sent from my iPhone using Tapatalk -
OK, experienced builders, first questions: 1) Belt. I've got two and from the looks of it two different rivet covers for the belt. I'm going to be using the square covers. The question is, which belt should I use? Is there really a difference between the one with the square recesses and the flat one? Yes, I will be adding my 45* cuts to the corners in place of the rounds either way. 2) Shoulder straps. I know I'm going to be using the one with the texture to it. But what costume is the other one for? I didn't see anything on any TK like costume in the CRL database. Although I may not have looked hard enough. 3) Hand Plates. Again, more for my knowledge than anything. I know one is ANH and the other is ESB/ROTJ. I thought the slotted looking one was for some sandys or HWT, but I can't seem to find it. Brian
-
You know how it is, work before pleasure...Plus, the wife doesn't know about this one...yet. And I've got a troop this afternoon for a book signing with Ashley Eckstein I'll be working on getting together some supplies (aka read Supply list for your TK build...) the rest of this week and hopefully I can make the Garrison Armor Build Party this Sunday. Plus I also printed out all the notes I collected from my first build. If it helps, let's get it done together. I'll be looking for your updates! I know my first build took forever. Partly from fear I was going to mess something up. But I learned we call that weathering...for the most part. About 2 years to build, then a month for my initial rejection, and two months for all the fixes. My GML was at the build party I got my final approval pics done and gave me the unofficial thumbs up on the spot.
-
You're reading this. You're following along with the build. Maybe you have a kit already, maybe you're new and looking to get one soon. Hopefully this will help you out as so many have helped me, whether they know it or not. If you haven't spent at least a week under the Getting Started - Read this First! section, you're not doing yourself any favors. If you're of average size or at least of average build, you're lucky as most kits should fit you just fine. If you're like me and could stand to lose a few pounds or more, read, research, and read some more. I'm 5'10" and pushing 250lbs. A "standard" kit doesn't fit and while I can build it to basic, it doesn't look good. (my opinion) For example, you can see from my approved kit, my thighs have crazy shims in the back that I'm not happy with: Same with the gaps between the kidney and ab plate: Overall, I think the gaps between the different parts are too much. But it's the best I can do with what I have. I hope, for the bigger troopers like me, that want to join, they can use this build thread as a resource for what can be done with the right stuff. Brian
-
As promised, back at work and here we go! Everything laid out on our conference table at work. What else is a conference table good for? I was surprised at how much stuff there actually was. Took up the whole table. Now for the detailed images. Here we have the helmet, pre-trimmed ears, two types of shoulder straps (need to look up the different versions of this kit) and biceps. Chest, back plate, and forearms. Looks like a lot more room than what I currently have. Ab and cod, belts (something else to look up), different ab buttons, different hand plates, thermal det was pretty much preassembled, drop boxes (inner and outer). Leg day (I had to move around the other side of the table for a better look. TK knee plate and two TD knee plates, thigh ammo belt (AM will prebend them for you if you like) Some of the extras, correct brow and neck trim, aluminum mic tips, ABS weld (I'll stick to E6000, thank you) and some hardware. Detail on the belts and buttons Detail on the ab buttons and hand plate options. Ab and cod detail (I was happy this was one piece. I've heard some kits this comes in two parts and didn't want to deal with that.) Close up on the kidney and butt plate. Close up on the pre-trimmed ears, mic tips, and shoulder strap options. And that's about it for now. It also came with what looks like the correct lens material. Decal options for TK or TD as well as some frown mesh and tube stripes for stunt and hero. I will say this, packing was awesome. Everything wrapped almost individually and stacked neatly. Not tossed in with peanuts like I've seen before. I'm going to have a heck of a time getting it all back in the box. But all in all I'm quite pleased with the kit itself and the value. If I didn't have work today, I'd be at home beginning assembly. Brian
-
Call this ANH TK 2.0? I was originally approved with an ATA kit and WTF bucket but I was never completely happy with it. Nothing against ATA, but I'm a bigger guy and ATA isn't made for someone like me. If you look at my kit you'll see 5" gaps on both sides between kidney and ab plate and crazy large cover strips/shims on the back of my thighs. So I started looking for a larger kit that would fit better. I had two in mind. My GML recommended AM, but I had thought another would fit better so I got on the wait list. And waited. And a few months past the estimated delivery date without word my turn was up, I tried to contact him for an update. Two and a half weeks later and still no response, so I reached out to Armor Masters this past Sunday, placed my order and sent some PayPal funds. The kit was boxed up and in the mail Monday! Fast forward to today and it's already BBB Day! I've NEVER seen things happen that fast. Pro to living in the same state is super fast delivery. Con...is when the state is California and you have to deal with the sales tax! Ouch!!! So let's start off with the obligatory BBB Photo. Since this is at work I didn't have much time to do anything other than take a quick look inside. Tomorrow I'll crack everything open and take a photo of the complete kit. What I've noticed already: - There's a lot of extras. Multiple hand plates, ab buttons, knee plates, etc. - Mic tips are aluminum. Should be good enough for basic, but they don't look like the resin cast ones on the inside. I'm guessing they'll need to be replaced for higher approval - Even came with helmet padding! - Plastic is thick. Even thicker than ATA. - Ears are pre-trimmed and the eye holes are already cut out. Overall it looks like there's a lot of trimming already done. - Everything is smooth. No bumpy wonkiness that are in other kits. My understanding is that the AM molds are machined aluminum. I thought I'd like something smoother and more even...now I'm not so sure. Anyone with an AM kit, feel free to chime in on what it takes to assemble. Brian
-
Some things to keep in mind, you already mentioned you're on the taller/heavier side so buying the "screen accurate standard" may not be the best option for you. You may find yourself unable to fit into the armor, which will be even more frustrating than getting yourself a standard party store costume. What you will find this boils down to is a delicate balancing act. What's you're budget? What's your skill level? What is your planned use? How soon do you need it? You're not going to find a full, complete kit for that cost. And if you do, most likely it won't fit properly or it won't be close to screen accurate. The better vendors, those who would fit you, may have a longer wait time for the plastic. If you have time and skill, the foam, Pepakura (or paper) route is an option, just keep in mind many of those models are not screen accurate and there is quite a bit of adjustment that needs to be done to get it to fit properly. Not to mention the time and work to make a quality costume. Take a good look at the difference between an ANH TK and a FOTK. While both are great options, the FOTK, being newer, can be double the cost of the ANH. Finally, while joining the 501st isn't a requirement, working with your local garrison can be a great help. They will usually have build parties where you can meet and greet with other enthusiasts like yourself and get some personalized help in identifying the right style armor for you as well as help building it. Best of luck to you!
-
Looking for a First Order armor
Gaanon replied to Angry Kylo Ren's topic in Getting Started - Read this First!
The lower your price point, the more you should plan to do on your own. Honestly, at that price, you can't even get the hard plastic let alone all the soft parts and hardware. If you're not looking for 501st approval, I'd suggest looking into Pepakura. I've seen a few sets of free FOTK files. It's not something that's difficult to do, but it does take time and patience. It can also allow you to spread out the cost over time. Good luck. -
After nearly two years building (plus another waiting for my kit) I was finally approved! Just in time for SDCC. Now I'm with the Imperial Sands Garrison out of San Diego County. Looking forward to my first troop and everything that comes next. First and foremost, is finishing my E-11. Thanks Dark CMF for an awesome build thread, I've taken quite a few of your ideas there.
-
Requesting access. TK45666 http://www.501st.com/members/displaymemberdetails.php?userID=24453
-
Supply list for your OT TK build....
Gaanon replied to justjoseph63's topic in Getting Started - Read this First!
Personally, Trooperbay is actually close to where I live. It's great to go in there and chat as well. I've bought a few things from him, holster, belt, decals. Nothing but good things to say about him.
