Leaderboard


Popular Content
Showing content with the highest reputation on 06/01/2018 in all areas
-
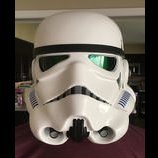
Toller Job bisher, Teddy! Stellar paint job on the tears and traps, but for the frown you will need to extend it a bit farther to match these ANH Stunt references:2 points
-
Have not put the pin in it yet to get the flipper positioned correctly but everything looks like it is going to fit1 point
-
1 point
-
You are making great progress on your build. I do not think I have ever seen such a clean paint job. Nice Work!1 point
-
Helmet and ab button paint done... I think. Glad that’s over!1 point
-
Even easier solution just use velcro to hold it in place1 point
-
Big Deal, Thank you for the input. If the flex- seal does not work out, I will look into other options. Ok, Update… First, I knew the bicep armor was tight but I realized that I would only have about ¼” overlap for the application of Velcro and that is when my arms are hanging down. If I bent my arm or raised it (flexing my bicep) it would really test the hold ability of the Velcro. So, I decided to add a ½” shim. In this picture I am using thick piece of HIPS as the shim and it is backed with a 1” wide piece of thinner HIPS. Everything is adhered together with PC-7. Once the PC-7 is cured, it will all get sanded flush. I will probably add another layer of PC-7 on the inside to make sure the HIPS is welded to the bicep armor and provides a smooth transition. Next, the sniper knew came out great. Next, I think the Velcro method will be the best method to properly hold the shoulder straps in place so I sewed some ½”x 1 ½” pieces of Velcro to the elastic shoulder straps that connect the back plate to the chest plate. Doing this in pieces rather than one big piece of Velcro insures that the elastic and still stretch. Next, I added some hard Velcro to the bottom of the shoulder straps. I will probably use white Velcro here after everything is painted. Lastly, I went ahead and cut out the underside of the shoulder strap boxes on the chest plate and added some PC-7 on a slope to provide a flat mounting surface for the Velcro (yellow circles). I also picked up some white liquid flex seal and painted a small area (red circle) in the center of the chest plate to test it out. And that is the update, thanks for the interest.1 point
-
I have a hyperfirm and it’s easy to troop with. I’m not much of a display person and haven’t compared it to other blasters so I’m not sure if any others are more intricate which would look better on display. It’s light and doesn’t weigh down my side when it’s holstered. Sent from my iPhone using Tapatalk1 point
-
Hey Peter Joseph or myself will be with you shortly.1 point
-
Work continues, albeit slowly this week. No photos to share other than these: Obviously my boots arrived! I ordered from Imperial Boots when they were "open" in May. I was delighted with how quickly I received them. Can't say I'm a shoe expert or anything, but quality is very good to me. I normally wear a 9.5US, so ordered a 10. Fit is good and they are surprisingly comfortable. The 4 year old said, "I don't have boots for my Stormtrooper..." with a big sad face. We'll have to negotiate that! Kid is going to eventually have me building a child TK! Anyway, I've begun looking into blasters. Right now I'm leaning towards a Hyperfirm E-11 but I'm wondering what others have to say. I'm looking for something in the midst of the spectrum between "display piece" and "good for trooping". Any good recommendations out there? Anyone have input about Hyperfirm? Thanks, all! I appreciate this community. So much good info and stellar people.1 point
-
Strapping between the shoulder bell, bicep, and forearm will definitely keep things in place. Here's mine: I agree that it looks like your thighs are long.1 point
-
Rivets and strapping on left side. Snaps are temporary, once I can use the sewing machine they will be rebuilt. Good enough for fitting for now. While I was at it I used e6000 on the shoulder snaps a couple of days ago and have the elastic material ready to start fitting the top of the torso. Working on the eye bridges in the mask. First coat of plasti dip is on, have to keep it thin so I don't fill up the screw holes.1 point
-
Nice work on the painting. Will you be extending the frown paint a little more in round two? Also, if you have tube stripe templates, be sure to check their direction before applying and painting them. :-)1 point
-
Great job so far. That counter is especially tasty. :-) The thinner clearing strip looks good too. Keep up the good work. :-)1 point
-
Helmet update: got a LOT of painting work done tonight, and seeing the lid come together just boosts my motivation more and more First, I sprayed the inside of the helmet black; mainly because I really liked the look of helmets that were black inside: Then I did almost all of the other painting except for the little black stripes in the grey helmet areas and the blue tube stripes, but I'm sure I'll get this done soon as well Tomorrow I will hopefully get some more done - and in the meantime you guys can help me out I hope: I got a package from RS yesterday with my strapping pack in it, and it's got random numbers on the little bags but no instructions whatsoever. Also, I don't really understand the process of putting together the rest of the armor, does anyone have a good build or even a video to recommend? Cheers guys, Freddy out1 point
-
Hey Tino, I adjusted the clearing strip. This better? I know it's a little high up but I like it this way. Made the strip 6mm. Dennis Blue Snaggletooth send me a reference picture and I took measurements from that picture. Will be adjusting the LED tomorrow and continue to work on my trigger group. Again thanks for the tips and info!1 point
-
Beautiful Job!! Should be an easy approval.... Move Along!1 point
-
Hi Alicia, Some tips/recommendations based on these photos: Biceps going into shoulder bells: I don't think you will need to resize these. Definitely adding a bicep to forearm strap will help to keep them in place - if you feel your bicep is slipping up, just bending your arm will pull it back down. Adding these straps will also stop your forearms from rotating like in the second photo. Think you'll be good with the kidney situation. Just be aware that there's a chance your kidney and butt plates no longer align. Another potential solution is adding some foam or creating a tab system for the ab and kidney to interlock. Thighs: You could trim the tops of these down if they are just too long. Regarding rotating, the thighs seem a little large, so you could resize them, though that's a lot of work. Perhaps creating a sort of v-strap hanging from your garter belt to two snap plate in the thigh could solve this? Ab to belt: Line 24 snaps are the most commonly used. In the second photo, your belt has detached from your ab, but also your ab plate looks crooked. Perhaps there is something to tweak in your chest to ab straps? You'll surely run into new challenges as you wear your armour and it will need some small tweaks here and there! Almost there!1 point
-
Sure thing - https://www.whitearmor.net/forum/topic/42310-cableguys-rwa-anh-stormtrooper-build-cleared-targetcenturion/ Good old masking tape! This should give you a chance to try it out and see how it looks. When you’re happy with the gap, you can then add the webbing underneath. :-)1 point
-
Big weekend! Started setting some snaps. Have put the female (flat backed) end in some 1” nylon strips. Now those are attached and curing on my shoulder bells and biceps. Went loosely by the BillHag diagram. Oh, and added elastic. Oh, and first time with the heat gun! I made my bicep clips. They are not perfect. And one day I may try to re-do them. But I’m proud of myself and learned lots in my efforts! I (think I) finished my bucket! Well, you know “TK finished” (meaning I still may tweak it 1000x for comfort.) My fans from ukswrath are ordered (woohoo on that Memorial sale!), and are on the way. So it looks like I’ll be starting that tweaking soon. And first official bucket selfie—- And re-finished that thermal detonator. This time with the control panel on correctly. But, this is still on my “not perfect” list, and will re-do to higher level standards. And (no pictures), did my first hot water bath. I molded my shoulder pieces and my ammo pack. I think I may tweak the ammo pack, but that will be another post with dedicated pictures. But a picture of why I am so amazingly thankful for the ultimate sacrifice paid by so many for our freedom. Sent from my iPhone using Tapatalk1 point
-
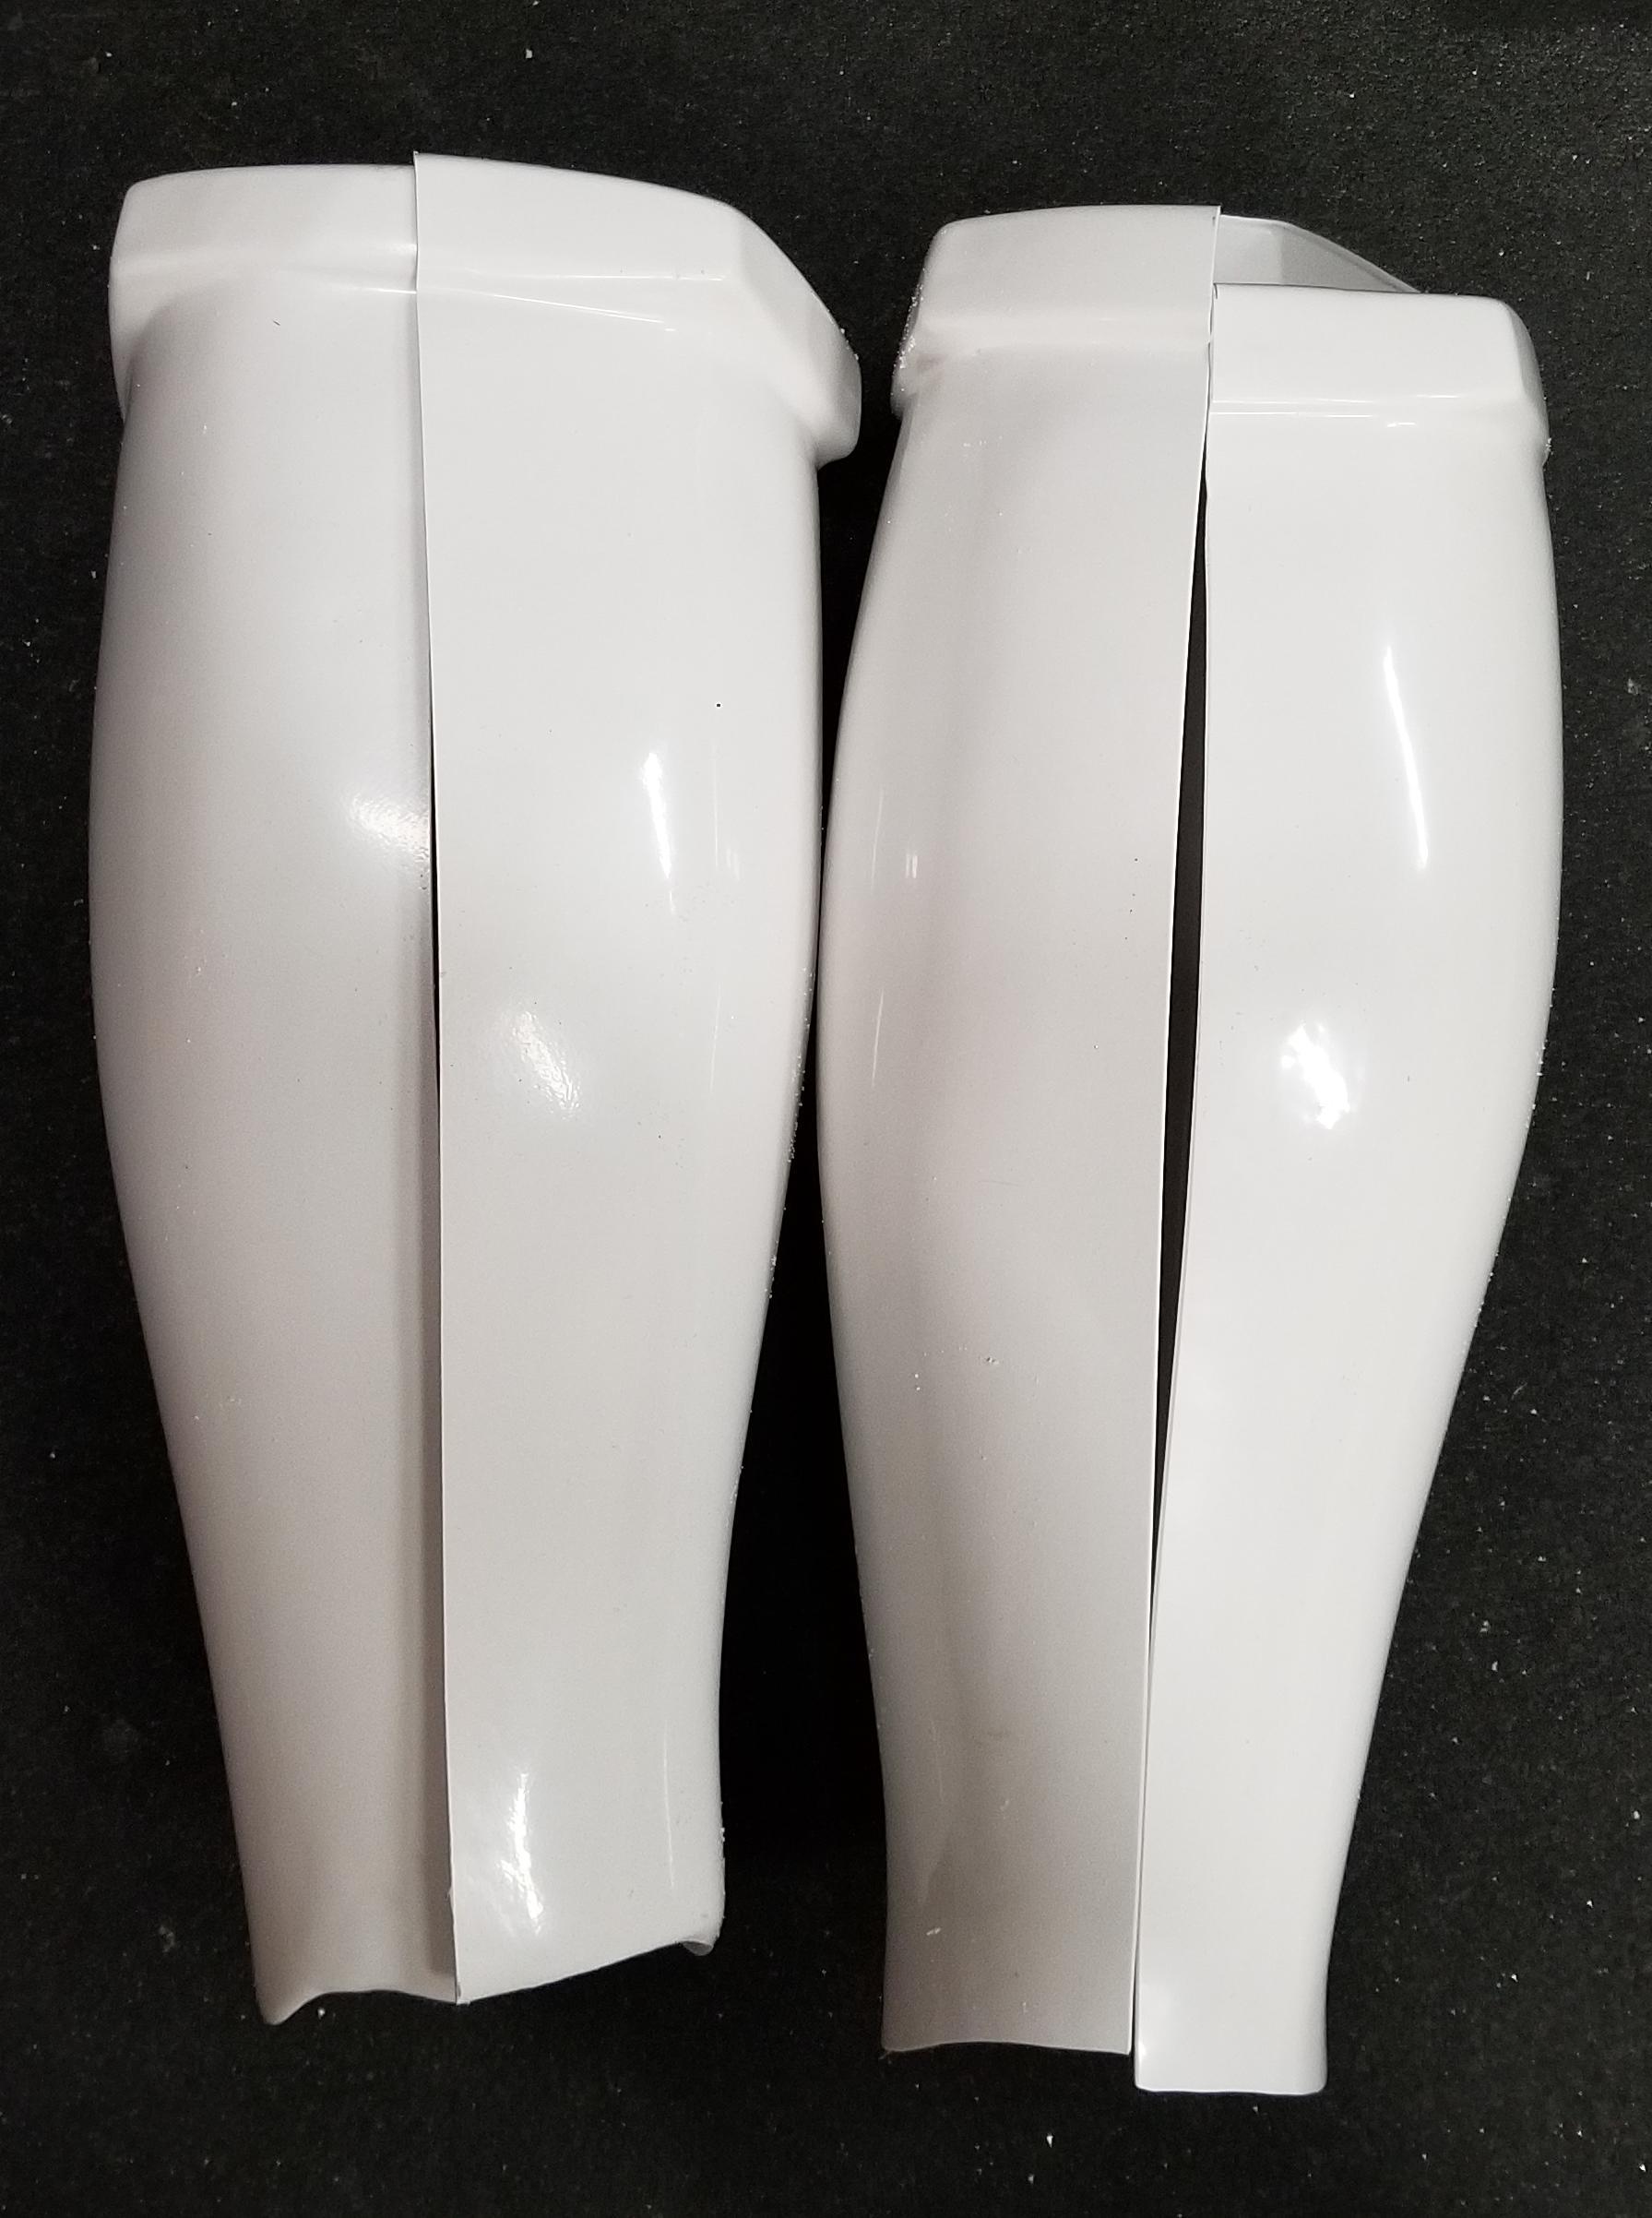
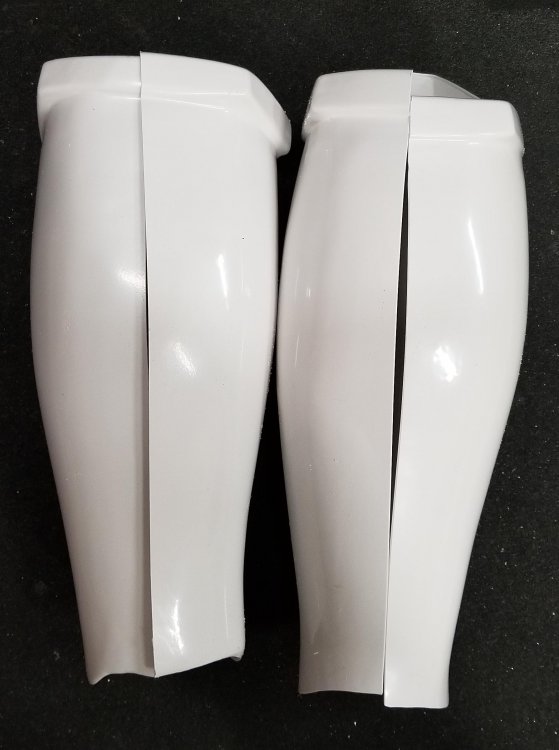
I'm roughly 3/4 done with a WTF Sandtrooper. Just finishing up the shins before the final calf cover strip. My calf sides are pretty close to alignment.
 1 point
 -
In regards to the belt, canon accuracy is what I was shooting for so yes, less is better.1 point