Leaderboard


Popular Content
Showing content with the highest reputation on 05/09/2018 in Posts
-
Hi all. Rather than me posting on specific threads, I thought I’d make a post about the correct use of the “Dave M” style decals/templates for ANH Stunt lids. If it is deemed worthy, perhaps it could become a sticky. I will then try my best not to mention it on individual posts (as the last thing I want to do is upset anyone). As the name “Tube Stripe Police” was bestowed upon me, I feel it’s my duty to try and spread he work to keep up the high standards of TK screen accuracy. I hope I have not become a nuisance by flagging it. So, here are some shots of the Set for Stun, or “Dave M” helmet from ANH. These pictures are from the excellent website www.starwarshelmets.com My interpretation of these stripes are that they were intended to look like vents on a curved surface. When viewed from straight on they should naturally curve with the tube. Here are some shots that I put together (using my old SDS lid, hand painted stripes using Dave M style templates/stencils from Mike at Trooperbay). For obvious reasons, I won’t show pictures of those that have been applied the other way around as they are not mine to share and I don’t want to alienate people. Should anyone wish to share, please feel free. I hope that all makes sense. Any comments of suggestions to improve this thread, please let me know. Kind regards, Dan4 points
-
Eric @Tolo has been with FISD a long time, including stints as DCOG and most recently as DXO. As things happen, Eric's personal life has changed for a positive for him, but for us it meant that he couldn't do what he needed and stay on as DXO. Eric - Thank You! for all you've done for FISD and we wish you the best. Fortunately on FISD, we believe in staff development, e.g. taking on new people to staff roles, and then grooming them for higher office, either here on FISD or elsewhere in the Legion. Many former FISD staff have gone on to be GCO/GXOs, SLs, and DLs. Continuing in that fine tradition, Andrew @Sly11 has graciously agreed to step up in to the XO role. Many of you know him from his solid work as a Deployment Officer, which he as rocked. Please join me in congratulating Andrew for a promotion well deserved. With unquestioned loyalty, TK-8020 "Daetrin"4 points
-
Just posted to the pre-approval program!3 points
-
Hi all. Rather than me posting on specific threads, I thought I’d make a post about the correct use of the “Dave M” style decals/templates for ANH Stunt lids. If it is deemed worthy, perhaps it could become a sticky. I will then try my best not to mention it on individual posts (as the last thing I want to do is upset anyone). As the name “Tube Stripe Police” was bestowed upon me, I feel it’s my duty to try and spread he work to keep up the high standards of TK screen accuracy. I hope I have not become a nuisance by flagging it. So, here are some shots of the Set for Stun, or “Dave M” helmet from ANH. These pictures are from the excellent website www.starwarshelmets.com My interpretation of these stripes are that they were intended to look like vents on a curved surface. When viewed from straight on they should naturally curve with the tube. Here are some shots that I put together (using my old SDS lid, hand painted stripes using Dave M style templates/stencils from Mike at Trooperbay). For obvious reasons, I won’t show pictures of those that have been applied the other way around as they are not mine to share and I don’t want to alienate anyone. Should anyone wish to share, please feel free. I hope that all makes sense. Any comments of suggestions to improve this thread, please let me know. Kind regards, Dan Sent from my iPhone using Tapatalk2 points
-
Sarah, I believe all the above images and more were all collected right here: https://www.whitearmor.net/forum/topic/41016-billgrams-the-one-stop-shop/2 points
-
you MUST have a completed costume before submitting. not point until you do2 points
-
I think your sizing is great. The general rule is if you can fit 3 fingers comfortably between the armor and you, then it is a good size. From what I can see with the photos you provided, you are in good shape with the Ab/kidney.2 points
-
The Tube Stripe Police strikes again!! Jameson, it might be the angle of the pic making it look worse than it is. Like Dan said, 99% of people will not notice - Dan is the 1% in this case. I did the same thing, but with the paint templates.2 points
-
How am I only discovering these now!? The one stop shop. lol. I feel so lost. These are great for new builders! Would have been a lifesaver for me! <32 points
-
I want to thank Eric for his years of dedication and hard work in all the positions he held within FISD. You will always be a valued member and hopefully can find the time to pay us a visit every now and then. Congratulations on your work life promotion which I believe is very well deserved and I wish you all the best. Thank you for your service.2 points
-
Thanks Greg Thank you Sir Thanks and yes the armor is truly Amazing - almost build itself Thanks Dan, time for you guys @wook1138 to keep up Thanks alot2 points
-
Biceps have been fitted and trimmed, will do final cuts when I put on the cover strips2 points
-
Congratulations Andrew2 points
-
Name: Jameson Willey Height: 5' 11" Weight: 190 lbs Future Garrison: Carolina Garrison Armor maker: AP Helmet maker: AP Cloth belt maker: AP Neck seal maker: Darman Boot maker: Imperial Boots TK type: ANH Stunt Name(s) of any Trooper(s) who significantly helped with your build: Frank75139, Neb Sgird, ABS80, lucnak, wook1138, TheSwede, gmrhodes13, justjoseph63, GilFran007, Twosolitudes (felt like we were working on our builds together at some points!) PHOTOS: FRONT (HELMET OFF) FRONT (HELMET ON) BACK I know the gap between my back and kidney is not ideal. I have tried pulling the ab/cod higher and moving the back lower, but I don't want to move it too low because it will be too far below my neck. I also just noticed some of the thin white elastic slack from the piece used to hold the bridge down is peeking out from my left shoulder so I'll get that trimmed. LEFT SIDE RIGHT SIDE AB PLATE CLOSE UP HELMET1 point
-
Hi all, As a very proud member of the 501st UK Garrison, I just wanted to share this with the worldwide trooping community. Words from the UK Garrison Facebook page: “Remembering our founder, Graham Campbell, on the 14th anniversary of his passing on 9th May 2004. From the 10 troopers that Graham founded the 501st UK Garrison with on 23rd March 2000 to the 536 we have today, his legacy has continued to grow and flourish. Lids off troopers as a mark of respect for the sad loss of the man with the vision that started this journey for us. "You are the men of the Imperial Army, Let's go to work..."1 point
-
Let's go to work.1 point
-
Congrats on your EIB!1 point
-
I did get my TD clips in though, I think that's the last hard part that I need besides straps and elastic!1 point
-
So as of right now everything is on hold. I got my helmet partially put together, just need to attached front and back, and put ears. But! we are fixing to move into the new house so everything got packed away..... I hate this... The kit will have to remain in pieces until we move into the new house. Oh well it will be nice having a dedicated space to build and not have to worry about much! sorry I am dragging on. I know its not a race but this is just sad...1 point
-
Thank you for chipping in, Greg. You did a superb job of correcting them and I really appreciate you sharing your fix. Best wishes, The Sheriff.1 point
-
Oh Dan, I'm not too proud to contribute here. I put the paint templates (roughly fashioned after the Dave M helmet and available from TrooperBay) on the wrong sides of my bucket. In many cases, these links are to the first of many consecutive posts. Here is me screwing up my templates like a total idiot: https://www.whitearmor.net/forum/topic/43437-wooks-first-build-anh-stunt-tk-ap/?do=findComment&comment=589733 Here is me getting called on it (Looking at you, Dan ) https://www.whitearmor.net/forum/topic/43437-wooks-first-build-anh-stunt-tk-ap/?do=findComment&comment=592275 Here is me fixing the issue: https://www.whitearmor.net/forum/topic/43437-wooks-first-build-anh-stunt-tk-ap/?do=findComment&comment=594834 And Dan, if I do this again, I fully expect you to call me on it immediately.1 point
-
Very nice. PANDA PROPS did a nice video using one of those. Handy if you wanted to mod it laster Sent from my iPhone using Tapatalk1 point
-
Your selection of photos looks good. Maybe send than an action shot when your blaster arrives. Which one did you go for? I’ll get my coat. :-( Sent from my iPhone using Tapatalk1 point
-
Frosted Flakes my dude! Damn! Yes I did get it trimmed.1 point
-
Thanks everybody! I have submitted my application for 501st approval and sent my pictures to my GML. I just sent him a link to this pre-approval thread. Do you think there are any other pictures he may need? Also, I just got the tracking info for my blaster!1 point
-
Sizing the torso, I have marked at the 2 inch point of removing from the kidney (nothing cut yet). Should I remove any more of the return to the front (I assume most of the top part is hidden by the chest piece)? How much room should be left in front and back? I currently at this mark can put fingers in the front and back at the same time, or if I push the piece to my chest I can fit my hand down the back.1 point
-
Hiya. The ab buttons are not an issue as such, I think it ‘might’ just be mentioned at L2/L3 as a suggested improvement. Not an issue using decals rather than painted - they look very neat. I think they might be Dave M style decals but, (and you’re not alone) I think they might be on the wrong cheeks. Easily done and 99% of people would never know. As they are decals, that’s an easy fix should you want to make it. :-) Here’s a pic showing what I mean. Notice the first few stripes almost running parallel to the frown. You won’t have to change them for clearance, just depends how far you want to take the accuracy. Your armour looks superb, by the way. So don’t take this as criticism. Just a couple of tiny things that could be tweaked, should you wish to. Best wishes Dan Sent from my iPhone using Tapatalk1 point
-
Tube, rubber pipe, hose, anything you can cut easily with a hole in the middle. It's the angle of the spacer which will help to straighten the mic tip. Something like this but not metal1 point
-
Looking good! Good luck buddy Sent from my SM-G925F using Tapatalk1 point
-
On that note, I’m stepping in to say that AJ is correct that this should be settled elsewhere. This is an unfortunate situation for all those involved - however the FISD is not a means for your rebuttals from your former partner’s negative postings, please keep it on Facebook. If you wish to disclose those personal details to those who inquire through PM then by all means, but not publicly - as this is simply “heresay”.1 point
-
Excellent! :-) Sent from my iPhone using Tapatalk1 point
-
Nice progress. Just out of interest, are you planning to troop with this or is it a fun project? I only ask because if you’re thinking of trooping it, you may wish to check with your Garrison’s GML to see if they are likely to clear it with the extended mag. As you’re probably aware, screen used blasters had the mag cut down a significant amount. At a glance, it looks like your’s is roughly twice the length of a screen used mag. Dan :-) Sent from my iPhone using Tapatalk1 point
-
Okie dokie! Ol betsy just need the power cylinder cords and the flippin lil clip part, which I still dont know where it goes haha The magazine was modded to be wider so the battery could fit. Still tight. After much fiddling, 4 magnets were installed on the mag. and housing to keep it secure. A new end piece was cut outta styrene and glued on the end. Mess of wires in the housing and barrel. Taped the BlastFX components, the memory card keeps getting undocked since its so jammed. Barely got the bolt piece shoved down the barrel. It was cut outta pvc and an aluminium strip glued to it. The spring fits perfect and even allows for spring action on the end cap when the understock folds and secures. Yay. Fixed the end sight cover.. Stil say it will crack off again haha its too fragile Not too bad for my 1st blaster. I know there are some bolts where there shouldnt be and gaps etc. but I am super happy with it! Was pushin a year on this project. Now I just need a stand [emoji3] I will do another video on our youtube channel after the last pieces are on. Sent from my LG-D415 using Tapatalk1 point
-
Looks sharp! Great job on the build!1 point
-
Looks good! I don't see anything holding you back from your approval. I think Glen (and yourself) already covered anything I could see. Good luck!1 point
-
Nice work, don't see anything too glaring that would hold you up for basic approval. Just to fine tune you could try bringing up your thighs a little, rotate them slightly, will give you a little more room at the knees. Even your ab/cod could come up a touch also. Also try to have your mic tips pointing in the same directions, straight out, you can do this by cutting some tube one side on a slant and the other side straight, place this behind the mic tip and rotate until they are pointing straight then tighten. Good luck with approval1 point
-
Let me be the first to say a big CONGRATS, brother! I am sure we can count on you to do the same great job as XO that you did as DO, and we are behind you all the way!1 point
-
What are you waiting for? Rip that box open and lets see that fresh armor!1 point
-
Congratulations!1 point
-
Superb!! Great job, Daniel.1 point
-
Fantastic armor, Daniel! Can't go wrong with TM.1 point
-
Congratulations Daniel, beautiful build and armor1 point
-
Congrats, Daniel. Another excellent job!1 point
-
First troop in my TK today. Revenge of the fifth.
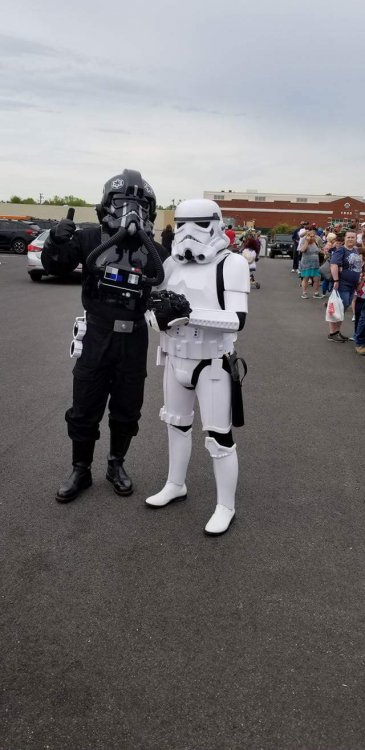 1 point
 -
There we go. 4 x black slotted pan head screws. :-) Sent from my SM-G935F using Tapatalk1 point
-
I had my kit out for a pre season check up at the end of last week, and well curiosity of the better of us. She's lost about 4 stone in the last year and so now is smaller than me in almost all dimensions. Who's in my suit! by Christopher Pearson, on Flickr Wife stole my suit! by Christopher Pearson, on Flickr She couldn't see a thing as she couldn't get her glasses in but she quite enjoyed it! The photos are above are with no effort made to fit it to her. A few straps would need to be shorter but not a huge amount.1 point
-
There are a lot of us who have built the RS kit and we are happy to help. Any kit is daunting when you first start out but it is totally worth the effort. Baby steps is how you get thru it. Sent from my SM-G935V using Tapatalk1 point
-
I deputize you official tube stripe sheriff Sent from my iPhone using Tapatalk1 point
-
Just finished this...1 point
-
I'm going to follow in your footsteps Berbs! I'll hopefully soon be joining the EIB ranks!!1 point