Leaderboard


Popular Content
Showing content with the highest reputation on 02/11/2018 in all areas
-
Oh and while I remember...if I don’t reply to anyone using their name, it’s only because I’m on Tapatalk on my phone and all I see are yr usernames [emoji106] Sent from my iPhone using Tapatalk2 points
-
Great progress, Michael. That’s coming along really nicely. As you’ve got a good touch with the green stuff, there are a couple of easy fixes you could apply, if you wanted to. It appears that, interestingly, your counter is missing some resin between the pins; Two small blobs of green stuff could sort that out. Another blob could be added to the hole in the underside of the folding stock, again, if you fancied it. I know you mentioned that you’re not going for “Hero” levels, however it’s clear to see that you’re good with the green stuff and could probably do these bits in your sleep. Looking forward to your next updates. :-) Sent from my iPad using Tapatalk2 points
-
I just finished and submitted this costume, and it was approved today! I highly recommend Troopermaster's TS armor and strapping kit, and Rob Kittell's duster and pouches. Here is my build: http://www.blizzardforce.com/forum/viewtopic.php?f=78&t=57871 point
-
HEY everyone i am not sure if their is a page on facebook..but i think their should be. for HWT...what do you think.?1 point
-
The good news is TLJ will be available in 4K, lots of hi-res screengrab goodness.1 point
-
ESB are black1 point
-
Fantastic...after all that faffing over the scope rail I managed to snap it trying to bend the end over! Grrr! I even cut part way through it and heated it to try get it to bend smoothly [emoji20] looks like I’ll have to order the ready made one from Tino now. Also made a start on the counter. Sent from my iPhone using Tapatalk1 point
-
Thanks for pointing these issues out! Got a little overzealous with the grinding on the counter and the folding stock. Will definitely fix those. Sent from my iPhone using Tapatalk1 point
-
Lol!! Sun, cold beer, blasters.... holiday is VERY enjoyable!1 point
-
Unfortunately it’s too late for that Chris, already chopped it down, but thanks for the shout [emoji106] Sent from my iPhone using Tapatalk1 point
-
Thanks Glen. A lot of that is from years ago, on other DLs. Build threads being private >> I've made them all public. FOTK FISD patch >> The issue with the FOTK helmet on the patch was only pushed due to the helmet not looking right. Did we ever get that full fixed? It would be easy to get that finalized & done. Time it took to get TFA L2 and L3 added to the CRL's. >> Once I got pictures I cranked them out in record time Phasma >> See above. I got the Legion's Phasmas involved to add that in. TLJ is just waiting on photos (not much I can do there) Little build/reference info on FISD for Phasma, most being shared on FB. >> That's on those members. I've created the space, we're asking people to put that stuff here. They just need to do it. I can understand the unhappiness a few years ago (I was unhappy to), but I've done by best to fix all that. What else can be changed to help those FO TKs return?1 point
-
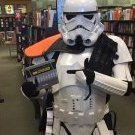
Someone posted this pix recently and it's awesome! I'd like to get this on a poster, or something, wouldn't you? This was taken with FX armor - anyone care to try to re-make it with modern suits? Free March to 1000 coffee prototype mug to the winner. What say you troopers?1 point
-
I think the second Trooper in the pic really says it all.. "Don't forget to check the tire pressure... it's a long trip to the other side of Scarif".1 point
-
Doh! Thanks Dan...obviously I was awake far too early this morning! Sent from my iPhone using Tapatalk1 point
-
Doh! Thanks Dan...obviously I was awake far too early this morning! Sent from my iPhone using Tapatalk1 point
-
Have you fitted the rear sight yet? Essentially, it’s going to be the distance between the hole at the front end that the rail sits in, and the gap in the rear sight. :-) Sent from my iPhone using Tapatalk1 point
-
I know these are baked and all, but I believe I have a level 2/3 TLJ FOTK detail to throw in the mixer, and it may be one that answers a previously identified mystery - the black dot/screw, etc in the Picatinny rail of the forearms. We will likely have to wait until home release to verify it, but during the executioner scene, while holding their axes near their intended targets, we get a very good look at the wrist end of the forearms. It appears to me, over my repeat viewings, that the forearm construction is different than it was in TFA. It appears to me that the flat piece, with the comms box and the rail hasn’t “wings” that extend underneath the sides of the forearms, to keep them in place, and prevent the flapping wrist ends we saw in TFA. My theory is that the black dot is legitimately a screw or some type of fastener which keeps that flat plate in place. i will search around for a picture to demonstrate what I mean, but home release will allow us to frame grab like mad, of course.1 point
-
This evening I got a lot of little tiny things sorted out. Doesn’t feel like I got much done, but the reality is that all these little pieces will come together a lot faster than I think they will. I also did a dry fit of all of the major components onto the main stock and think this is going to come together nicely. I don’t have any ambitions of making a hero level prop, but that’s OK and in-line with my stunt TK armor. I thought about going back to using the scope parts that came with the little kit, but I found a way that I could get things to work. I used the Green stuff to make a lens stopper in the scope, and will hold it in place from the back end with the black ring that came inside the scope kit. I think it’ll work out nicely! And the little lens will just be glued into the front of the scope. I would have got a lot more finished tonight, but have to stop making noises when everyone else decides to go to bed but me. [emoji13] Here are some photos from tonight‘s work. Sent from my iPhone using Tapatalk1 point
-
Well done, I think this is the first rotj I’ve seen since I started here Sent from my iPhone using Tapatalk1 point
-
I know what you mean... I still have some left for now, but I am waiting for 50 more magnets to be delivered soon - hopefully next week. And I was planning on going to buy some more clamps tomorrow. I have a lot of the smaller ones but I like the big ones too as they are a bit stronger and I feel like I might end up needing more as I progress and get more and more things drying at the same time ! Sent from my LG-M470 using Tapatalk1 point
-
Nice work, great to see you are using tape and clamps, you can never have enough of when building armor, I don't know how many times I've order more magnets1 point
-
I mounted the larger lens straight into the scope, housing included, with the reticle attached at the smaller end (you can just about make out the reticle in the second picture). Smaller lens I removed from the housing, and mounted with the curved end facing outwards. I made a bit of a messy job gluing the smaller lens in unfortunately Sent from my SM-G925F using Tapatalk1 point
-
More time to work on the helmet today - first thing I did was use a heat gun and a pointy-metal-thing/spare carpet spike from my speaker to enlarge the holes in the ears so the screws would sit flush when countersunk completely (the original Anovos screws were pan head): I also picked up some cap nuts to completely eliminate any risk of exposed threads scratching up my face. I then cut down the frown mesh, and cut up some craft foam so I could go with a sleeker install: Lastly I re-assembled the helmet - still need to get the visor/lenses installed as well as the new helmet padding and fans:1 point
-
Forgot I’d fitted a sight pin too! Had to make my own as I haven’t got a clue what I’ve done with the one that came in Tino’s kit! Think I need to push the grub screw in a little further...[emoji848] Sent from my iPhone using Tapatalk1 point
-
Ok, now that my minor crisis has been averted I can get back to it.... Just before I continue with the Front Sight I thought i'd mention that I ground off the large resin screws at the front of the blaster and replaced them with the hex screws from T-Jay's kit. I also installed the bayonet lug. I strengthened the lug by inserting a piece of a nail into the lug and into the body of the blaster. Ok, back to the front sight... Update - Front Sight (Part 2) Once the sight pin was assembled, I spend quite a bit of time grinding away at the original sight frame from the Doopydoo's kit. Eventually I got all the inner resin removed so I was left with just the sight frame. Next I held a piece of sandpaper against the tube and sanded the bottom of the sight frame to better hug the curves of the main tube. And then came the task of cutting the hourglass shaped channel into the main receiver tube. I sketched off the shape and started with a large flat file. Then later moved to angled needle files. Checking constantly to see if the sight would slide in yet. (Some of these photos are out of order. For example, here I hadn't actually cleaned out the T-Track holes yet.) Next I used "green stuff" to add the texture grip to the sight frame... And here's what it looks like.....nothing glued in yet.... Mark1 point
-
Looking good. Best of luck trooper!1 point
-
Nice work, I'm on the skinny side and found even with trimming to the minimum sizing I also had to add some foam in places, really helps stop pieces clanking around1 point
-
Happy Shin-dependence Day!1 point
-
Hi Danny thank you for your EIB application. Great to have another of the staff shooting for the higher levels. CRL and EIB Application Requirements: All the required submission photos have been posted. Beautiful job on your build Danny, looks like you've done your homework . With that Andrew and I have confirmed your armor displays all necessary elements as set out in the Expert Infantry CRL. Welcome to EI, Congratulations. Other-Armor Fit/Assembly: In this section we review observations made by your fellow troopers and ourselves. Some observations may lead to suggestions to improve the overall look of your armor. If any suggestion affects any application, it will be listed separately in the above or below sections. You have a few areas we'd like to go ever with you. Most are to enhance the overall look of your armor but one we want to see fixed if you decide to shoot for L3, and another just for fun since your staff lol . Starting with the eye sockets. We prefer to see a little less return edge material here as seen in the reference photo however, the accuracy of the armor is ultimately up to you. Here's a reference photo Shoulders there should be minimal gap here. This could be a simple strapping issue if so tightening up the strapping and maybe removing more lower return edge to draw them closer to the biceps will help quite a bit. Here's a reference photo Next up the posterior, it should sit below the kidney plate. Tuck that bad boy away and you're good. Reference photo Something we'd like to see fixed before L3, though not listed in the CRL the chest bracket screws should be white. Please paint these when you get a moment. Reference photo And for fun. We were wondering if you've been hard at work serving the Empire or just trying to emulate the "Head-bumping" trooper lol. Go get yourself cleaned up would ya lol. Centurion Suggestions: In this section we prepare you the best we can for Centurion. If there are any areas of concern they will be discussed here. At this time we see nothing from holding you back for a clean Centurion application if you so choose to apply. Excellent job Danny, see you at Centurion1 point
-
LOL from what I can tell Shingate will never ever settle down1 point
-
I'm glad you like it. It's going up for sale soon to make way for my new ANH armour I am building for myself.1 point
-
My wife asked what I was reading and I said bikini cods. She is now convinced FISD is a place where half naked girls hang out. I'm trying to tell her otherwise. Sigh...some days there is no win.1 point
-
I added some weathering to my armour recently. I think it looks pretty good1 point
-
Actually it's all about movie clips. The reality is that the CRLs are based on what you see on screen, not prop replication.1 point
-
This is why I want to join the FISD. You all are such an amazing and uplifting community. Not going to lie I started getting scared seeing all the differences popping up. But I think with my experience with fiberglass and Jims armor in hand I should be able to get all these changes incorporated. You all are inspirations!1 point