Leaderboard


Popular Content
Showing content with the highest reputation on 12/23/2017 in Posts
-
I had an amazing first troop. I'm in this for the charity, first and foremost. Friends, a close second. The charity was great. 5 Bad Guys Did Good today and I have 4 new friends. Great guys who really made me feel welcome in my new garrison. Thanks David, Brad, Andrew and Dan. I learned a bunch and had fun. Thanks Dan, TK-2759, for the cotton gloves to wear beneath my rubber gloves. Really made it easy to get my hands out after the troop and not have dish pan hands. And for straightening my drop box after that little girl hugged my leg. Thanks Brad, TK-21814 AKA 68Brick, for the advise on foam for fixing my thigh to make me look better. And thanks to each of the guys who asked me several times, knowing it was my first troop, if I was doing ok. Safety, really important. We shared stories and hugs after the troop. Again, amazing first troop.4 points
-
The wife has imposed a build-ban until after Christmas. Something about spending attentive and quality time with family or whatever - I really wasn't listening that carefully as I just downloaded TrooperTalk and was trying to figure it out. Anyway, Merry Christmas and Happy Holidays everyone!3 points
-
Ok, so it's Friday, three days before Christmas, and I'm jumping up and down like a school girl yelling: OMG, OMG, OMG, OMG!!!!! Santa came a few days early this year!!! Now I'm going to summon up ALL of my strength....I will NOT open the box. I'm wrapping it and putting it under the Christmas Tree. My daughter (age 6) will just have to deal with the fact that Daddy's Present from Santa is bigger than hers. Mark
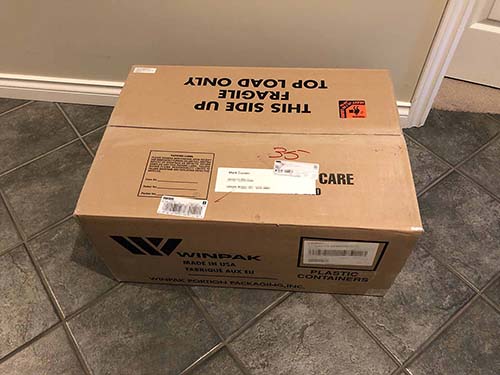 2 points
 -
For those interested, this print hanging at my workbench is from Tony at Run Riot Media: Sent from my XT1254 using Tapatalk2 points
-
Welcome, Newtrooper. Did you see https://www.whitearmor.net/forum/forum/38-getting-started-read-this-first/ ?2 points
-
Your build is looking good. I have large thighs too. I completed the front seem with the cover strip first and then worked on shaping them at the back. It was much easier for me than trying to fit front and back at the same time. Congrats on the soon to be baby! p.s. being a dad is awesome and really fun.2 points
-
Hey everyone. I thought it was high time I started a build thread over here as well as my Garrison. I couldn’t pass on the 40th anniversary deal that RS had going earlier in the year. After finance officer approval my BBB was on its way and I received it just in time to deploy overseas for six months. That’s a long time to do some research and make a bunch of online orders for parts and other bits and pieces during limited time off. I decided to go the HWT route via ANH Stunt with the aim of making the two interchangeable with belts, pauldron, cleanup etc. I’ve posted here rather than HWT, but will probably start a backpack build over there soon to seperate the two. ANH Stunt first then HWT. Anyway, I’m back now and have been making some progress between much needed family time. I pretty much came home to this. There are a few bits of merch in there in case anyone is trying to identify everything. Bucket partly assembled and painted here. Stepping back a bit, I should start with the bucket. I marked out the cut lines for the eyes and used a Dremel to carefully remove the material. The eyes was a combination of drill, Dremel and files. Being an RS kit there are many bumps and wrinkles but I love it. Did I mention this is a PVC kit yet? Once I was happy and had trimmed the parts a little I fitted the two together. You’ll probably notice that I’ve made them a little loose and there’s a gap between the faceplate and brow. That’s the issue with blinding using the hole marks in an RS kit, folks. I fixed this up later on after some good advice from the guys in the SCG (that’s the Southern Cross Garrison, not the other one I see around here a bit :P). Next up I began painting. The frown first followed by the tube stripes. I used some stencils from Trooperbay as I didn’t trust myself. A little bit of cleanup to do... ...followed by the traps and tears. Black first, then carefully laying down the gray. I really tried to take my time to get it right. You don’t realise how much your hands shake until you try to paint perfectly straight lines, and fail. More templates for the lines... again I have some clean up do to but I’ll do that later. Now its time to do the dreaded ears. I really didn’t want to do these as I was sure I’d mess them up. I went nice and slowly, trimming a little at a time, just the high points until I had a nice fit. Now I’m not entirely happy just yet but I’m leaving them for now. I think overall they should be thinner. I then fitted the lens. This was also from Trooperbay as I wasn’t at all happy with the film-like stuff that RS provides. (I know, I know, I haven’t finished the vocoder - waiting for a better brush to arrive because it’s nearly Christmas and going anywhere is crazy right now lol. Also, yes the brow is high, it works for me right now. I may alter it later but I know that will take some work at this point) And lastly, just last night in fact, I painted the black for the ears and fitted the mic tips - I forgot to take pics of that process sorry. And that’s where I’m up to. I’ll try to post things as they happen from now on, rather than playing catch-up. Having fun so far and that’s the main thing in my book.1 point
-
Between 15 & 20 garrison members are looking to build FOTK suits. This will be the place-holder where they will chart their progress. Stay tuned1 point
-
Between 15 & 20 garrison members are looking to build FOTK suits. This will be the place-holder where they will chart their progress. Stay tuned!1 point
-
1 point
-
Stickers will be in the mail soon1 point
-
I know this won't happen until the new year but my EIB request is in. This has been such a great experience. I can't believe the top two items on my bucket list have happened. Stormtrooper armour and I'm in the 501st.1 point
-
Yeah, I still need to go back through and sand things down once I’m done with all the cover strips. I will take a second look at the cover strip angles. Thank you! Sent from my iPhone using Tapatalk1 point
-
Looks like some cover strips have sharp angles, might want to sand them out a but - if you didn`t already plan for it that is - all in all great work1 point
-
Some nice progress at the Imperial factory....brackets are in and this time I countersunk the screw-heads, drilled the holes for side-connection, cod and put the belt together - just missing the covers....just a small break to get some exercise in then back to work1 point
-
Looking good so far! Go back to E-6000. It's a marathon not a sprint. And when mistakes are made you don't need to live with it or come up with a get me by remedy. Not preaching, just suggesting Save the CA for your third suit.1 point
-
Continuing on with my build, The E6000 dried on the first wrist piece and it turned out pretty good. But I decided to face my fear or Zap a Gap and do the remaining three arm pieces with Zap a Gap and Zip Kicker I had a few minor screwups but nothing I think is irredeemable: • accidentally used 5/8” cover strips instead of 7/8” on the first bicep I did, which forced my hand to do the same with the other. • because of that I decided to put in some supporting cover strips on the inside for a little more strength • a couple of the strips had small cuts into them (didn’t see them until after gluing and then pulling the film off), but they sanded out. Will polish them later. • one of the forearms has a slight mishap with the zip kicker and my yellow shop cloth — I think it sucked some of the yellow pigment into the armor. [emoji35] But I might be able to fix that later with some light sanding/polishing...or as a last resort airbrushing it with some matching white paint. Could you guys just take a look and let me know if I’m headed in the right direction or if you have tips for considering — I’d appreciate it! Sent from my iPhone using Tapatalk1 point
-
Guessing you don’t have anything holding the thighs yet? They seem to be moving about a lot? Shoulders don’t need any Velcro, just glue at the front and some 5mm flat white elastic loops at the rear. Should hold them in place just fine. Shoulder bells are probably as good as your going to get them.1 point
-
Thank you for the wonderful detailed feedback Sly! Thank you everyone for the greets. I'm so happy. I will make the necessary changes. I will definitely submit for Centurion next year. Merry Christmas and Happy New Year to you all. This is so awesome.1 point
-
Hi, NewTrooper. Good link from mr Woof. Once you know which character you’re going for, ie ANH/ESB/ROTJ hero or stunt Stormtrooper, sand trooper, shadow trooper etc., have a look at the relevant build threads. You’ll get a good ideal there of which armour you might prefer. :-) Welcome aboard. :-) Sent from my iPhone using Tapatalk1 point
-
That's worth a shot. I think I'm gonna steal another one of your ideas, Sean.1 point
-
Got to it a tad before you posted. Thanks!1 point
-
More progress, started with the thighs and getting them trimmed and ready for assembly. I was a bit nervous because I have pretty large thighs, and there was just barely enough material to sneak them in with the cover strips. I also broke out the paints again and painted the ab plate buttons. My build is touch and go, and my order of assembly is all over the place. Mostly due to my wife about ready to have our baby! This build is helping me deal with the nerves, for sure. [emoji16] Sent from my XT1254 using Tapatalk1 point
-
Hi Tony, thank you for your application and welcome to your Centurion review!! CRL and Centurion Application Requirements: All submission photos are present. Your armor displays all the necessary elements to qualify for Centurion, Congratulations!! and welcome to the rank., again lol Other-Armor Fit/Assembly: Excellent job overall on this armour, and an outstanding example for all budding FO TK 's to follow. Nothing more to add. Congratulations brother, continue to make the FISD and Golden Gate Garrison proud!!1 point
-
Yeah I definitely need a second canvas belt as you can’t have visible holes where the holster was. That’s ok, I have two already having planned for that1 point
-
Some good tips there, I imagine it would. Also... troop (and new shoe straps) successful!1 point
-
And so you should, put the center cap in first and then put the belt on the ab and mark the outer ones on the canvas..this helps avoid stress and belt popping of, I learned this from Troopermaster Here`s how the belt looks laying flat - looks wrong but is right1 point
-
As many of you will already know, chapter #32 - Downloads contains two PDFs (A4 and US letter size) that are direct copies of this thread content, with only minimum changes to optimize some page breaks here and there. Both PDFs have now been updated with all the additions from the contributors and the links are now also available in the very first posting. A document version (currently Dec. 2017) is stated on page 2 of each PDF.1 point
-
Hiya. You should be able to find all that you need in one of Tino’s (T-Jay) build threads. Here’s one of Tino’s pics: -------- And here’s a pic of mine: --------- Hope that helps a little. :-) Sent from my iPhone using Tapatalk1 point
-
This morning I’ve worked on the belt and TD. Using the awesome Billgrams as my guide I set to work. The old score and snap works really well on PVC. I wasn’t sure if it would to begin with but it’s actually quite easy to work with - on long straight lines anyhow. And in no time at all... I won’t go further until I’m ready to do the canvas belt. I’ve seen people lay them flat to attach it but I feel I should allow for the curvature of the suit so there’s no bunching up or anything. That’s another day. RS sends the TD with the clips already attached. I know I’ll have to replace the screws at some point. One thing I will do soon is put more of a bend in the clips so they sit flush with the pipe. Again I used the Billgram. The end caps were quite easy to trim and fit. I made sure to remove one of the screws to let the pressure out - didn’t want anything to break! The control box trimmed up quite easily as well. I’ll need to strap it down well to glue it properly. Anything amiss before I do?1 point

.thumb.webp.27f7939d37871f319ff836257d4a3668.webp)