Search the Community
Showing results for 'Isopropyl alcohol'.
-

Tim’s first time build (RS Prop Masters ESB TK)
Chemi replied to TrickyT81's topic in ESB Build Threads
I've never used that glue, but I'm sure someone will be able to give you some advice. Maybe soaking it in warm water, or using isopropyl alcohol, or mineral spirits might help. What is very important, is that you don't use products with acetone. -
One thing other than mineral spirts that worked for my is isopropyl alcohol. You could try 70% before moving up higher to like 92%. Be sure the overpaint that you're trying to remove actually gets some of the moisture of whatever solution you use. I generally start with q-tips or some fine-tipped ones from a craft store. Think of them like a fine-tipped sharpie vs a regular one. They're absorbent, but tipped for precise application. Depending on how much paint I'm trying to remove, I may then use a toothpick to chip away at the paint, or stick with the fine-tipped swap.
-
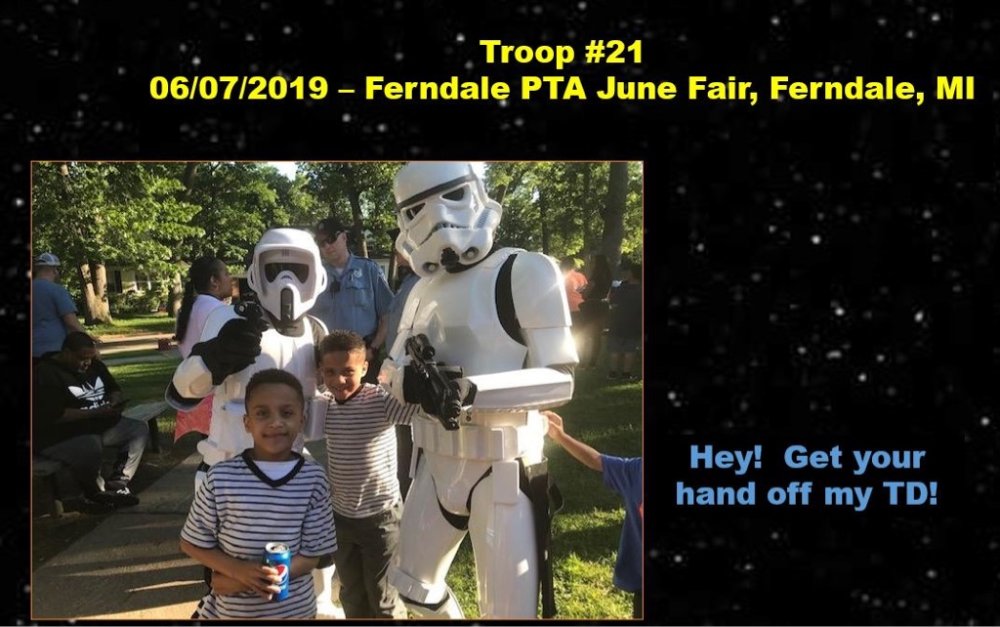
Any bad side effects to using rubbing alcohol to shine ABS? It works great on scuffs, but if it accelerates yellowing or something else I’m unaware of... figured I’d ask the experts. Sent from my iPhone using Tapatalk
-

MintImperial’s “Mini Imperial” WTF Kids TK Armour Build
MintImperial replied to MintImperial's topic in ANH Build Threads
Thanks Glen. I used that trick when I painted my own helmet using a stencil. Instead, for this one, I just very carefully etched back into the blue with a toothpick soaked in alcohol. It’s by no means perfect. But match better than what you see above. Will post more photos later. -
High time i start my build thread! I had ordered from Imperial Surplus a little while ago. Big shoutout to Kevin for offering superb customer support even though my order was placed very close to an unfortunate incident. Hope everything is back on track. That being said, the two boxes arrived earlier than i had assumed. Impressive how all of that fit inside the box! I spent plenty of evenings rough trimming all the piece after giving them a good cleaning with rubbing alcohol. Most of the supplies were bought in advance while i waited for the box to arrive. Research is key, i am using a lovely guide/blog called "My Descent Into Nerdness" and a bunch of tutorials that were linked. Like setting snaps and so forth. Taped the vambraces just to see how it would look, pushing some excitement to speedrun this. Can't have enough clamps. (Yea, the odd one out was for the girly touch ;P) First butt joint Getting some magnets ready to not scratch the armor too much.. ... aaand put them to good use! Progress went on, sanded shoulder bells and assembled the biceps armor. Just held stuff in place for a first look. Noticed that the vambraces sadly could not perfectly overlap on the raised edge, unless i fancied lubing up my hand to barely squeeze through the opening. Seems i got big hands! So we had to give a bit more space there. Bicep still needs touching up, as everything else. Taped a shin and tried with my placeholder boots - which then went to someone to take some of the excess material away around the ankle. Should make the shin armor sit a bit lower afterwards, as closing the shin caused the leather around the tongue to bunch up. The curse of EU size ~43 / 44 or i believe 12 in US size. Shin assembly afterwards While most things were curing (Using E6000 that was a bit harder to find here in Germany. Hope it wasn't one of the fake versions, fingers crossed), i used the time to finally stop being scared of messing up the helmet and went at it with an exacto knife. Don't be like me, do use gloves for anything. Even if it is just 'testing the waters a little'. Tackling the belt boxes currently, took the entire afternoon today but i think they turned out alright. Always wear protection! And don't forget to take a break here and there. If i can do it, anyone else that tries their hand at it will also manage. A dremel/rotary tool is a wonderful little helper and there is plenty of spare ABS to get a feel for it. If you are unsure, try to take little steps. Always easier to take a bit more away than to try putting something back after you took too much away. Last but not least - question time! Do i trim up to this line at the eyes? I could not find a helmet that was flipped upside down to check. I do know that i could take a bit more away around the teeth area, judging by other pictures i saw of FemTK buckets. But i am not sure regarding the eyes on mine.
-
Wipe the insides with a clean rag. Get rid of that moisture, immediately! Clean with a soft washcloth and warm, soapy water if needed. Any liquid soap will work fine, I use dishwashing soap. Make sure everything is dry before storage. Cracks needs to be fixed as soon as possible. I use CA glue and spare pieces of plastics for a quick fix, and ABC paste made from spare pieces melted in aceton for a more permanent fix. If possible, repair from the inside. If the repair is visible on the outside, I sand it smooth with incrementaly higher grit sandpapers, and finish off with Novus polish. Scuffs is just battle damage and bonus weathering. It looks awesome (and movie accurate!) after a few troops. But if I want to shine, I rub away the scuff marks with an eraser, and then I wipe the armor with a soft cloth and isopropyl alcohol to get rid of any grime. I finish with Novus polish. Novus should work on all plastics, also PVC, but take a look at their website to be sure. It's novuspolish.com. Thighten all screws, nuts and bolts before storage AND before the next troop. Nothing is more annoying than losing a chicago screw on the holster in the middle of a troop. If you have an emergency repair kit (and you should!), check to see if you need to refill it. @Nairy: Yellowing has nothing to do with polish, but UV and heat. All white armor will turn yellow over time. Exposure to the sun will accelerate it, so do not store your armor near a window. I also advice against storing the armor near a heat source. But you can turn yellow plastic (temporarily) white again with a hydrogen peroxide and UV treatment. The tricky part is that it is difficult (and expensive) to submerge the armor in peroxide. The common way to solve this is to make a creamy peroxide gel to smear on the armor, that sticks to the plastic while the sun does its thing. Search "Retr0bright" for a recipe. Or get a ready-to-use mixture, like Trooperbay's ArmorWhite.
-

ANH Stunt "fitting/adjustment" thread (AP)
Doggydoc replied to BAZINGA's topic in ANH (Stunt and Hero)
Yes. I used industrial Velcro and sewed it to the elastic by hand. @revlimiter is correct in that you just need a band of it to still allow the elastic to work. The only issue I found with sewing is that if you use the self adhesive Velcro, the needle picks up the glue as it goes through and it gets very hard to push through because it gets sticky. You just need to have some isopropyl alcohol to wipe it as the glue builds up. At hi Val also helped a lot to save your finger pushing it through. It is not visible, so it does not need to look pretty. I will grab a photo and post it for you. -
TK84215 requesting ANH Stunt EIB status (TM) (1041)
Lazerjock replied to Lazerjock's topic in Request Expert Infantry Status
I thought the frown might me boarder line. I'm on it! Thank you for the incredibly fast response too. I'll post new pictures of the frown as soon as I can. Most Likely this weekend. Do you recommend any paint remover. I read Isopropyl Alcohol, Mineral Spirits & Goo Gone will work. I have 90% Isopropyl Alcohol I use to clean my 3D printed resin parts. I will start with that. Again thank you for the compliments and quick response. Chris -
 OP (MV) Post #48: Helmet Repainting In my previous build update I covered my initial painting of the helmet traps and tears, and while I was happy with the results of my tears, I was too heavy-handed with the paintbrush on the traps, and some paint wrinkling occurred. This update will include the following: Trap Repainting Frown Teeth Repainting Ear painting and Countersink Reinforcement Tips Helmet Interior Hardware Paint and Lens Polishing Faceplate and Cap Alignment (pre-attachment) Neck Opening Dimensions and S-trim Questions Upcoming Response to Comment Trap Repainting First up, repainting one of each of the rear and side traps. In both instances, I previously went too heavy with the enamel paint, resulting in some wrinkling. I was happy with the external profile and placement of the black "outlines" that I had painted before, so I decided to try to sand down the wrinkles on the grey, then repaint a second layer on top of the first one (as opposed to removing ALL the grey and black paint and starting fresh). Below is a photo progression of the process. First I put down two layers of tape around the perimeter of the sanding area in order to prevent scratches on the white ABS. Then I began with 220 grit sandpaper then worked my way to 600. I did not want to use any courser grit so as not to accidentally scratch too deep into the paint. After sanding I wiped the area clean with rubbing alcohol, removed the blue tape, then proceeded to hand-paint the gray portions again with Humbrol #5 gloss. Before painting the gray on the left-rear trap (which had been left black for the past year so that I could paint it at the same time as the right now) I also wanted to straighten out the bowed bottom edge that I had accidentally painted when using excess Trooperbay decal material as a template as documented in this post. Some blue tape, 91% isopropyl alcohol, and craft (popsicle) sticks later and I now have a sufficient bottom edge. On the right-side trap and the right-rear trap I also wanted to narrow the black outline, which essentially meant painting the grey out a little more. In order to minimize the first layer paint edge from creating a visible seam line on the new top coat, I sanded down the edges of the first coat to create a smooth gradient to the bottom black layer. I was also hopeful that the base layer of black underneath the new extended grey area wouldn't result in the grey appearing darker than the main center mass of the grey, and I think it looks just fine. The narrowed thickness of the black outline now better matches my left trap and the tears. With the base grey and black outline now complete on the rear traps, it was finally time to have a go at black vent lines. I decided to use the exact same strategy that I employed for my tears, using a TB masking template and sponge technique as documented by Cricket. Joseph also has a Template Painting 101 thread for those of you new to the craft. First I sealed the template with a thin layer of grey, and then I sponged on several coats of black. The top photos below show the state before cleanup with mineral spirts and toothpicks, while the bottom pair shows the initial final result. As can be seen when looking closely, this is where I ran into my first problem. Somewhere along the way I erred with paint thickness or drying time (I pulled the templates up within five minutes, which was surely too soon for drying), because when I pulled up the templates some of the painted extreme tips of the vents came up with them. After cleaning it up as best I could with mineral spirits, craft (popsicle) sticks, and toothpicks, I was still not satisfied, but I decided against free-hand painting the problem areas due to the finesse that would have been required. Unfortunately, in that moment I had to head off to work so I had to table the paint work and lose valuable cleanup TIME before the paint fully cured. After a day or two of deliberation busy life obligations I decided to try something crazy, which was to reuse the same already-used masking templates. Note that, at least back in 2020, Trooperbay included two sheets of each template, so technically I had some to spare, but I wanted to save my second set. Surprisingly, it worked ok, and though I did have to spend some time cleaning up paint that seeped under the template, I’m mostly happy with the end result, shown below. The first three photos show my process up close, first with what the reused template looked like before repainting, and then my cleanup tools (mineral spirts in a small bottle and DVI cable cap). This quad-photo below shows the traps before (left) and after (right) cleanup. It's not perfect, but I can live with it. In hindsight, I slightly wish I had used a standard template instead of "hand-painted" one, in order to achieve more uniformity. Frown Teeth Repainting I spent months debating whether or not to add more paint to the teeth, not due to the first coat being too light, but instead due to the teeth color stopping well before the gums. Essentially I was trying to decide whether the teeth needed more coverage, particularly at the bottom. In my heart I knew that answer was yes, but I was hesitant to potentially compromise the very smooth paint job I laid down with the first coat. I had certainly used borderline too much paint in order get a buttery smooth surface, but luckily didn't experience any wrinkling, likely due to there not being a concave surface for paint pooling (and instead a convex plane). This first triple-photo below shows the "before" state from my first found of painting a year ago. For a time I considered simply adding some paint at the bottoms of the teeth, but I knew I'd never be happy with a visible paint seam. I was also worried about a ridge at the edge of the undercoat being visible through the extended top coat. To test whether or not this would be an issue, I pulled out my trusty paint test strip of ABS that I'd used for various paint tests (paint thickness, opacity, finish, color, sanding, straight-line clean-up) in the past. I sanded down an edge of an old painted rectangle then painted a new later on top of both it and an un-sanded edge. Once it cured I noticed that a faint line of the bottom layer edge was visible in the top layer, which cemented my decision. To combat such a ridge I decided to very carefully sand down the edges of the original coat of teeth paint in order to create a more gentle taper to the unpainted portion of the teeth/gums (this was the same technique I used for my aforementioned fixed traps above). With edge sanding complete, it was time to dive into the new coat of Humbrol #5 gloss enamel. Rather than rely solely on and painting to masking tape like I did the first time, I elected to use a combination of freehand painting and masking this time, particularly since I know knew how easy it would be to clean up over-paint while it’s still wet. I decided to mask the tops of all except the center tooth since I wanted to maintain the top edge, and also added guide tape at the bottom of the teeth (shown in the before and after photos below) to mark the front edge of the frown curve. However, rather than paint to that bottom guide, I free-handed the bottom painted portion, ending well before the line. It was really more a point of reference. The goal of this repainting was to have a “full” frown when viewed from the front when previously some of the teeth looked like they were missing their bottoms. This before and after photo below shows the difference between post-sanding, after which a little bit of the edges of the teeth paint had been removed, and after they had been repainted. Notice how the paint extends lower, even compared to the very first photo in the triple-pane at the beginning of this teeth section. I think I succeeded in eliminating the appearance of white humps at the bottom of each tooth, as hoped for. The triple-photo below shows pre-cleanup teeth immediately after removing the masking tape, followed by larger images of my finished product post mineral spirit cleanup. I am now quite happy with the result. Ear Painting and Countersink Reinforcement While I had my paints out I thought I would also try my hand at painting the rank bar areas on my ears. I suspect that most builders usually do this after their helmet is assembled, but I wanted to take advantage of having the untrimmed ears sit flat on a table to maximize stability during the hand-painting process. I understood that I might make errors in my ear trimming so I painted all four of the ears that came with my ATA kit. Once I move on to trimming and sanding the ears I will cover up the painted area so as not to damage the finish during the constant handling and sanding process. Throughout my TK-building journey I’ve grown to appreciate the imperfections and abnormalities of this white armor, and one area I was intent on maintaining was the rectangular vs rounded edges of the painted ear areas. This was done very easily on my ATA armor and I essentially simply followed the form of the ABS. I laid down some masking tape on the four sides of each rank area then followed up my Testors 1139 semi-gloss black enamel paint application with some mineral spirit cleanup. I let the black layer cure for several days before returning with the Humbrol Gloss 5 gray enamel in order to allow me to clean up any mis-painting without impacting the black layer below. Similarly, I waited several days before returning to do the single black rank marking on each ear. Thoughts on my ear painting? For those of you interested in an alternative to painting these ear details, Trooperbay sells pinstripe tape and rank bar decals. Personally I almost caved on the rank bar lines since it took me three tries (wiping off the paint twice to start over) to get it to my liking. My method of paint application may have been a bit unconventional, using the large end of a toothpick and then cleaning up with the pointed end. Also related to the ears, a year ago when I used milliput for my hovi reinforcement and lens mounting I had some extra left over so I decided reinforce the inside of the ears where the mounting screws would need to be countersunk (for higher levels of approval). Here is what that looks like. Notice that in one ear I also painted over the milliput with Testors 1145 gloss white enamel, which apparently dried to a bit more of a cream color. I had planned to use that same paint for the various bits of armor hardware that needs to be painted, but not anymore. Instead I think I'll spray paint the screw heads similar to how Justin did it. Any tips on an appropriate white spray for the very cool white of ATA armor (I believe similar to WTF and AP)? I cannot stress this enough—NEVER EVER RUSH through paint application, or build steps in general. I've previously stated this advice in the past, but it's worth mentioning again. Your build is not a sprint; it's a marathon. In regards to paint work, if you have to ask yourself and deliberate whether or not you have enough time for preparation, application, and cleanup, then you probably don't. Take your time. Do things methodically. No shortcuts. Leave extra time to spar should something unforeseen arise. The context of this advice this time is that I rushed through my trap painting and didn't initially give myself enough paint clean-up time, and also cut it very close with my ear painting. Paint multiple thin layers. Every time I paint I keep attempting to walk a fine line between laying down barely enough paint for a smooth enamel finish, and too much which will result in wrinkling. In the past I experienced wrinkling twice while painting two of my traps, and this time I can extremely close with my ear painting. I applied just a little too much gray on my ears, which resulted in a few tiny pinholes (perhaps from air bubbles, which could have also been the result of poor paint stirring or brush technique). Interior Hardware Paint and Lens Polishing On my known to-do list was also painting the raw metal screw heads and washers inside my helmet so they would disappear into the rest of the black interior. I removed my lenses and hovi tips and sprayed the screw heads and exposed washer sides matte black, being careful not to paint the threading. I accomplished this by pressing them into a piece of cardboard to hold them steady and cover the threading. A long time ago I acquired some screw post covers, so after cutting them to length, they essentially black out the hovi posts. With the lenses off I also tried to polish them up since I scratched them up a bit while sanding the edges. At that earlier point in my build I didn't have any sanding experience and didn't realize how easily the lens material would scratch up. Using Novus 1 and 2 I was able to buff out some of the scratches, which I'm sufficiently happy with, but some do still remain. I used the Novus paper towels by hand, but would a polish drum for my dremmel provide a better solution? I have the three levels of Novus, but would another agent work better? Or perhaps I'd be better off sourcing some replacement lens material? The photo below shows pre-buffed lenses with tape covering the screw post holes to keep the Novus 2 paste from entering. Faceplate and Cap Alignment A long time back I had previously posted a mock-up for faceplate and cap alignment to inquire for feedback about brow height, but I wasn't yet ready to attach the pieces at that time, so we'll try it again now. Using Dan's excellent reference posts on helmet alignment and brow height, I set out to achieve proper alignment, with perhaps a slightly lower brow than the average Stunt trooper. I'll admit that I've always loved the menacing presentation of a lower Hero brow. So friends, what do you think of this? I'm sure @CableGuy has some thoughts, and I feel like I've seen @ABS80 comment on alignment in the past, though I admittedly am not working on an AP kit. I do know that some additional trimming around the edges of the pieces in the ear and neck area are still in order. The first quad-photo below, admittedly, utilized lights at a bad angle, so the brow looks deceivingly low due to shadows. The last photo provides a more accurate depiction. For attachment of the face and cap I'm intending to use two screws on each side, with washers and a regular nut. Would a locking nut or washer be better? I hope to place one screw somewhat between the top two ear-piece screws, and the other towards the bottom of the ear. I imagine this lower one should go above where the bottom ear screws in, correct, so as not to congest that area near the S-trim? Neck Opening Dimensions and S-trim Finally, in preparation for my helmet face/cap assembly, and ear trimming, I'm hoping to crowd-source some information on neck-opening sizes. I know that getting a helmet on often requires putting it on sideways then rotating, and that things can get tight quick, so I want to ensure I give myself enough room before making a final cut in my S-trim. Can any of you share measurements of how deep and wide your neck openings are, and what your recommendations would be for sizing? I'd hate to cut it too small then have to widen it up down the road and then have an insufficient length of S-trim. The first dual-photo below is an example photo of what I'm looking for, using a WTF bucket that I won from Stormtrooper Ranch last year (which has been helpful for hands-on observation). The second show my ATA faceplate next to the WTF. Are there minimum and maximum recommended opening sizes? As a reminder, this section contains all the questions I asked throughout the post, and sometimes also new ones which are generally listed first. I've always been hopefully that such a consolidation might increase the likelihood of them being remembered and answered. =) Are any improvements needed on my rear and side traps? Thoughts on my ear painting? Any deficiencies? Any tips on an appropriate white spray to match the very cool white of ATA armor (I believe similar to WTF and AP)? It seems both Testors 1145 and the Humbrol gloss white are both somewhat off-white. Would a polish drum for my Dremmel be the best solution to buff out scratches on my helmet lenses? Is Novus 1 and 2 the best buffing products to use on lenses? Would it be better to simply source some replacement lens material and cut new ones? What do you think about my faceplate and cap alignment? Is it ready for attachment? For attachment of the face and cap I'm intending to use two screws on each side, with washers and a regular nut. Would a locking nut or washer be better? I hope to place one screw somewhat between the top two ear-piece screws, and the other towards the bottom of the ear. I imagine this lower one should go above where the bottom ear screws in, correct, so as not to congest that area near the S-trim? Can any of you share measurements of how deep and wide your neck openings are, and what your recommendations would be for sizing? I'd hate to cut it too small then have to widen it up down the road and then have an insufficient length of S-trim. Are there minimum and maximum recommended opening sizes? Did you miss me? ;-) Not armor build related, but still relating to the hobby, do any of you have suggestions for a chrome spray paint? Faceplate and cap attachment (screws) Ear trimming and fitment Neck opening sizing and S-trim installation Tube stripe painting My completed ATA helmet build vs the WTF TK/TD I won from Stormtrooper Ranch And there we have it. My first real update in nearly a year. Here's to progress, and rebuilding momentum to continue my build and journey to the 501st! As a reminder, a specially-formatted (not just a webpage printout) downloadable PDF of my entire build thread to this point is contained in [THIS SHARED FOLDER]. The PDF will be updated within a day or two of my own new posts and will note sequential version numbers and revision dates. Additionally, I've now revisited all my previous posts on this build thread and updated (reduced) the image widths where single rows of two to four images bled onto a second row due to a narrowing of the whitearmor webpage to accommodate the activity column last year. In a web browser this thread should now display as originally intended. Bill @CT 1977 - Thanks for your kind words; I'm glad to hear my content has been helpful to you! Trooperbay is definitely still up and running, though ironically I faced a similar access challenge when attempting to navigate to the site from work. I think some filters block the site, and certain browsers might display security certificate issues. But Trooperbay is definitely the place to go, and this masking template link is working for me right now, as is the other one that Chemi linked to. You may also try utilizing a different device, such as a tablet or phone, if you've been on a computer.
 -
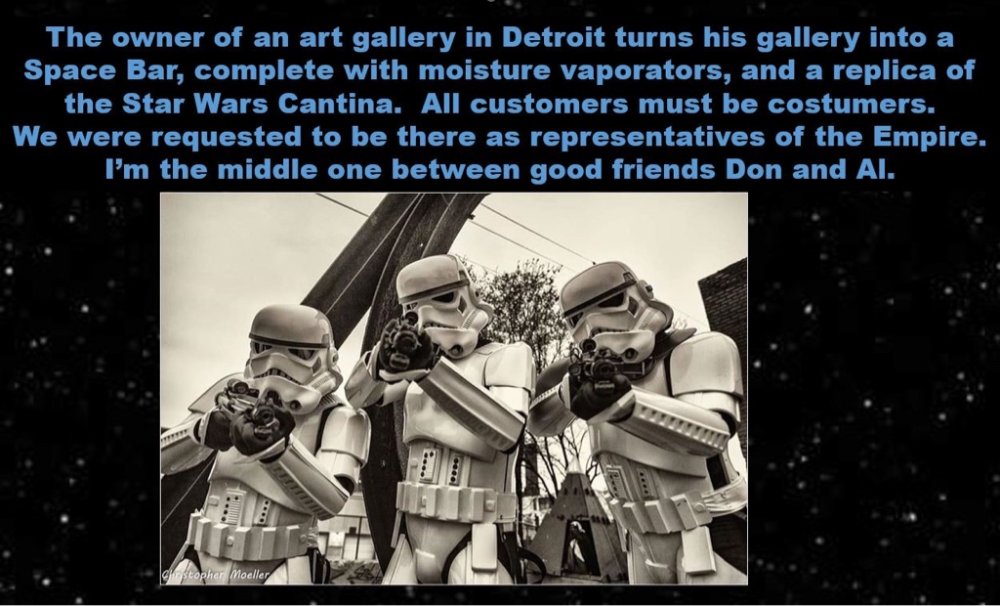
I received this email from the GGG, and thought it should be shared: (With the author's permission, I have edited it for content) Yes, we are all adults, and many of us are of drinking age, but due to safety, liability, and Disney/LFL preferences, it is important that we discuss alcohol and trooping. Consuming alcohol before or during a troop invites many unneeded problems. Doing this creates the risk of the effects getting more intense as heat builds up inside a member’s bucket, (especially outdoors in the sun) which can cause you pass out or become suddenly WAY more inebriated than you thought you were. It is also a bad idea for a multitude of other reasons. A tipsy trooper can easily damage the host’s location or equipment, make poor judgments about behavior, or otherwise reflect poorly on the Legion and create a situation where the Garrison is liable for damage. Additionally, if a tipsy trooper gets into a car accident after the troop, the host can be held legally liable for serving or selling that trooper alcohol, and the last thing we need is “I invited the 501st and they cost me 7.5 million dollars in legal fees and fines.” Not good PR, to say the least. Also, due to our relationship with Disney/LFL and our mission as a Legion, we have a responsibility to portray our characters appropriately when we are in public or posing for photos that can be released to the public (which nowadays is all photos, especially with FB, instagram, etc.), and Troopers with drinks in their hands are very much against that respectful character portrayal that Disney/LFL trusts us to embody and safeguard, so do not allow your STAR WARS character to be photographed pretending to drink alcohol (or even holding a drink) while at a troop.”. The "Mouse" and LFL have lots of eyes out there. Trust me. To be clear, we are not saying that drinking is discouraged, forbidden, or even bad, just a friendly reminder that alcohol and armor don’t mix. It's not worth getting suspended and/or removed from the Legion, so wait until after the troop and you are out of armor before you begin celebrating. . . and please make safe decisions, because we want to see you at the next troop! A big THANKS to Jon Nagel, Kyle Beagle and Diana Torres
- 21 replies
-
- 15
-

-
OP (MV) Post #54: Helmet Completion You read that right. This post will cover the remaining steps in the assembly of my very first helmet. Note that internal padding and electronics will be covered in a later post. Supplies Resources CRL Helmet Alignment and Attachment Brow Trim Adjustment Extra Interior Paint Neck Opening and Attachment Trimming Ear Trimming and Painting Tube Stripes Neck S-Trim Final Helmet Exterior Questions Upcoming Pencil Masking tape Magnets Ruler Lexan scissors Xacto (hobby) blade Mounting hardware of your choice Mini trangular craft swabs (NEW, see photo below) Below are some resources links that I've previously posted when I first began my helmet work and are now particularly applicable with there I am in assembly. I've divided them into five categories: brow alignment, ears, example builds, tube stripe painting, extra build threads, plus a link to the FISD OT Gallery at the bottom. BROW ALIGNMENT Choose Your Brow Height by CableGuy (Print PDF) Helmet Alignment by CableGuy (Print PDF) EARS Helmet Ear Tutorial by gazmosis (Print PDF) Draw No Gap Ear Line by bpoodoo (Print PDF) Ear Placement by justjoseph63 (see particular posts) (Print PDF) EXAMPLE BUILDS pandatrooper's ATA Brow & Ear Section (Print entire thread PDF) Ales ATA Ear Section by Ales (Print entire thread PDF) ANH TE2 Helmet Build by TK-4510 TUBE STRIPE PAINTING Template Painting 101 by justjoseph63 (Print PDF) Tube Stripes by CableGuy (Print PDF) EXTRA BUILDS A.J.'s Helmet Work LTM's Helmet Work Cricket's Sponge Template Painting and Lid Work (several posts) zv288bot's Helmet Assembly, Scimitar's Excellent Helmet (Pages 1-3) wook1138 Helmet Progress Ensi's Helmet Work dereferenced's Photo-Heavy Posts plus Flickr album TheLorelei's Helmet Posts (across many pages) FISD OT Gallery (screen references and props used) Click image to enlarge, or navigate directly to the CRL. Helmet Alignment and Attachment To continue where I left off back in [insert month and link], while tackling my faceplate and cap alignment I had two goals: Set my brow-height at the lower end of the Stunt acceptable range; certainly not as low as Luke's Hero. Align the pieces in which away that enabled me to line up the ear screws with the rear edge of the side traps, as shown in the photo below. Though that latter goal may seem more ear-related rather than general helmet alignment related, it is relevant as I wanted to ensure I properly trimmed the cap edges so that its overlap seam with the faceplate would fall under and be obscured by the ears at the angle I wanted them to be set at. I also wanted to be sure position the screws for the face and cap in a way that would not hinder placement of the ear screws. Thus, before drilling holes for attaching the face and cap, I drew a light pencil line down from the trap rear edge to mark the lateral placement of the ear screws (knowing, of course, that the end result wouldn't be exact since I'd be somewhat at the mercy of pre-formed screw-hole dimples on the ear pieces). I also removed the ears from a WTF helmet to measure roughly where the ear screws would be placed vertically along my drawn line. If the ears are positioned as far up (high) as possible, touching the brow trim, then then top ear screw will be about 0.5 - 0.75 inches (1.27 - 1.91 cm) from the brow trim, and the second ear screw would be 1.75 - 2.00 inches (4.45 - 5.08 cm) from the brow trim. Once again, I realize this is only approximate, and the only reason I wanted to mark this on my helmet was to drill my face and cap attachment hole sufficiently away from the future ear screws areas. I then split the 1-inch (2.54 cm) difference between the ear screws area and drilled my face and cap attachment hold 0.5 inches (1.27 cm) forward from my pencil line. With the eventual addition of the two top ear holes, the three holes will essentially form a triangle. And here we have my bucket with face plate and cap attached and with magnet sachets removed for the first time. I used some extra screws, washers, and locking nuts from my lens installation, rather than rivets, to give me ease of disassembly in the future. Eventually all the internal hardware will be painted black to match the rest of the helmet interior. While I had the WTF ears off the other bucket I laid them over the top of my ATA helmet sizes to gauge what the form of the ears would cover on my cap piece so I could determine how much more plastic to trim. I had previously trimmed the flashing of my pieces very conservatively, so after taking the photos shown above I disassembled the helmet pieces and trimmed a little more ABS around the cap ear areas and the neck opening on both helmet pieces. Note that I placed blue tape over my painted traps to project against any nicks from my scissor tips. Here is where I landed after this next round of trimming. I figured I could still open up the neck area even more, but before doing so I wanted to get a basic form of my ATA ears in place, so I left things as is. Brow Trim Adjustment Through the many hours of my helmet assembly I had no doubt observed the tiny details of the sculpt and assembly details. One tiny insignificant detail that I wanted to address was one that I’d never before seen any other builder do, but once I had the idea in my head, I couldn’t rid myself of it. And what was this, you may ask? The flushness of the end of the brown trim with the helmet at the rear edge of the side traps. OCD me wanted that little tiny gap to disappear, so I set out to create a spacer on the inside of the helmet to pull the rubber brow trim right up against the cap piece. I trimmed some ABS scraps that already had a curve in them and E-6000ed them to the cap. Viola! Very clean looking if you ask me. Note that I was aware of the impact that adding a thin spacer on the inside of the cap would be. The faceplate would no longer be able to sit as flush up against the cap with the spacer in place, but I figured that added span would be easily masked with the ear pieces in place. Easily curable with a slight deeper cutout step at the top of the ear pieces. Extra Interior Paint While I had the face and cap pieces disassembled I added a little extra pint to the interior of the helmet. After finally attaching the two halves of the helmet an unpainted section was left exposed. My original can of truck bed liner spray was on fumes, but it got the job done. Neck Opening and Attachment Trimming Before moving onto the actual ears I needed to get the faceplate and cap to fit more harmoniously with each other, so first I widened the neck opening a bit, mainly on the cap piece. I added a second screw on the right side to encourage a better fitment then proceeded to evaluate the next trimming steps. Below are some before-after photos of additional trimming for both sides of the helmet. I always marked my intended trim lines with pencil to prevent accidental over trimming. Without pencil markings a reference, it can be easy to get carried away and shave off too much—something worth remembering for your entire build. At this point I had some rough-trimmed ears to use to help guide my trimming, and I used my heat gun for forming purposes for the first time. I needed a bottom section on the right-side cap to curve inwards a bit more, so I “insulated” the surrounding area with popsicle sticks (not sure if it was effective). Still not entirely happy with the form on both sides, I used an xacto blade to actually thin the plastic to create more of a flush surface at the seams. More on this again in the next EARS section! Ear Trimming and Painting Undoubtedly the ears had been a mental barrier for me for the past year, but the time had finally come, so I reviewed the helmet and ear resources I had saved (some of which are listed at the top of this post) and set to work. ATA ears have very minimal, and in some areas practically non-existent, ear trim lines fabricated into the pieces which isn’t necessarily a bad thing. My goal has been to line up the ear screws with the rear edge of the side traps, but that’s not how all builders assemble their kits, so there truly can’t be any one-size-fits-all ear trim lines. In this case of not having distinct guide lines I actually had fewer limitations on cutting locations. The trickiness of ear completion is rooted in the three-dimensional nature of the form, thus requiring trimming on the x, y, and z axes. And, because of the diversity in cap and faceplate tolerances and installation placement, there’s really no template or guide to use when trimming ears. It really simply comes down to trial and error. The perfectionist and “engineering” side of me went to work. Rather than utilize methods such as using a compass or aluminum foil, I decided to employ an elementary (literally) technique—paper mache. Essentially I would create a paper mold atop a “good enough” rough trimmed ear, and then use that mold to trim the final ear. I decided that it may be helpful to have several spare ears on hand to help perfect the technique, so I reached out to recent ATA builders to ask if they had any they could spare. (INSERT TAGGED users) @Cheeseballs, @Cali_Nole, @PajamaTrooper, answered the call, and @Cricket even sent me an old pair of RS ears. In the end I acquired five individual ATA ears, all pulled (vac-formed) from within a year of my own armor and thus all a color-match. Iza @Cheeseballs even sent me the awesome cartoon below: (And no, @Morgi, you cannot have my ears.) The first thing I did was to pencil-mark the very faint trim lines on one of my original pairs of ATA ears (ATA kits ship with two pairs), which I had already painted black on for practice. I then proceed with trimming to the lines using lexan scissors and an xacto blade. No dremmel at this point. After attaining a rough profile that was acceptable, though most definitely not the ear gaps I was after, I aligned the ears with the traps and drilled the mounting holes. I recalled seeing a technique involving drilling the holes in the ear pieces and installing tall screw posts in the cap in order to maintain proper and consistent ear placement when sanding and test fitting, shown in the photo below. With the “guide post” screws inserted from the inside of the cap I proceeded with some further trimming, and the following images reflect where I landed. Notice the ear gaps are quite pronounced due to first-time-builder over-trimming, but they would be rendered moot by the forthcoming paper molds. Happy with the semi-final profile and placement of the ears, I then moved into the paper mache phase. But first a brief explanation on why I opted for a paper medium. I had considered using molding silicone but thought it might be too messy, and the ear gaps would have posed leakage problems. I also desired to stay away from any recasting appropriateness discussions, and hence fell back on paper, and more specifically, toilet paper / bath tissue. Haha. I prepped my helmet in a wash bin, poured some water in a small container, and raided a bathroom closet for some low quality toilet paper leftover from the beginning of the pandemic. I then set alternating layers or wet and dry toilet paper atop the ears and the surrounding helmet area. The goal of this was to capture a true form of the seam between the helmet and ears, so I paid special attention to the borders of the ears where they rested on the helmet. Here is a three-stage photo sequence showing layering in progress, the completed wet mold, and the final dried product. Note that I poked hold in the wet mold so that I would later being able to discern proper seating upon the ear. As shown below, the edges of the hold did pull up from the helmet surface, due to shrinkage while drying, but the edge form capture remained most uncompromised. Here is what the inside of the paper molds looked like. Notice that even the screw head forms were captured by the mold. If I recall correctly, complete drying took between 24-48 hours, and once that was done I laid the molds over another set of fresh ears and traced the form line over via pencil. For redundancy to check my work, I then also formed two layers of aluminum foil over the helmet and ears and compared the resulting form lines to those from the toilet paper molds. As shown in the last photo ABOVE, there were some slight discrepancies between the paper and foil lines, so when I proceeded with actual ear plastic trimming I stayed conservative and followed the more shallow lines. Note that in the photo above, the ear pieces are actually a color match; there was simply some white-balance issues while photographing. With the molds complete, I was also able to determine that one of the spare ears that I had acquired was already over-trimmed for my purposes, as shown below. I then proceeding with trimming out new ear forms, which I actually planned on being a second draft of sorts. I estimated that there may be some inaccuracies with my rudimentary molds, and that I may also simply make errors due it being my first real attempt at close form fitting. (Recall that with the first set of ears I cut for molding purposes, I paid virtually no attention to the helmet-ear gaps). Here are some photos AFTER trimming with an xacto blade but BEFORE fine-tuning sanding; honestly, already passable as-is, if you ask me. Before moving on to trimming and sanding my final set of ears for actual use, I had initially decided to paper mold all my remaining new ears simply to double check that their profiles were all identical to begin with. Finding that they were, and behind quite happy with the results of my second draft ear sanding with negligible gaps, a new thought dawned on me. Rather than reusing my original paper mold for my final ears, or even remolding the helmet with my second draft ears, and could simply remove my second draft ears from the helmet, place them inside the new molds, and trace the ear edge/trim line onto the inside of the paper mold. I could then cut the paper molds along the lines and then place those molds atop brand new ears and trace the outline back onto the ears. I suspect that sounds really complex in writing, and as of now, I have not actually executed that process (other than molding the ears as shown below). To this point, the ears shown attached to the helmet above (with red background) were intended to be intermediate ears that we then be replaced by final ears. However, they turned out so well that, coupled with working on a tight deadline over the past two weeks (January 2023), I elected to keep them. There is a stray hobby blade slice that is visible upon close inspection, that that imperfection may push me to eventually redo the ears, but for now I can live with it. At one point in my build I wanted to be able to done my helmet so I actually painted up these intermediate ears, minus the rank bars. I had recently discovered little craft swabs, which looked line minimalistic and dangerously pointy q-tips, and worked GREAT for paint edge cleanup. Just dip them in a little mineral spirits and crisp straight lines are achieved in no time! Some of you may recall me having previously painted ears as documented in this post, and those were to be the FINAL ears, which remain unused at this time until I get motivated back into action. You'll notice in the ears above that there were not yet mounting holes at the bottoms of the ears so I went back and drilled them at the pre-molded areas, starting first with a small drill bit then working up in size. I think used a countersinking tool (TURNING BY HAND) to properly cradle the screws (required for higher levels of approval). To restate, DO NOT countersink using a drill or you will likely bore all the way through the soft plastic. To finish off ear installation, I spray painted the six screws with white glossy white paint and a clear enamel. I'll dive more deep into this paint process when I touch on painting the rivets for my ab and kidney armor pieces. Tube Stripes For the past several years I had intended to hand-paint my tube stripes, but when I realized that there were actually ANH-style decals that individual stripe pieces instead of one large piece of vinyl (like ESB), I changed course. There's no way I'd be able to paint, even with a template, as clean as a decal, so I purchased a set from Trooperbay (link to be added later). In preparation for application, I cleaned off the helmet tube surface with isopropyl and let it air dry for a few minutes. * Note, I've since redone my frown teeth paint job, so disregard the teeth paint. * Two of the critical factors in tube stripe application are 1) Orientation of the stripes, and 2) distance from the top of the tube/edge of the fact. First, orientation. As shown in the image below and documented by Dan "CableGuy" in this thread, the stripes should tilt or fall forward towards the front of the helmet, as opposed to appearing to be leaning backwards. Once proper orientation of the left and right sets are determined, proper placement must then be judged. The edge of the stripes are to be roughly one pencil's width from the edge of the face of the helmet, and so for my build to trimmed my decal paper to match that space. See the first photo below showing the pencil, and note that that particular decal is for the wearer's right side of the helmet. I then ran a pencil eraser over the top of each stripe to ensure maximum adhesion with the top layer of "contact paper." Convenient to have a pencil so handy. Next was to peel off the topper, and hopefully the stripes would peel off the backing paper with it. I peeled up at an angle, say perhaps 45-degrees, instead of straight parallel with the length of the decal. A few times the stripes didn't immedialy pull up, but in those cases I simply lowered the top sheet back down and and tried pulling from the other edge (essentially just changing from 45 degrees on one side to 45 degrees on the other side). In the end each stripe pulled up very well. After trimming the top rear corner of the decal paper to gain clearance from the ear (next photo below), I carefully placed the decal down onto the helmet. Screen-used helmets had varying numbers of stripes on the sides, and I opted to use all 16 stripes on Trooperbay's left-side decal, and 15 stripes on the right side. I then got my handy eraser back out and scrubbed it over the decals again to maximize their adhesion to the helmet surface (see photo below). This would hopefully combat them from peeling up with the top contact paper. Here is the final result on one side of the helmet, and I was equally satisfied with the other side as well. Neck S-Trim The final component of my helmet build was to install the S-shaped trim around the opening of the neck. Note that some armor makers provide trim that has a U-profile rather than S, but the S-profile trim (shown in the first photo below) is required for higher levels of approval. Another point of nuance is that some builders place the seam of the trim at the back of the helmet, but it's actually most hidden when set in the front at the Vocoder paint. This area of the helmet is so recessed that it's impossible for onlookers to see, while a seam in the back would, in fact, be visible. When fitting the trim it's important to try to pack it as tight as possible in order to maximize tension and thus retention. Start with one end at the Vocoder area (close-up shown below), and squeeze it onto the the helmet, trying to get as deep a fitment as possible. Once you've wrapped it all around, before cutting it to length, go back and try to squeeze more tension by working around the whole length again. You may be surprised to find that you were able to compress an addition 1cm to 1-inch onto the helmet the second time. Once you've done this you may now cut the excess trim, and I would recommend adding in an extra 1cm in length just in case. You can then try to compress it again, and if absolutely necessary, cut it shorter if it simply won't fit. Better to have to cut again then cut too short the first time. On the wide shot above you'll see that the inside of the trim may "bubble" away from the rest, which is due to the curvature of the inside edge, which is technically shorter than the outside edge. If this is really bothersome to you, you could consider gluing those areas down with E-6000. Final Helmet Exterior The big reveal. Moment of truth. Final product. Here is my first ever build helmet! This next set of images more closely reflect what my helmet now looks like after receiving feedback for my Expert Infantry (Level 2) submission. I was asked to remove some paint from the bottoms of the teeth, as it appeared to extend onto the gums. I also took the opportunity to "re-form" the end tips of the frown. First Attempt: Second/Final Update: Helmet interior ATA vs WTF Comparison Forearm pieces Printable/downloadable PDF of my entire build thread to this point contained in [THIS SHARED FOLDER]. The PDF will typically be updated after each new post and will note sequential version numbers and revision dates.
-
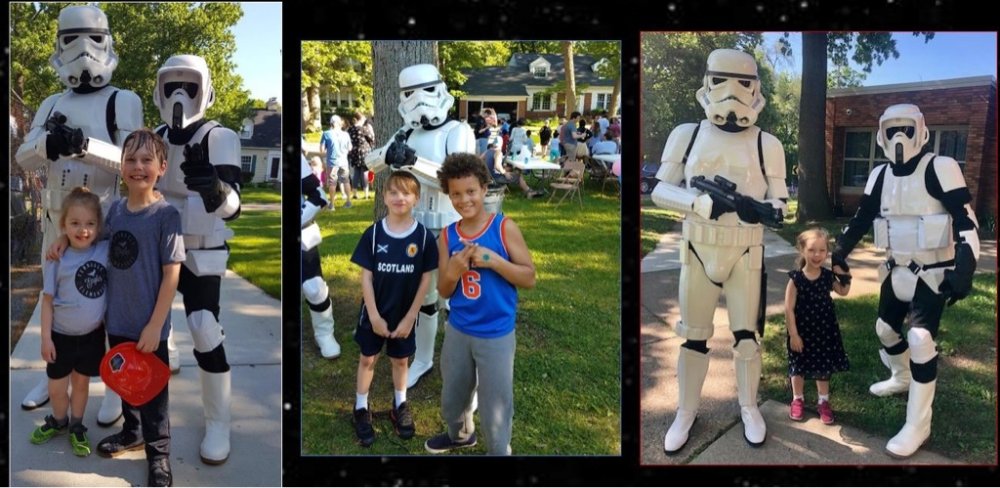
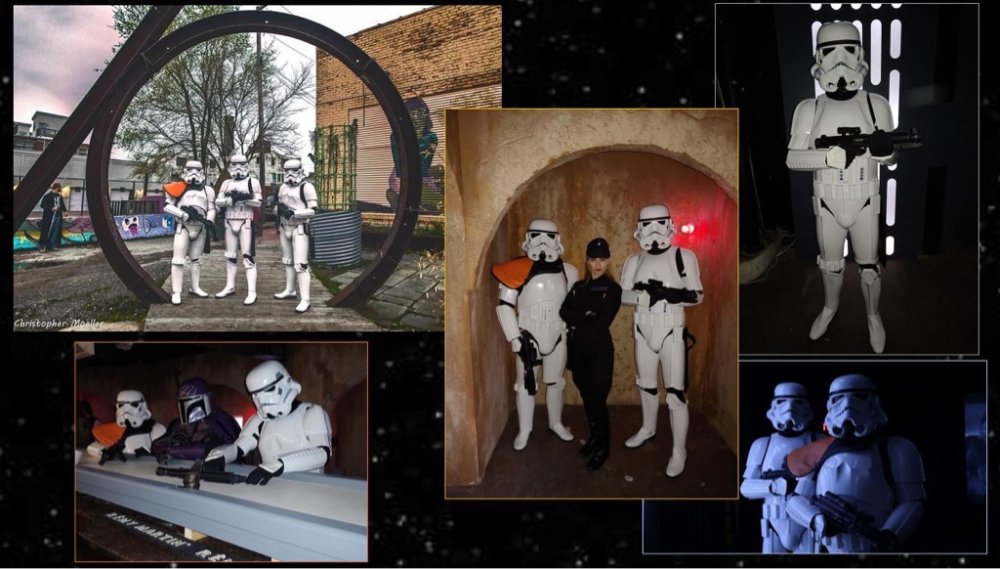
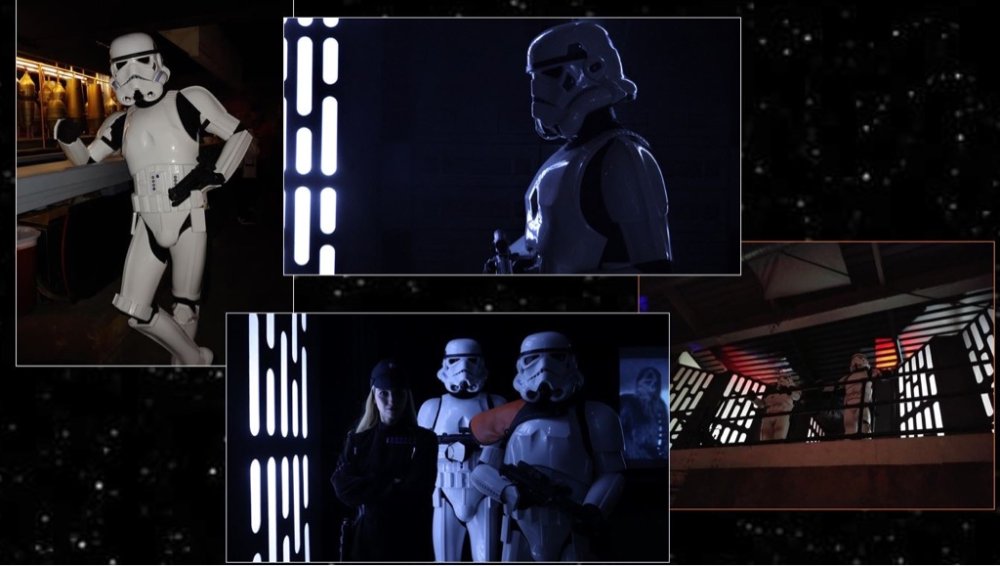
 Another unofficial troop, due to the evils of alcohol (oh, brother), but good fun at Star Wars trivia night. Some tough questions like how do you spell Kashyyyk?? Troop 21 at an end of the school year party. Needless to say, some of the kids needed a stern Stormtrooper to put them in their place. Sent from my iPhone using Tapatalk

-
My first May the Fourth! Although this was actually on the third, since it was a weekend long event and we were swamped with other events on the fourth. And because of the horrific evils of alcohol, it’s not allowed to be an “official” troop due to ridiculous rules… because in the films, we can see violence up to the level of an entire planet being blown away, but the Force forbid we see a Stormtrooper at a bar. Sent from my iPhone using Tapatalk
-
Ya. Definitely a learning experience. This is my first large scale print and everything, minus small parts, was printed hollow to save resin. I'll have to look at my 3D files, but the walls are maybe 2 or 3 mm thick as suggested in 3D forums. As you can see from the small grey circles, I do put drain openings in. I guess they are not large enough to let the alcohol enter and rinse properly. The holes are anywhere from 2 to 4 mm diameter. I use an Elegoo Mercury Plus washing and curing station. The black resin is "Water Washable". This doesn't mean you are to rinse items in a sink and let it pour down the drain. That is super bad for environment. It basically means you don't have to use alcohol. To keep things simple, I used 99% alcohol for everything. I rinse items about 5 minutes for larger pieces. These are simple placed inside the curing machine tub, and there is a little spinner that creates a circular current that washes most of the resin away. You let part drain, then switch machine to curing mode. I couldn't find any info (even from Elegoo) about what cure times you should use. I only did about 5 minutes total. So, my takeaway: Create larger openings where able: For example; the magazine housing comes in two pieces. The main large box and a thin base plate (you can see it peeled away in the photo). For the next print I will create a large rectangular opening on the bottom of the magazine housing, leaving enough of a lip to attach the base plate. Anywhere I can't do this I will place the largest holes possible and accept that I have lots of filling to do. Rinse better: A person on a 3D forum says he uses a syringe filled with alcohol or water (when resin allows this) to pump cleaning fluid through the parts. Since the cure station tub holds dirty used alcohol (it is expensive...) after the initial "spin cycle" rinse I will fill another storage tub with water and let it soak and rinse in there. Same forums suggested that leaving parts soaking in 99% for too long can also cause damage to parts. Remove internal supports when able: On same forum someone suggested not using internal supports if able. The supports and structure cure at different rates, causing the warping and cracking. They may also prevent rinsing fluid from circulating properly. Make sidewalls thicker: Helps beef up structure and reduce warping. Elegoo comment to a forum question was 4mm. Downside is more resin is used, but it is better than wasting a big print. Research cure times: For some reason, I think leaving a piece in the UV machine for 10 minutes will cause it to burst into flames LOL If I can swing the time this weekend I will try and reprint. I won't get blaster done by Empire day next week, but it may get done by the time we move in middle of June. Stay tuned all!!!
-

Toothdoc's Armor Master v4.5 Helmet Build (Rookie Trooper))
Toothdoc replied to Toothdoc's topic in ESB Build Threads
The next series of photos show a problem I had battling that HUGE ear area gap on the right side of the helmet. I thought I should have a much better fit similar to what I got with the left side. So, being the perfectionist, I answered the call to fix it somehow. I just wanted a better fit before I started on the ears. I first tried using a hair drier to soften the plastic and work the area down somewhat. After darn near burning my fingers, I just wasn't getting any resolution to my efforts. So my next approach to this was to drill another hole just below the top edge of the tube area and try to add another screw to this area pulling the gap a little tighter. For some reason I grabbed a 4-40 socket head bolt, a couple of washers and a T-nut to do the work. I got my hole drilled and added the fasteners. I then thought I'd be smart and put a little dab of blue (removable) LocTite thread locker on the tee nut. The gap was somewhat smaller and I was pretty smart, or so I thought. I left my work area for a short break and came back and GASPED! WTF?!? (except I didn't say Walt's Trooper Factory) The tiny amount of LocTite I had applied had gotten onto the ABS, softened it somewhat and now the area was CRACKING under the stress of the bolt I had just installed to help close the gap. YIKES! I quickly disassembled the helmet and thoroughly cleaned off the LocTite residue with a paper towel and some handy isopropyl alcohol. DANG! What had I just done? The left hole in the photo below was the site I drilled and applied the LocTite on the tee nut. One cn clearly see the fractured areas. First, I cleaned (scraped) the area on the interior aspect of the helmet free from paint and down to bare plastic. I carefully ensured that the cracks were positioned back together and were flat, especially on the outside of the helmet. I then got a piece of 0.7 oz fiberglass cloth and cut out a patch about 1" x 2" and tried it over the area for effective coverage. I mixed up a small amount of my trusty JB Weld Plastic Bonder epoxy. I then smeared a fair amount on the bare plastic with a popsicle stick and spread it out in a thin manner. The fiberglass patch went over this and I used my finger, first dipped in the isopropyl alcohol to work the fiberglass cloth into the epoxy and smoothed out the final surface. I used care not to over use the alcohol, just enough to keep my finger wet and have less sticking to the epoxy. I let the entire thing dry for about 24 hours before returning to evaluate it. Upon later inspection, the repair seemed very strong and quite well mended. My goal was to eliminate any further propagation of the cracks and keep it together. My efforts seemed to have done a good job. I used a sharp #11 blade and trimmed the remaining glass cloth from the edge of the plastic. I touched up the black paint with some Testors flat black and a model brush. I reassembled the helmet and just didn't worry about placing a bolt back in the same area as before. I was decided to leave the area alone and just use the right ear to do my best and cover the area. Something I should have just done all along! Moral of the story is that these things DON'T FIT TOGETHER VERY WELL and the ears will most likely cover a lot of the crazy gaps well enough. I don't believe its an AMv4.5 helmet thing, but a TK bucket design thing. Lesson learned! -

Modifying a Black Series helmet for accuracy
OddViking327 replied to OddViking327's topic in Rogue One Build Threads
Finished! It was difficult to figure out this weathering technique, but it worked in the end. I wanted to replicate the weathering of the troopers in the Kenobi show on Mapuzo, the ones in that truck/transport scene on the mining planet. They had this great dusty-wiped-clean-to-white look. Some were more heavily dusted, and others less (see reference pics). The trick would be to make a permanent paint look. I had some detailed close up pics from a stunt performer on the show, who said I can identify him here on these forums: fellow 501st Legion member Ardeshir Radpour @equuspolo (again, sorry but they are not able to be shared here). The photos showed some of the “dust” effect was beading up, like acrylic from an airbrush would on glossy paint. After a test, my hunch was right. I used some Vallejo acrylic airbrush paint (black and US earth brown), diluted with some Liquitex acrylic airbrush medium. Sprayed from a distance, at 10 PSI, this got the faint dusty look. I tried quickly wiping it with a soft rag with alcohol, but that smeared it. I had to remove a lot of that first coat with rubbing alcohol, which left a patchy residue (but that added to the overall grime texture). Next I tried the same mist. Let it dry a few minutes. This time used water and a coarser rag (a piece of khaki twill pants), and wet the area and scrubbed the acrylic paint off. Acrylic, though dry in a few minutes, on a glossy surface is still sort of removable with water and light scrubbing for a few hours. Using my fingernail behind the wet fabric I could make a line or scrape area. Bit by bit, I hit the high points and any other areas, removing brown. This technique was not easy, a little frustrating, because if you scrub too hard, you remove it all in a patchy way, but you want to just get some of it. It is a fine balance. Finally, some brushed on acrylic black marks on high points here and there like it looks on the references, and a few patches, which is done much like movie clone armor has. To weather the black parts, I used some grey Fuller’s earth dust on the corners of the lenses, in the cracks on the vocoder, and hovi tips to give those black areas some dust in the recesses. Wiped it off with a rag, and because these are going to be hard to contact, they are not permanently bound to the surface (they should just stay like real dust would). Finished! Here are the results, shot in sunlight to compare to the sun-lit scenes on Mapuzo: -
 You can definitely go black with the interior as many of us do. It can be a bit tricky, as you will need to mask off any openings (eyes, frown etc.). Many of use Plasti Dip spray, which is a rubber-type sealant. It stinks like crazy for a day or two but then goes away 100%. No matter what type of product you use, be sure to sand down and thoroughly clean the interior beforehand so that the product has a good surface to adhere to and wear a mask or respirator. Overspray can be removed with a NON acetone paint thinner or sometimes even rubbing alcohol. I have a set of extra large black rubber (flock lined) gloves if you want to see if they fit better. If interested just let me know via PM and I will send them to you (no charge).
 -
I used mineral spirits for the gray paint to remove it and isopropyl alcohol for the blue paint.
-
 Hey guys, I posted these on MEPD. But I thought it might be useful for people here who may want to achieve a similar weathered look for EU characters, etc. ============== Hey guys, here's a tutorial I created, based on weathering your armor with the "oil / dirt / sand" look that I started a topic on here: http://forum.mepd.net/index.php?showtopic=7274 It uses 2 passes of paint, with pretty simple paint mixtures. It creates a great random looking quality. I figured a written tutorial with pictures would be really long for the detail I wanted, and I was far too lazy to type that much, so I tried to take a crack at making a video tutorial instead. Here's a separate tutorial for weathering boots (watch the armor weathering videos below first) http://forum.mepd.net/index.php?showtopic=7289 Some info / materials / supplies before you start: - I am using Liquitex "Burnt umber" acrylic paint and Amsterdam "black" and "warm grey (I prefer quality acrylic water based artists paints because the pigments and binders are much better than craft paints) - I use the burnt umber straight out of the tube for the first pass - the second pass of the "oil / dirt" color is achieved with about 70% burnt umber, 20% black, and 10% warm grey (approx.) - clean your boots with alcohol, wipe and let dry before painting - I use natural sponges for the weathering and terry cloth rag (wet with water, then wring it ALL out before using) - don't use wet sponges for weathering (this waters the paint down, reducing the adhesion) Steps for brown: - do the "burnt umber pass" first - make sure to work the paint into the nooks and crannies - let dry for 5 minutes or so - wear and bend boots or crinkle the leather per the video to deform the boots - use twisting and dabbing motions with damp rag to remove paint - once you are happy with the brown, let it dry overnight (important) Steps for "oil colored / black" paint mixture - again, use the sponge to dab a light coat of the oil / black mixture - let it dry for 5 mins - put on the boots to bend / crinkle like above - remove most of the black with twisting / dabbing motions to reveal some of the brown - concentrate on removing most of the black, especially in high spots - make sure weathering is consistent on both boots and consistent with armor - let boots dry thoroughly before using Part 1: research, prep, supplies and materials required, etc. Part 2: Burnt umber (brown) first pass
 -

TKSnake's ANH TK Repair & Electronics Tutorials
TKSnake replied to TKSnake's topic in Tutorials, Tips and HOWTOs
Soldering 101 If you've always wanted to get into soldering your own electronics for cosplay but have never picked up a soldering iron before, I've created some tips on how to do basic soldering, based off my personal experience on doing soldering as a hobby and for the US Military. The Basics of What You'll Need: Soldering Wand or Station Soldering sponge or metal tip cleaner Solder Flux Soldering Clamps (like Velleman Helping Hands) Isopropyl Rubbing Alcohol An old toothbrush Assorted wiring shrink wrap If you'd like to know more, please read on. Soldering Irons Cheap soldering irons can get your foot in the door. As long as it can melt solder, you have something you can work with. Simple soldering wands are the main way people do soldering. However, if you want to get into good soldering, a solder station will be a better option for a number of reasons, but most importantly because: Soldering stations have a built-on solder iron holder. You don't have to worry about dropping your iron, which can be dangerous and cause bodily harm or damage property. Most stations have a sponge holder, which is important for cleaning the iron and making clean solder welds. You can control temperature. Soldering wands always operate at full power, meaning that tips wear down faster due to oxidation; plus, there's a higher possibility of damaging components at high power, especially when soldering on Printed Circuit Boards (PCBs). Soldering stations typically have a temperature dial. For about $30 - $50, you can get a decent soldering station with adjustable temperature. For example, the Weller WLC100 is a great beginning soldering station, doesn't cost much more than a stand-alone wand, and includes a sponge and temperature control (my non-endorsed, honest opinion). Tips are more expensive than budget tips, but rightfully so - they'll last longer than budget tips too, especially if you use my Best Practices tips below to help ensure their longevity. When I was in the USMC, I was trained on Pace PRC-2000 workstation. I'd love to have one since it does soldering, paste dispensing, has a de-soldering vacuum, etc., but as they cost over $5000 they're a but out of my price range at this time Types of Solder Electronics work is done with solder, which is a blend of tin, nickel, and sometimes a touch of lead to lower the melting point. Typically, I use standard 60/40 (60% tin / 40% nickel) solder with a rosin core. For health issues, ironically, lead (if using leaded solder) isn't as big of a fumigation problem as the rosin flux inside of the solder, since lead doesn't boil off until it reaches ~2000 degrees F (most soldering is done only at ~400 - 500 degrees F). Rosin helps the solder adhere and melt, but is a sticky, tarry substance that can build up in lungs over time, like tar from cigarettes. Make sure to solder in a well ventilated area, and blow fumes away from your face when soldering. Most solder has a flux core to help with solder jobs. For electronics jobs, we use rosin flux, NOT acid flux (which is used in plumbing). You can also use solder without flux, and use extra flux instead (which is what I personally do). Look below for more info on flux. Flux Most beginning soldering jobs fail because they don't use extra rosin flux. I can't emphasize how important flux is in creating strong, clean solder joints. Although there's typically flux already on many solders, extra flux can really help solder a joint together. Flux cleans any oxidation and helps lower the surface tension of the solder, so it can better permeate the solder joint and create a strong weld. Just a small dab per joint is all you need. It does leave a sticky film afterwards, which you can clean up using my Clean-Up tips below. Best Soldering Practices When soldering, using the following steps help ensure a clean, strong soldering joint: Apply solder to the joint, NOT the iron. Apply flux to the joint, heat up the joint with the soldering iron, and add the solder to the hot joint. Using clips can help keep joints stationary while soldering, especially when soldering two wires together, for example. This leaves your hands free to apply flux, the soldering iron tip, and solder. Keep your soldering iron clean. Before you start a solder joint, run the tip of the iron across your wet sponge quickly to remove oxidation. Always use non-abrasive methods to clean your iron to ensure the nickel outer shell lasts as long as possible. Prevent tip oxidation. While your iron is idle, tin the tip with some solder to protect it against air, which causes oxidation. Turn your iron off if it's going to be idle for longer than a few minutes. Replace your tips as necessary. Over time, the end of the tip will become irregular, as the outer nickel outer shell wears off and the tip's iron core is exposed, which oxidizes and wears out faster. When this happens, you should discard and replace the tip. Otherwise, your solder jobs will start getting chunkier and chunkier, leading to bad joints and faulty circuits. Solder Joints Tinning Whenever you solder stranded wires (wires made of smaller wires, like in most flexible wiring, it's important to tint eh end of the wire. This is done by applying some flux and then soldering the end of the wire with a hot iron and some solder. Tinned wires are easier to work with, and provide a little extra solder when soldering the wire to a board or another wire. Hook Joint When soldering wires together, one technique you can use is a hook joint. It's easier when using helping hands but can be done also via gravity (dangling one wire from the other during soldering) so long as there's no weight load on the wires. Tin the end of both wires to be joined If the joint will close the connection, remember to slide shrink wrap down the wires to be shrunk later Use a needle-noise pliers or round pliers to create a u-shaped hook on the end of each wire Hook the wires together, and crimp the hooks on top of each other Apply flux to the joint, then solder with a hot iron and solder Apply shrink wrap to cover the solder joint Butt Joint Butt joints are harder and require your clamps or helping hands to hold both ends of the wire together during the solder weld, but are sometimes necessary when wires are close together or you want to keep shrink wrap from bulging to make installation wire mesh or the wires themselves easier. It's similar to the above procedure, but with fewer steps. Tin the end of both wires to be joined If the joint will close the connection, remember to slide shrink wrap down the wires to be shrunk later Use the helping hands to place the end of one wire on top of the end of the other wire Apply flux to the joint, then carefully solder with a hot iron and solder without disturbing the placement of the wires Apply shrink wrap to cover the solder joint Through-Board Joints For Velleman MK136 and other solder kits, your solder joints will be through-board; that is, the component leads will go through the top of the board, and soldered on the bottom of the board. When doing through-board soldering, remember to get your components set up first and trim as much of the lead off as your' comfortable with (using masking tape to hold components to the board while soldering also helps). put on some flux, and get the hot iron to touch both the lead and the pad before adding solder. Remember to only use as much solder as necessary to connect the lead to the entire circumference of the pad. Surface Mount Soldering Surface mount components are what most modern PCBs use, wherein micro-miniature components are soldered onto the top of the board, typically using wave soldering, or paste soldering and heat guns. These are advanced manufacturing techniques and not currently part of this how-to post. De-soldering If you need to de-solder, such as removing pre-fab components from a PCB or correcting a mistake (like soldering an LED backwards), de-soldering is typically done in two ways: Wicking braid: This is copper broad that is placed on top of a soldering joint. A hot iron is placed on top of the braid, which wicks up the solder as it melts, like a paper towel. The braid can get hot during de-soldering, so take care to not get burned. Solder vacuum: While liquefying the solder joint while applying the iron, a small vacuum is placed near the joint. When the button on the vacuum is pressed, the vacuum engages and suck up the liquid solder. Although this method doesn't require any disposable braid, I find it less useful than braid personally. Some high-end soldering stations include a de-soldering tool, which is essentially an iron with a hollow tip which acts as a vacuum. However, these stations can be quite expensive. Insulation and Shrink Wrap When you're soldering wires together, it's important to add shrink wrap to each conductor so your wires don't short out. Think carefully when soldering, as often times you'll need to apply shrink wrap before you solder, since you won't be able to add it after the solder joint is made. You can shrink wrap with a heat source, like a lighter or heat gun. The former works well enough, but remember to move your heat source around while shrinking to avoid charring the wire or shrink wrap. Heat guns work better in this case since they are less likely to char. Use shrink wrap just large enough for the job, to ensure it shrinks to a nice, snug fit. For some joints, you might need two different gauges of wrap - a larger one to cover the joint, and another to place over the end of the larger gauge, to shrink it more snug to the wire insulation. Clean-Up On the soldering kits and larger jobs, you'll want to remove excess flux with isopropyl alcohol and an old toothbrush or disposable towels. Alcohol cleans up the stick flux residue without corroding or damaging the components. An old thrombus is stiff enough to scrub off the flux while gentle enough to not damage your components or solder joints. Clean your soldering iron sponge or tip cleaner after your soldering sessions. You don't want to get old solder back on the tip while you're trying to clean it. After everything else is clean, remember to clean your hands. Flux is a stomach irritant and can lead to GI discomfort. Like your solder projects, you can clean flux from your hands with some rubbing alcohol and light scrubbing, and good 'ole soap. More Information: You Tube: How to Solder (from CuriousInventor) -
As the Boy Scout motto says, "Be prepared". In most cases, if taken care of a well built set of armor should last a long, long time. Inspecting the various components before an event is suggested, but when the inevitable "Oh crap" moments occur having things at-the-ready can really help. Not just for you, but for a fellow trooper as well! The following is a list of suggested items to have with you for "wardrobe malfunctions" which happen to many of us during a troop. I'm not saying you have to have each and every item shown below, so the choices are yours for what to include. 1. Gaffer's ("gaffa") tape (white/2" (5 cm) wide: This is a heavy cotton cloth tape with great adhesive properties, and is widely used in theatre, film and television productions. Although strong, it can be torn by hand as needed, leaves little or no residue and will generally not damage most surfaces. If you look closely, it was used a LOT in the first SW films, and is a good temporary fix for cracks/splits. -- alternatively -- 2. Duct tape (white/2" (5 cm) wide: Everyone knows it has a powerful adhesive property and super strength, but it leaves behind a strong, sticky residue which can be difficult to remove, especially if left on for extended periods. Rubbing alcohol, Goo Gone or even cooking oil can remove it, but it is not easy so therefore is not suggested. In case you have a strapping issue (snaps pop out, strap disconnects from an armor piece, etc.) it's not a huge deal if you are prepared. Installing/setting snaps in the field is not always possible (unless you have a hammer/snap setting device) and can take time. Though temporary, a quicker alternative is to use nylon strapping (you probably have a few feet left over from your build) cut to length with Velcro (cut to size) in lieu of the snaps. 3. Black 2" (5 cm) wide nylon strapping 2' (60 cm) long: Black 1" (2.5 cm) wide nylon strapping 2' (60 cm) long. Industrial Strength Velcro *** (2" x 4" sections) *** Although very strong, it will a leave residue from the adhesive backing. This can be removed from your armor with Goo-Gone or a similar product. NOTE: If you want to be extra prepared, having lengths of other materials (nylon.elastic, white Velcro etc.) used in your build are encouraged. 4. CA (Super) Glue (Single use sizes) 5. Zip-Kicker I am not a fan of using CA glue on any armor part, but in an emergency it can certainly come in handy. If needed, I highly suggest using the GEL type, as it will not run like the regular type does. Available at most craft and "Dollar" stores. Zip Kicker is an accelerant that will set CA glue instantly. There are other name brands, but I used this one as an example. Available in a spray or aerosol. 6. Razor knife 7. Lexan scissors 8. Sanding sponge Having a sharp razor knife on hand will come in handy for many things, including cutting strapping, Velcro, etc. For safety, I recommend the folding type as seen below, and always have a new blade in it. Dull blades are useless. Be CAREFUL when cutting. As TKs, we are not known for our shooting accuracy, especially when missing our trigger finger. Lexan scissors are great for cutting/trimming ABS, especially if you need to cut shims for cracks/splits (see below). Do NOT use these to cut Industrial Strength Velcro. The adhesive will gum up the blades. A sanding sponge is perfect to have in case you need to smooth out any rough edges that may be cutting into you or snagging your under suit. Scrap ABS A piece of scrap ABS about 2" x 6" can be used to make emergency shims for cracks. Just cut it to the width/length needed and CA glue it to the inside of the affected area. 9. USB battery charger/power supply 10. Batteries Whether you use the rechargeable USB type or regular type for your fan system, etc. having a backup is always a good idea. 11. Screwdriver (multi-bit) 12. Small pliers Although these may only be needed for those with the "classic" strapping system, they can be used to tighten helmet screws and such. I have loaned mine to those with costumes from Lord Vader to Boba Fett on troops. It's better to "have em' and not need em' than need em' and not have em'". I have the "stubby" type screwdriver as seen below, as it takes up less room and all the bits are stored in the handle. 13. Lens de-fogger Even if using a good fan system in your bucket, you can still get fogged lenses. Not only is it annoying, it's dangerous, as our field of vision is not the best to begin with. You can purchase a product designed to prevent this, or (as I do) rub a bit of shaving cream (foam type) inside and polish it out before each troop. Your choice. 14. Magic Eraser 15. Paint pens For minor scuffs on shiny white armor the Magic erasers really do the trick. A single one will last a LONG time. Paint pens are a quick and easy fix for deeper scratches in your armor (white) or touch-ups on the ear bumps, etc. (black). I suggest the Acrylic type (not the oil based) paint as it can be more easily removed if/when needed. 16. Adhesive bandages It happens. Cuts, armor bite, blisters, etc. I suggest having a few of each in various sizes, especially as they don't take up much room. 17. Disinfecting wipes Let's face it. We wear compression suits and plastic so we sweat, and sweat can smell bad. To keep my bin from having the aroma of a gym locker I use these to wipe down my armor before putting it away after each use. Your fellow trooping mates (and the public) will thank you. 18: Cleaner/Polish No Matter how careful you are with your armor, you are going to get scratches or scuffs. It happens. One way of dealing with it is to use a product that cleans and shines all at one time. Although I have not used it (yet), this product has high reviews: Link and reviews here. Thank you to Greg @Oldracer for this tip! Now, there are a lot of other items that I have seen people carry.... electrical tape, a hammer, snap setting tool, safety pins, files, etc. It all depends on your particular needs and how much room you have, but most of the above items will fit together in a medium sized plastic container. Please feel free to add anything that you feel may help, and happy trooping!
-
I stumbled on Eric's 3D pack build and was smitten by that vent box. I immediately printed one with the idea of gluing it to whatever piece of tupperware was the right size. It's simple, but just look at that. Really nice right? Much nicer to my eyes than some stacked pieces of cardstock (no offense meant at all to stacked cardstock packs). Mine is printed in ABS since I do a lot of things out of that material. And then I kept reading, thinking, obsessing, and considering and I really loved how the tombstone box was angled in Eric's 3D prints... and then I got all the 3D printers working on things. I now have all 3 boxes printed, the flat end caps printed, radio knobs, tube supports, and a blanking plate. More sanding is needed, but I really love this. These are all done with the "CRL accurate" files that Eric shared. It was the angled tombstone box that made me do it. So subtle, but so nice. While printers printed, I blacked out my pouches... with a sharpie. Fortunately, Sharpie is easy to remove with rubbing alcohol and I should be able to get 95% of it off. I also didn't color the back threading. I'll redo with acrylic paint and a medium to turn it into dye.
-
Modifying a Black Series helmet for accuracy
OddViking327 replied to OddViking327's topic in Rogue One Build Threads
This helmet is nearing completion! I kept the helmet in three pieces for as long as possible, to make installing the elements easier. I installed my Vocoder tubes I built in a previous post. I had to trim down the smaller rods to only about 1cm long after the bend (or else the bottom of the rod showed as a slight kink), and discovered that I could bend it at the full 90° and use some graphite powder squirted into the tube to help get the tube slid over the bend. No need to hammer them in the tube, which ruined the tube a few times. Once these were inserted and carefully aligned, I glued them in place with CA glue, and then trimmed them. I carefully put a tiny bit of CA glue behind the three longer tubes to fuse them to each other to make them one stronger unit like the originals are. I installed frown screen and used blue self adhesive craft foam for the blue tube stripe vents (and added CA glue to ensure they stayed). The green lenses in the original helmet are way too transparent, so I cut some Hobart welding shield pieces to add behind, glued them at the edges with CA glue and accelerant (careful with CA glue and transparent pieces, it will fog them in a permanent way, so accelerant can speed up the cure and avoid it), and installed the lens piece. The brow strip was from Trooper Bay (exact right length, with just a little stretch to get it the last few mm to the end). Because the brow was lowered, a thin strip of white was visible. I taped off and airbrushed that top edge black. The brow was glued on with E6000, with a dot of CA glue on the ends to help keep it in place while that cured. Face finished, I glued the helmet back together. I had removed most of the internal liner pieces, keeping only the top ring ledge that screwed into the top, and cut it in places to allow the vent backer plates to fit. I added some overlapping seam strips to help secure it those butted joints in places (not pictured). I glued in my black backer plates (some have the mesh, and are more like frames). There were two light-leak gaps at the top traps, so I fabricated a fitted piece of plastic to glue in as a backer (I had thrown out the original inside plate, a perfect piece probably could have been cut from that). Lower black gasket: I tried a pressure cooker gasket that someone recommended, but at least on the one I ordered from Amazon, the edges curled away from the edge rather than toward it. It was just looking like it would catch on everything, and I would also have to glue it somehow. I remembered I had some black truck edge trim from another project, which was self gluing, and it looked perfect. I had just enough, with just a few centimeters cut off at the end. Once this is on, the helmet lower edge also feels much more sturdy. I glued in the grey vent pieces, carefully aligning them before spritzing with my CA glue accelerant. This helmet now has airflow through the vents! I discarded the old inaccurate Hovi tips, and ordered New Hovi tips from Trooper Bay. Compare the new to the old, as well as the updated vocoder piece: Here you can see my standard Black Series helmet, and the updated one. I put a light inside, showing the newly tinted lenses, and also how the old one sort of glowed compared to the painted one. Here you can see the extended "jaw" line: Final step is weathering to match the Kenobi troopers. I did a test this morning with some airbrush paint, rubbed off with an alcohol rag. I have some very close up images from my contact (apologies, I was asked not to share), which show a mix of fine airbrush color, and some spattered droplets like happen when liquid paint is on gloss, so I will be replicating that. These helmets also have what look like a few dark dry brush marks in spots like Movie Clone Trooper armor has. I was glad to learn a few things on these test pieces, so I can try and do it all in one go on the helmet. Nearly done!! -
TK 34677 requesting ANH stunt EIB status[AM] (1047)
Chemi replied to WillJ's topic in Request Expert Infantry Status
Perfect Will...Thank you for the quick response and the quality of the photos!!! Everything looks great. Unfortunately, to move along, we need a little "clean up" in the tooth area (as per the CRL for Basic approval, the "Frown is painted gray and does not leave the teeth area".) All you need is a non acetone paint remover(I used some 96º alcohol), and a toothpick and a few cotton swabs to remove the the excess of paint. Thanks again, Will. -

CoolHandLAZ's Anovos ANH Stunt TK Build (FIRST BUILD!)
CoolHandLAZ replied to CoolHandLAZ's topic in ANH Build Threads
Long post coming I felt inspired to work on my helmet so I shifted to that for a little bit. I'm thrilled with how it's come out so far! Anovos had the hard hat liner which I didn't like too much so I took that out. Actually I gutted the whole helmet. I was going to paint the interior black but felt nervous about taking the helmet apart and putting it back together. So I left it as is. I then moved onto some of the centurion mods since I felt that would be easier to do at the beginning. I first replaced the bottom ear screws with screws from @justjoseph63 and painted them white. After that I moved onto the frown. Researching on the forums, I found a few different ways to clean up the frown. Since rubbing alcohol was at a premium because of the pandemic, I couldn't go exactly that route but I did find alcohol prep pads. These worked wonderfully because I didn't have to worry about excess rubbing alcohol getting everywhere and I was able to really dig in there and clean those teeth up. I still have to do the tops correct? (I realized this after the fact) but I think I got the bottoms to where they need to be. This one was taken after I put the lenses in. After that was done, I went ahead and extended the frown on both sides using enamel paint. I still need to do a bit of cleanup on that but I'll do that when I get around to cleaning the whole helmet. I replaced the Anovos supplied lens with one from Trooperbay. I decided to cut out the eyes to give me more space in the helmet. I'm glad I did because once I filled up the helmet, it got crowded. I traced along the holes from the outside with paper and used that as a pattern to cut out the lenses. I left the protective film on to avoid scratches. Using sugru I acquired from @justjoseph63 and following his tutorial, I formed the attaching points around the eye holes. I had to trim down my lenses a bit because I aired on the side of safety from the start and made them big. Once I got the correct size, I pressed the lenses onto the sugru, and after letting them bond for a day, they were very securely attached. They are not coming off. Had to do a bit of clean up on the outside of the lenses from the sugru seeping through but it was fairly easy to remove. I also removed the mesh frown cause it was falling off and I needed to put more glue on it. I saw in another tutorial on here, someone used craft foam to outline the frown. I liked how it looked clean and how it prevented anything from catching on the mesh. I just measured the foam around the mesh and cut it out. Then I used E600 to attach both to the helmet. I used magnets to keep everything down while drying. For padding, I bought some military tactical pads on amazon. It took me a little bit to get the sizing right. I used painters tape to move things around before I got it exactly how I wanted it. Then, with industrial strength velcro, I attached everything. (I took this picture before doing the frown). After the pads were in and secure, I decided to move on to the fans. I bought @ukswrath's fan kit and cooling bracket and am very happy with those. They work wonderfully! I ended up going with an external battery pack for convenience. I got an anker one on amazon. The battery pack got velcro'd to the inside right of my helmet. I then installed the fans and the bracket. The fans attached to the bracket and I ran the cables underneath. I was able to configure them so that they would be able to plug into the battery pack. This was a little tough because the helmet is asymmetrical but I got it to work. For the speaker system, I went with @ukswrath's internal speaker system/Hovi tips. Man was this a great choice. Everything is self contained. I love it! I started off by removing the Anovos Hovi tips. This was very easy since they were just screwed in. I had to drill out the holes a bit in order to fit the cabling through. I ran the cables through the holes and screwed the new Hovi tips in. This was also very easy. I velcro'd the amplifier onto the left side of the helmet, exactly opposite of the battery for the fans. I then ran the cabling under the cooling bracket so that it could plug into the amp. The last thing I did was plug in the mic and position it so that it was right by my mouth when I put the helmet on. I taped it down so it wouldn't move. And voila! It fits great and sounds awesome! It also feels balanced because I have the electronics evened out on both sides. I don't have an Icomm but I may in the future. We'll see. But yeah that's where I'm at! Just a few cleaning things I still need to do. Let me know if there are any suggestions to improve. Thanks!