Search the Community
Showing results for 'Imperial Gaskets' in topics.
-
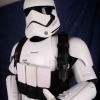
 I think I'm cool enough The undersuit was bought on extreme racing's webpage. http://www.extremeracing.co.uk/http-//www-extremeracing-co-uk/Costume-Body-Suits/Stormtrooper-Costume-Body-Suit/prod-10-html/prod_10.html Apparently, these were the same ones used onscreen. I probably wont end up using it though, because in all honesty..... it's flippin HOT! now i know why Finn was always sweaty in his stormtrooper shots. Gloves and boots are from http://www.imperialboots.com and i cant speak highly enough of them. Francois, who runs the company is excellent when it comes to customer service. TOP NOTCH! http://www.trooperbay.com for all your stormtrooping needs I got the belt and decals from here. very pleased with the material. and the decals fit perfectly so far (minus the top forearm stripe which i'll end up painting). I believe these guys sell the pouches as well. My pouches are from MTK. they are great! link http://www.whitearmor.net/forum/topic/34805-for-sale-tfa-pouches/#entry453833 Gaskets: now i originally bought Jim's Gaskets and liked how they looked. However, they are very baggy and need to be altered IMO to fit under the armor better without bunching up. I just purchased some latex/rubber gaskets from imperial gaskets. I was able to get them right away, because, Wyatt, the owner, had a pair of factory seconds laying around. normally you have to be on a wait list, even for those! (i guess i just got lucky) He also makes fabric ones which are the best gaskets out there right now! I'm currently #70 on the waitlist and was #95 in February for the fabric gaskets (just to give you an idea of how backed up they are). Apparently, the anovos provided gaskets were really crappy and now Wyatt is making gaskets for pretty much everybody who has a FO kit now. Here is the link to Imperial Gaskets - http://www.whitearmor.net/forum/topic/31019-imperial-gaskets-more-upgrades/ Or if you are really good with a sewing machine, you can make your own! http://www.whitearmor.net/forum/topic/34099-tfa-fabric-gaskets-how-to/ Hope this helps!
 -
The Entertainment Weekly photo spread from a couple weeks ago confirmed that Rogue One stormtroopers have gaskets. Today however, we've learned that the shoretrooper and stormtrooper appear to have cloth gaskets--different from the TFA trooper and the Rogue One Death Trooper. What are your thoughts on the material being used? Although Disney could probably make their own cloth gaskets similar to what Imperial Gaskets is doing, the material looks like corduroy fabric this time around. It's not as prominent a rib as the rubber gaskets. It kind of looks like this. Wishful thinking? A quick google search pulls up nothing for black corduroy sweaters or long sleeved shirts, but is it too crazy to think that they'd just get a hundred yards of the material and make their own undersuits? Also--woot for actual vents instead of stickers and a vocoder that's not painted on!
-
.thumb.JPG.0594464b5116e73e45fce31c6b373ef5.JPG) COSTUME INFORMATION Armor: ANOVOS TFA beta kit Chestplate seam mod (wings cutted and reassembled) Chestplate chestslot mod (cutted and reworked) Biceps detail mod (3 step stairs) Shoulder bracket mod (àla Ukswrath) accurate fabric behind detail holes replaced front Belt Boxes with resin Belt Boxes (made by R2Dan) replaced Handguards with resin Handguards (made by R2Dan) Helmet: ANOVOS TLJ Standard Line Gaskets: ANOVOS Belt: Belts of The First Order Belt Pouches: custom made (by TK-72216) Holster: working metal holster (made by R2Dan) Undersuit: shiny pants and black top from Amazon Neckseal: custom made (by TK-72216) Boots: Imperial Boots Gloves: Endor Finders F-11D Blaster: 3D Printed (printed by Sanotized Creations) Name: Richard Voss Height: 176cm (5‘9“) Weight: 85kg (187 lbs) TKID: 40193 Garrison: German Garrison Basic Approval: https://www.501st.com/members/displaymember.php?userID=26769&costumeID=408 About my action Shot: unfortunately I forgot my blaster, when we were taking photos of me in armor. While we still had to do an action shot, I was lent the Blaster of TK-51337. The Blaster in the single shots is my own (this single photos we taken a few days later). Of course, if required I can jump into full armor again and take a new action shot with my own blaster. Here is a picture with all of our F-11D's at once (mine is in the middle) Basic Shots (Guideline Points 1-5): Chest (Guideline Points 6-10): Detonator (Guideline Points 11-13): Shoulders (Guideline Points 14): Biceps (Guideline Points 15): Forearms (Guideline Points 16-18): Abdomen (Guideline Points 19-21): Cod (Guideline Points 22): Posterior (Guideline Points 23): Thighs (Guideline Points 24): Shins (Guideline Points 25): Ankle Spats (Guideline Points 26): Helmet Details (Guideline Points 27-30): Neckseal (Guideline Points 31): Undergarments (Guideline Points 32): Shoulder Gaskets (Guideline Points 33): Knee Gaskets (Guideline Points 34): Gloves (Guideline Points 35-36): Belt (Guideline Points 37-38): Boots (Guideline Points 39): Blaster Details (Guideline Points 40-45): To prevent confusion: We (Richard TK-40193, Daniela TK-72216 and Sebastian TK-51337) built our stormtroopers together last year - the local Rise of Skywalker premiere was our first troop as FOTKs. In January we submitted our armors for basic approval and passed it. We then decided to update the few parts that we hadn't initially built to the Level 2 and Level 3 standards and are now appliying for the next levels of approvement. Since we built the armors together almost every mechanism, closure method and solution to strapping problems is the same - there are small individual differences but nothing major. We took our new approvement photos before a green screen in our living room with a set up to lights over a couple of days so lighting and background should be consistent in all three of our applications. Thank you very much for your time!
COSTUME INFORMATION Armor: ANOVOS TFA beta kit Chestplate seam mod (wings cutted and reassembled) Chestplate chestslot mod (cutted and reworked) Biceps detail mod (3 step stairs) Shoulder bracket mod (àla Ukswrath) accurate fabric behind detail holes replaced front Belt Boxes with resin Belt Boxes (made by R2Dan) replaced Handguards with resin Handguards (made by R2Dan) Helmet: ANOVOS TLJ Standard Line Gaskets: ANOVOS Belt: Belts of The First Order Belt Pouches: custom made (by TK-72216) Holster: working metal holster (made by R2Dan) Undersuit: shiny pants and black top from Amazon Neckseal: custom made (by TK-72216) Boots: Imperial Boots Gloves: Endor Finders F-11D Blaster: 3D Printed (printed by Sanotized Creations) Name: Richard Voss Height: 176cm (5‘9“) Weight: 85kg (187 lbs) TKID: 40193 Garrison: German Garrison Basic Approval: https://www.501st.com/members/displaymember.php?userID=26769&costumeID=408 About my action Shot: unfortunately I forgot my blaster, when we were taking photos of me in armor. While we still had to do an action shot, I was lent the Blaster of TK-51337. The Blaster in the single shots is my own (this single photos we taken a few days later). Of course, if required I can jump into full armor again and take a new action shot with my own blaster. Here is a picture with all of our F-11D's at once (mine is in the middle) Basic Shots (Guideline Points 1-5): Chest (Guideline Points 6-10): Detonator (Guideline Points 11-13): Shoulders (Guideline Points 14): Biceps (Guideline Points 15): Forearms (Guideline Points 16-18): Abdomen (Guideline Points 19-21): Cod (Guideline Points 22): Posterior (Guideline Points 23): Thighs (Guideline Points 24): Shins (Guideline Points 25): Ankle Spats (Guideline Points 26): Helmet Details (Guideline Points 27-30): Neckseal (Guideline Points 31): Undergarments (Guideline Points 32): Shoulder Gaskets (Guideline Points 33): Knee Gaskets (Guideline Points 34): Gloves (Guideline Points 35-36): Belt (Guideline Points 37-38): Boots (Guideline Points 39): Blaster Details (Guideline Points 40-45): To prevent confusion: We (Richard TK-40193, Daniela TK-72216 and Sebastian TK-51337) built our stormtroopers together last year - the local Rise of Skywalker premiere was our first troop as FOTKs. In January we submitted our armors for basic approval and passed it. We then decided to update the few parts that we hadn't initially built to the Level 2 and Level 3 standards and are now appliying for the next levels of approvement. Since we built the armors together almost every mechanism, closure method and solution to strapping problems is the same - there are small individual differences but nothing major. We took our new approvement photos before a green screen in our living room with a set up to lights over a couple of days so lighting and background should be consistent in all three of our applications. Thank you very much for your time! -
 COSTUME INFORMATION Armor: ANOVOS TFA beta kit Chestplate seam mod (wings cutted and reassembled) Chestplate chestslot mod (cutted and reworked) Biceps detail mod (3 step stairs) Shoulder bracket mod (àla Ukswrath) accurate fabric behind detail holes replaced front Belt Boxes with resin Belt Boxes (made by R2Dan) replaced Handguards with resin Handguards (made by R2Dan) reworked Forearm detail holes Helmet: ANOVOS TLJ Standard Line Gaskets: ANOVOS Belt: Belts of The First Order Belt Pouches: custom made (by TK-72216) Holster: working metal holster (made by R2Dan) Undersuit: shiny pants and black top from Amazon Neckseal: custom made (by TK-72216) Boots: Imperial Boots Gloves: Endor Finders F-11D Blaster: 3D Printed (files by The5thHorseman) Name: Sebastian Schlump Height: 187cm (6‘2“) Weight: 81kg (179 lbs) TKID: 51337 Garrison: German Garrison Basic Approval: https://www.501st.com/members/displaymember.php?userID=20276&costumeID=408 Basic Shots (Guideline Points 1-5): Chest (Guideline Points 6-10): Detonator (Guideline Points 11-13): Shoulders (Guideline Points 14): Biceps (Guideline Points 15): Forearms (Guideline Points 16-18): Abdomen (Guideline Points 19-21): Cod (Guideline Points 22): Posterior (Guideline Points 23): Thighs (Guideline Points 24): Shins (Guideline Points 25): Ankle Spats (Guideline Points 26): Helmet Details (Guideline Points 27-30): Neckseal (Guideline Points 31): Undergarments (Guideline Points 32): Shoulder Gaskets (Guideline Points 33): Knee Gaskets (Guideline Points 34): Gloves (Guideline Points 35-36): Belt (Guideline Points 37-38): Boots (Guideline Points 39): Blaster Details (Guideline Points 40-45): To prevent confusion: We (Sebastian TK-51337, Daniela TK-72216 and Richard TK-40193) built our stormtroopers together last year - the local Rise of Skywalker premiere was our first troop as FOTKs. In January we submitted our armors for basic approval and passed it. We then decided to update the few parts that we hadn't initially built to the Level 2 and Level 3 standards and are now appliying for the next levels of approvement. Since we built the armors together almost every mechanism, closure method and solution to strapping problems is the same - there are small individual differences but nothing major. We took our new approvement photos before a green screen in our living room with a set up to lights over a couple of days so lighting and background should be consistent in all three of our applications. Thank you very much for your time!
 -
 Armor info: Armor: KB Props Helmet: Props Emporium Gaskets: Imperial Gaskets Rifle: Branfuhr Studios Gloves & Boots: Imperial Boots Neckseal: Geeky Pink Lady Undersuit: Stormtrooper undersuit Cape: Geeky Pink Lady Belt & Pouches: Trooperbay Personal info: Name: Kaden Taylor 501st ID: TK36544 Garrison: Wisconsin (Black Ice Squad) Height: 5' 5" Weight: 145 LB
 -

Cookie Monster's Jimmiroquai FOTK
Cookie Nomster replied to Cookie Nomster's topic in TFA Build Threads
One thing I put focus on early was the gaskets. I ordered cloth gaskets from Jimmi as part of this kit. They aren't as screen accurate as the imperial gaskets, however they will be cooler. This outfit is reported to be extremely hot while wearing, so I don't intend to use the rubber gaskets anytime soon. With that said, I found that Jimmis gaskets required modification. Here are a couple pictures through the lifecycle of trying them on, and having my visiting-from-out-of-town sister do some sewing work for me: Shoulders only - as you can see, they need to be brought in so they aren't loose around my biceps. Maybe I should start lifting weights! Jims gaskets are separated, as you can see. The elbows connect with one velcro strap, and other purchasers of the armor have had issues with gasket falling away and exposing part of their undersuit (from a behind-view of the trooper). I'm demonstrating how that could happen here (see the split, revealing my arm - this was a problem for some troopers). Demonstrating the gap that can be unintentionally exposed, depending on how they fit So I decided that I would sew my elbows and shoulders together, since my arms aren't particularly long. Additionally, I would bring in both the biceps and elbows so they were a little tighter to my arm. Additionally, the knee gaskets needed to be brought in as well. Pinning the gaskets in place prior to sewing She came to visit and ended up working instead! A side shot of the completed product Front shot of completed gaskets As I mentioned, the knee gaskets also needed to be slightly brought in (particularly at the bottom under the knee). The pin row in this image below marks the area that was being brought in (I didn't have a fabric pencil at the time, so that's why pins were used to show the "line") -
To all the troopers deciding or have built the new stormtrooper armor. Other then Imperial Gaskets. Is anyone making/ sewing there own ribbed undersuit? There is a few ideas on board, but looking for more input. What is everyones thought on what would work best, what are others useing, etc? Lets here it. Thanx
-
Just wanted to share my TLJ Executioner final approval pics and Facebook build page Armor is Jim Tripon Fiberglass kit Gaskets: Geeky Pink Gaskets Boots & Gloves: Imperial Boots Speaker / Voice: RomFX Cooling System: Ukswrath on Etsy Armor Paint by: Mad Scientist Workshop / Auto Paint: Fiat 249 Axe: 3D printed / Diversity Props Pistol and F-11: Heston 3D Solutions Belt: Trooper Bay Build and Submission Pics here: https://www.facebook.com/TK41970
-

Dead Post Links & Broken Photos, How You Can Help
gmrhodes13 replied to Sly11's topic in Forum Help & Support
https://www.whitearmor.net/forum/topic/37260-questions-on-new-fn-armor-maker/, restored by gmrhodes13 https://www.whitearmor.net/forum/topic/36506-fotk-backpack/#comments, restored by gmrhodes13 https://www.whitearmor.net/forum/topic/36921-tfa-tk-quadnoculars/, restored by gmrhodes13 https://www.whitearmor.net/forum/topic/34068-question-about-imperial-gaskets-arms-fitment/, restored by gmrhodes13 https://www.whitearmor.net/forum/topic/36503-tfa-variants-spotted/, restored by gmrhodes13 https://www.whitearmor.net/forum/topic/36605-gaskets-how-shiny-is-shiny-enough/, restored by gmrhodes13 Page 10 complete https://www.whitearmor.net/forum/topic/34541-anovos-tfa-fn-stormtrooper-helmet-thoughts/, restored by gmrhodes13 https://www.whitearmor.net/forum/topic/35948-how-to-transport-the-new-armor-safe/, restored by gmrhodes13 https://www.whitearmor.net/forum/topic/34719-coating-inside-of-anovos-helmet/, restored by gmrhodes13 https://www.whitearmor.net/forum/topic/34981-recaster-alert-furry-props-on-etsy-selling-recasts-of-my-tfa-armor/, restored by gmrhodes13 https://www.whitearmor.net/forum/topic/35343-kellwolfs-first-order-tk-build/, restored by gmrhodes13 https://www.whitearmor.net/forum/topic/34458-anovos-first-order-stormtrooper-statue/, restored by gmrhodes13 Page 11 complete -
Perhaps it's a bit early to make this topic, though in my mind I feel its good to get things right... before the boxes come! A good use of time, since there's currently a snowstorm. Coming in.... R1 TK Hard Armor kit - ABS Plastic - 850 Armorworks - 2/11/20 Estimated ship R1 TK Helmet kit - Hybrid Urethene / Polyester Resin - Headshot Props - 2/4/20 Estimated ship (Yes I'm aware about them) E-11 prebuild - Aluminum, Resin, Plastic - QuestDesignCanada - 3/28/20 (will need "upgrades" for R1. D-Ring, Counter, Flashlight) R1 TK Gloves - Leather - Endorfinders - 1/24/20 Estimate Arrived 1/23/20! Helmet Lens Plastic -TrooperBay - 1/25/20 Estimate Arrived 1/25/20 Frown Mesh Wiremesh -TrooperBay - 1/25/20 Estimate Arrived 1/25/20 Helmet Brow Rubber -TrooperBay - 1/25/20 Estimate Arrived 1/25/20 Helm S Seal Rubber -TrooperBay - 1/25/20 Estimate Arrived 1/25/20 1P Undersuit Cotton/Lycra -ExtremeRacing - 2/1/20 Estimate On the Todo / Looking into / to Order list: R1 TK Gloves - Leather - Endorfinders Undersuit.... Any recommendations? Neck seal... Contacted GeekyPink with some Qs, their products look great. Balaclava... I own some winter balaclavas, though they're... for winter.... should this be tight fitting or loose? The one I have is tight and a bit thick. Knee Gaskets.. Depends on undersuit. R1 TK boots -Leather -Imperial Boots (Reminder set for 12am Feburary to make an order) TK Belt -Canvas -Imperial Issue [CRL States BELT SHALL BE MADE IN PLASTIC / 2 PART PLASTIC, included with 850 Armorwork kit.] Helmet Lens... Trooperbay or Amazon/Ebay for dark green face-shields lens. Harness... Possibly GeekyPink or just wear black suspenders. Paints - Full automotive Primers, Flat, Gloss, paints. (Local) Gonna touch base with my father on this, as he's a current Car Salesman, former Mechanic and Bodyshop worker. Strap/ Hookups.. Elastic straps with snap buttons Teeth mesh... Easy to find in local stores. Same goes for the Hovi Mix Tips (Hovi Tip Covers still needed) Brow trim... Rubber bar from local stores.. Anyone have reference on how much the brow protrudes? ABS plastic... Hoping to use the 'scrap' from the Armor kit for details like the Tube stripe blue indents. Aswell as re-enforcement if needed. If not, then Buying a sheet off of amazon. Most of the small stuff here, like glue and buying more clamps Travel container... Looking into it. Local Garrison suggests 50 gallon Husky 37 inch wheeled container. Purchased! Helmet lining... Home made using foam and leather Onboard mic... Possibly iComm from TK6294. Hide it underneath all the clothing / chestplate. Helmet AC... Something I plan to look into later. I've never really had an overheat issue with my head in previous costumes with thermal wear. (regular clothes + insulated bodysuit + biker pads). Concerning fogged up lens, usually id coat them with a AntiFog agent / Ceramic spray. Lasts a few hours, though temporary. M300A Mini Scout Light.... would this work? https://www.ebay.com/itm/Element-Airsoft-M300A-Mini-Scout-Flashlight-Black-180-Lumens-EX-191-/141610520007 E-Web Heavy Repeating Blaster... out of the price range Anything I'm missing? My workshop and dremel have been ready. Also worth noting I've been in contact with my local garrison, have been very welcoming and eager to help if needed! Goal: Complete before July 2020. 5 months of building. Acceptance into 501st eventually leading to Level 3.
-
 Gaskets What can I say about these other than they feel like you are wearing rubber floor mats. The weir stick was difficult to work with, and whatever you do, do not get it on your hands, wear gloves. I made that mistake and was pealing glue off my hand a week later. I washed the gaskets in mild soap (Dawn dish soap) and let them dry completely. Best to just let them air dry so as not to get towel lint all over them. I glued the Glue Strips on one side of the gaskets first and let it dry, then came back the next day to glue the other half. It took longer but I was able to line every thing up nice. Then I put some weight on them and let them set overnight. I tried to glue both sides if the shoulder at the same time. The glue strip started sliding around; I wasn’t wearing gloves, so I got covered in glue trying to keep it all together. They turned out okay though. I sewed straps to the shoulders, front and back, and attached buckles, these are adjustable so I was able to get them good and tight. I sewed velcro to the top and bottom of the knee gaskets, only on the front. and glued the mating velcro pieced to the armor. I have nothing on the elbow gaskets, that may change. Overall, the leg pieces are too short for me and the shoulder pieces are very bulky and don’t want to fit into the bicep armor. The elbow pieces don't want to fit into the forearm armor with my arm in them. Very frustrating. If I put the armor on the gaskets and then try to put my arms in, I have more success but need assistance. I will have to start trimming these down to see if I can get them to work better for me. I should have a better idea of what to do with then once I've worn them for an extended period of time. I will update this post with any modifications I make. In the meantime I ordered a set of TK4502 Imperial Gaskets. You glue them with Elmer’s rubber cement, and set up much quicker. Easier that the floor mats and Weir Stick. Here is a link to the tutorial. I also ordered a set of Mrs. TK4502’s Fabric Gaskets, (I hear they are very comfortable). Update: Since the silicone gaskets came in from Imperial Gaskets, I have not troopes with the Anovos ones. -Zaphod
 -
Started to list my parts collection in the first post. but I will also list it here. Parts: Armor - KB Props (May the 4th A-) Helmet - Anovos Standard (FA and TLJ) {also got a KB FA helmet, but I may sell it} Gaskets - Geeky Pink’s (Then perhaps rubber ones) Neckseal - Geeky Pinks or Anovos (have both) Belt - Belts of the First Order Belt Pouches - Trooperbay Gloves - Imperial Boots Boots - Imperial Boots Metal Holster - R2Dan (order request posted, no response at the moment) F-11D - Imperial Factory and Anovos F-11D guts - BlastFX SE-44C - Imperial Factory Voice Amp - TRamp
-
So it turns out my wife is a bit of enabler. Around 10 or so days ago she starts asking about why I don't 3D print a costume, to pass the time during lockdown. Maybe a Death Trooper like our friend did or maybe a First Order Stormtrooper..... So I present the next in my semi regular series I like to call: Projects I am starting but may not finish. I know someone who is also printing one and also asked around and also asked a few UKG FOTKs for a bit of advice. I am going to be using these files: https://www.cgtrader.com/3d-print-models/art/other/star-wars-tlj-storm-trooperhelmet-chest-shoulder-armour-ep8 They aren't perfect, I've already adjusted a 1 file for accuracy and will probably need to adjust more either before or after printing. They also will need adjusting for fit, there's far less flex in this than with the ABS or Jim kits. I have printed 2 Ab sections and stopped to double check my measuring. Once I am happy I'll probably need to start over due the below Another isssue I have found is as I need to scale some things, I have to do multiple items as a group so they all scale from the same point, and will still fit after printing. I am using meshmixer to do this, though I have also bought armoursmith to try help with the sizing. For example if you scale the ab section and the boxes seperately then once you go to fit the boxes to the plate the fit is off and so it won't sit properly. To get started I didn't have a huge amount of filament, so whilst I waited for some more to arrive I printed the knee plates, hand plates, and the helmet beak which used all the filament I had. I ordered some Monoprice PLA+ to try and it seems to be a good choice so far. It's cheap, prints good enough that the mandatory sanding won't be a nightmare and also takes the afore mentioned sanding well. The first "fix" I have done is to improve the accuracy of the hand plate. The "indent" that face forwards was just no good. Rather than try fix it with filler and drills I went back to the provided V1 file where it was missing. I took this into fusion and modified it with a far more accurate version, or at least I hope so. I also, after a EPIC screw up by the main UK video game store, treated my self to a DLP resin 3D printer to chear my self up. Not gotten far with this but have printed some of the helmet detail parts and plan on printing all small details on it as I get to them. There's a bit of a learning curve, as with all new technologies, but I'm starting down the path. There were a few failures: and some sucesses: Looking forwards to getting better with this technology. So on to things I already have: 3D printed SC-44C, TFA version needs finishing. I'm not sure if I'll swap to the TLJ yet as they are rather close from more than a few inches away. 3D printed F-11D Standard by 5th Horseman (also needs finishing) The blasters will be getting some new parts from the resin printer so they look better, also getting the paints I need may need to wait for the world to re-open. I've also ordered the smallest torch I could find and have modified the 2 parts to try and fit it. I'll start a build thread for that at some point. Ordered: Imperial Boots Imperial Boots Gloves - bit nervous of these as I was between sizes and they aren't cheap. But I HAVE lost feeling in my hands due to gloved being too tight which took days to return to normal so I hedged up not down. Lots of work to do yet, and not sure when I'll be ordering things like the gaskets and undersuit/some shiny shorts. I also need to find some more reference images, and dig through some more build threads to check things like fit and position of where things sit etc. Learning curve example: Whilst taking the photos this morning I noticed one hand guard was missing it's bottom layers! I was playing with the settings on the print and clearly pressed the wrong thing. Not a huge issue, I can fix this part with some filler but just shows some of the issues you may run into on a build like this. Worst case I can re-print it's about 3h a hand guard. I also plan on casting these for both fun and to be able have a couple of spares in the case.
-

Captain Phasma- starting up a build
tkrestonva replied to FunkyAmazon's topic in Captain Phasma - TFA and TLJ
Omg ... you are nearly the perfect height for a Phasma! Most of us First Order stormtroopers use cloth gaskets due to comfort. About the only vendor of rubber gaskets out there is Imperial Gaskets. They (Rhonda and Wyatt) are members here and offer gaskets in both latex and fabric. I have both. Personally I prefer the fabric gaskets due to comfort, but you're right about the look of the latex gaskets - they do look amazing. Where are you located? -

fishgoh0nk's TLJ Build Thread (KB Props)
fishgoh0nk replied to fishgoh0nk's topic in TLJ Build Threads
I guess it'll be good to put where I'm sourcing the soft goods from: Gaskets, harness, neck seal, shiny shorts - GeekyPink's Boots - Imperial Boots Gloves - (likely Endor Finders) Belt - Might try to tackle this from scratch Pouches - Might try to tackle this from scratch -

Gaskets-FN Armour-Are they approval-able?
Soulart replied to Jayben Kenobi's topic in TFA Stormtrooper
Hi Andy. It's Teresa with Geeky Pinks Phantastic Gaskets [emoji4]Each undersuit is based upon what each costumers personal preference is. I personally do not wear a one piece. I just cannot do it. My custom made gaskets are $170-190usd.... Unless you are also referring to a custom harness, neck seal etc.... Which I offer as a full meal deal..... No matter which gasket maker you go with, ( and all of us that make them, are really good and care about your costumes) you will still need some form of a harnessing system to hold your bits in place. Regarding full shirts and one piece outfits, I have asked myself about this too..... And as a seamstress, and an avid costumer, my response to myself ( and you) is this... (I've thought on this hard , for what may seem or look cool and reasonable, may not be practical .) 1. How would you clean it.... Without degradation of the gaskets... our bodies get brutal under that armor.... Breathability is always a concern for me, as not only do I wrap my body in a 2 piece suit,/ shorts and tank top and gaskets, but I also strap a canvas tent to my back. Ewww.... I troop for hours. Not minutes, like they shoot in the movies. I want my body as comfortable as it can be, and my armor not to shift nor move. When Fabrics get wet, what do they do.... Stretch. Lose shape... 2. Weight of armor attaching to a stretchy fabric suit... will the weight of pieces on different Fabrics rip out or weaken stitching? My answer is yes... 100% yes. Constant removing of armor pieces off of a one piece suit will certainly wear it out much faster than a separate gasket. What happens when all your stitching comes undone... thankfully, I could fix that... but can all of our customers that buy our goods? Probably not, if you've asked us to create for you in the first place. 3. Now this is personal, I'd feel like a sausage. In casing. I think I'd feel squeezed, and if I ever thought I may need to use the washroom, my entire frigging suit of armor and wet undersuit needs to be peeled off my body. AND someone needs to help me... Again, SO much ewwww... 4. Cloth is not rubber... it will not last as long as rubber either. Ever. Sewing it onto a one piece suit, will lessen the life of the gasket. Or life of suit. (Cloth will not last forever regardless if it's in 2 pieces or more either) I want my customers to have them as long as they can. I'm sure Imperial Gaskets, Sister Margaret, and any other creator will want you to preserve them too. I can't speak for others, but I do know they put care and thought into their sewing too. We all want you to look the best you can, and be as comfortable as you can be, while looking amazing! I do not know about Imperial Boots suits, and again, we all purchase based on our personal wants and needs. I also bet they are amazing! And in NO way am I knocking their product. If you say they are killer, I trust that they are! These are just my own reasons or thoughts as a costumer and seamstress in response to your question. 5. How are you going to attach armor in place to be certain your armor stays in place. Are you attaching with velcro? Snaps? Strapping? Elastic? Where. How. Is it too much stress on the suit. Or gasket? Again so much of personal preference comes into play here for what you think will work best for your build. The longest I've stayed in my ottk is 9.5 hours. Longest time in my Phasma has been 6.5. I despise armor shifting out of place. My gasket pieces are all separate. Spaced precisely where I want them for my body measurements. Velcro attaches to the insides of armor piece very securely. Each piece is separate, for minimal strain or stress to each gasket from armor pieces. Shorter the gasket piece, less stress and strain to it. (From a force and friction point of view) also, a single piece is easier to replace if needed, rather than an entire suit... My harness is truly the foundation and security for my entire armor. Gaskets attach to it. Armor attaches to it. Nothing moves unless I want it to. Regardless what I have on for under clothes. Which sometimes is a pair of compression shorts mid thigh and a tank top or sports bra! Have you marched Kilometers in a sweltering hot parade? It's deathly hot with my canvas tent on my back.. I honestly thought to offer a pair of shorts for the FO wearers... accurate looking, yet more functional. I just have my own set I've built so far. HA... sorry if that was a bit too much info! [emoji4] but I have given this serious thought.... Our hobby is ridiculous to some, and it can be costly. OK... it is costly. But it is great. Your questions are valid, and have mirrored some of my own. Please feel free to message me with any concerns or questions you may have with anything I create. Or just costuming in general! I'm happy to respond honestly and openly. Teresa Soulart TK 41307 Sent from my STV100-3 using Tapatalk -
I have both latex and cloth gaskets (both of which are from Imperial Gaskets) and the breathability difference is stark. The latex gaskets have the breathability of a wetsuit or a rubber body glove (which means they don't breathe at all), the cloth gaskets are more like a sweater or thick shirt. As far as cleaning goes, I simply wipe out my latex gaskets with a wet cloth. For dealing with the bunching, my shoulder gaskets are connected to the ab armor via a couple of nylon straps - they both pull the gaskets down and hold the armor up. Yes, it looks like part of your mobility problem at the elbows is that your upper arm armor is too long.
-
Here you go: Imperial Gaskets- Sells Cloth and Rubber Gaskets https://www.whitearmor.net/forum/topic/31019-imperial-gaskets-new-style/ Geeky Pink's Phantastic Gaskets - Sells Cloth Gaskets only https://www.whitearmor.net/forum/topic/40849-i-am-sewing-fabric-gaskets-neck-seals-and-harnesses-fo-and-ot/ My advice is to go cloth. Doesn't hold in the heat as bad and you have more maneuverability. But everyone likes something different!
-
While we may have a few members that can help you with Snowie info, this detachment is entirely about Imperial Storm troopers and First Order Stormtroopers and mainly the shiny white versions. There are pros and cons to both OT and FO TK costumes, but both are very difficult to bend over in lol. The OT TK undersuit is simply black compression gear so the ability to cool down when there is a breeze absolutely exist. In an FO set of armour built accurately with rubber gaskets does not allow for that airflow so definitely is a hotter costume to wear. There are fabric gaskets available which are more breathable but still hot. Range of motion differs in both but this also comes down to how you trim the armour to fit your body type and build. Negotiating stairs in OT armour is very difficult for some but easier for others again due to how its fitted and how long your limbs are. FO TK's tend to walk a very specific way due to the armour and gaskets so mobility is affected differently. Many of the OT armour kits available have parts that have screen lineage so originals were cast from parts of the genuine armour many years ago. For OT the average height of the actors was between 5'9" - 5'11" so much of the armour fits that range up to and over 6'. As armour can be trimmed to fit we have plenty of troopers shorter than 5'9" that have very successfully made armour fit them very well. Im aiming to use the word armour more than 10 times here The construction of an OT kit is vastly different than constructing and FO kit, the later involving much more work, sanding and final painting so more expensive to build overall. Jimmi is one of the makers of FO armour, but there are more, KB for example (Kevin Brice) Hope this small amount of info gets you researching further and helps get you a little bit closer in your decision making process. Good luck on your journey Junos
-
 Finished filling and gluing together the gaskets. For filling, I just used a small paintbrush dipped in the liquid latex that was provided with the gaskets and essentially painted over the air bubble holes. Then waited for them to dry. Repeat ad nauseum until they look adequately filled. There are still a few imperfections but the only person they're really going to bother is me. For assembling the gaskets, if you got your gaskets from imperial gaskets Wyatt posted a great how to on how to assemble them here. The only thing I did differently from his instructions was use scraps with the corrugated pattern on them to glue the seams together, as seen here. It gives more contact points for the glue, and I also found it made a helpful guide for lining up the ridges in the seams. The gaskets fit me quite snuggly, and I probably could have left an extra inch or two of wiggle room, but they're not uncomfortable. The bigger issue seems to be all of the extra material I have around the torso/shoulders. The gaskets (and Wyatt's tutorial) were definitely made with someone with a larger frame in mind. I'm going to try them on with the armor and see how everything fits, and then decided whether or not it's worth the trouble to do a few modifications. The main change I'm thinking of doing is to cut a little further up the arm, as shown by the red lines in the image below. I may also need to trim down the edges if they show through the neck hole in the armor (although I suppose that would ultimately be hidden by Phasma's cape).
 -
 Name: Ardeshir Radpour Username: equuspolo TK-42128 Southern California Garrison Los Angeles Squadron Height = 5'10 Weight = 165 Armor Maker = KB Armor - Trimmed to fit like Anovos Helmet Maker = Anovos Premium Fiberglass Boot Maker = Imperial Boots Gloves = Endor Finders Belt = Trooperbay Belt Pouches = Trooperbay Pauldron = Trooperbay Neck Seal = Imperial Seamstress Holster Maker = Dan Sczudlik Gaskets = Geeky Pinks F-11 = Branfuhr Studios Resin Kit- Custom built by me with custom light system. Electronics = Wireless Microphone with Acker Amp Custom Parts = Chest yoke and Backplate welded together with ABS Slurry. Chest Pills and Chest cut out backed with Textured Fabric, TD slurry welded. Entire armor painted with Rustoleum 2x Glossy White. Belt, Cod, Butt Plate attached to armer with Anovos leather waist tassets
 -
Dead Post Links & Broken Photos, How You Can Help
gmrhodes13 replied to Sly11's topic in Forum Help & Support
https://www.whitearmor.net/forum/topic/32826-is-anyone-making-pistols-yet/, restored by gmrhodes13 https://www.whitearmor.net/forum/topic/32436-undersuit-gaskets/, restored by gmrhodes13 https://www.whitearmor.net/forum/topic/32663-epvii-nerf-blasters/, restored by gmrhodes13 https://www.whitearmor.net/forum/topic/32204-concerns-with-forearms-and-big-hands/, restored by gmrhodes13 https://www.whitearmor.net/forum/topic/32168-behind-the-scenes-armor-assembly-photo/, restored by gmrhodes13 https://www.whitearmor.net/forum/topic/32012-to-paint-or-not-paint/, restored by gmrhodes13 Page 15 complete https://www.whitearmor.net/forum/topic/27323-stormtrooper-in-episode-vii/page/, restored by gmrhodes13 Page 16 complete - TFA Stormtrooper COMPLETED -------------------------------------- not done yet in progress completed (Command Staff) (Extended Staff) Communications Center Announcements Forum Help & Support New Recruits Getting Started - Read this First! FISD Guidelines 501st and Detachment Access Requests New Member Introductions Newly Approved Members - Sound Off! Enlisted Barracks Off Topic Field Training Exercises 501st & Detachment Members 501st General Discussion 501st For Sale/Trade Detachment Only - General Discussion - Election Archives ???????? - Poll Archives NA ???????? Detachment Merchandise - Trading Cards Events Fire Team Area Advanced Tactics TK Pre-Approvals - TK Pre-Approval Questions & Discussion - Request TK Pre-Approval Expert Infantryman Program - FISD Expert Infantryman Badge (EIB Requirements - Request Expert Infantryman Status FISD Centurion Program - FISD Centurion Requirements - Request Centurion Status FISD Master Armorer Program The Replica Section Imperial Commissary For Sale/Trade (Personal Items Only) - For Sale - Archive Ongoing Sales & Project Runs eBay Armor Armory Hard Armor (General Discussion) Assembly, Mods, and Painting - Tutorials, Tips and HOWTOs - Templates and Blueprints Boots, Soft Parts, and other Accessories Electronics for Helmets / Blasters 3D Parts and Technical - 3D File Depository - 3D Printer owners - 3D CAD Designers and Tinkerers FISD 3D Contributor Program The Foundry - Armor and Prop Making Costuming And Builds Original Trilogy (501st Approved) Rogue One - Rogue One Build Threads ANH (Stunt and Hero) - ANH Build Threads ESB Stormtrooper - ESB Build Threads ROTJ Stormtrooper - ROTJ Build Threads First Order Battle Group Costuming and Builds First Order (501st Approved) - TFA Stormtrooper ------First 4 pages complete > TFA Build Threads > Garrison Titan FOTK Build Area - TLJ Stormtrooper > TLJ Build Threads - TROS Stormtrooper > Rise of Skywalker Build Threads - Captain Phasma - TFA and TLJ > Captain Phasma Build Threads - Captain Cardinal > Captain Cardinal Build Threads - Commander Pyre > Commander Pyre Build Threads CRL's and check lists Quick access Weapons of the First Order Quick find resources Gallery & Research Costuming and Builds - EU (501st Approved) Heavy Weapons Trooper - HWT Build Threads Stormtrooper Commander - TKC Build Threads Incinerator Trooper - INC Build Threads Sky Trooper - SKY Build Threads Death Trooper - Death Trooper Build Threads Battlefront DICE Shocktrooper Star Wars Rebels - Rebels TK Build Threads Concept Armor - MQ Build Threads Legacy Stormtrooper (Joker Squad) - Legacy Stormtrooper Build Threads Weapons Locker General Weapons Discussion BlasTech E11 - ANH BlasTech E11 - ESB BlasTech E11 - ROTJ BlasTech E11 - TKC BlasTech E11 - R1 BlasTech E11 BlasTech SE-14R BlasTech DLT-19 MiniMag PTL Missile Launcher, T-21, RT-97C (MG-15) BlasTech DC-15A and DC-15S TK Lightsabers Flamethrower (Plasma Rifle) Recon (non TK 501st approved) Kasyyyk Stormtrooper The Force Unleashed Stormtrooper Other 501st Costumes Other Non-Approved Star Wars Costumes Non Star Wars Costuming Imperial Embassies /Danny Ayuda en español Unterstützung auf Deutsch Praesidium Italica 银河帝国中华大使馆 Section Française 日本語 Kiosk Русскоязычный форум Recasting Discussion Recasting Discussion ---------------------------------------------------------- NEXT: First Order Battle Group Costuming and Builds First Order (501st Approved) -TLJ Stormtrooper -
 Hey all, apologies for the lack of updates on this thread... where does the time go? I admittedly have had a bunch going on lately (which I'll post a bit about here - again, my threads are less of a 'how-to' and more of a diary of my journey, and often includes a bit of life updates as well for those curious...) but I have also made some progress that I haven't shared just yet. Hang on, it's a doozy. Sooooo what's that ol' Rascal been up to? Frankly, I've been super burnt out, took some time off, and am easing back into things. I was fortunate enough to be part of a pretty cool project over the summer and ended up working on (building or rebuilding) like a half dozen suits in a very short timeline, and by the end of it, didn't even want to look at armor again for a while! haha More on that... later maybe. Next up, let's do a workspace update - I finally took the time to do a little garage/workshop remodel, so I could stop building armor in the living room of our one-bedroom. This little overhaul included doing some restoration work on an old metal workbench and vice that was left to me by my late grandfather. The workbench was cleaned up, repainted inside and out, got a new laminate top, a very cool oversize architect style light, second movable clamp light for detail projects, new hand press for snaps/punches, a power strip, cutting surface, drawer organizers, and an old monitor I had laying around (with VGA-to-USB-C connector, so my phone can run an Android desktop environment on it - great for displaying reference materials, how-to videos, etc). The old Columbia vice was also disassembled, cleaned, sanded/filed, and repainted somewhere near its former glory. I was also fortunate enough to receive a couple of new tools as wedding presents, including a very nice Milwaukee drill from @Ninety-Nine and a cordless rotary tool. I also got some pretty awesome Wall Control pegboard for behind the bench, to hold many of my tools (and a row of blasters). Finally, I updated my little patch collection wall in the space above it - featuring some fun FISD, IOC, and Southern California Garrison/Orange County Squad patches (my personal units). A brighter, directional main garage light also replaced the bare low-watt bulb. Pretty happy with how it all came out, but I still have a good deal of organizing to do and will likely add some more bins/organizers to the side. I added a lot of links in case anyone wants to know where this stuff came from - I'd recommend any of it! Before: And after (still a work in progress): Speaking of wedding presents, I took a good deal of time out this summer to help plan things out, and well... get MARRIED! My wife (and Jawa, DZ-71490) and I had a beautiful, small ceremony in August at a resort overlooking the beach and it was a phenomenal day. @Dsposato0 was kind enough to help MC and represent the FISD Crazy enough, a few weeks after the wedding (bringing us to the last couple weeks), and she ended up spending a long weekend in the hospital with a burst appendix and recovering, so armor again went on the backburner while I took care of her. She's doing much better though and work continues! I also was PET-scanned again this summer and continue to be in remission from cancer, so that's cool too. Butttt I also ended up taking a fin to the back of the head while out surfing in May and needed 20 internal sutures and 17 staples to hold my head shut, so that wasn't fun and prevented me from wearing a bucket for about 6 weeks (Hall of Meat - a pic of the wound for those with a strong stomach). It healed up well but again, set me back. We've forsure had ENOUGH medical issues to deal with lately. I have a build for @JHowe102 and a new Shadowtrooper recruit I'm currently still working on (but nearing completion), then once those are out the door, it will be back to focusing on the FOTK, then on an Anovos ANH build to replace my original ANH-S suit that has seen some battle... I was able to be patient in my search and came across a deal I couldn't say no to. I won't be doing a build thread persay (why, when @ukswrath has it fully covered?) but will likely do a little 'tips and tricks' thread, showing some of the techniques and tools I use throughout my build, and maybe it'll help someone (or me with your comments!). Still a bit backed up in the (MESSY) workshop though. Okay, so where's the FOTK at?! So let's start with a little spoiler for future projects (since I SWEAR I'm done for a while after closing all of these open projects out... adding some little troopers will be the focus!)... I bought more armor haha I found someone selling JUST the pieces needed to upgrade from TFA to TLJ, also from @jimmiroquai , and painted, 'ready to wear'. I saw the Facebook Marketplace post right around when the new Black Series TLJ buckets started shipping, so it felt like fate. You'd think I'd have learned my lesson about BS conversions, orrr about buying secondhand armor, but nope - I had these parts shipped from the UK and was pretty disappointed in the paint preparation and overall quality. You can literally see where a piece of masking tape was left and just painted over... the chest pills were hacked pretty haphazardly... and there was both topical damage (scratches/gouges) and casting imperfections that were never addressed originally - NOT up to my high standards. It'll be a full sand and repaint too. The other downside of this new set of armor is there was a LOT of velcro epoxied into it that was very difficult to remove. One upside is that it has not had additional resin added to the interior, so it is significantly lighter than my other chest/yoke. I'll likely add some resin, but NOT as much as the other suit, which will likely get sanded back a bit. I'll actually probably use the new chest/back/shoulders (not the cod/TD) for the TFA that I'm likely to wear more often, and the heavier stuff for TLJ. Another pretty big update is that I have been working with Sheev's Emporium a bit and snagged one of the first of their new full soft good kits (gaskets, neckseal, and rigging) for FOTK's and the stitched ribbing is probably the best I've ever seen. Looks like a very well designed kit and I'll be excited to take delivery this week hopefully (will post an update). I also have shiny shorts coming from @Soulart/Geeky Pink's, and already have Trooperbay gloves and Imperial Boots chukkas in hand, so that should be all my soft goods accounted for. I also snagged a rubber F-11D since I decided to sell the 3D printed one I have instead of trying to sand the myriad of print lines out. The gentleman who cast it was both former Praetorian and Ano...ther company, and apparently there is some controversy as to the ownership of his mold over on Faceballs, soooo that was a whole thing. But it's a solid, good looking rubber blaster and was a fair price, so whatever. I'll get around to painting it up as well and will likely use it as my trooping blaster, but won't try to add electronics to it. Okay, but where's the actual armor at?! The armor still has a long way to go, and I've had several minor (that feel like major) setbacks, and much like my ROTK, I can tell that several steps in the process are very linear and need to happen before I can move on to the next. The first and most daunting is adding the additional resin to the new pieces. For many months (freakin' pandemic Etsy hobbyists) resin has been very difficult to come by, and I am FAR from an expert in it, so I was really trying to buy the same stuff I used on my ROTK that worked well, but it has been out of stock (and the can I had went bad... resin has a short shelf life and I should have known that). I finally was able to find what I believe is a comparable product in stock at a reasonable price, so that's up next. Happening somewhat in parallel has been general paint prep. I started with the new chest and back/yoke, and well, this isn't even as many priming/sanding passes as I've done total, but here's a few shots. I've definitely learned since doing my ROTK and need to be a bit less of a perfectionist, and to "follow the rules" when painting - stuff like to allow for proper dry times, don't try to paint at night or when it's cold/humid, mask and manage for overspray, etc... always lessons being learned the hard way, but it's coming along. Another big lesson I learned is that my ROTK... is too shiny. The screen used suits are maybe a semi-gloss at best, but definitely don't have a thick layer of high gloss clear like mine. While it does look great, the time and money I spent to get it that way... really just wasn't worth it. What I DO like about the paint is how hard and scuff resistant it is, which I attribute to the 2K paint. I think for this one, instead of a Rustoleum white base with 2K clear on top, I'm going to try just USC's 2K Gloss White on top of white primer and call it a day. This should in theory be MUCH easier to repaint in the event of damage... which has already happened to my ROTK and now that I have to think about repairing it, I wish I had done differently (live and learn). I haven't had major issues with using THIN layers of Dynatron filler (which is similar to Bondo glazing putty) but I was recommended USC Garage's Flexible Glaze, which is a 2 component filler. I'll SAND the old paint, make any structural/deep REPAIRS with Apoxie Sculpt or marine epoxy, then a thin layer of filler/GLAZE on top, then PRIME with light colored filler primer, then white sandable primer moving forward (scratches/chips on the ROTK revealed the dark colored primer, which wasn't ideal), and then TOPCOAT with the 2K gloss white. I'll be doing the inside with satin white, as the flat I used last time tends to scuff and transfer color more. I'll probably be purchasing one of those decent sized paint booths that are like a popup camping tent since I made a huge mess in my garage last time, even after hanging plastic sheets. Anyways, I think that's it for now... LONG overdue, but hopefully updates will be coming more frequently now and I'd like to have this thing approved by the end of the year. My brothers in the SoCal Garrison (including @equuspolo, @Surfintrooper, and @yo_its_nino) totally inspired me with this photoshoot over the weekend, and it is too cool not to share! Photo by @KC Grim who may be joining the FO ranks soon as well! LONG LIVE THE FIRST ORDER!
 -
 INFORMATION: 1. First/last name: Jonathan Curtis 2. Future Garrison/Squad/Outpost or local area: Garrison Tyranus, Sienar Fleet Squad 3. Armor maker: Walt’s Trooper Factory 4. Helmet maker: Walt’s Trooper Factory 5. Cloth belt maker: Imperial Issue 6. Neck seal maker: Geeky Pink’s Phantastic Gaskets 7. Boot maker: Imperial Boots 9. Blaster maker: N/A 10. Gasket maker: N/A 11. Height: 5’ 7inches 12. weight: 153 Pounds 13. TK type (ANH Stunt/Hero. ESB, ROTJ. TFA etc.): ANH Stunt 14. Name(s) of any Trooper(s) who significantly helped with your Build: Gmrhodes13, TKSpartan, Sly11, Cricket, Cableguy, Troopermaster, TheSwede, JustJoseph63. Front View: Back View: Left Side: Right Side: Ab section: Helmet:
 -
 Greetings and salutations fellow troopers. At long last I have received my FOTK kit. It has been a long road that started in June 2016. Anovos unveiled a Premier FOTK kit that was promised to ship in Sept 2016. Welllllllllll, that kit still hasn't shipped to the poor folks who purchased that. I jumped out back in March and ordered a kit from KB Props. Unfortunately, life got in the way for KB but at long last I received most of my TFA kit last week. I was hopeful to suit up for the Ep 8 premier as a member of the First Order, but that just isn't realistically going to happen. I say "most" as there are few little pieces missing, namely the hand guards and the TD "holder" (the 3 ridged piece), which KB will send soon. Also coming from KB is an executioner "upgrade" kit with a black yoke, second back piece and black shoulder bells. I already have a TFA FOTK helmet from Anovos and have the Executioner helmet on order from them too, for now. Surprising to nobody, it has been delayed to next quarter. Goal: Basic approval for TFA FOTK and TLJ Executioner. The builds are similar enough that I hope to get two costumes out of only a little extra effort. By documenting my build and efforts to achieve that goal, I hope and seek your input as I progress on how to best accomplish this goal. Quick Links for my own convenience: Inspiration Build Threads: The great and always thorough Ukswrath's thread. Ruthar's Fabulous KB Build TFA FOTK CRL TLJ Executioner CRL Previous Build Experience: Anovos ANH-S, Centurion certification. Body Stats: Since this matters to some people considering a build, I am providing my body composition at time of build. Ht - 6 ft 0 in (1.83 meters) Wt - 205 lbs (93 kg) Somewhere between Mesomorph and Endomorph body type (I'm muscular but I also like ice cream ) Parts Origin: Buckets: Anovos Standard Line TFA and Anovos TLJ FOTK Helmet from Star Wars: Galaxy's Edge Kit: KB Props FOTK + Executioner add-on Helmet Fans - Henry's Helmet Fans Helmet Audio - Ukswrath's FO Audio kit Gaskets: Geeky Pink's Phantastic Gaskets - Cloth Boots/Gloves: Imperial Boots Belt: Belts of the First Order Blasters - Hestonkent's F-11D blaster with shoulder stock. Laser Axe from Stormtrooper on Weekends Supplies/Tools: Belt Sander - Others have sworn by this and I am now one of them. Great for quick sanding and creating a nice clean straight edge for seams. Contour Gauge - great for trimming the Ab boxes! Gaffer's Tape Heat Gun Industrial Strength Velcro - white, low profile, 3'x1" Lexan Scissors - curved and straight Neodymium 1.26" x 1/8" disc magnets x 6 Needle File Set - for pill holes and general filing needs Rotary Tool Tungsten Carbide Dremel Tip - for the pill holes. Weld-On ABS Cement - 1 Quart (1 Pint would probably be enough) Build Chapters: 1. Trimming (Admittedly, I do not go into great detail on how to trim most of KB's armor outside of the below links, you are better served looking elsewhere for this info) Miscellaneous Trimming Stuff Shin Accuracy Ab Boxes Chest Hole Filing Pill Hole Drilling (Chest, Biceps, Shins) 2. Assembly Ab/Kidney (bottom of linked post) Ab Box bolting to Ab piece Biceps Pt 1 Biceps Pt 2 Forearms Greeblie Sanding and Shaping Seam Filling (Forearms, Shin Boxes, Ab Kidney) Seam Filling (Yoke) Shoulder Bells (towards the middle of the linked post) Shin Boxes Shin Closure Overlap Spats Pt 1 (middle of the post) Spats Pt 2 Thermal Detonator Pt 1 Thermal Detonator Pt 2 Thighs Thigh Holster Yoke 3. Painting My FOTK was pro painted by a friend so this is mostly about preparation for that. I will be painting the black pieces of the Executioner Yoke and Bells and will update when I do that) Paint Prep Paint Progress 4. Strapping Ab/Kidney Magnetic Closures Belt Butt Plate to Back Chest to Back Cod to Ab Decal Application Gaffers Tape (Shins, Biceps, Chest) Gaskets Velcro Hand Plates Knee Plates Posterior Prep (towards the bottom of the linked post) Shins Shoulder Bell to Yoke Spats Thigh Supports 5. Progress Checks First Test Fitting Second Test Fitting (upper body mostly) Submission Photos Epilogue: 18 months later... Finishing up the Executioner costume.