

naatsirhc
-
Posts
543 -
Joined
-
Last visited
Content Type
Profiles
Forums
Gallery
Articles
Everything posted by naatsirhc
-
I know it's not armor but I thought I would give you a peek at my ewok project. TK-4261 and I have been making ewok costumes for our daughters to wear at an upcoming event. I will post a build thread on the RPF when I finish that will detail our ingenuity. I will add a finished photo here! Hope you like my handy work, here is a shot of a mostly furred head. Finished fur
-
Awsome job Jesse! I have been too busy trooping and working on other projects lately to spend time reviewing all the new build threads. Really nice work on that AP armor. Thanks for doing a great build thread
-
I paid $20 for the one I have, mine is 2 pieces. I am making my daughter an ewok costume and I will finally have use for it. For $20 I had to get it, it was never intended for trooping. Wow! $117 that's
-
Who files a claim w/ out contacting the seller? Who files a claim for $7.50? Mike provides a great service and has always answered my e-mails, when I have inquired about my order! Thanks again Mike for your hard work and great products.
-
Tom, Performix is the maker. My can is 14.5 oz. Here is a pic of the can.
-
TK7573 Requesting EIB ANH Hero[104][SDS]
naatsirhc replied to brulafu's topic in Request Expert Infantry Status
Congatulations on making EIB #104. Nice job trooper! -
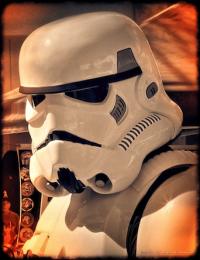
I finally found the paint on Plastidip, expensive and worth it. I gutted my bucket and re-painted the black back in. The overspray from the painter negated my spray job and it has been driving me crazy. I brushed in 3 coats and let cure for a day. Replaced my mic tip holder w/ a black one and re-installed my electronics. I am really happy w/ the end result, it looks so much cleaner.I still need to add a bit more padding in the dome, but I am ready for trooping. I have a second fan to add when needed and have figured out how to get one more battery box into my little ATA. Here is the new and improved black interior
-
Daryl, Thanks for checking out my build thread. Congratulations on making your TK official! Now let's get that EIB
-
Nice armor Great job!
-
ATA Helmet Build[*ATA]
naatsirhc replied to Irishtrooper's topic in Build Threads Requireing Maintenance
Good to see an update. Is that a gloss paint? Look forward to seeing it after a couple more coats. Nice job so far, keep on truckin! -
Hey there, I decided it's time to update my build thread with my helmet mods. After trooping a couple of times, I realized a couple things. People can not hear you well from your bucket and it gets hot and sweaty in there. With some help from some squad members I obtained some generic hovis w/ speakers, amp and mic. Got some tubing and ran some wires. I got my fan from TK-4261, this is an awsome gem of a fan that sucks from one side and has a wide blow vent. He saved the day, ATA is probably the smallest bucket and I was having trouble finding something to fit. It runs on 3 AAA batteries and has lasted several trooping events at a time. The ATA bucket is very similar to the AP, at first glance they look the same. The biggest diff I found was the tube area on the cap-n-back is more shallow on the ATA, so I had to place my battery boxes in the face. I have added padding to the front and back to stablize the helmet and provide range of motion. I used a locking velcro for the fan, and industrial for the padding, amp and battery boxes. The fan is controlled by the red push button and the sound a rocker switch. Let me know what you guys think!
-
We would love to see you make it to California! I have really enjoyed your book. Enjoy your trip!
-
Nice work on the armor, just in time to be one of the first 100. Welcome to EIB, go ESB!
-
TK 7143 Requesting EIB Status[100][AM]
naatsirhc replied to TKittell's topic in Request Expert Infantry Status
Congratulations on being #100, welcome to EIB! -
Home Depot
-
TK 4625 requesting ROTJ EIB status[TE][APPROVED] 2nd
naatsirhc replied to TK-J's topic in Request Expert Infantry Status
Great job on the trifecta. Most impressive! You have set the bar. Congratulations on spanning the original trilogy -
I would say it would be 8-10. It is tough, for someone to brake in with both locks and an additional pad lock it would require a saw or dremmel. It would probably take some time. Just using a pocket knife or something similiar would take a long time, you can not just stab thru and cut. I bought this because it holds everything, I know other troopers who use these, it is large enough that it is not easy to run off with and strong enough to keep someone out while I am trooping. I cringe at the sight of rubbermaid tubs that look as if they have been falling apart for at least a year or two. I figure that my gear is worth over a grand, so paying a bit more for a nice storage bin seems practical. I think it looks pretty good too!
-
Quinn's ATA Build[*ATA]
naatsirhc replied to Quinn_101's topic in Build Threads Requireing Maintenance
one thing is I noticed on most ATA builds is that one of the thighs edges don't line up creating a sorta gap. I am not sure I want to take a blow gun to it since with my lack of true skill is lacking but is other wise not sure how to fix I was wondering how you fixed it or if it was not even present. Also what is that black 'paint' that you put inside of your helmet. I like the look of the finished product. Jesse, I used a common BIC lighter to soften the styrene. I held it far enough away to not scorch the plastic, and only for a minute or less. I then used a clamp to bring the pieces in line with each other. It sounds harder than it is, I do not own a heat gun, I have been using the lighter method for a long time when bending and forming plastic parts. Here is a pic of the finished thigh back, notice left side is flat and right side has a ridge near the bottom. The strip hides a small gap that occurs when bring the parts in line. I wish I had a shot of that area before assembly. The Black paint is called plasti dip, it is a rubber coating that can be removed. It comes in spray and brushable, my painter got overspray on mine so it is not as clean as it once was. It is, most likely, easier to paint your bucket first then brush in the black where you want it. Hope all this makes sense. Look forward to seeing your build! -
finished my ata build finally[*ATA]
naatsirhc replied to NoGoodSkills's topic in Build Threads Requireing Maintenance
I am trooping that event on Saturday, so I will see you there. Welcome to the SCG! -
finished my ata build finally[*ATA]
naatsirhc replied to NoGoodSkills's topic in Build Threads Requireing Maintenance
Looking good! Nice sandy Be sure to sign up with the SoCal Garrison and look into joining the San Diego squad! You will need to do this if you plan on trooping. -
I have a Stanley tool box with wheels, I believe I paid $60. It is very tough and can be locked. It has a tray that works great for under armor, neck seal, gloves, TD, batteries etc... I like the fact that it holds everything and looks nice. It just needs some more decals and a name plate!
-
Quinn's ATA Build[*ATA]
naatsirhc replied to Quinn_101's topic in Build Threads Requireing Maintenance
Jesse, The arm strips are 5/8", but yes the armor ridge once butted should equal the strip. All of my armor is done that way in the front, the back is wider with the correct strip width. My calves clam shell like the screen versions, but I used a small piece of velcro at the top to help keep them closed. I believe I have a bit more than a 1/2" hang over on the calf backs.Hope this helps, if you need pics to clarify that are different from my build thread I will be happy to post them. -
Quinn's ATA Build[*ATA]
naatsirhc replied to Quinn_101's topic in Build Threads Requireing Maintenance
Hey Quinn, Glad you picked the ATA kit. It is a tough build but well worth it. I did cut my leg strips at 7/8", front and back thighs and shin fronts. 1'' for the back of shins. It is the ridging on the actual armor that I was trying to get clarification on. Most kits out there have instruction booklets and ATA does not so that leaves a lot of room for guess work, but I found the help i needed through our FISD brothers. To help clarify, I will briefly go over what I did. I made all of the ridges on the front of the armor the correct width of the strips. It is on the back of the armor that I left the ridging width be wider based on my build. I am 6 feet and around 210 right now. Some people make there finishing strips wider in the back to match the ridge width, I used the correct strip width for both front and back of my entire armor. I believe this makes it look more consistant. I made this decision after asking for advice and received a reply from Terrell, so I went with the advice of the maker and am most pleased with the outcome of my armor. I hope this answered your question. I look forward to seeing your build, post lots of pictures and feel free to ask for help. Good luck! Naatsirhc PS- Thanks Daniel for the compliment! -
Paul, You know your doing something right when you go uncontested! Thanks for doing such a great job! Congrats
-
Hey Todd, How about some updated pics of your progress? Good to see your still working on your kit. ATA is one of the harder builds, but the result is well worth the effort!