

Quinn_101
-
Posts
106 -
Joined
-
Last visited
About Quinn_101

Recent Profile Visitors
1,120 profile views


-
Hey All! Hope this is the right section for this question. I have my first set of armor which is ATA HIPS ANH and is now about 7 years old. The main thing I want to do is get it back to the white that it use to be and some how recover the the chips in paint that have formed over the years. My personal best guess for most of it would to be sand it down to and repaint. That would work for the most part but things like the helmet would be trouble some due to it have so many different colored parts. Any advice that would help would be greatly appreciated! Thanks! Quinn_101
-
On any of your 501st or even Rebel Legion costume builds? Do you like the satisfaction at the end of the build or the excitement before it? Love the challenges the various kits comes with or love finding that unique solution or when things go right? Hate it when every possible goes wrong (Murphy's Law)? Let's share our stories =D Cheers, Quinn
-
One word, Epic.
-
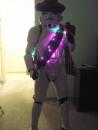
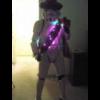
Haha I love that video, On a not of Tesla Coils, I believe these are two solid state ones that are very musical enabled enjoy =D
-
Newbie Armor history guy here, So what I have read, looks like Gino (I know of him from starwarshelmets) was a armor vendor who I suppose mess up baddly in the past (I don't know why assuming deals went bad really quickly). Now it appears as if he has returned and everyone is questioning why and such. I am sort of right or not. Correct me please if you don't mind. Second note. I do have to say those helmets are nice just because they are the Gloss plastic. Its a pain to paint HIPS for sure. But for around $500 USD is a bit much for me. Probably would have to watch and see how the game is played out if the price drops far enough before he stops selling them. Just my .02 cents. Cheers, Quinn
-
If you havn't started your belt, look up Firebladejedi's tutorial on belt making. I just did mine, struggle, looks "decent", just needs cleaning up. I would be interested to see a non-sewn belt though =D
-
Go with Chunk and get your E-6000 at Wallmart. Cheapest price from what I seen. My local Joanns stocks it at around 6.50 along with all other major stores (Fred myers, Michaels, Home Depot...) Walmart last I say I believe it was 3.86 or 4.86 something like that, I just know its like a buck or two cheaper. Same with Snaps which your going to need. For a set of line 24 snaps (8 of them with the tools thingy) is like 3.36 or so while Joann's and Craft Marts was about $5 for 8 without the tools =/. But beware, NOT ALL Walmarts carry same stock. I found that my local one about 3 miles from my homes doesn't carry snaps at all and the next closet one, about 20 miles does. =/ Good luck on your FX build, looking foward to reading it. Cheers, Quinn
-
Quinn's ATA Build[*ATA]
Quinn_101 replied to Quinn_101's topic in Build Threads Requireing Maintenance
So lots of working gluing and cursing up a storm due to paint not wanting to work. Almost done with my bucket. Just need to add lenses, mouth mesh, tube stripes and the mics. As for armor, By tomorrow around 4pm (curing time) all will have been glued, core parts painted with butt plate giving me grief, limb parts are unpaint but glued. Belt and holster I don't have yet but planing on getting soon. Currently I have a hasbro just painted black with plans on getting the the d.d. resin kit. Here is the updated link; http://s37.photobucket.com/albums/e100/KARNAGE555/ATA%20Build%20March%202010/ -
PGHtrooper21, Nice what you did to remove the strips, I had to do the same thing. Re pain trying to remove the e-6000. Word of advice on gluing; On the strip I lay a line of the glue down the center. Then with like a scrap plastic or like a Popsicle stick spread the glue evening through out the strip. If you use to much, then take some masking or painters tape and run it just outside where you want to glue that way if you get "spillage" you can easily remove it. Keep up the good work, take your time, measure twice cut once. Cheers, Quinn
-
Quinn's ATA Build[*ATA]
Quinn_101 replied to Quinn_101's topic in Build Threads Requireing Maintenance
So I tried to paint my helmet today considering the freak sun shine weekend. (All week been rainy, windy, cloudy followed by 1 hour of sun. However, dispite my efforts to prevent bad things from happening, I got runny spots and bugs couldn't stay away at all =/. It's recomended to sand down affected areas and repaint right? On the another note, got both shins glued together, while other parts have 1 strip on them. Making some progress thanks to Sherlock Holmes at 4.30 in the morning =D Get some pics up soon on the photobucket, Cheers, Quinn -
Quinn's ATA Build[*ATA]
Quinn_101 replied to Quinn_101's topic in Build Threads Requireing Maintenance
Alright so I got a question, well two; 1) Gaps - Gluing the left shin and bicep I got a small gap between the return edges part just about the strip-joint. Any fixes? I would assume placing a backing and filling the gap with bondo would work. However, when I tried it with some bondo I found never harden. 2) I went beyond the mold line in some places cause I wanted more return edge. But what I would need to do is 'level' it out. What I was thinking was heat up the area needed a bit, then using a flat edge, flatten as needed to the area. I will get pics or try by tonight if not tommorrow Stay classy, Quinn. Got the gap pic(s) up along with progress pictures. Enjoy! http://s37.photobucket.com/albums/e100/KARNAGE555/ATA%20Build%20March%202010/ -
Correct me if I am wrong but isn't AP and FX/AM the same pieces?
-
MOT did this when I got his armor. I was surprised when I got my second that it wasn't labeled "L" and "R". But however begger's can't be choosers cause the kit was very nice (plasitic fro strips, everything for bucket, suggest sizes for the strips, and even extra plastic!) But a little L and R never hurt any especially with the shins mainly be the confusing parts. Idk what kit you got, but from what I noticed there are prim differences between left and right. Biceps - insides are clear cut; one is square the other is rounded. outside, well idk that one. forarms - I think its the left that is a bit more "formed" to the arm while the right is more square. Thighs - insides have that swoop and the out sides should meet it. Shins - idk of any kit that does not have a indented section on the inside of the shins but the indented are the insides. I personally struggled for about 30's trying to figure out what is L and R out-side, but I just went with what lined upped the best. Hoped that helped anyone. Quinn
-
Quinn's ATA Build[*ATA]
Quinn_101 replied to Quinn_101's topic in Build Threads Requireing Maintenance
Haven't been working to much lately on the armor, but while I was in Vegas, I stopped by a military surplus store and found this. Unfortunately its only 2" wide not 3". However I believe there at the store (Hahn's surplus) there was a 3" wide webbing. But if I recall it looked like it was nylon based giving it a shinny white color. So close XP -
That might be me... lol