

Cantina Security
-
Posts
589 -
Joined
-
Last visited
Content Type
Profiles
Forums
Gallery
Articles
Everything posted by Cantina Security
-
another desert death trooper
Cantina Security replied to TK1636's topic in Build Threads Requireing Maintenance
Looks good man, I'm gonna use an idea or two from your build. Nice work both of you guys.... -
That was pretty funny, but man, why doesn't Rubies at least fix the Ab to chest plates...
-
+1 on the file. Teeth are a personal preference , some prefer round, some more squared. I do prefer the sharper squared off teeth, but the roundies don't look too awfully bad... Good luck with your out post.
-
Bummer on the hand guards. The boots did look nice in the photos. Hope they hold up. You did cean the hand guards prior to paint also correct?
-
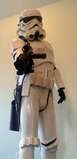
Sanded my blues away. Went back over with greens and blacks. Not sure how I feel about it. After a few tweaks I at least have the armor consistent with color and texture. I have to admit I am color deficient , so, I am usually heavy handed with color. Hence the blues before. Now, I think the greens are too much.... I am seriously considering starting over. Didn't think a DT would be so challenging , starting to thing otherwise. When you weather the armor, the pigments do not show up in a photo unless they are emphasized . I think my problem lies where I put on too much pigment, because i can't see color that well, and in photos, the colors are always lighter than they are. I will post pictures later. My last set needed some adjustments and I need to take other photos with the new changes.
-
Hands down the baddest blaster build I have ever seen. Damn good work Aaron....
-
ESB Build WIP (OGA)
Cantina Security replied to ShavedWookie's topic in Build Threads Requireing Maintenance
Yes sometimes you need to adjust the width of the over strips. 15-18 mm are what they should be. The legs are usually where they need to be adjusted. Looking good sir shaved Wookie ... -
Blackhole Stormtrooper NE build
Cantina Security replied to Trebor2k56's topic in Other 501st Costumes
Cool, I love these troopers. Nice work so far. -
Hopefully this week, I did sand away some of the blues, and am just looking for the time to knock it out. Thanks guys for the feed back and support. Maybe I can still redeem this bastard creation. We really get great feed back in town, and at conventions. Just want this thing to be radical in everyone's eyes. Thanks again, Joseph , Brian , and Morten....
-
Dang man, bummer, good of you to share your experience ... Good save.
-
Cool, man, nice photos for sure. There needs to be a "Take Your StormTrooper To Work Day"
-
Sanding it and covering with other pigments. My GML said the blue may be a problem. Any opinions on the blue?
-
Any body have any suggestions ? I am toning down the blue, and adding some blacks and greens. Also got a contact in for the red eye. Feed back is appreciated.
-
Dual TM ANH Hero build!
Cantina Security replied to lindkvast's topic in Build Threads Requireing Maintenance
I like to cut out most of the material with a dremel then use some small hobby files to get the details in the teethe and corners. Files are nice, just be careful. Good luck. -
Thanks you guys. Still going to update when I get another step further.
-
Thanks fellas. It was fun. Still working on it. Only going to make it better.
-
Is a blue color frowned upon? I am color blind so, i thought some of these troopers had blue. Especially the video game version. Maybe its just some troopers make up, but, i feel as though Blue would work well on my trooper.
-
Ok, Finally at a point where we can see where this thing is going. here are some progress photos. still need to upgrade the boots, neck seal, and add some more layers of filth. Forgot to paint one boot... Always something... Long way from this... So, Any Suggestions?
-
Knarly man... Feels good to paint a brand new helmet and then turn around and tear it up.... I may do another, to have a couple options. Yours is looking good man. Keep it up.
-
Im trying to hold off on the photos, till I have something to really look at. I should have somthing soon.
-
Ok, so here are a few pictures of the armor coming back together. I must say this has been a fun and rewarding experience. slow going, but still fun. making drop box covers, and adding circuit board some texture and detail prior to base coloring.
-
Really close. Base paint laid down. Going with some acrylic overlays also. Pictures soon. Really taking shape.
-
Yeah man, good luck. I'm sure this will turn out fantastic.
-
Dual TM ANH Hero build!
Cantina Security replied to lindkvast's topic in Build Threads Requireing Maintenance
Cool, looking good, you got this. Slow and steady, the hard part is over, getting started. I like to pencil in the trim lines then score with a straight blade or trim with curved scissors. Leaving a nice even return edge. Use a dremel with a sanding drum to even out your edges. Good luck. -
Working towards Death.........
Cantina Security replied to RogueTrooper's topic in Build Threads Requireing Maintenance
Cool, Tom, I'm getting close with mine...