

Cantina Security
-
Posts
589 -
Joined
-
Last visited
Content Type
Profiles
Forums
Gallery
Articles
Everything posted by Cantina Security
-
How to revive an old thread.... Ask it a new question.... So I was thinking of a Styrene helmet build and am not sure about the thickness and differences between ABS and HIPS. I know HIPS is quite thin, and am most familiar with ABS. Could anyone provide some feed back or possibly some pros and cons between the two?
-
 I can take a few pics of my sterling pieces if you would like Steve...
 -
When you put the clamshell on, snap the crotch first, then the mid section, then the shoulder. Steve has the right order, you mentioned calfs before thighs, but that couldn't possibly work. Under suit , neck seal , thighs, belt, boots , shins, torso, shoulder-bicep-forearm assembly, gloves , helmet. It helps to have all your armor sitting up about waist level, on a bed or dresser or table of some sorts. Have fun, it gets easier over time. A helper is always nice....
-
What works for Adhesive Removal
Cantina Security replied to Cantina Security's topic in Hard Armor (General Discussion)
So the Goo Gone didn't make the adhesive go anywhere , even had some goo gone extreme, but it has warnings on the label for certain types of plastic, so I tried a test piece of scrap, and it didn't do much either. I'm going to try lighter fluid, thinking about the kind for Zippos , not for the BBQ , correct? If that doesn't work I will try to other suggestions, thanks again guys... -
Looks good trooper...
-
TM Armour.... 1.5mm vs 2.0mm
Cantina Security replied to stearman_325's topic in Hard Armor (General Discussion)
I went with 1.5 from a few opinions of troopers, mainly TM himself explaining that the thinner the armor the more flexible, meaning less cracks in the armour. I thought I wanted thicker armor but, after my armor arrived I am glad I went with the 1.5 My RS is 1.5 also, but feels thinner and lighter than the TM , so TM' s 1.5 seems a bit thicker to me. I think if you go with 2.0 make sure to get a 1.5 helmet, just to keep all the detail in the pull. -
No, I actually got some scrap from RS with my last box that came from them. Before I got the scrap, I got a few pieces from Trooperbay . After I assemble, I am sanding and painting the entire armour with white, then going to add the infected weathering...lol
-
What do I need to trim armor?
Cantina Security replied to BRYZORD's topic in Getting Started - Read this First!
To answer your question, a good sharp utility knife, Lexan scissors , or tin snips will do the trick. Sand paper and a dremel tool come in super handy. Do as Mathias suggests and check the forums for teqniques and other specifics, but mainly , you don't need a lot of expensive tools, go for the un trimmed ... -
I cut right In the middle of the overlap on both pieces. Trimmed my cover strips to 15 mm and glued in place. I will post a picture in the next day or so.
-
OH BOY... First build! (RS)
Cantina Security replied to albisancho's topic in Build Threads Requireing Maintenance
Don't be afraid to hit some of your edges with sand paper , it will help you smooth and even out your edges. -
Diana's RS Props Build- ANH Stunt
Cantina Security replied to AsBlondeAsLuke's topic in Build Threads Requireing Maintenance
Try a TM build. He has beautiful armor and a pleasure to work with. CAP West, then AP then MTK, ATA. Wait time would be a factor for me anyway. Good luck, I'm sure you guys will knock it out of the park... -
As long as its 100% acetone it should be ok, I have a buddy that just used nail polish remover, and he said it was ok. He also recommended that you make the paste like a thickish paint and apply like that. He said it made for easier sanding.
-
ABS paste sounds like a good plan. May want to add a small piece of reinforcement strip on the backside too. Small piece of ABS and Adhesive. Looks good.
-
That doe seem best, my impatience gets the best of me sometimes, but I will try this approach with the legs. The forearms and bicepskmare complete. Not painted just assembled with butt joints and cover strips. Thanks Eric.
-
Thanks Eric, I was certain that was too much, I tend to over do a lot of things . Also, we should be gluing one side at a time correct? One side ABS strip on front left calf. Let dry . Then assemble to front right side calf.let dry. Then back side right, with ABS strip. Let dry, then assemble to left side rear. Four step process for each section?
-
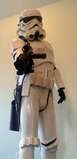
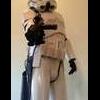
Wow, totally hilarious... Funny Bill... That is pretty cool. Yes I had forgot my holster in my preliminary photos, then wrong side on the second go around.... My GML caught it both times too.... Oh well, another reason to kit up.
-
So I'm really struggling with the E6000 , not sure how much to use. It has been squishing out the sides of the covers trips. Being a DT I can clean it up, and it will help add texture. If I was building a nice shiny TK this would be unacceptable. Anyone have any pointers? I have been scoring and peeling off, which works ok, but a lot of extra work. Any feed back would be greatly appreciated ...
-
Prepare to be amazed Germain ...lol. I think the abs gussets will hold just fine. JB Weld is amazing stuff. I will use a heat gun to curve the gussets to the shape of the inside of barrel assembly to provide as much contact as possible with the adhesive. Also the inner barrel should help give me Some more support. I'm the kinda guy who likes a good challenge. I do admit, I was scratching my head on this one...but I think my approach is decent. I thought about cutting off the end, forward sight assembly , bayonet lug, flash break and such, but then I would have to reposition all that stuff perfectly and I would like to keep it as much intact as possible. Thanks for the feedback fellas...
-
TM Helmet Build ( ANH )
Cantina Security replied to Cantina Security's topic in ANH (Stunt and Hero)
Wow, cool Vern thanks.... I always thought it was just different manufacturers and the last tooth was not cut out. I alway attributed the different looks, to be different makers,: ATA, AP, TM, RS, etc... Now that I think about it, those Guys weren't around back then, and I guess they had two forms. Do we know of anyone who casts the Hero Lid? -
ATA ANH Stunt Helmet Build Question(s)
Cantina Security replied to IronTusk's topic in Build Threads Requireing Maintenance
Remember Luke peeling off his helmet... Mine are tight on me also, but as Gaz stated, put your head in side ways, and screw that sucker down on your melon.... Good luck. -
Smooth lines my friend...
-
TM Helmet Build ( ANH )
Cantina Security replied to Cantina Security's topic in ANH (Stunt and Hero)
What is the diference Vern ? Beside the tooth detail? -
Looks good bro... Good luck.
-
TM Helmet Build ( ANH )
Cantina Security replied to Cantina Security's topic in ANH (Stunt and Hero)
Got the teeth... Whoops, went stunt... Kinda wanted to do hero... oh well, a good excuse for another kit... -
So I didn't want this project to go cold, so i made a start in between other projects. Cut the pipe at an angle that would mate up to the Front assembly, and was thinking of adding ABS gussets to keep these parts together. Here is a few pictures. Going to use JB Weld to fasten together, then use ABS paste to fill in between pipe and metal assembly.