gmrhodes13
-
Posts
31,206 -
Joined
-
Last visited
-
Days Won
1,069
Content Type
Profiles
Forums
Gallery
Articles
Everything posted by gmrhodes13
-
Currently no maker (that I'm aware) you could get one 3D printed if you have or know someone with a printer
- 1 reply
-
- 2
-

-
 You have TK access on the forum. Some info here on detachment affiliation
 -
RS Prop Masters Stunt TK Pre Approval
gmrhodes13 replied to Wookie Mistake's topic in Request TK Pre-Approval
Nice work, just a couple of things Your detonator is rotated backwards a little too much, you may also want to check the measurements between the end caps and control panel Drop boxes should align with the end of the plastic belt For Level 3, Drop boxes are vertically aligned with the end of the ammo belt with minimal gap between belt and box. Your images are a little small in resolution which makes seeing some details a little difficult. I'm sure you should breeze through base approval and a few tweaks for higher levels. Good luck and hope to see you with a TKID soon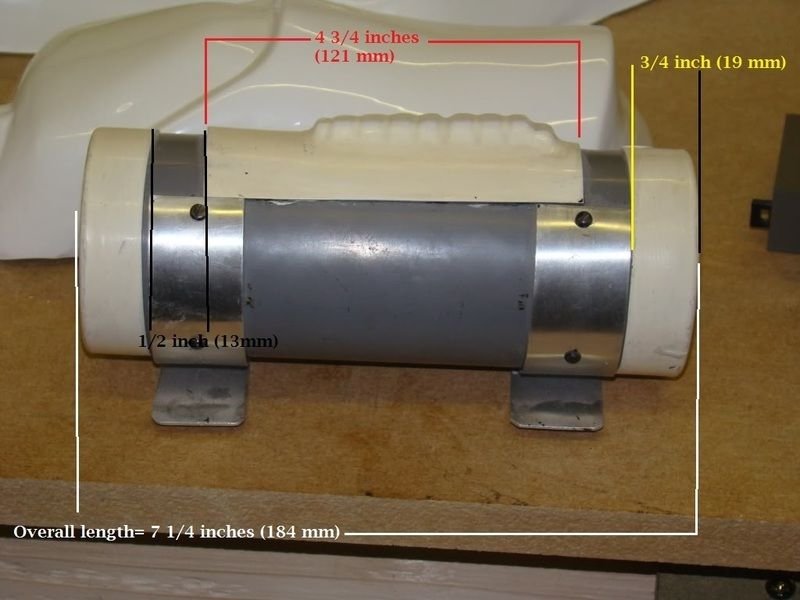
-
TK-13239 Requesting ANH Stunt Centurion Status(AM)(533)
gmrhodes13 replied to Sawanator's topic in Request Centurion Status
Congratulations trooper and welcome to the centurion ranks FYI thread title will be updated soon -
You can add more strapping on the kidney/posterior to see if that helps, to stop them coming apart I came up with some V clamps some years ago and quite a few have had success keep the pieces in alignment. With a heat gun or oven you bend strips of ABS plastic into the shape of a V, only glue one side and the other remains free to allow movement when you bend. Just helps stop the butt plate from pushing back from the back plate. Some have even tried multiple V tabs If you wish to go down the bracket route (RS) there was someone making the brackets some years ago, they aren't too had to make you can find info in the threads below How To fit here https://mrnostripes.weebly.com/ Tony made some brackets supports to help them not pull through or crack the plastic CableGuys (RIP) video on fitting the bracket system
-
A very nice build, good luck with your application
-
Mel's WIP adhd fueled mess.
gmrhodes13 replied to PInksnepid's topic in Hard Armor (General Discussion)
I'm sure your little cousin will love it A good tip when masking areas is to use a good painters tape, just seals a little better, also if you paint white first that will fill any areas which may seep under the tape, then paint your black over the top -
Salutations from Deepest Darkest Essex
gmrhodes13 replied to Mr_Ed's topic in New Member Introductions
Hello and welcome aboard, good luck with the research, hope to see a build thread from you soon -
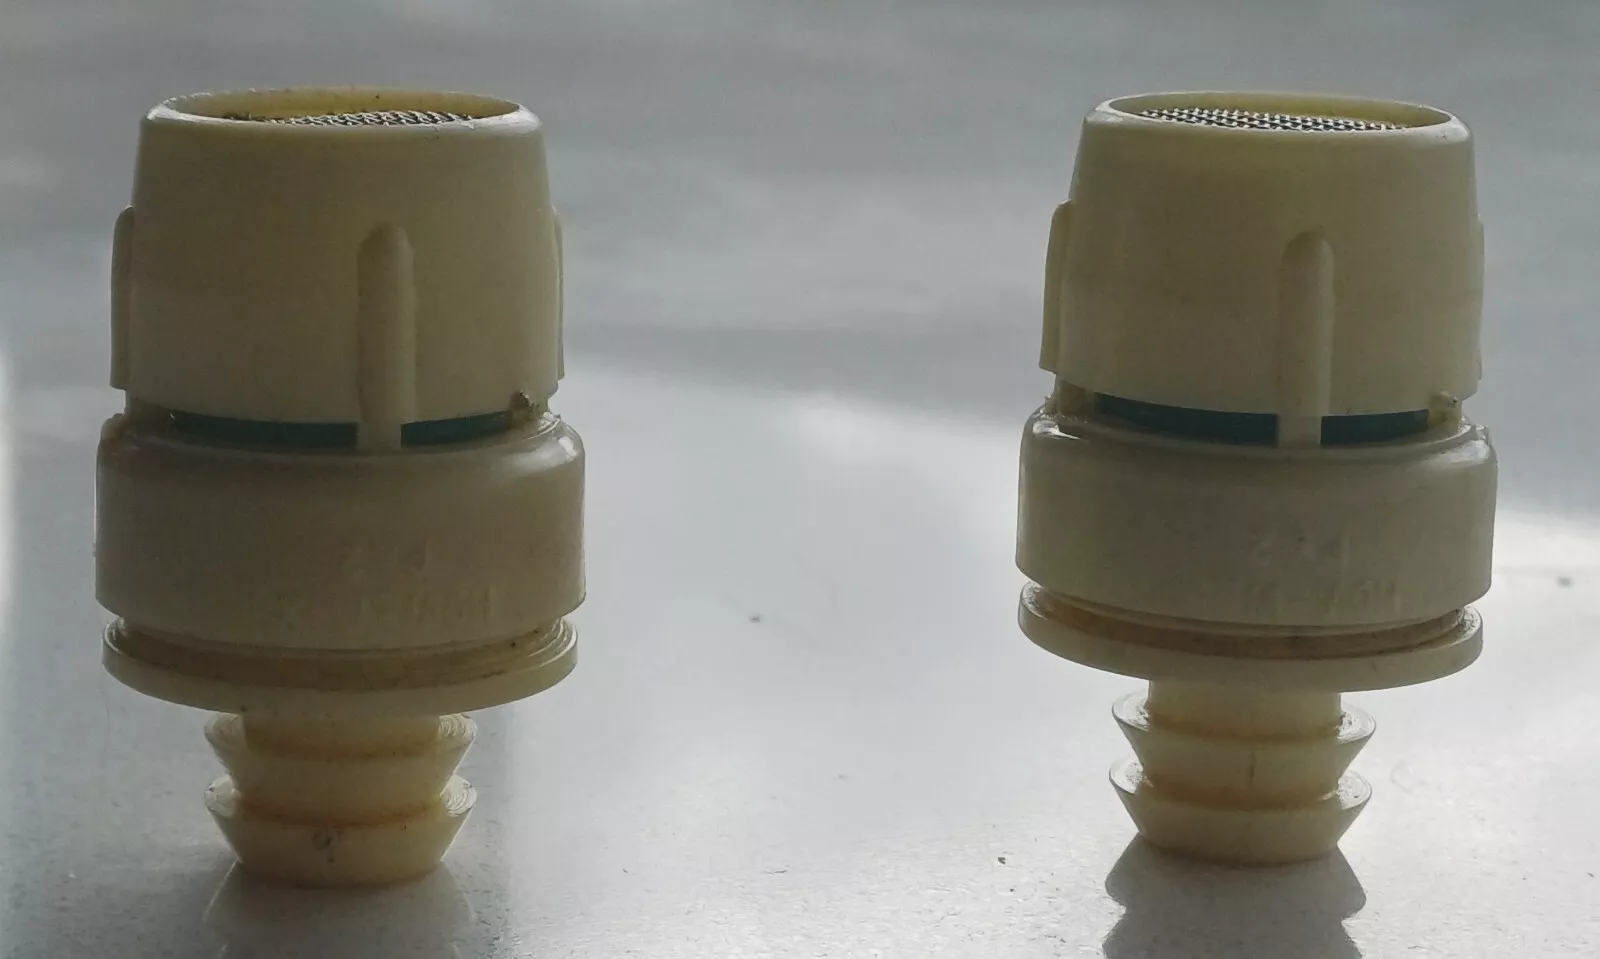
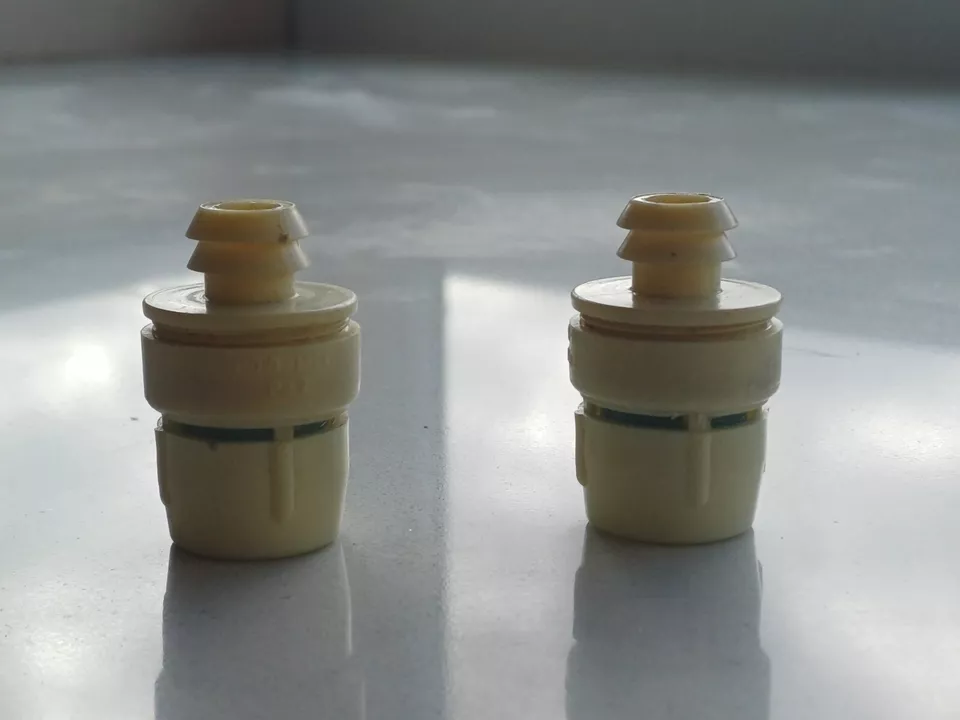
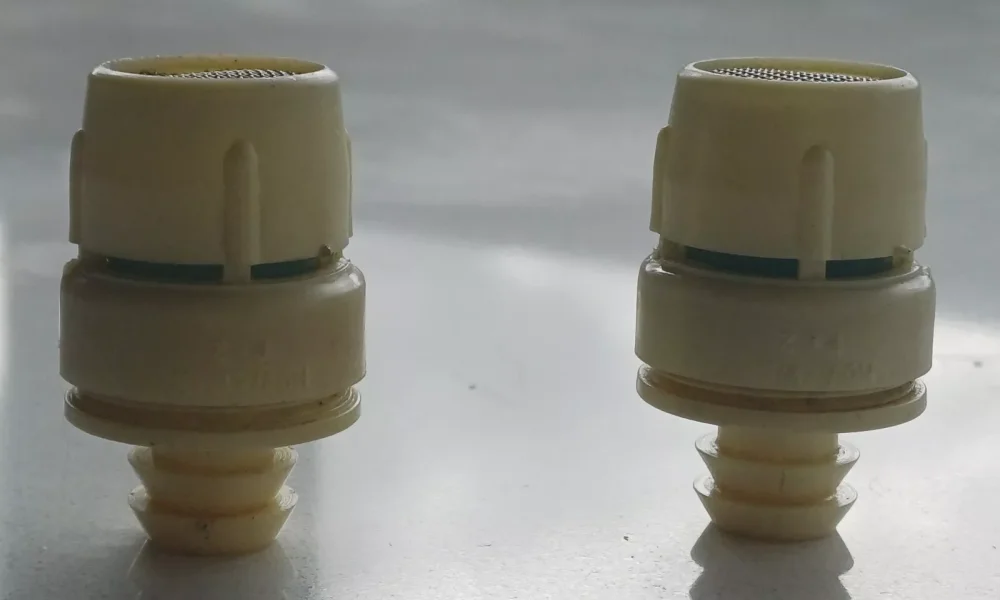
Stormtrooper Helmet Mic Tip Hovi Mix Aerators - Ebay Link here £500.00 1 bid Ends in 6d 21hSaturday, 04:20
.webp.c696cb4131103a2604b2e0221d4da33e.webp)
.webp.4c90dea230327980185987b5b6f34be0.webp)
.thumb.webp.6b9469a74b552f71d410928d09b4e540.webp)
.thumb.webp.9a18c8607a22c1aa7e1bf51b090e9046.webp)
.webp.8cbf91fceaef17bae551b48e978e7b31.webp)
-
Feedback on RS test fit please
gmrhodes13 replied to Thiboterham's topic in TK Pre-Approval Questions & Discussion
Here's one with multiple V tabs, albeit you normally just need them on the ends -
TK-13239 Requesting ANH Stunt Centurion Status(AM)(533)
gmrhodes13 replied to Sawanator's topic in Request Centurion Status
Before the DO's get here you may want to look at the photo requirements, you are missing a few Armor Details 9. ___ Thigh ammo pack connections (interior and exterior, left and right sides) 10. ___ Sniper knee plate (left and right sides) 11. ___ Wrist openings BLASTER 28. ___ Rear (showing D-ring) Accessories 21. ___ TD (Thermal Detonator) front and rear showing screw type Good luck with your application -
You may find you won't have to color your foam, can't really be seen from the outside, well depending where you add it Looks like your boots have an extra panel, I would check with your GML (garrison membership liaison) as he/she/they are the ones looking after your costume approval. Reference of boots Boots Boots are above ankle height and made of white leather or leather-like material. Small U-shaped elastic sections on both sides of the ankle. Flat sole with a short heel. No buckles or laces. Jodhpur/ Chelsea-type boots or an equivalent style is acceptable. Elvis or Mariachi boots are not allowed. OPTIONAL Level two certification (if applicable): There is no seam present on the front of the boot. Boots have a black sole
-
Chair cushion foam, yellow I think is universal
-
BlueBantha Requesting Pre Approval Review (MTK ANH Stunt)
gmrhodes13 replied to bluebantha's topic in Request TK Pre-Approval
Great news, congratulations and welcome to the ranks Request TK access here (don't forget to add link) You can also start a trooping log info here -
DrMatt's Imperial Armored Commando build - Completed
gmrhodes13 replied to DrMatt's topic in Imperial Commando Build Threads
Hello Matt looking forward to seeing your progress, one big thing for printed armor is the finish, make sure you remove the print lines before paint, good luck with the build 3D printed components must have no visible print lines and must be smooth for a realistic appearance. -
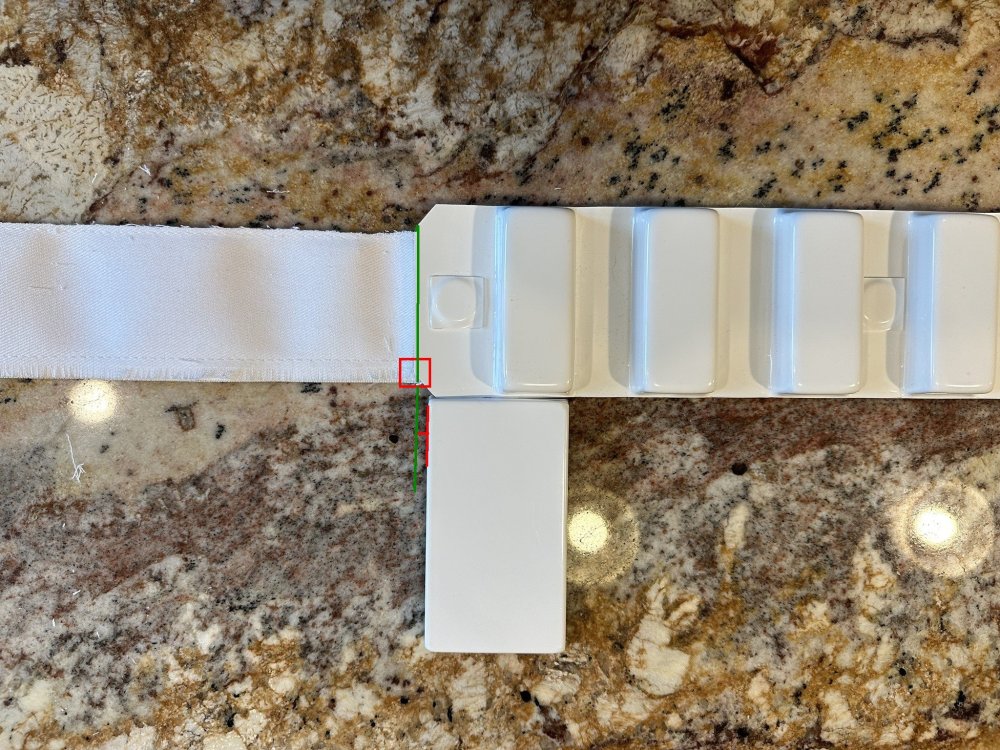
Nice work, drop box should align with the end of the plastic belt (not the cut angle) Also you could trim a few mm's off the end of the belt, corners should meet the belt, your bottom not quite OPTIONAL Level three certification (if applicable): Drop boxes are vertically aligned with the end of the ammo belt with minimal gap between belt and box. The corners of the plastic ammo belt shall be trimmed at a 45 degree angle that that meets the outer edge of the cloth belt. For Level 3, the corners of the plastic ammo belt shall be trimmed at a 45 degree angle that meets the outer edge of the cloth belt. For Level 3, Drop boxes are vertically aligned with the end of the ammo belt with minimal gap between belt and box.
-
Hello and welcome back, some build threads you may find useful https://www.whitearmor.net/forum/topic/38416-crickets-rs-stunt-build-for-the-vertically-challenged/ https://www.whitearmor.net/forum/topic/38842-fragarocks-rs-stunt-build-not-to-scale/ https://www.whitearmor.net/forum/topic/42868-sha-shas-wtf-anh-stunt-build-complete/ You may very well need to add some side shims, quite common and lots of builds to follow
-
They are fine (correct way around)
-
L2 Thigh ammo belt is attached to thigh with a solid head rivet, painted white, in the upper corner and fastened to the lower thigh ridge. Not solid head
-
I doubt it as it was painted separate Screen used helmet
-
Position looks ok but your rivet is not correct OPTIONAL Level two certification (if applicable): Thigh ammo belt is attached to thigh with a solid head rivet, painted white, in the upper corner and fastened to the lower thigh ridge. But you could check with your GML, he/she/they may allow for basic approval
-
Some great threads for those of a thinner shorter stature https://www.whitearmor.net/forum/topic/38416-crickets-rs-stunt-build-for-the-vertically-challenged/ https://www.whitearmor.net/forum/topic/38842-fragarocks-rs-stunt-build-not-to-scale/ https://www.whitearmor.net/forum/topic/42868-sha-shas-wtf-anh-stunt-build-complete/ I'm 6' but very skinny so I tried to keep the kit at a regular size (about the same seen on screen) but added foam in a lot of areas, I have a block of foam in the fronts and sides of the thighs, forearms and biceps, as well as quite a big piece of foam behind the abdomen, this was being squashed in on the sides when the belt was tightened, adding the foam stopped the belt from pulling too much. Thighs do look a little wide so you may want to trim those down a little, really depends on how they have glued it, hopefully E6000 which would make it easier to come apart with a little pressure. A nice How To for armor fitment
-
Always an impressive event to watch, hope it's another great day
-
WTF First Time build. Need some feed back, thanks in advanced !
gmrhodes13 replied to Woody's topic in ANH Build Threads
Dave M (hand painted) decals are what is normally used for L3 centurion (or hand painted) Masking template https://trooperbay.com/product/stormtrooper-tube-stripe-masking-templates-star-trooper-wars-armor-cosplay-costuming-sci-fi-501st/ You can see the stripes are slightly different, emulating "hand painted" Full decal kit https://trooperbay.com/product/dave-m-helmet-hand-painted-look-decals-anh-stormtrooper-star-trooper-wars-cosplay/ OPTIONAL Level three certification (if applicable): Tears/traps shall be hand painted or use decals that emulate hand painted (with correct ANH TK details). You can also make your own tube stripe templates, I used painters masking tape, use white first to fill any gaps in the tape, then go over with the blue.
.webp.d9968450b23fc9344691f3753fe34913.webp)
.webp.3fb1542443e04c75b32cd1b955fde3d3.webp)