gmrhodes13
-
Posts
31,219 -
Joined
-
Last visited
-
Days Won
1,070
Content Type
Profiles
Forums
Gallery
Articles
Everything posted by gmrhodes13
-
I'm not home at the moment, I just went off screen reference and guesstimated
-
I agree, I had a heck of a time with my first helmet, ears where the worst
-
Nice positioning
-
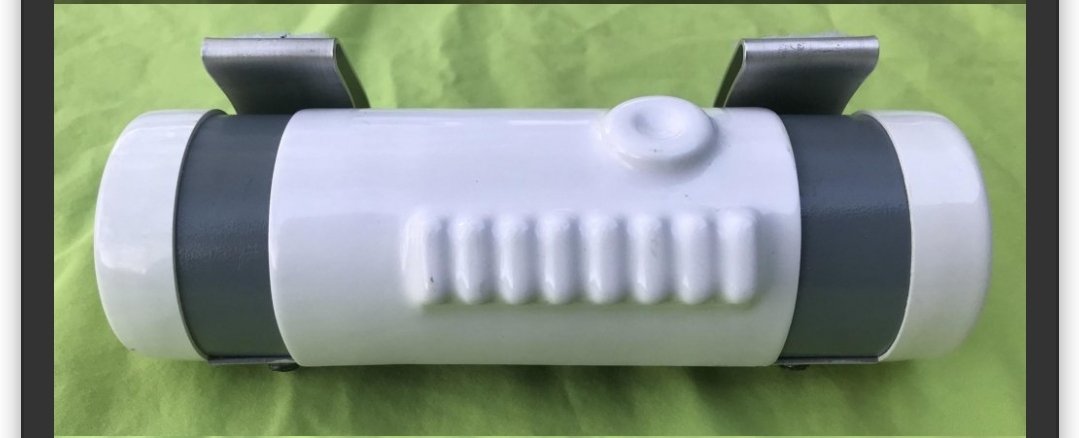
Just going through some files and noticed I had this video of the Sithtrooper armor flexibility, fpr anyone interested in materials used these days 72215482_961535254182683_849740901348540416_n.mp4
-
FYI you can request higher "Stormtrooper" access here if you are an approved Stormtrooper
-
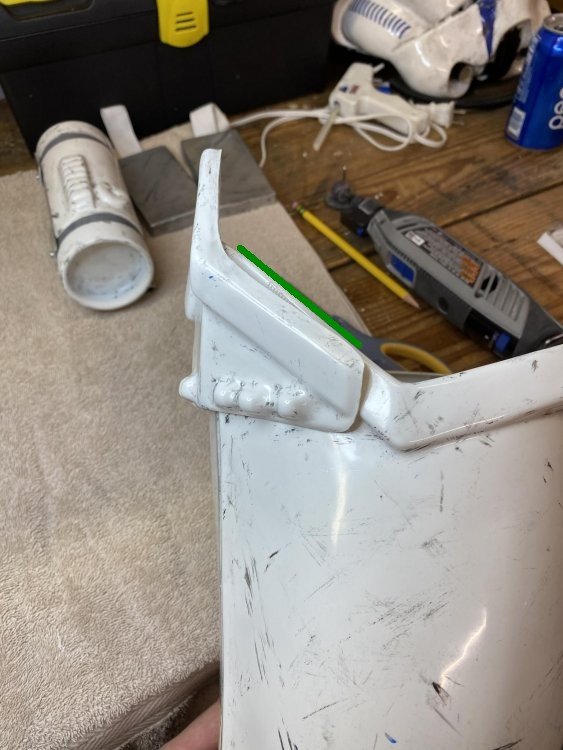
I used a piece of would and pulled a piece of ABS heated over it, ended up with a nice shape very close the the original shape on the ab, then used a dremel with a drum sander to get the same shape underneath as the ab, a little fine tuning with sandpaper, also added a little ABS paste and sanded, took a while but I was happy with the end result
-
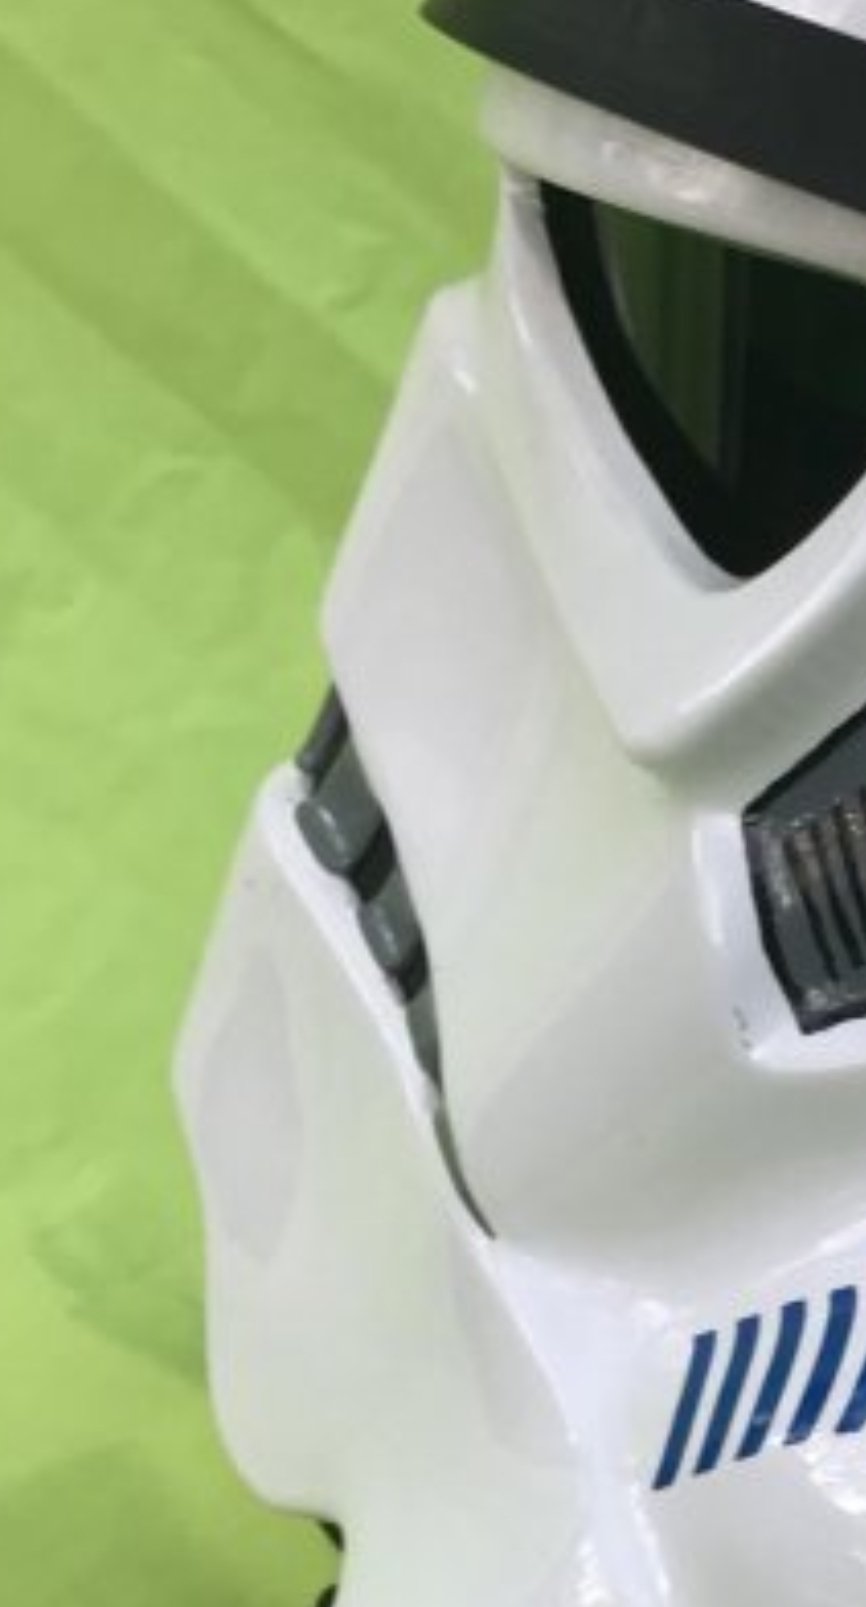
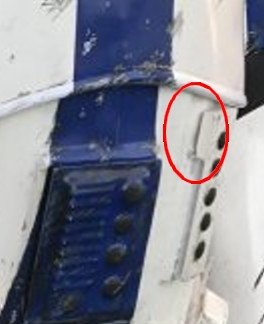
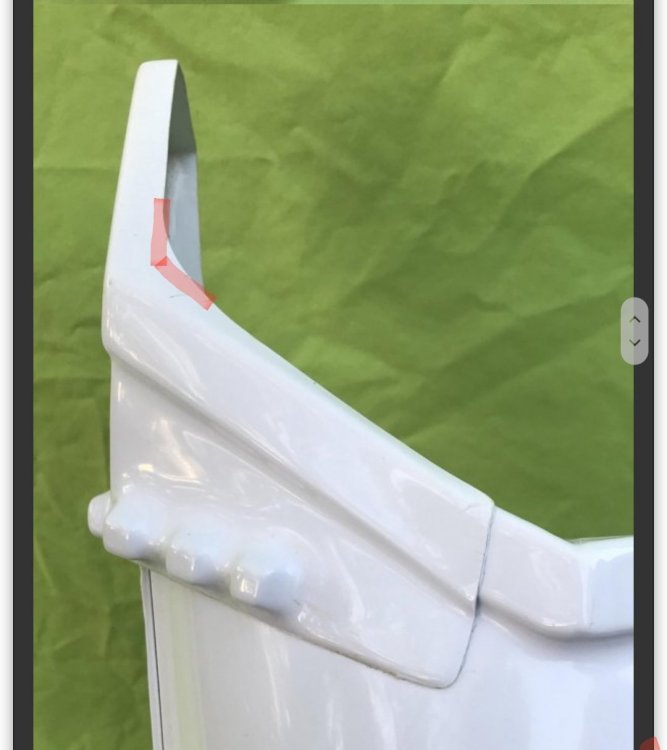
Sorry yes, forgot to reference that, you can see it's that the box section stands out a bit from the side view, but it's not really noticeable from the front so you may be ok
.jpg.3ca3f900f4d3e5ee98363496f9bf6eb3.jpg)
-
Not at all mate, I was on phone last night so had limited editing facilities, I'm normally on computer and do add references when I can. Good luck with the wrist surgery, I'm still getting over two hand surgeries myself and theirs noting worse than using the use of your hands when you want to build
-
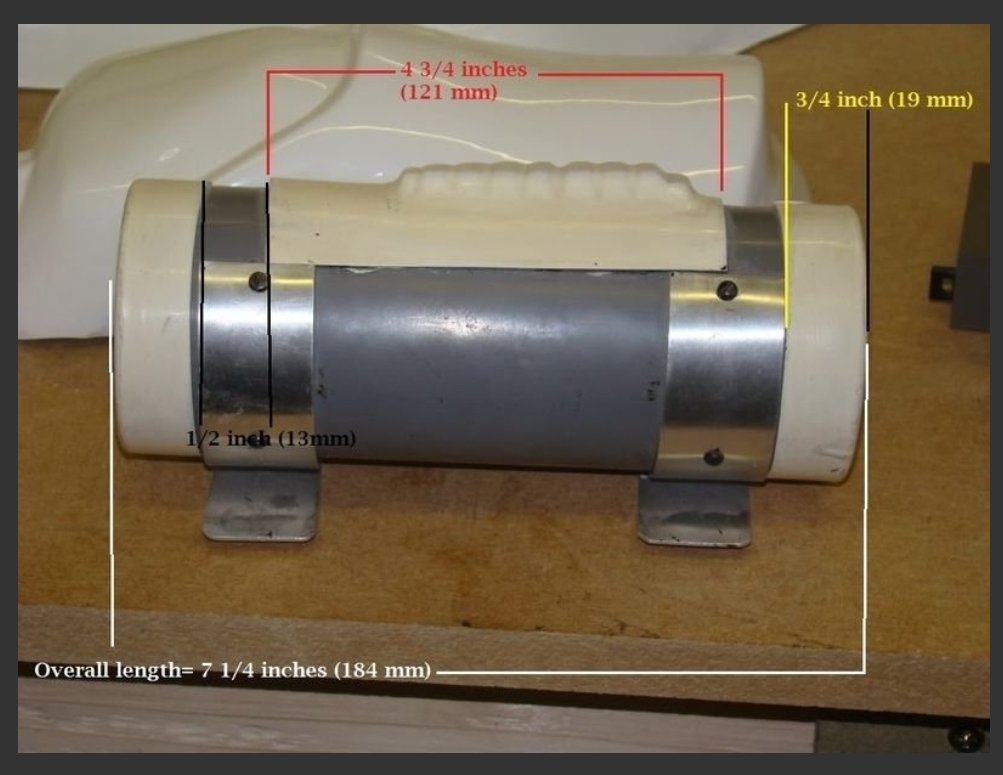
I found it easier and less costly to find a piece of pipe slightly larger than the TD tube, cut to size, remove old TD panel then glue new panel on. Here it is in my TFU thread with the TD images
-
Looks better, ideally you want to follow the angle of the shin behind but I think that is as close as you are going to get now the front is aligned better. Also note the feedback I have given are suggestions, it is ultimately the DO's (deployment officer) who make the final decisions
-
 They are only suggestions, DO's have the final say
 -
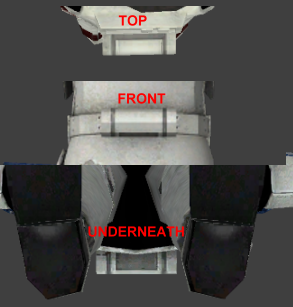
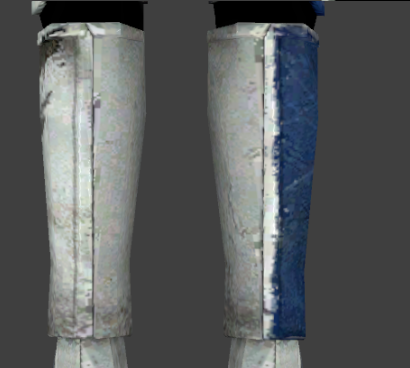
Also you mention Centurion L3, if you are aiming for that level you will need a different TD Either game style or ROTJ The thermal detonator control panel has correct ROTJ details, or the "game style" version. The ANH/ESB style is not allowed.
-
RS do a nice pre built helmet BUT one thing to be wary about is the color when mixing armor and helmets from different makers, RS is quite cream compared to ATA. There are some great build threads and info out there, take a look and you may see it's not so daunting
-
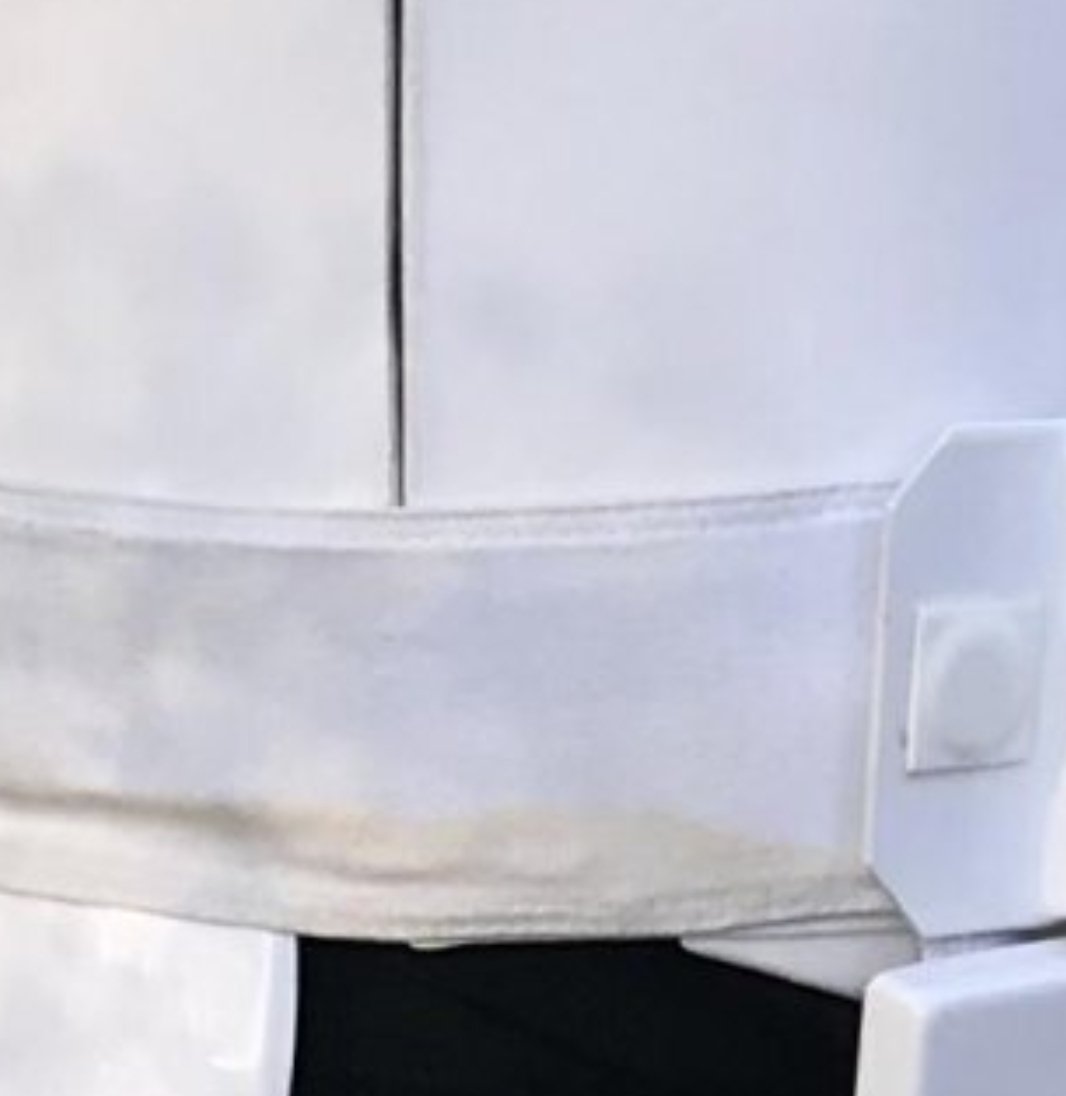
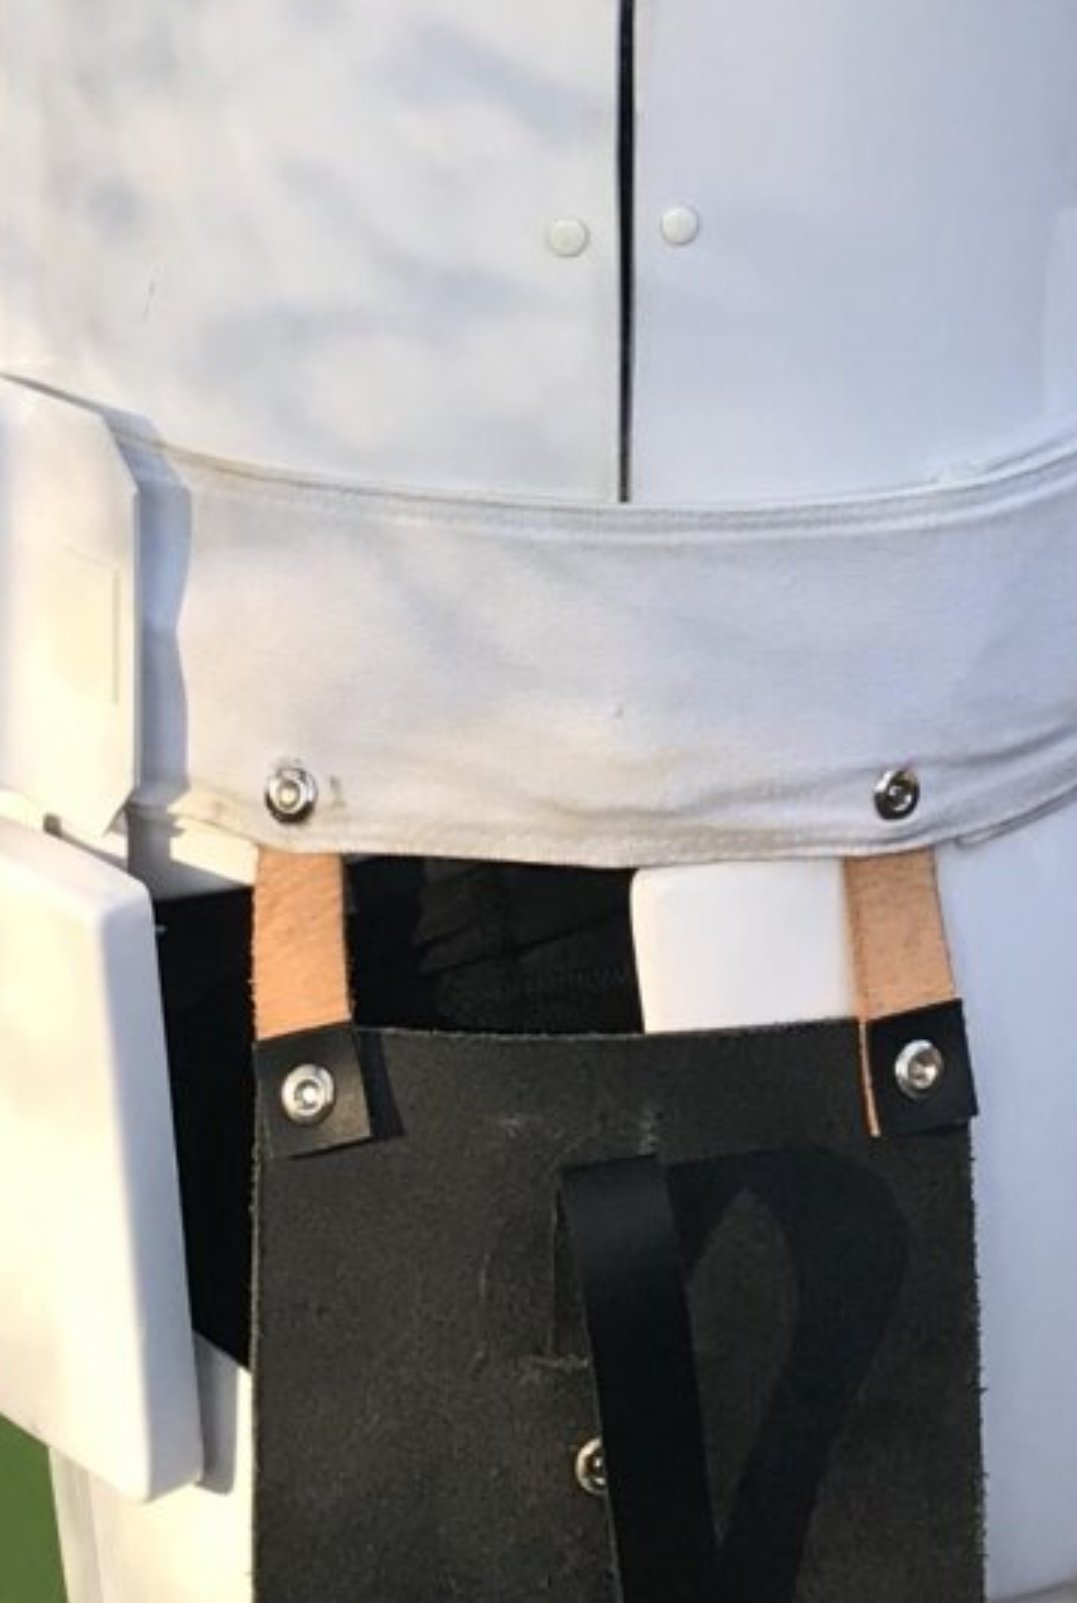
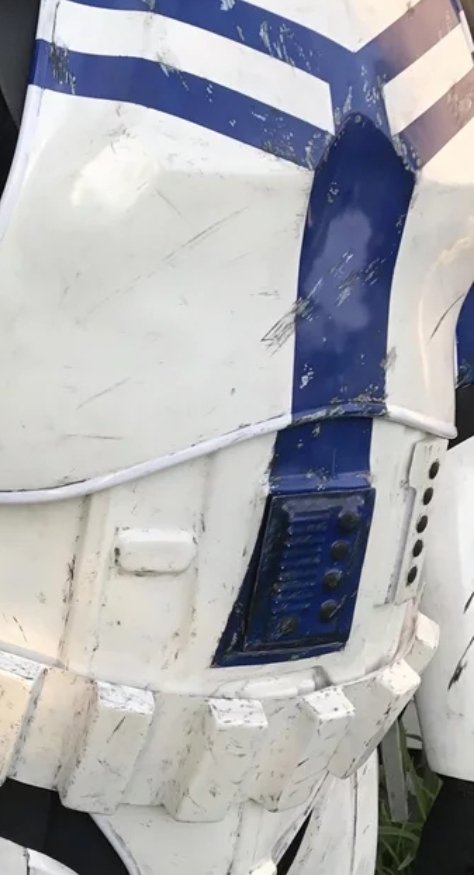
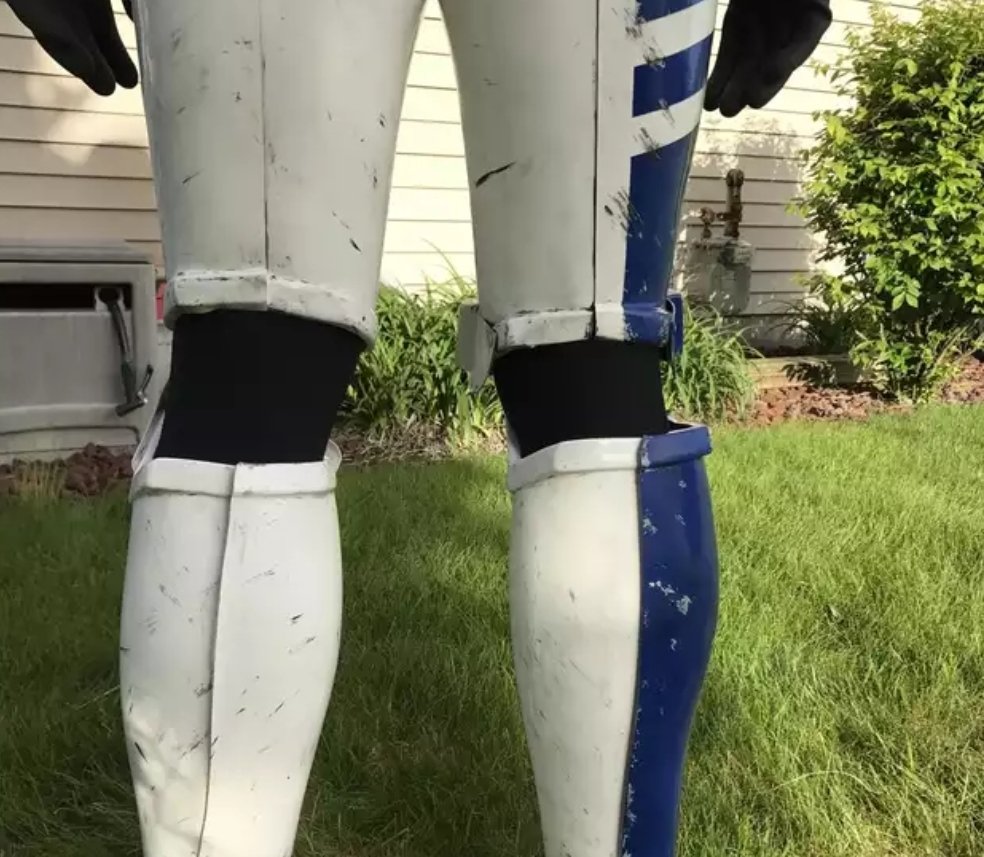
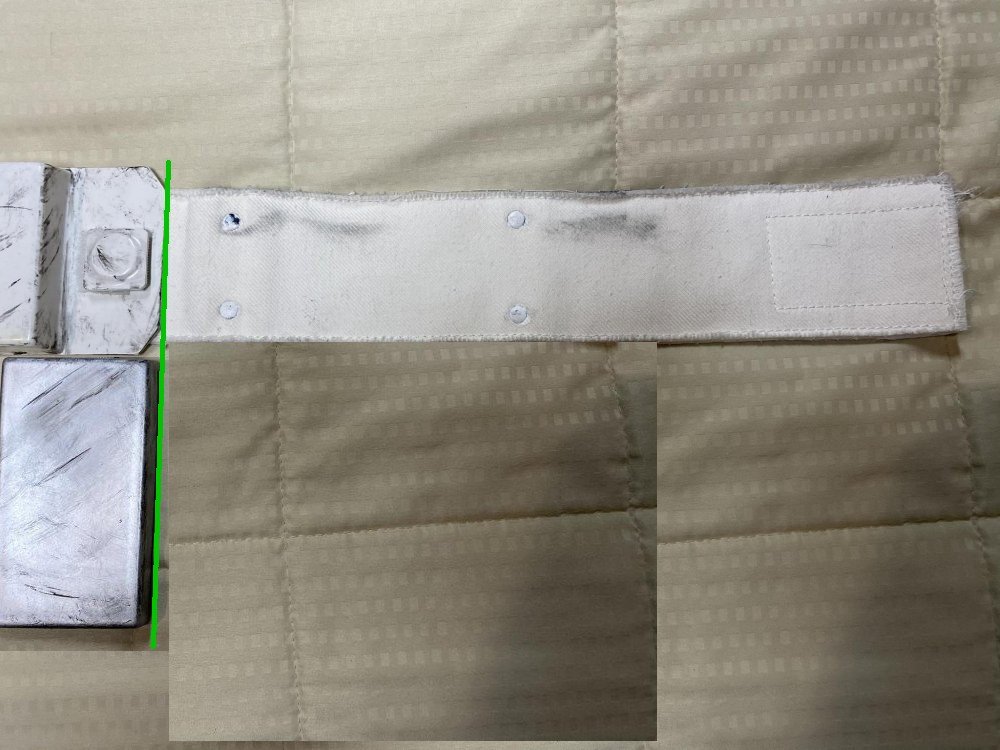
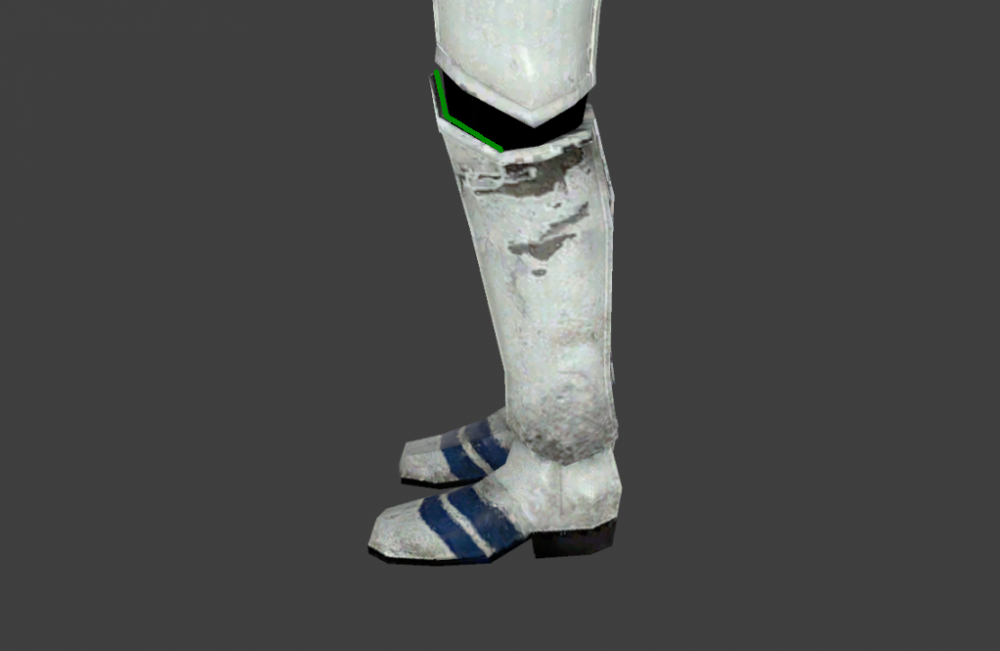
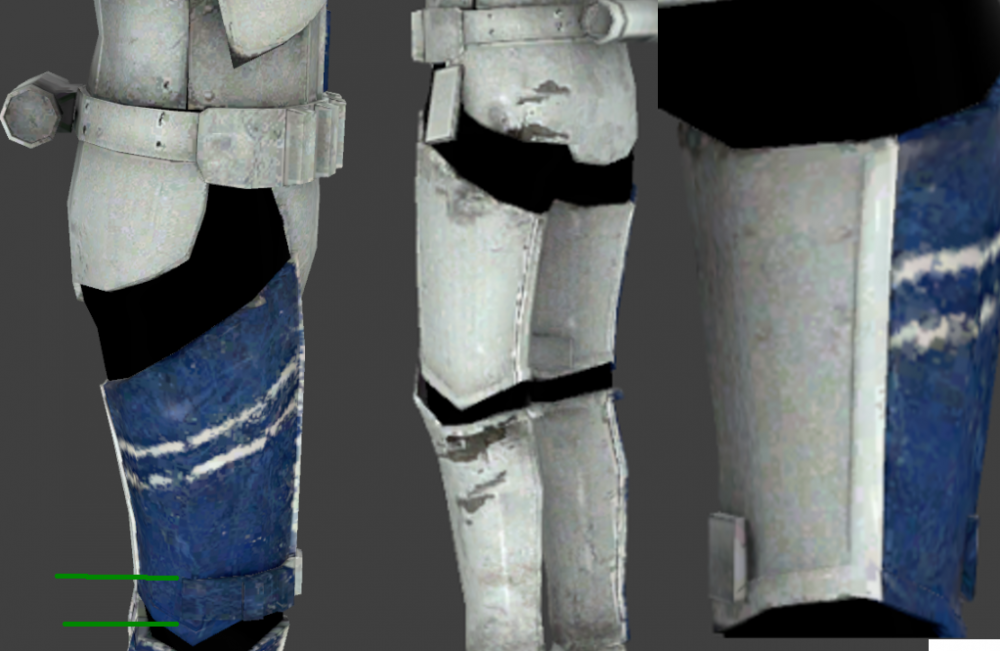
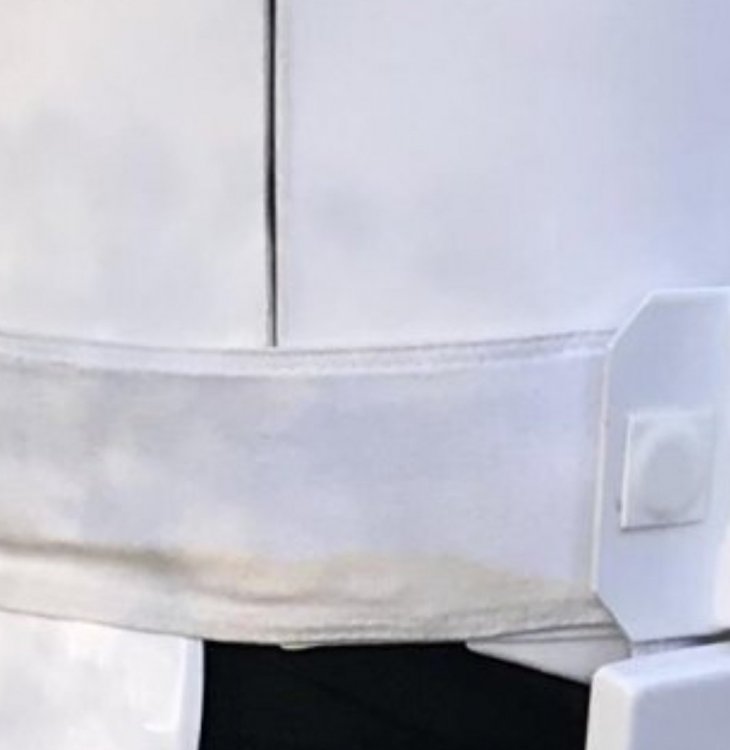
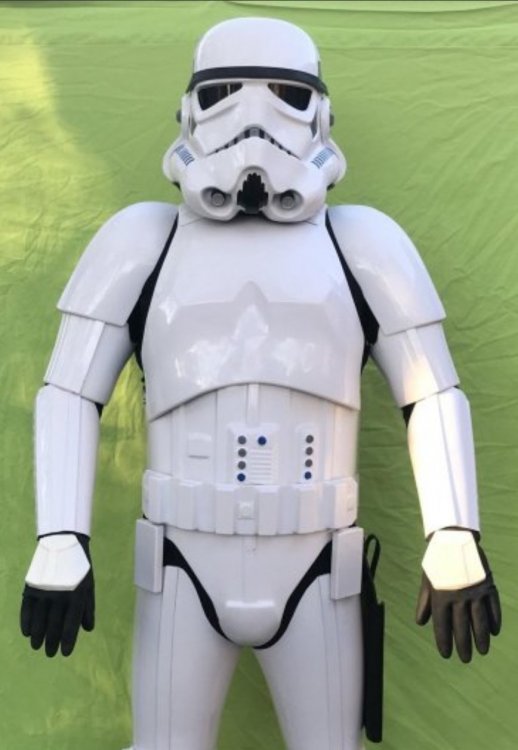
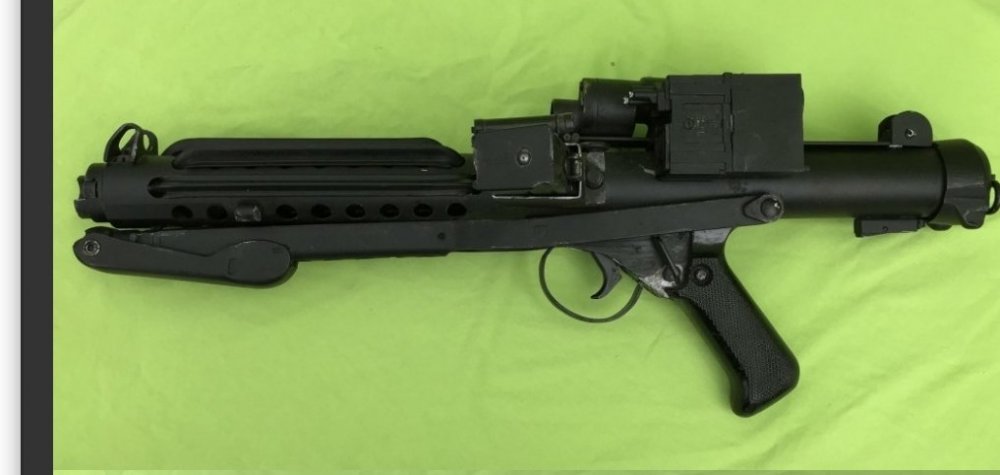
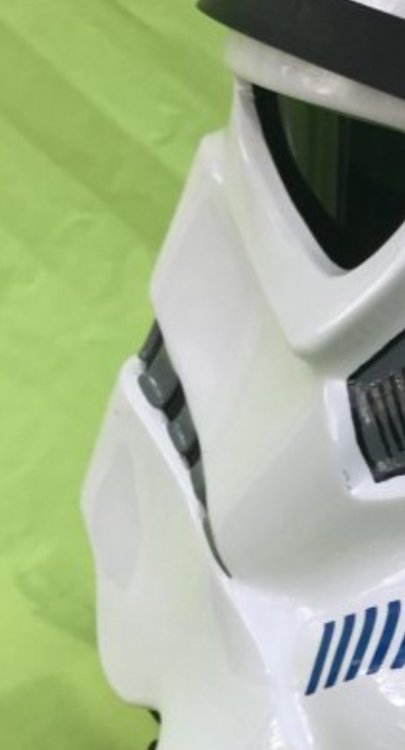
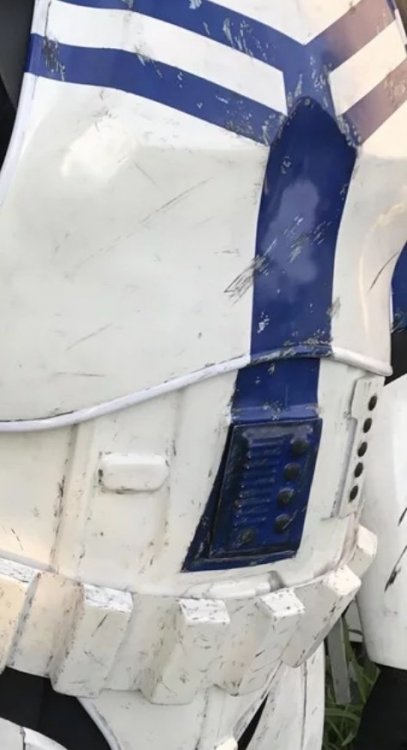
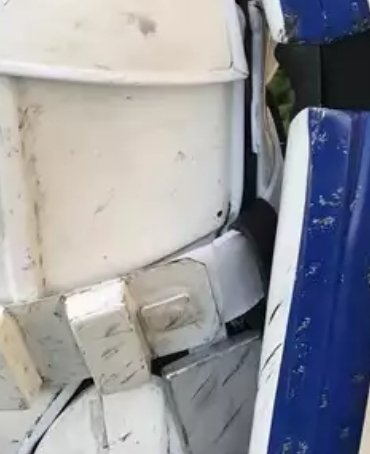
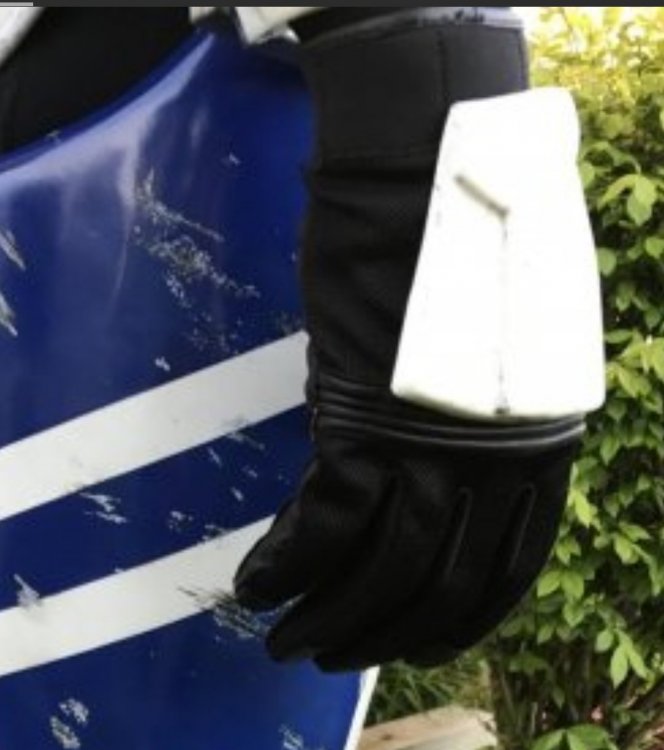
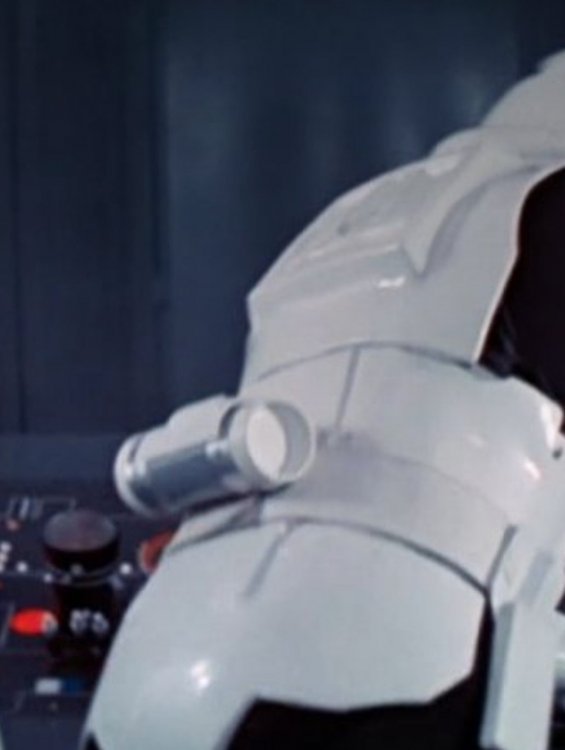
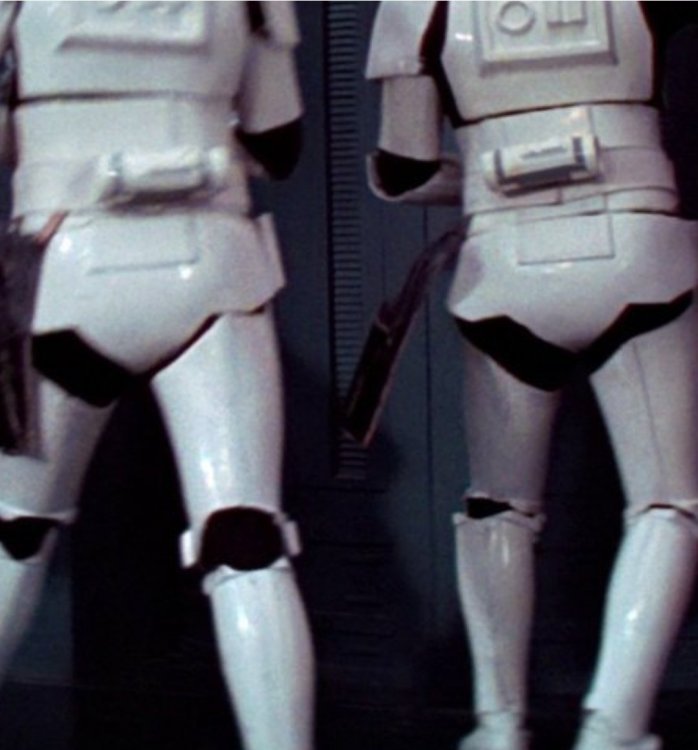
Correct gloves are pictured above with silicon hand guards. The pics taken outside were a test fitting with other gloves. I’ll add these here to show. Correct gloves should be worn in your approval photos Repositioned drop boxes moved the buttons further towards edge. Should align with the end of the plastic belt The drop box elastic is outside the plastic belt shown here Square buttons should be closer to the end of the belt square buttons positioned close to the end of the belt For the shins it does not state the closer needs to face inside, except if it’s AM armor then it reads “ the AM greaves (shins) shall be on the proper legs, with with a new cover strip. The cover strip edge shall be facing the inside of the leg. Note: There is a manufacturer defect with the AM greaves (shins) that may cause you to wear them improperly. Please see the tutorial titled : “AM armor shins: the proper way to assemble and wear”. on the whitearmor.net.” I checked and rechecked the wording, if you require the seams to face inside then it should be clearly written that ALL shin seams face inward, over lap seam, and cover strip seam. I understand it looks better and I am remaking my left shin to correct that as we speak but again it’s not written in the CRL that way. Not everything is worded in the CRL, there is still some research to be done when building This document is not intended to be a detailed how-to on costume construction; rather a visual guide to be used for 501st costume approval. Details on construction may be found on the respective costume detachment web forum. Closes outside over inside Detonator screws need to be black and should be closer to the end of the brackets You could trim the inner curve of the sniper plate, you also have a large gap under the middle Please understand I am in no way trying to come off like a jerk I want to fully understand what I need to fix but I’m the type of person that understands it better if I have photos to reference along with the written description. Some of the CRL the way it’s written is confusing. And the TKC is not the same as a TK so I had to do some digging to make sure I built it correctly. Mostly I followed the CRL pictures at least what I could see. Also I had a question on the Centurion level. On the ammo belt that goes on the right thigh it says the ammo belt is on the top of the lower ridge has square corners and glued in place no rivets. Do you have any reference photos that I could see? I want to make sure I understand what is being asked. Also the rivet positions on the kidney plate and ab plate. I’m a little confused as what it should look like, it’s asking for a total of 4 rivets 2 on each side. Is that on both the left and right side or just the right? And what are the positions. I know I sound ignorant asking these questions but like I said it makes more sense for me to see what’s being asked rather than just reading g about it. There is a whole gallery section for the TKC full of references you can find here https://www.whitearmor.net/forum/gallery/category/15-tk-commander-reference/ Thigh ammo strip for L3 Also need side rivet photo
.jpg.7d76975b7323bfa18ee16f1ca21af140.jpg)
.jpg.2b6dae21fbc5fedca04f042d6f304dc2.jpg)
.jpg.de00436d9200c69b8a968abfdc4b699d.jpg)
.png.82642eb42aa69d1d2b9dee3efbf669c4.png)
.jpg.ed9d43e047c027adc6cb69c036d4189b.jpg)
-
Definitely looks quite dark, but if it's the same grey as the teeth and traps you should be ok. Nice work
-
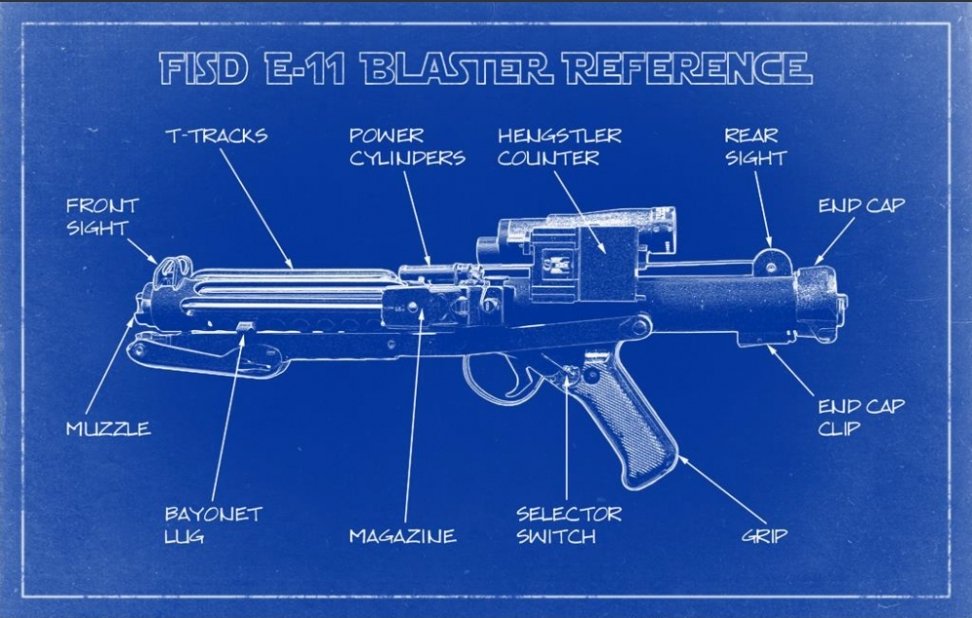
Imperial Arms 3D E-11 (version 3) kit
gmrhodes13 replied to OddViking327's topic in ANH BlasTech E11
Nice work -
That's a little annoying, normally I'd say contact the supplier but Anovos is not known for the best of communications. You may find someone that has converted to a Sandtrooper as they don't use 4 button ab plates. Maybe post in the sales thread a Wanted To Buy, or even on MEPD
-
Nice work trooper a couple of things before the DO's get here: You could remove the curved area from you sniper plate Your TD gap between the end caps and panel are quite large Belt is quite wrinkled on the bottoms also appears stained You may want to adjust your biceps up a little you have no gap at the elbows and the pieces are overlapping You may have a little paint on the ower gum Frown is painted gray and does not leave the teeth area The counter on your blaster appears a little far back, normally some scope can be seen on the rear Could you also post the following images: Close of of your ab/kidney rivets Both side outer and inside of the thigh ammo strip connectors/rivets Good luck with approval


-
Nove work trooper, a few suggestions before the DO's get here. I did notice your drop boxes are not aligned with the end of the plastic belt. The drop boxes are either grey or white and dangle from the sides of the plastic front belt (ammo belt) via white straps and are aligned with the end of the ammo belt Also the elastic straps of your drop box is sticking outside the plastic belt section. Also square buttons are positioned close to the end of the belt Area behind your smaller ab plate at the top stands out a lot Shin closures should the outside over inside so the opening is not seen from the sides, your left is the wrong way around Gloves are incorrect Gloves shall be rubber or rubber like chemical gloves in black A few other images will no doubt be requested: Both sides of the thighs ammo strip Close up front and both sides sniper plate Both sides of blaster and D ring Both sides of your ab/kidney Close up of belt Close of the detonator, front and clips Good luck with approval

-
Both ways are acceptable and screen accurate
-
Hello and welcome aboard trooper
-
Looks like you are good to go, purchase away
-
Dan has an nice documented RS build which may help There is a lot of tweaking with helmet builds, move one spot and it affects another spot, you will find most helmets will have a gap until pieces are pulled together, using magnets can help aligning things up
-
Hello and welcome aboard, looking forward to seeing your build thread, remember measure twice and cut once, you can always ask questions, many are ready in the wings to help. Some links you may find useful And the galleries https://www.whitearmor.net/forum/gallery/category/24-anh-tk-reference/
-
A good idea, looking forward to seeing the progress.