gmrhodes13
-
Posts
31,219 -
Joined
-
Last visited
-
Days Won
1,070
Content Type
Profiles
Forums
Gallery
Articles
Everything posted by gmrhodes13
-
I have some foam between the chest and ab and TD to stop paint being rubbed off, you could reduce that foam a little, you don't want too much of a gap. Continuing along nicely
-
Looks like that is the image from one of the cons, it has the blaster arm strap to the side. I wouldn't take too much info from display costumes as they aren't always dressed correctly, it could very well be a belt from another costume mix matched to this one, hence the V section behind it. As we have already seen from other images there are some differences which should be allowable but this particular one I believe is not correct and should not be replicated.
-
Looks like you are off to a good start, looking forward to seeing the progress
-
Just looking through a few of your images and there are a few areas which will need some more sanding, perhaps filling too. With Phasma the base needs to be as flat as you can get it as every blemish will show in the final stage. When sanding filler you can wrap sandpaper around a small block of wood, helps to sand flat raised areas or you can purchase a rubbing block from an automotive store Once your armor is finished and you have sprayed a few coats of spray putty or primer/filler you can then give a light mist spray with black, this helps when wet sanding (or dry sanding) to show high and low areas, any areas with black remaining will need more filling. https://www.renownauto.com/blog/entry/what-is-a-guide-coat A couple of videos on guide coat and block sanding

-

Dead Post Links & Broken Photos, How You Can Help
gmrhodes13 replied to Sly11's topic in Forum Help & Support
ANH Build Threads Page 14 Complete gmrhodes13 Page 13 Complete gmrhodes13 Page 12 Complete gmrhodes13 Page 11 Complete gmrhodes13 Page 10 Complete gmrhodes13 -
Dead Post Links & Broken Photos, How You Can Help
gmrhodes13 replied to Sly11's topic in Forum Help & Support
Just for your info (and anyone else reading) we are not updating members build threads, we are asking that those are updated by the members themselves, we have already spent countless hours and over a year and a half going through the rest of the forum, which is still ongoing, tackling members build threads would take us the rest of our days so we are leaving those for the members themselves. -
Hello and welcome to the forum, good luck with the research.
-
Dead Post Links & Broken Photos, How You Can Help
gmrhodes13 replied to Sly11's topic in Forum Help & Support
ANH Build Threads Page 19 Complete gmrhodes13 Page 18 Complete gmrhodes13 Page 17 Complete gmrhodes13 Page 16 Complete gmrhodes13 Page 15 Complete gmrhodes13 -
Nice work on those teeth, your dentist would be proud
-
Some return edges will need to be there, like bottom of the chest and sides of the back/yoke. When in doubt check out the gallery sections
-
Trimming can be done in numerous ways, depending on your skill and what tools you have handy, some use score and snap, you run a sharp knife along a line a few times then with pressure hold down and snap the excess away. There are also scissors and dremels for those able to use power tools. You will pick up a lot of info looking through build threads, here are just a couple of different ways to trim.
-
Dead Post Links & Broken Photos, How You Can Help
gmrhodes13 replied to Sly11's topic in Forum Help & Support
ANH Build Threads Page 25 Complete gmrhodes13 Page 24 Complete gmrhodes13 Page 23 Complete gmrhodes13 Page 22 Complete gmrhodes13 Page 21 Complete gmrhodes13 Page 20 Complete gmrhodes13 https://www.whitearmor.net/forum/topic/40693-crookknights-anh-tk-spacetrooper-build-thread/ restored gmrhodes13 -
Nice work, just to add to the above comments, just on your side you can see the butt plate is away from your kidney, you could try tighter strapping or I came up with a V tab idea that works quite well. With a heat gun you bend strips of ABS plastic into the shape of a V, only glue one side and the other remains free to allow movement when you bend. Just helps stop the butt plate from pushing back from the back plate. Great work and good luck with approval
-
850 are making updates all the time to their armor range, looking forward to seeing the progress, good luck
-
Tat2trooper TX Anovos build thread
gmrhodes13 replied to tat2trooper's topic in Other 501st Costumes
For a RS set I fixed I ended up putting a piece of ABS behind the whole shoulder straps which gave a little more strength especially to the sides. -
Dead Post Links & Broken Photos, How You Can Help
gmrhodes13 replied to Sly11's topic in Forum Help & Support
ANH Build Threads Page 35 Complete gmrhodes13 Page 34 Complete gmrhodes13 Page 33 Complete gmrhodes13 Page 32 Complete gmrhodes13 Page 31 Complete gmrhodes13 Page 30 Complete gmrhodes13 Page 29 Complete gmrhodes13 Page 28 Complete gmrhodes13 Page 27 Complete gmrhodes13 Page 26 Complete gmrhodes13 -
Fish's ANOVOS Build Thread - Aspiring for L3
gmrhodes13 replied to fishgoh0nk's topic in ANH (Stunt and Hero)
Some other references of the mobility cuts Also you may want to bend those shoulder straps down a the back, you can add some elastic if you haven't already -
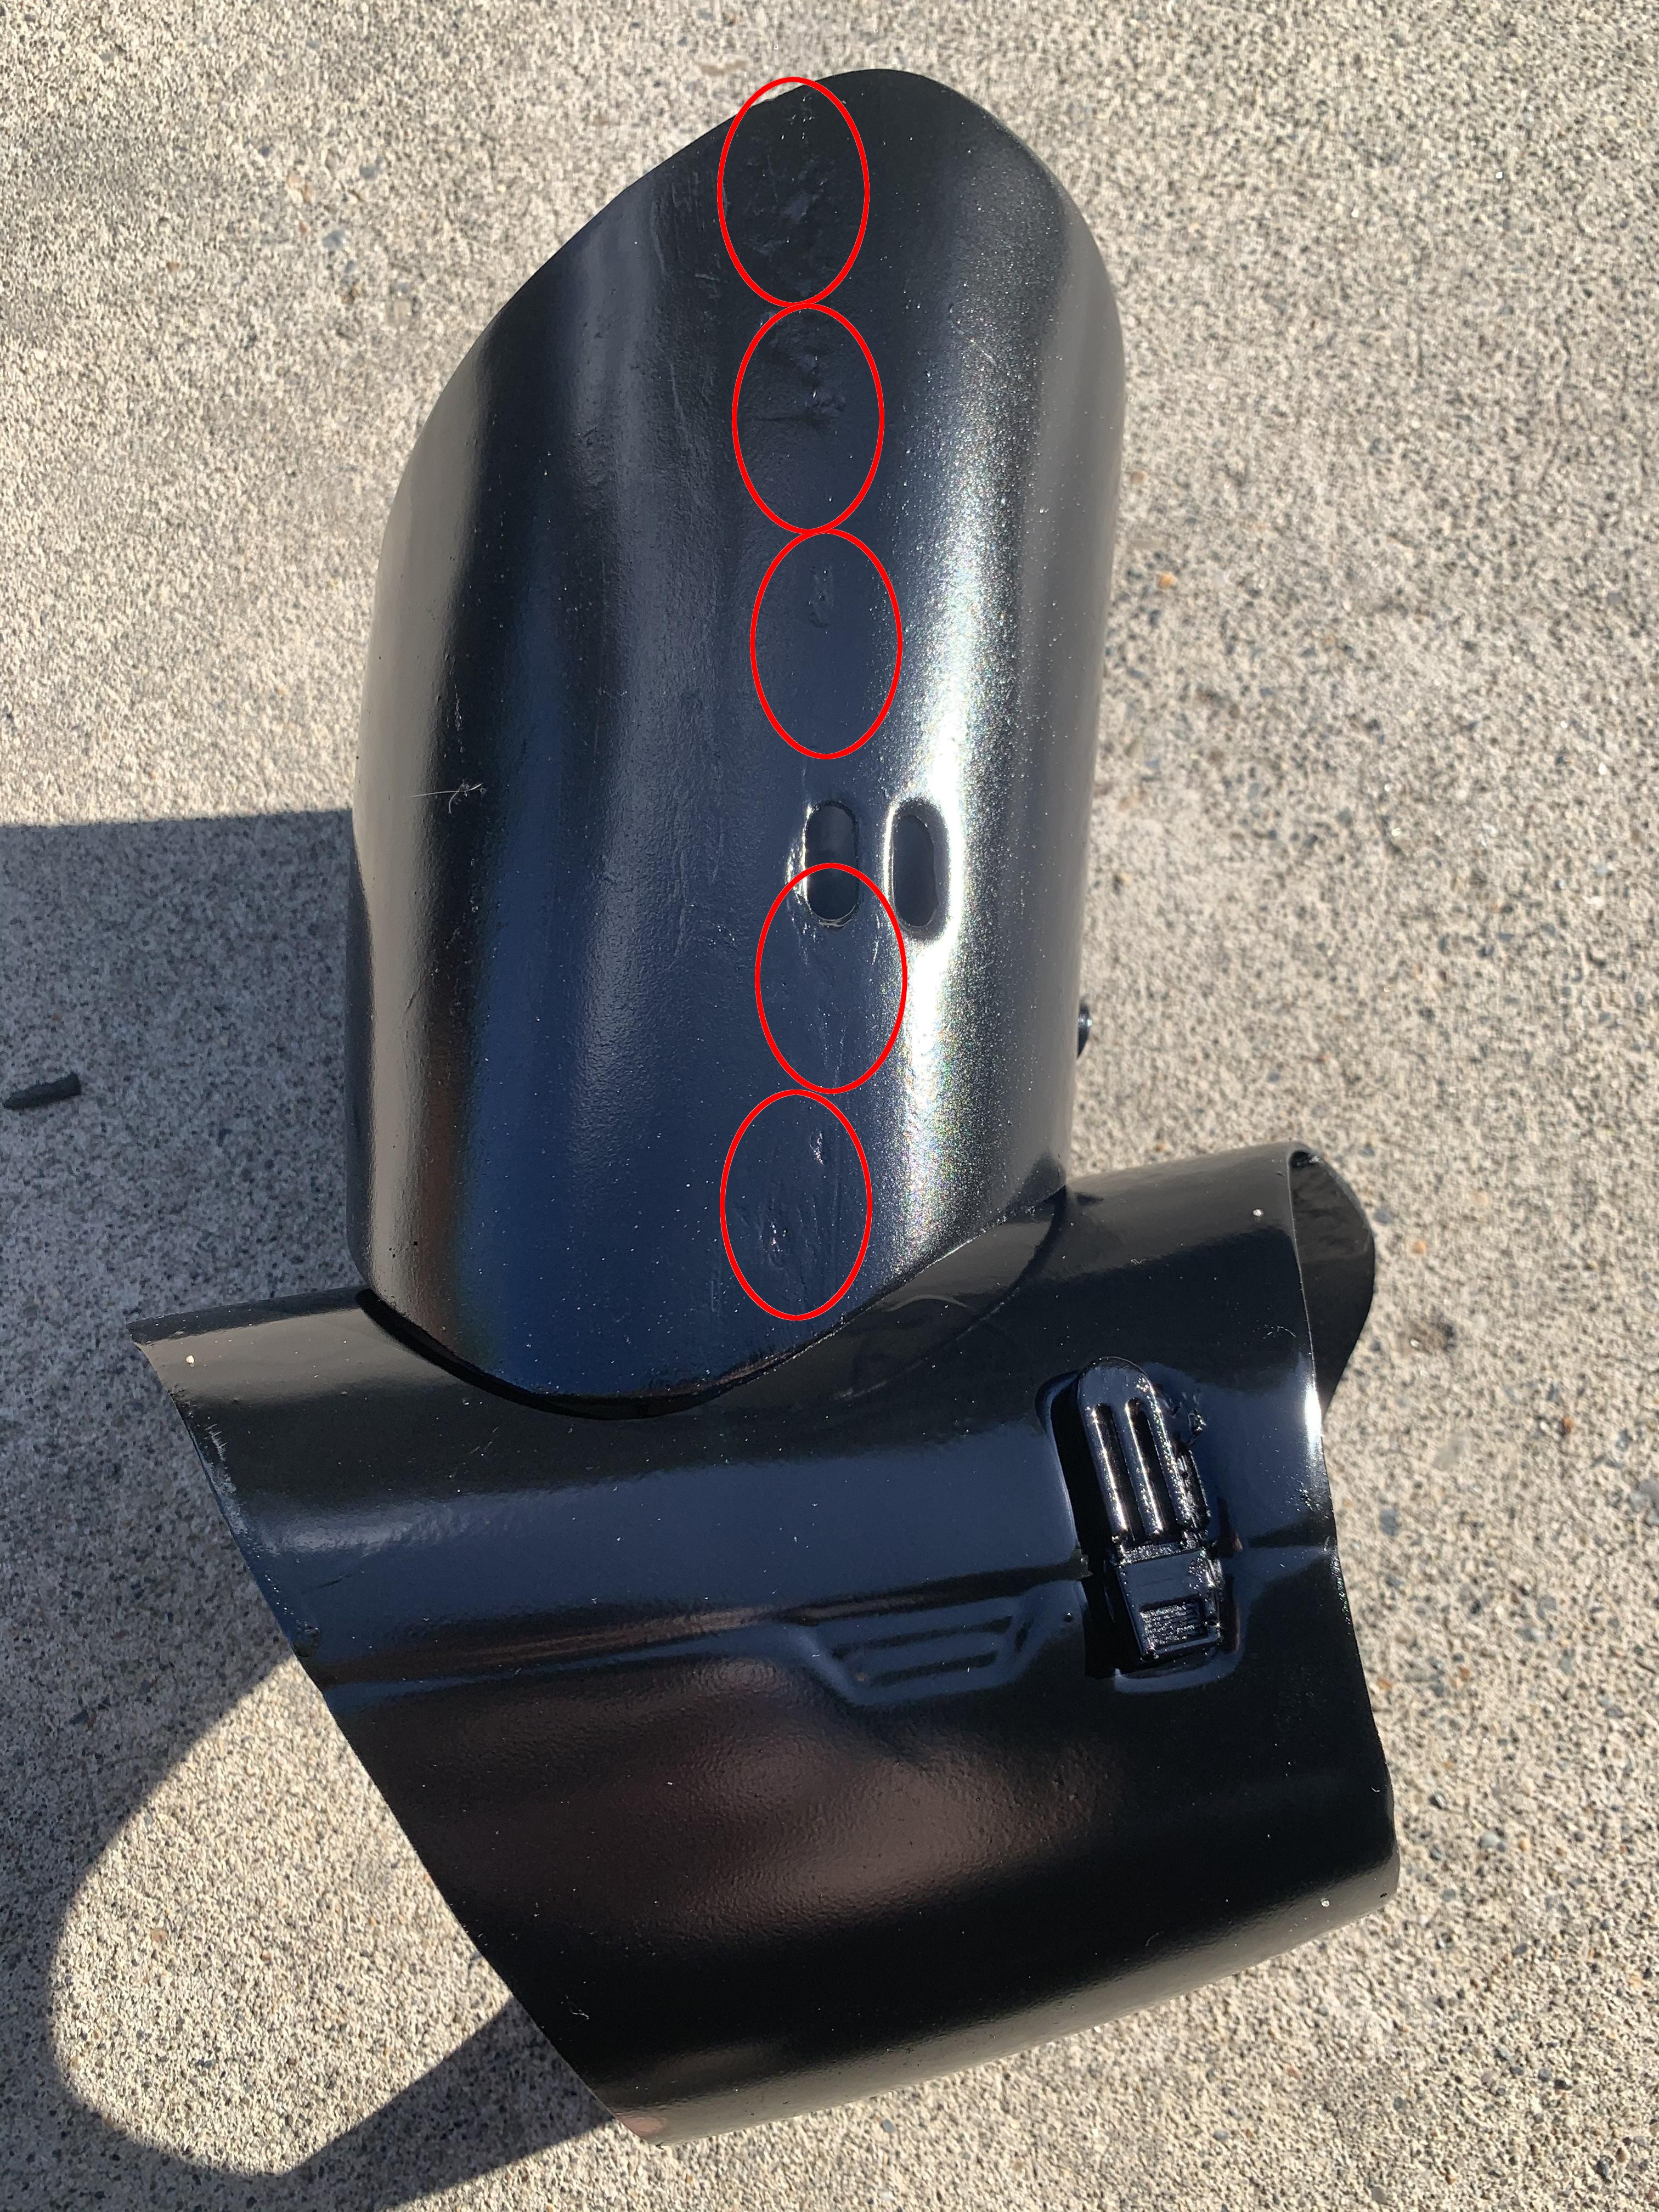
Tat2trooper TX Anovos build thread
gmrhodes13 replied to tat2trooper's topic in Other 501st Costumes
Ouch, we see this with a lot of the thinner armor makes. Looks like you have it well in hand -
Hello and welcome aboard, good luck with the research
-
Gretchen's ANOVOS ANH TK Build progress
gmrhodes13 replied to Stormtrooper therapist's topic in ANH Build Threads
Personally as a GML I would not be able to approve the belt, I would take a look at some of the how to belts threads and perhaps have a go at making a new one. As long as your velcro is not seen from the outside you will be fine. You may find you may be better swapping to elastic and clips as the originals had. Generally basic photos requested are: Front Back Side Side Action Helmet off But some GML's may ask for more detail images if there is something they would like to check. Using a neutral background wall, sheet or tarpaulin (not black or white, or brick or garden) helps your GWL when it's time to edit then upload your approved images for the roster You could also take advantage of our Pre Approval Area, a good way to get some feedback before applying through your GML. -
Always a good idea to look through some of the build threads. Although I have not build a R1 as yet I believe I would add most of my pieces by snaps and elastic, when you look through a lot of the screen references with running and bending you see the thighs and cod bend and hit the belt quite a lot, this could be part of the reason some of the behind material had been cut out as you see a lot in the mandalorian, reused armor modified, I can see some damage if everything is stiff and glued. Here are a couple of pics pulled from builds
-
The name "Remnant" according to LFL sources comes after ROTJ and the start of the New Republic so wouldn't cover R1 or Solo. Perhaps you could split some CRL's into 2 versions like other detachments do, example: Stormtrooper: Anthology - Rogue One / Solo / Mandalorian Version 1 - Clean Version 2 - Weathered Stormtrooper: Incinerator Mandalorian Stormtrooper: Artillery Mandalorian
-
I wouldn't go off the Hot Toys figure you want to try use screen sources as not all figures are 100% Here is another side view with no section on the rear, BUT it would help to have it there to attach the belt too. As we see with other TK's of this type some modifications have been made because of the wearers height Here you see some on the the side but none at the back On the front I would think you are better keeping it for attaching the cod and belt. Most of the front images of troopers the belts appear to stay pretty rigid which I would think is because of this section behind being attached too.
-
Dead Post Links & Broken Photos, How You Can Help
gmrhodes13 replied to Sly11's topic in Forum Help & Support
ANH Build Threads Page 40 Complete gmrhodes13 Page 39 Complete gmrhodes13 Page 38 Complete gmrhodes13 Page 37 Complete gmrhodes13 Page 36 Complete gmrhodes13 -
chiefbonan ANH Stunt TK Approval
gmrhodes13 replied to chiefbonan's topic in Request TK Pre-Approval
Nice work I don't think you would have too much to worry about for basic. For higher levels you could bend down your right rear shoulder strap so it sits on the back plate. Just watch the closures of your rear shins, right one not quite aligned. Also TD is sitting quite high on the belt. Could be image reflection but looks like your bottom ear screw is pulled in quite tight bending the ear? Middle side ab/kidney rivets not aligned Good luck with approval