


gmrhodes13
-
Posts
31,199 -
Joined
-
Last visited
-
Days Won
1,068
Content Type
Profiles
Forums
Gallery
Articles
Everything posted by gmrhodes13
-
You need to request 501st TK access here before applying for EIB. Instructions in first post of the thread Here is your legion membership profile link https://www.501st.com/members/displaymemberdetails.php?userID=45080 Once you have been upgraded you can post your EIB application here https://www.whitearmor.net/forum/forum/19-request-expert-infantry-status/ Instructions how to apply here
- 1 reply
-
- 1
-

-
Your images are way too small only 240 x 320 pixels so they can't be enlarged to show any details, you may need to upload larger.
-

Hello from Daytona Beach! Anyone Nearby?
gmrhodes13 replied to larryebaum's topic in New Member Introductions
Hello and welcome aboard. You can find local garrisons/squads here https://501st.com/maps/imagemap-northamerica.php Great thread full on information for the first time Stormtrooper builder Looking forward to seeing a build thread from you soon -
File Name: 501st Legion card holder boxes Designer: einbeins Last Update: 18/09/2025 File/Link: https://makerworld.com/en/models/1805394-501st-legion-card-holder-boxes?from=search#profileId-1925562 Description: Card holders for the ID cards of the 501st legion to store your own cards or the cards you receive on troops. In this file you'll get both versions. Please note: these are not official products of the 501st legion! I just made them for myself and maybe you want them, too :) Images:
-
- 3
-
-
File Name: Star Wars Power Converter Designer: BuildersMark Last Update: 19/09/2025 File/Link: https://makerworld.com/en/models/1807502-starwars-power-converter?from=search#profileId-1928049 Description: Luke - “but I wanted to go to Tosche Station to get some power converters.” Only have seen a picture of this and decided to create a model of it. Originally I modeled it in 2021, but with the advancements of AMS MMU, I wanted to do an updated model. Images:
-
ANH Stunt build (DDD) by TI/SL/IC 93339
gmrhodes13 replied to Retroactive's topic in ANH Build Threads
Looking good, in case it has not been mentioned you should sand with coarse sandpaper any areas glue will be applied for extra adhesion, gives something to grip to -
ANH build: this is where the fun begins
gmrhodes13 replied to LoudDragon's topic in ANH Build Threads
Looking forward to seeing some photos -
My access if fine now
-
File Name: Wind Up Mouse Droid Toy Designer: isaiahkol Last Update: 18/09/2025 File/Link: https://www.printables.com/model/1417612-star-wars-wind-up-mouse-droid-mse-6-toy Description: The mouse droid is an iconic Star Wars droid seen zipping around the floor of every imperial spaceship. Print it yourself, wind it up, and it will do that in your house. Kids would love it, cats I'm sure would freak out. Some easy assembly required, just print everything and then hot glue together as shown in images. Be careful not to glue any of the moving parts, or else they will shockingly not move. Some small rubber bands on the wheels help with traction. I printed with Jet Black Prusa PETG on my Core One. Images:
-
- 1
-

-
If you use the "direct link" option (link with file extension ie: .jpg, .png , .gif) and your images will show. Imgur how to here
-
Hello and welcome aboard, here's a thread full of useful information A great way to get advice and feedback is to start a build thread. https://www.whitearmor.net/forum/forum/80-anh-build-threads/ There is also our galley area full of references https://www.whitearmor.net/forum/gallery/category/24-anh-tk-reference/ Look forward to seeing some photos soon, good luck with the build
-
File Name: Stormchunker Kit Designer: The Kit Kiln Last Update: 23/09/2025 File/Link: https://makerworld.com/en/models/659269-stormchunker-kit-no-support-no-ams-no-glue?fbclid=IwY2xjawM2viNleHRuA2FlbQIxMABicmlkETFBZzVXazZXNUV0aTVHTGRSAR6D24cHXrFVAnxk_oVJXAo1gwrGVhR_nSERxjXFtJDiCxY9aUPEaKkTxSM1nA_aem_m_3xzLcmOd7v_DIvwb4x0Q#profileId-588491 Description: This chunky Stormtrooper kit is roughly 6.5 inches (17cm) tall once assembled. Shop the filament we used in this model on our Amazon Storefront As with all of our models, this prints with no supports, assembles with no glue, and doesn't require a multi-material 3D printer! Assembly instructions are included in the download with the files, and the print settings are listed in the photos above ^ Images:
- 1 reply
-
- 1
-
-
Just found a glitch this morning, if I click on "home" or "forums" it kicks me out and I've got to sign in again, each time I click on either, BUT if I click on a link or another sub forum I'm signed back in again, was a little weird. I can deal with it but just thought I'd mention it in case others are having the same issue.
-
You need to have TK access on the forum before applying for EIB, request here, instructions in first post of the thread Info on EIB application here and here
-
That is an incorrect link, this is the one you require https://www.501st.com/members/displaymember.php?userID=48930&costumeID=125
-
DohF4 Requesting Pre-Approval Review (RS Propmasters)
gmrhodes13 replied to DohF4's topic in Request TK Pre-Approval
Great to hear, welcome to the ranks trooper, you can request higher access here We also have a trooping award system you may be interested in, info here Hope to see you apply for EIB and Centurion in the future Look forward to seeing you out and about -
NEW In Memoriam Detachment Leader Merchandise Officer Hall of Fame FISD Meme's Around the Detachment Legion Census 2024-2025 Detachment Affiliation INFORMATION & AWARD PROGRAMS FISD Tri-Fold Brochure Common FISD Acronyms and TK Glossary Pre Approval Forum 3D Section Field Exercise Award Imperial Attaché Program Master Armorer Award Fire Teams EIB & Centurion: What do these terms mean? Need Help Ask the Deployment Officers Advance to 1500 Advanced Tactics Awards Newsletter Editor Staff List 2025 Follow FISD Terence Stamp, has died age 87, 17/08/2025. Stamp played Chancelor Valorum, the predecessor to Palpatine in 1999s The Phantom Menace. He leaves behind an extraordinary body of work, both as an actor and as a writer that will continue to touch and inspire people for years to come. Best known for his fierce portrayal of General Zod in Superman and his stirring role in The Adventures of Priscilla, Queen of the Desert Condolences to his family and friends "Buckets Off" Patrick Wright, IC-25296, passed away in hospice care on the morning of July 26th, 2025, after a long and hard-fought battle with cancer. Patrick was always happy when he trooped with his family as a group. He is survived by his wife, Wendy (DZ-25293), and his two sons, William and Alexander, both of whom were members of the Galactic Academy. Patrick was a proud U.S. Navy Veteran and worked in the financial industry. Our heartfelt condolences go out to his garrison, family and friends: buckets off, Troopers. "Buckets Off" Greetings troopers, I am now back from Batuu, which also marks the end of summer for most of us. Before we know it days will be short and nights cold so now is a great time to get you're armour out and check it over for any repairs after a hard season of service. Last month we launched a new version of the troop reward system so if you missed that make sure you check it out here: The flag @Daetrin left with the UKG has been making progress around the nation and worth checking out, I look forward to meeting it in person if I get a chance. We are still waiting on a few CRLs in at the queue with the Legion, for those of you waiting we thank you for your patience but if you are waiting on one and want an update, please do let us know and we can give you a more proper update. With Unquestioned Loyalty Chris Pearson TK-10991 "themaninthesuitcase" Detachment Leader Greetings and Salutations Troopers! Welcome to the "ber" months For those of us in the Northern Hemisphere, it's time to start seeing some cooler temps. I for one am looking forward to wearing my FISD hoodie again. On to the merch stuff! Old Business "FISD EIB Coins" I am down to the last 2 EI coins for this style. The next EI coin will more than likely be whatever design we do for our 20th Anniversary, so if you are eligible to order an EI coin, and you don't want to wait until 2026, or you prefer not to have an Anniversary coin, please look into it. In order to buy one, you have to have an approved EI costume and you can not have ever bought an EIB coin from any pervious runs. EIB coins are a once and done coin. If you have this one and would prefer one of the older versions, I may have an option for you so please dm me. EIB v11 coin run is still open This run is closed. If you haven't received yours, it is more than likely because you haven't paid for the shipping. Please DM me for more information. You can learn more about the run here Pin Run The interest thread for the pin run for Expert Infantry, Centurion and Attaché is still up. You can find more information here. Flag and Banner Run We are still working on the standard flag run, and hope to run it with the Member Designed "War Banner". Which leads me to the Member Design Contest. We are still asking for "War Banner" designs for this item. Members that are interested in submitting a design will post their work in The "FISD "War Banner" Design Contest" thread in the Detachment Merch section of the forum. This contest will run until the end of September, at which time the Command Staff will pick a winner. As with our other design contests, the winner will receive bragging rights, this MBO's gratitude, and flag of their design, courtesy of the FISD Command staff. Details of the contest can be found here. NEW BUSINESS New FISD Merch Items The Command Staff is currently working on a few new items including some designs for next year's 20th Anniversary of the Detachment. More info will be announced soon. As always, questions, comments, thoughts, suggestions, please feel free to reach out With Unquestioned Loyalty James Silvius TK-12953 "jsilvius" Merchandise & Branding Officer Stand and be counted! Please welcome TK-13239 to the Stormtrooper Hall of Fame, August 2025! @Sawanator Troop log can be found here. With Unquestioned Loyalty Jonatan Östling TK-23592 "Nairy" Attaché Ambassador You can find the full meme thread here Blast-A-Trooper Finally after many years of asking the Blast A Trooper files have been shared on the legion forum, sharing here for anyone who may have been looking for them https://drive.google.com/drive/folders/1_W3-wBM3Gsp5EN_juDwPSCVYhLcpv_MD Updated images added 05/09/25 https://drive.google.com/file/d/1gUQPWZGdcPmlHIGTgGu0dsV5KyJw28bn/view https://drive.google.com/file/d/1mJdqi4fBeAp5LHPXutWkQrC9vfBmx3MM/view *NOTE* unfortunately for those of you Down Under due to our PLI (public liability insurance) restrictions we are not able to run Blast A Trooper events as the insurer do not allow the firing of projectiles at our members (I know right, foam darts, ouch ) Thread here Request Edited Signature Banners/Profile pics/Fire Team Logos Troopers! I want to help out the community and the people that doesn't have the time or have the necessary tools or skills to create a cool Signature banner or have the background of your Action Photo removed, or even if you have a request for a certain Profile picture! I don't know how popular this will be, or what requirements I will need, but we will learn as we go and if it turns out to be popular and it gets too much for me - I'm sure that we can find a few more that are willing to help out! Thread here With Unquestioned Loyalty Jonatan Östling TK-23592 "Nairy" Attaché Ambassador Trading Card Archives For those with FISD detachment trading cards please consider sending two to Paul @Daetrin keeper of our detachment archives. Address and more info here With Unquestioned Loyalty Paul Hoeffer TK-8020 "Daetrin" Detachment Founder Keeper of Archives ALMOST THAT TIME OF YEAR AGAIN: CENSUS 1st October - 31st October 501st Legion 2024/2025 Census, recording troop attendance from 1st November 2024 to 31st October 2025 Hello fellow 501st members, it is almost census time again, access to the census is available from 1st October 12:01AM GMT and closes 31st October 11.59PM GMT. It is the responsibility of all 501st approved members to fill out the census each year which you can find here (to enter use your legion forum login and password) You must be registered on the main forums to participate in the census:here Here's what the charter says about activity definitions: Operations Protocol/Membership An Active Member is defined as a member in good standing who meets the following requirements: Meets all 501st Membership Requirements (i.e. ownership of an approved costume, is over 18 years of age, etc). Has an approved membership record in the 501st Legion Membership Database Maintains active contact with their CO or GML. Active contact and participation will be confirmed during the annual Legion Census held each year during the month of October. Maintains contact information/membership record in the 501st Legion database either through their CO or GML. Participates in at least one Garrison or Legion activity per year while wearing an approved 501st costume owned by said member as recorded in the Legion Census. One year is defined as the period from Legion Census to Legion Census. Examples of an activity include, but are not limited to conventions, charity events, or any activity designated as an official event by a coordinating administrative unit of the Legion. Members who serve in military branches are exempt from activity level requirements if their service renders them unable to meet these requirements. These Minimum Activity Level Requirements should be administered as justly and with as much common sense as possible. A member may retain active status, even if they do not meet all of the requirements listed above at the discretion of their unit Commanding Officer or Legion Command. Filling out the census only takes a few minutes and you also have the opportunity to update your contact information ie: address, email, phone and so on. Any questions you have in regards to the census please contact either your GCO (garrison commanding officer) or your GML (garrison membership liaison) Census form layout With the last forum update the viewable area of the census may not be full page, as such change your page magnification to 75% and you should be able to see the whole page. Note: make sure you tick the box "Is the above information correct?" please tick YES Census guide in PDF https://www.501st.com/members/501st-Census-FAQ.pdf How to log in legion forum: https://www.501st.com/forum/download/file.php?id=18773 Any problems with the logging in please contact the LWM team here: [email protected] What is detachment affiliation https://www.whitearmor.net/forum/topic/43940-what-is-detachment-affiliation-and-why-is-my-info-not-correct/ So stand up and be counted troopers, you have until 31st October OK so you look at your Legion profile and it shows that your detachment affiliation to FISD is pending, or otherwise incorrect. Why does this happen, and what is detachment affiliation anyway, and what will FISD do about it? The answer is that detachment affiliation is only ever used once a year, and for one purpose. The only time the Legion ever uses it for anything is to determine who can run for DL and who can vote in detachment elections. That's it. Otherwise it is pretty much ignored and not used for anything. The process of validating detachment membership is cumbersome and time consuming because people use different email information between their Legion and detachment logins, and that there is no way to bulk update the rosters. For a small detachment it is not a big deal to do this manually, but for a detachment the size of FISD with hundreds and soon thousands of 501st members, it's impossible. Fortunately we have technical folk both on FISD and in the Legion web team. Once a year they take a feed from FISD's database and do a bulk update on the Legion database. This occurs right before the election cycle starts and is done once per year. Pro tips: 1) Ensure the email address you use on the Legion & FISD boards are the exact same. 2) Ensure that your FISD profile has the correct TKID. 3) IMPORTANT! You MUST be in the right security group. It should be "501st Stormtrooper" in order for the automated system to pull you over. This thread is where you get your detachment access updated. 4) If after the bulk update is complete and your profile is still not updated, and you are 100% sure your info is in sync between the two boards, then ask for to the Legion web team. They should get feedback on why this isn't working. 5) If all else fails, ping the FISD staff. Which basically means that we'll simply tell the 501st web team to bulk approve everyone 6) If still you have no luck you can contact the legion web team directly via email: [email protected] To check detachment affiliation go to the 501st holocron here, login using your 501st forum username and password, click on YOUR PROFILE DATA, then look down the lower part of the page for YOUR UNIT AFFILIATION, then under DETACHMENT AFFILIATION. If you do not see FISD listed reach out to your GML (garrison membership liaison) as they can add it if you are an approved Stormtrooper. If FISD shows as PENDING it will usually become approved before legion elections begin each year as this is an automated process, if you find it has still not change before legion elections please contact our DL Chris @themaninthesuitcase he may be able to do a manual update. INFORMATION & AWARD PROGRAMS For a full list of FISD awards programs head here. *Now Available in Swedish* Want to spread the word about FISD?, you can with our FISD Tri-Fold Brochure. Originally these were done in a limited run by the member who created them, but nowadays, we have moved this to a print your own service making them accessible to all countries around the globe. Files are available to all full 501st members on request by contacting our DL Chris @themaninthesuitcase you can find more info here Currently Available languages: English - Spanish - German - Swedish Are you new to the FISD and wondering what the heck all those abbreviations and strange sounding terms mean? To help you @justjoseph63 has started a list of the most commonly used ones that will give you some insight. If you have ANY questions about a particular term that is not listed or suggestions for new ones please contact Joseph. You can find the list here. Pre Approval Forum allows future Troopers the opportunity to submit photos of their completed build to be reviewed by the Staff, Imperial Attaches and others in preparation for forwarding it to their GML for approval. Any and all advice/suggestions given will be specific, constructive, helpful and respectful. Please note that this program will NOT take the place of your local GML, as Detachments are not chartered for costume approval and can not override a GMLs decision, but is instead a peer review program designed to help you look your best and offer guidance and positive feedback. For more information on this program, please visit the link here. Don't forget to visit our 3D section when next surfing the FISD forums, there is plenty of useful information to potentially help you on your next TK adventure. You might be feeling may generous and share with our community a new TK related 3D file and maybe win yourself a 3D contributors award so check out the details below and be part of the in house 3D community. Here is a link to the FISD 3D Contributor program. Don't forget to create a troop log here on FISD and get awarded for your missions and deployment. The list of accomplished troopers keeps growing, so for the official 501st event where you wore your TK! Once you've hit a milestone count, go over to the "Trooper Missons and Deployment -- Post yourget on board and register your troops today Simply start (or update!) your troop log, keep the running total in the title, and post (at least!) a date and name milestones here" thread to request your profile be updated! Simple, right? Also if you would like your troop photos shared on our social media channels please add the following to the first post of your FISD troop log: I give permission for FISD to repost my photos on social media in an appropriate fashion. Award Recipients August - September TK-26476 "TK 26476 - Marz Elson" Marcel - - - - - - - TK-22020 "TK22020" Cam - - - - - - - TK-47826 "CloseTheBlastDoor" Hanson - - - - - - - TK-35947 "Peppe" Peter - - - - - - - TK-30874 "0megaRed" Eric - - - - - - - TK-19525 "Tall_Trooper" Torben - - - - - - - TK21615 "JenEcho" Jenny - - - - - - - - TK23276 "zv288bot" Jorge - - - - - - - - TK-37423 "GoofTrooper" Eric - - - - - - - TK-96004 "Doggydoc" Gerald - - - - - - - TK-20177 "Cybergrunt" Bill You can now also request a letter of commendation, more information available here Are you an approved TK that spends more time on the boards than the average Trooper? Do you enjoy using your knowledge to help out future and existing Troopers? If so, we would like to invite you to join the Imperial Attaché program! Members of the I.A. team are chosen to help out not only those here on the boards, but on a local level as well. Our aim is to have at least one in each and every Garrison, Squad and Outpost in the entire legion to be the eyes and ears of the FISD on a local level. If you are a 501st approved Trooper who wishes to join the ranks of the Attachés, please get in touch with me and/or visit: http://www.whitearmor.net/forum/topic/15252-fisd-attaché-program/ For a complete list of Imperial Attaches, go here. Some of the benefits include: Access to exclusive Attaché merch, including patches. You may also be in the running for an Imperial Attaché Award. An award for those attaché's who have gone above and beyond [minimum 1 year of service]. You can find a list of prior recipients here. Imperial Attaché Outstanding Achievement Award Is the Attaché position vacant for your Squad/Garrison/Outpost? Interested in becoming an Attaché? Contact me by PM or apply in the thread below: Fellow troopers and Attachés! Our forces have yet again been reinforced, please welcome our two newest Attachés: AUSTRALIA, Knightfall Garrison Chris @Slouch, Melbourne BELGIUM, FanWars Garrison Manu @berodrim, Hannut With Unquestioned Loyalty Jonatan Östling TK-23592 "Nairy" Attaché Ambassador Master Armorer Program FISD has many wonderful programs to help members build and submit costumes for our detachment, whether it be a classic Stormtrooper, a First Order Stormtrooper, or even one of the new Imperial Armored Commandos. While our Expect Infantry and Centurion programs get most of the attention, FISD staff wants to relaunch the Armorer Program (Currently called the Master Armorer Program). What is the Armorer Program you ask? Well, it is a program designed to recognize those troopers that go above and beyond to assist themselves and others in getting costumes built, submitted, and approved. One of the goals of all the detachments in the 501st Legion is to help members build and submit costumes that meet and hopefully exceed the minimum requirements of the Legion’s CRLs. Currently the Master Armorer program has the requirement of helping a minimum of 5 members achieve Expert Infantry status. The member must have spent at least 30min physically helping another member with cutting, gluing, sizing, etc, just because they want to help (no money exchanged). There are 3 levels of the award, FISD Armorer, FISD Senior Armorer and FISD Master Armorer. The new program will add a 4th level at the beginning called the Apprentice Armorer. The point scale will be as follows. 5 points - Apprentice Armorer 10 points - Armorer 20 points - Senior Armorer 30 points - Master Armorer If you love building armorer and love helping fellow members get their costumes built, then this is the program you’ve been searching for. We look forward to awarding more members with this award as we know how much we all love Troopers helping Troopers. More information can be found here Armorer Rocker Patches Rocker patches are now available for the Armorer Program, there is currently just the one patch, and members are eligible to receive two of them once they reach Level 2, "Armorer". More information can be found here Want to setup a "Fire Team? the Fire Team program is completely optional, and is intended to help form a common identity and spirit of camaraderie among 501st Legion Stormtroopers in the same geographic area/garrison that troop together. Fire Teams are not officially recognized by the 501st Legion nor the FISD, although they will be able to access a Fire Team sub-forum on the detachment website. You can find more information here. For those interested here is the original discussion on the creation of Fire teams here With Unquestioned Loyalty Mark Ryner TK-4584 "captsafe66" Fire Team Relations So what exactly are and levels? These programs were designed for those who choose to take their armor above and beyond the minimum requirements for basic 501st Legion approval. It gives you the chance to show a level of dedication and pride that takes your armor closer to being as "screen accurate" as possible, without as much extra work as you may realize! You can find more information on the programs here. For those unaware it is possible to achieve extra awards at Expert Infantry for each additional version costume you have approved, additional awards are not issued with another Expert Infantry number (you are only issued 1 Expert Infantry number) but you will see a star above the award on your profile and the thread title will show [APPROVED] 2nd, [APPROVED] 3rd, [APPROVED] 4th and so on. Multiple EIB award recipients and info here NOTE If you are approved with a "2nd Version" of a particular costume that you are already approved with you do not receive an additional award, there is only 1 award issued for each costume version ie: only 1 x Hero, 1 x Stunt, 1 x HWT, 1 x ESB, 1 x TFA and so on. If you have a second/additional version costume approved you will see "2nd Version" and [APPROVED] added to the thread title, no additional profile stars (more info on profile awards here) For those of you who have a particular issue (or issues) before or after submitting for Expert Infantry / Centurion level approval, in order to get you an answer faster you can now privately contact the entire Deployment Officer team at one time! Questions about fitting, repairs, CRL standards/requirements or anything pertaining to reaching Levels 2 and 3 are not only welcomed, but encouraged. Keep in mind that no question is too small, and that your queries will only be seen by the D.O. Staff. We are here to help in any way we can, so please feel free to send us a message by clicking on this link: @Deployment Officer Team and we will get back to you A.S.A.P.! More info here This area lists all those who have gone above and beyond basic approval toward screen accuracy and obtained EIB or Centurion or both. FOR August - September the 1st Imperial Stormtrooper Detachment would like to congratulate the following. Expert Infantry Badge Award: No approvals this period - - - You can find a list of multiple award recipients here. Multiple EIB award info here Expert Infantry Honor Gallery here --------------------------------------------------------------- Centurion Badge Award: No approvals this period - - You can find a list of multiple award recipients here. As always if you have any interesting stories or photos please send me a PM. With Unquestioned Loyalty Glen "Q" Rhodes TK-85421 "gmrhodes13" PRO, Newsletter Detachment Leader (DL) Chris Pearson (themaninthesuitcase) TK-10911 Detachment Executive Officer (DXO) Andrew Franke (Sly11) TK-11469 Chief Deployment Officer (DCA) Mario Reyes (TKSpartan) TK-48117 Deployment Officer (DCA) José Mª Sánchez (Chemi) TK-30173 Deployment Officer (DCA) Gerald J Gyorffy (Doggydoc) TK-96004 Provost Marshall (DCoG) Steven Sheades (starsaber25) TK-10466 Provost Marshall (DCoG) Caleb Mask (MaskedVengeance) TK-73692 Provost Marshall (DCoG) Arthur Wong (giskard8) TK-39093 FISD Diplomat (DPRO) Tony Jobe (ukswrath) TK-10116 FISD Diplomat (DPRO) Tim Waychoff (Dark PMF) TK-51878 FISD Diplomat (DPRO) Christoph (Danny) Lauber (Ripper_L) TK-55550 Fire Team Relations (DCoG ) Mark Ryner (captsafe66) TK-4584 Merchandise and Brand Officer (DMBO) James Silvius (jsilvius) TK-12953 Trading Card Specialist (DPRO) Eric Ho (Hoda) TK-77520 Newsletter Publisher (DPRO) Glen Rhodes (gmrhodes13) TK-85421 Social Media Relations (DPRO) Luca Hahn (Morgi) TK-66744 Content Editor Support (DPRO) Adam Wolf (Revlimiter) TK-89400 Content Editor Support (DPRO) Vicky Mandlmaier (Vicky_Velocipanda) TK-50893 Content Editor Support (DPRO) Jeff Salt (Wingnut65) TK-50297 Attaché Ambassador (DPRO) Jonatan Östling (Nairy) TK-23592 Personnel Officer (DPER) AC (NoVATie) TK-5597 Systems Administrator (DWM) Mathias Rodstedt (Locitus) TK-2959 Systems Administrator (DWM) Eric Brager (Darth Aloha) TK-9674 Systems Administrator/Detachment Founder (DF) Paul Hoeffer (Daetrin) TK-8020 Imperial Propaganda Machine (IPM) Brian Long (Tilheyra) TK-47933 Imperial Propaganda Machine (IPM) Torben Sobierey (Tall_Trooper) TK-19525 Facebook: www.facebook.com/whitearmor - - - Facebook Group: 1st Imperial Stormtrooper Detachment (FISD) Official Twitter: www.twitter.com/FISD501st or @FISD501st - - - Instagram: www.instagram.com/fisd501st Discord: https://discord.gg/FmQZ2qW8gx - - - Bluesky: https://bsky.app/profile/fisd501st.bsky.social On behalf of the 1st Imperial Stormtrooper Detachment Command Staff and the Imperial Propaganda Department


-
- 9
-
-
Hello and welcome, a great thread for those of a larger stature
-
TheSwede’s Night Trooper build.
gmrhodes13 replied to TheSwede's topic in Night Trooper Build Threads
Being separate pieces but the crack continuing, mind you we don't really know how the armor was damaged. -
Hello and welcome to the forum, here's a great thread full of helpful information you may find of interest A build thread is a great way to get feedback on our build, hope to see one from you soon Good luck with the build
-
TheSwede’s Night Trooper build.
gmrhodes13 replied to TheSwede's topic in Night Trooper Build Threads
Interesting you continued the crack from the abdomen over the belt. -
Very nice, you could take it to the next level with some wire on the T-tracks and paint the butt similar to bakelight wiring references bakelite references Couldn't quite make out if you have the ridged plate on the rear of the stock and screw
-
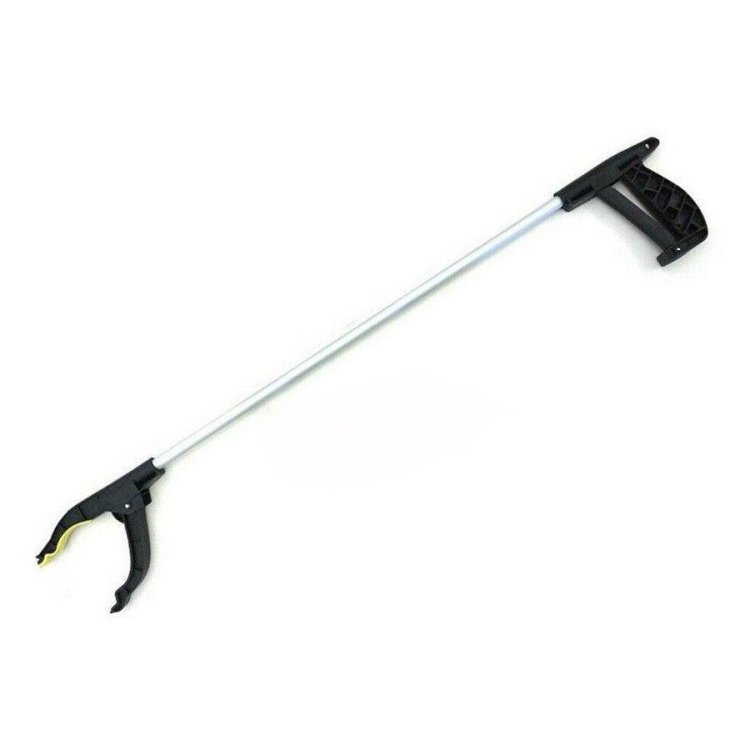
I have the same tool and did exactly the same thing on my first use, in the end I added a piece of elastic to the handle with a loop so I can have it around my wrist and I also added a magnet on the end and glued a magnet inside my glove, the magnets usually attract enough so I don't have to bend all the way down.
-
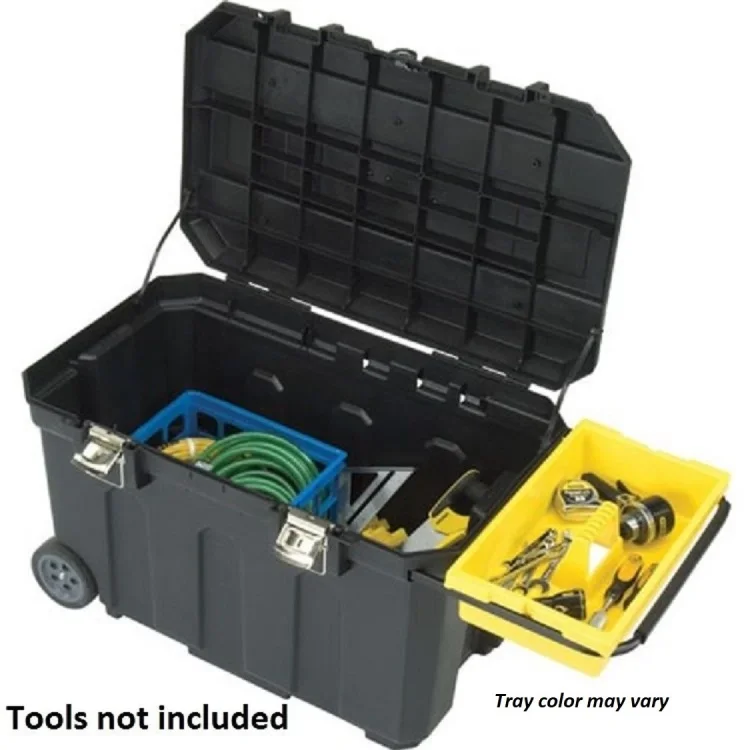
We have similar boxes here, their advertisement has the drawer in the handle
-
You need to add the link to your Legion membership profile, please read the instructions in the first post of this thread


