gmrhodes13
-
Posts
31,208 -
Joined
-
Last visited
-
Days Won
1,070
Content Type
Profiles
Forums
Gallery
Articles
Everything posted by gmrhodes13
-
Have a look through some of the build threads, also EIB and Centurion. Most have prop makers initials in the title . Some research is required.in this hobby.
-

Boots for a Stormtrooper
gmrhodes13 replied to Alon's topic in Boots, Soft Parts, and other Accessories
Do you have a photo? You can compare with screen used boots You can find CRL requirements here https://databank.501st.com/databank/Costuming:TK_anh_stunt -
Velcro can be used Shoulder Straps These shall be securely mounted in front and may free float in back. They may be affixed with rivets, Velcro, or adhesive. The rear tab of the shoulder strap is optional and may or may not be present. OPTIONAL Level two certification (if applicable): No visible rivets are allowed. OPTIONAL Level three certification (if applicable): These shall free float in back. These shall be glued in front. The plastic shoulder straps need to be held down in the back via a white elastic band to the white fabric that connects/bridges the chest and back piece. Although not mentioned until L3 adding white elastic around the fabric and shoulder straps can help hold them down. k.
-
When in doubt check with the CRL's Abdomen Armor The abdomen armor has a button area that matches the color pattern shown (3 blue + 6 gray); buttons are approximately 7/16" (11mm) in diameter. OPTIONAL Level two certification (if applicable): Any gap between the abdomen and kidney armor is no more than 1/2" (12.5mm) wide. Any shims used to achieve this effect are of a similar material and color as the abdomen and kidney armor. Shims fit flush and seams are allowed. A split (bifurcated) or single cap rivet is present on the lower tab (cod area) of the abdomen armor. Rivet does not need to be functional. Rivet on must be brass or silver in color, approximately 5/16" (8mm) in diameter and is not painted. OPTIONAL Level three certification (if applicable): Ideally there no gap between the abdomen and kidney armor. Abdominal and Kidney Plate align horizontally at top. A single visible seam line is present. Some add side shims so this gap is reduced, here's just a few threads on how to achieve this
-
Thanks for the image, if you use the "direct link" option your image should show instead of just a link
-
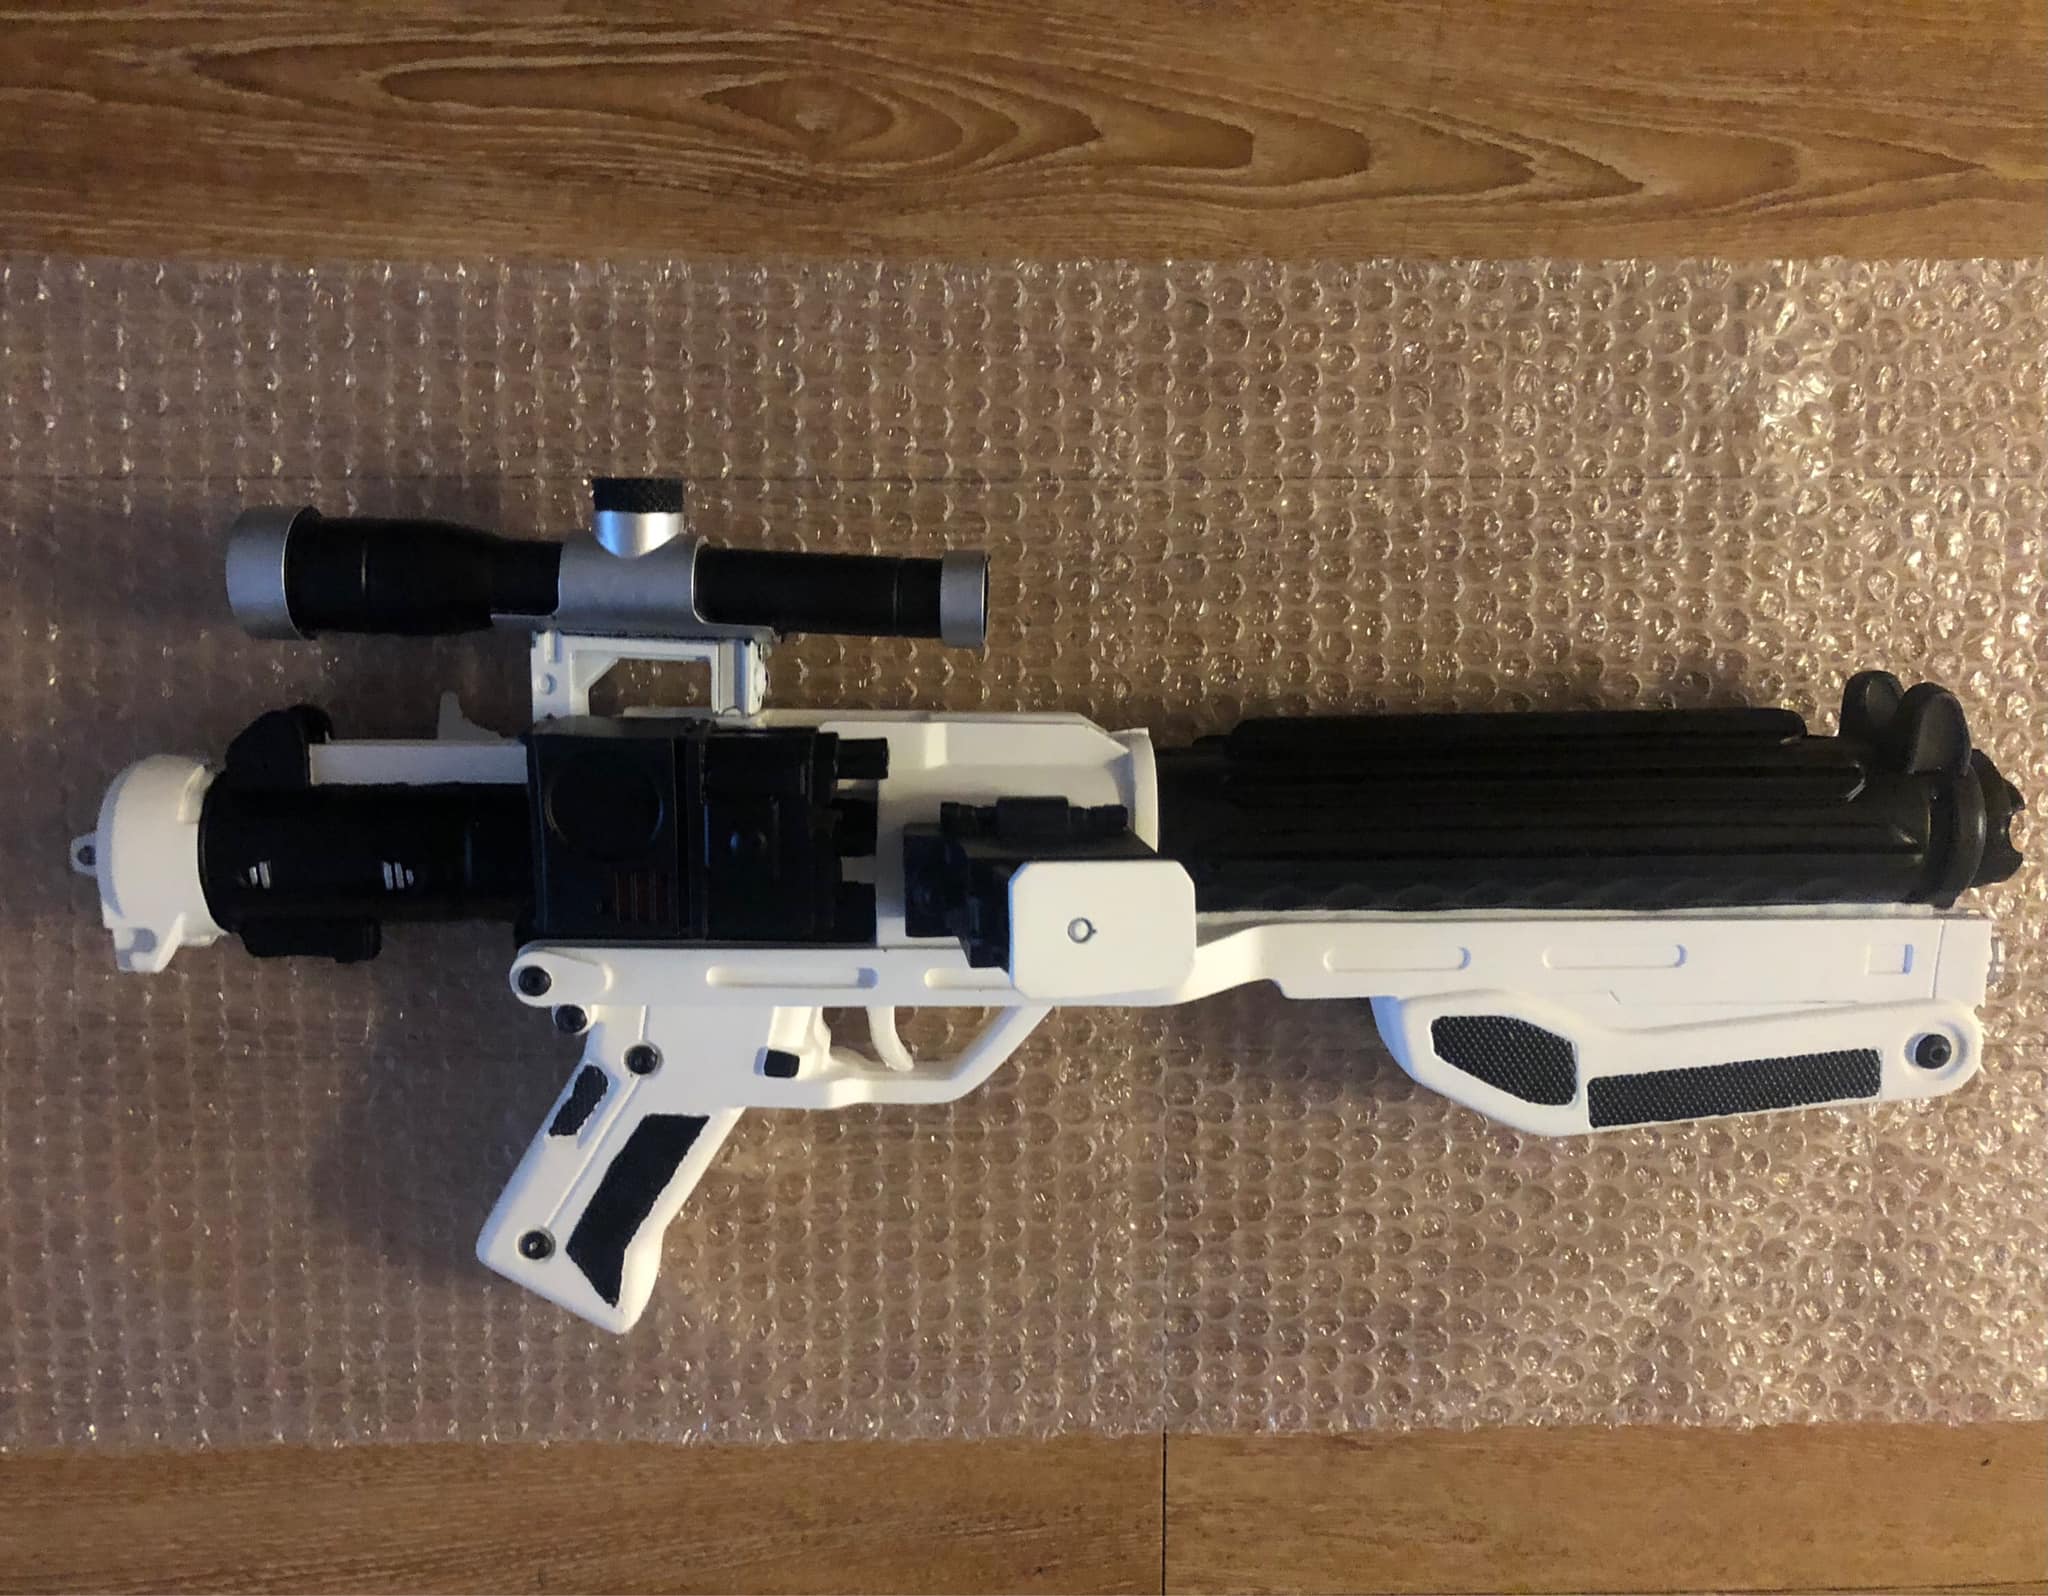
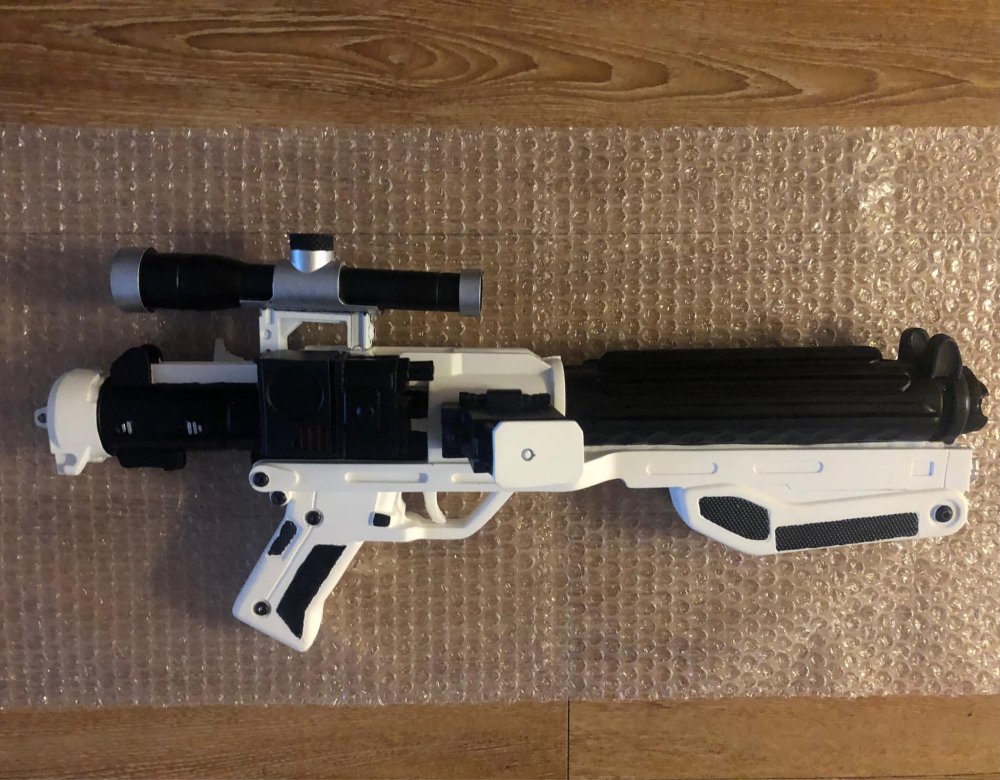
Hello and welcome, research is the key For basic approval always check with your GML (garrison membership liaison) Anything you are not sure about for L2 or L3 you could direct your questions to the @Deployment Officer Team Soft goods Rubber gaskets (Thorsson Associates Workshop) - Origin USA:Link Here Email: [email protected] FB: https://www.facebook.com/Thorsson-Associates-Workshop-11207604214298 Neck seal CRL: Black with horizontal ribs, fitted to the wearer, and extending from the base of the neck to conceal the entire neck. No hair or skin should be visible around the neck area. OPTIONAL Level two certification (if applicable): OPTIONAL Level three certification (if applicable): Ideally, the neckseal shall have 11 ribs. (note there has been mention about 8 ribbed neck seals) The neckseal has a glossy finish. - (From memory I don't think the DN have a glossy finish) Blasters you can't go past The5thHorseman's files, they are amazing. In my opinion the resin printers give a much better finish, I will definitely be purchasing one once they get a little bigger, although at present with PLA+ I print ultrafine so I have less prep work to do Many resin blaster suppliers have gone the way of the Dodo. Occasionally blasters do come up in the DN FB build group https://www.facebook.com/groups/1779429248751089/ Like this one, recasted rubber Anovos F-11's https://www.facebook.com/groups/1779429248751089/user/563765233/?__cft__[0]=AZW_P8o9uektM2KXP5r9fVmiaqAC3Y-aGQe5RicJ23IHxBDHBcWsjAvDCHwbkRYl-Z2ICWbmy_25llkuwmgkOVLCWIj9a-ep-YaHOF2On3qFBOrrnI0otvpyAFZfcS4CqC-NQraM8dSdJHigIoouU5Z6EXDIXQ8Dx2IS8tIIhZTBbHv3wGdDwHFiab81J8mTKVc&__tn__=-UC*F Black Series helmet needs some work, check this comparison Ho to make more accurate
-
This is the link you need to add https://www.501st.com/members/displaymember.php?userID=34290&costumeID=124
-
Your ab wants to come up, it is sticking out under your chest, need tighter strapping between, this should help everything come up and give you a bigger gap between cod and thighs. Compare with this image of Luke and see just how far his abdomen is under the chest, his chest is over his ab buttons, yours may not come up this much. Also not how the chest height changes with movement
-
Strapping Systems Rivet Setting 101 by justjoseph63 (Print PDF) Snap Setting 101 by justjoseph63 (Print PDF) Snap Setting Hardware Solutions by TheRascalKing E6000 and Snaps Discussion by Harbinger, Snap Options by ukswrath Snaps with Rivet Heads by TheSwede Split Rivet Placement by DroidHunter How to Use a Rivet Tool by huttman How to Make Snap Plates by stukatrooper Elastic ABS Reinforcement by Cricket A must when building a TK
-
Tossing around the idea of making a TK
gmrhodes13 replied to Balancesheet's topic in New Member Introductions
Hello and welcome, research is the key to this hobby, this thread should help you -
Research is the key This thread should be of help
-
I've not heard of a time frame before polishing, I have polished mine in the past to remove dark marks, glitter and youngling drool (and icecream hands) I use Tcut a local polish, many use Novus polish
-
Just note on the diagram it only shows single snaps on the shoulder bells, bicep and forearms, personally I add double here too, I've had a snap come off at the shoulder straps and have the second snap there saved me from not being able to troop at an event
-
Was a lot slower in places but that's what you get for a series of 12 episodes compared to the quick paced 6 episodes we have seen in other series. I enjoyed the series, the only issue I have had is seeing more and more costumes/variations that aren't around in RO or ANH, really isn't consistent with the timeline, but that's just me, some I've spoken to haven't cared about the inconstancies .
-
IMPERIAL BOOTS VS TK BOOTS
gmrhodes13 replied to TK71169's topic in Boots, Soft Parts, and other Accessories
One thing I've not had issues with is the boots, I have both TK and IB boots, use the standard insoles without issue. We are all different and something for one person can be different for another. Always good to hear feedback though for those looking. FYI anyone reading this thread TK boots no longer supply boots, haven't for a few years now, they were having supply issues as well as loss in sales due to the emergence of Imperial Boots -
ANOVOS (DENUO NOVO) FOTK Armor Delivery Possibility
gmrhodes13 replied to JonnieBear's topic in TFA Stormtrooper
Thanks for the feedback Jody, always good to hear from people about their experience -
SaltyR1 Requesting Pre-Approval Review (ATA)
gmrhodes13 replied to saltyr1's topic in Request TK Pre-Approval
Great news Chris, congratulations and welcome to the ranks, I see you've already requested higher access. Here's a good read, a little outdated but will give you some idea of how we operate and what to expect https://databank.501st.com/databank/TrooperSurvivalGuide Once again congratulations -
Hello and welcome, as a 501st member you can request higher access This thread may be of help
-
The mandalorian concept remnant troopers?
gmrhodes13 replied to 87ninefiveone's topic in Anthology/Remnant
McQuarrie concept trooper was not only concept artwork but also has come out in figure form giving 360deg references. Ultimately the LMO's have final say on costume inclusion as well as how much reference material is required for that costume -
I have also seen a large one with lights

-
The mandalorian concept remnant troopers?
gmrhodes13 replied to 87ninefiveone's topic in Anthology/Remnant
No CRL work on these here that I'm aware, you may want to reach out to our DL Andrew @Sly11 also contact the LMO's in regards to new to the legion costumes [email protected], some info here as well on what is used as reference for new CRL's and other requirements https://databank.501st.com/databank/Costuming:CRLGuide -
ANOVOS (DENUO NOVO) FOTK Armor Delivery Possibility
gmrhodes13 replied to JonnieBear's topic in TFA Stormtrooper
For anyone brave enough, although they do seem to be able to supply some things now
-
Called it Congratulations trooper, looking forward to seeing your EIB application soon
-
arduino: a cheap board for E11 blaster effects
gmrhodes13 replied to skyone's topic in Electronics for Helmets / Blasters
You can find the sound files here: https://github.com/Protonerd/FX-BlasterOS/tree/master/Sounds Manuel doesn't get on the forum very often and doesn't update this thread, you could reach out to him on Facebook https://www.facebook.com/fxblasterarduino -
Hello and welcome back, real life always comes first. I found straps/snaps to be a little kinder on your armor, the bracket bolt/screw system although accurate can crack between the bolts/screws depending on the thickness of your armor and how hard you troop in it. I also like to use double snaps, occasionally you can have one fail and have a second snap there helps you to still be able to troop. Basic placement of the strapping and double snaps