gmrhodes13
-
Posts
31,191 -
Joined
-
Last visited
-
Days Won
1,067
Content Type
Profiles
Forums
Gallery
Articles
Everything posted by gmrhodes13
-
X-Wind added https://makerworld.com/en/models/2077620-star-wars-gingerbread-ornament-x-wing#profileId-2244692
- 1 reply
-
- 1
-

-
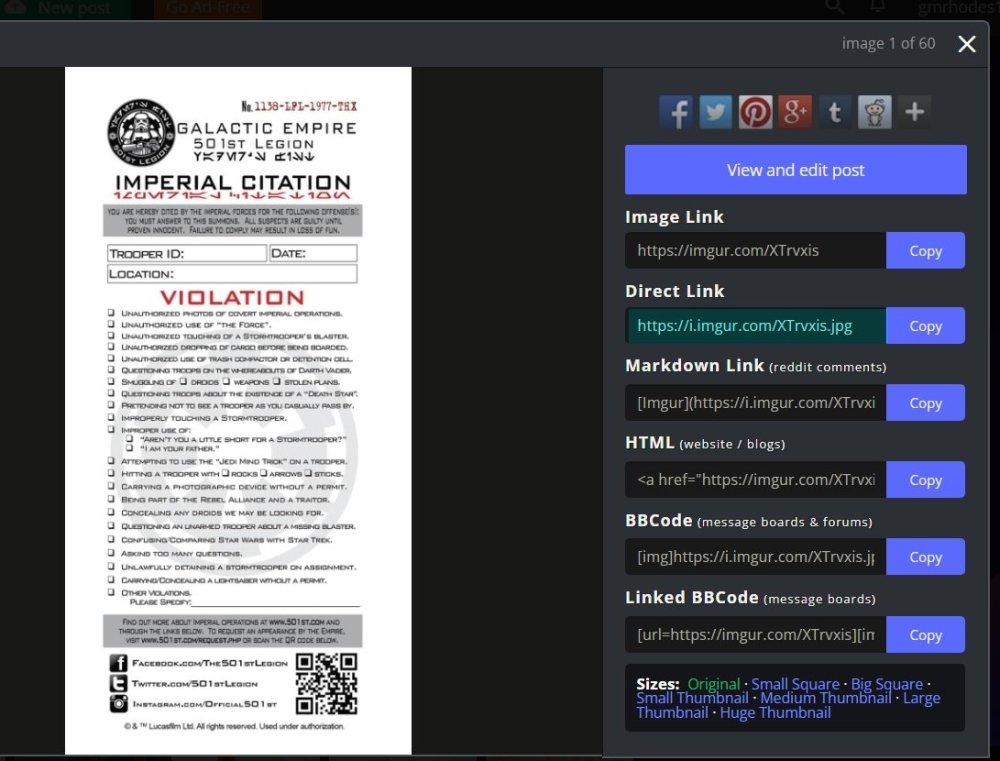
You need to use the link with the file extension, example .jpg .png .bmp .gif Either the Direct Link or right click copy and paste Apparently it can be a pain in mobile app
-
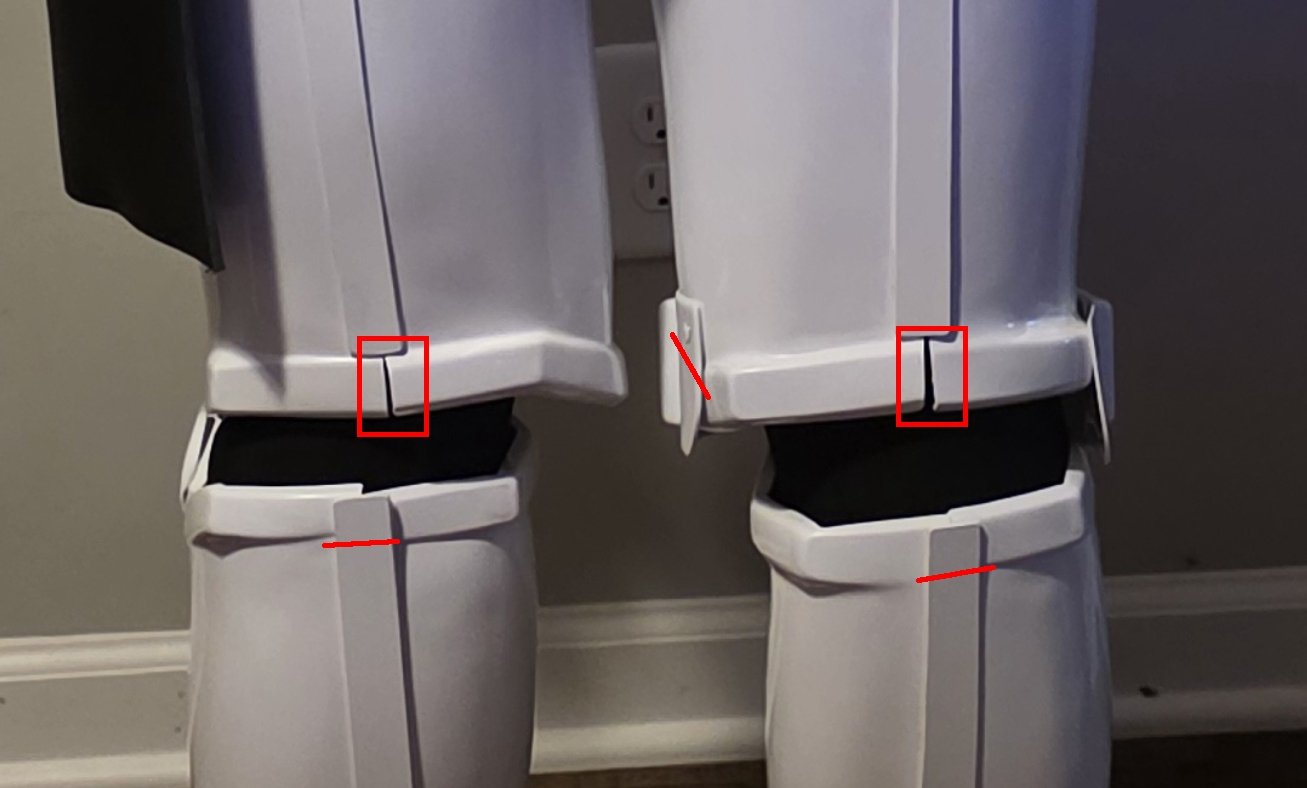
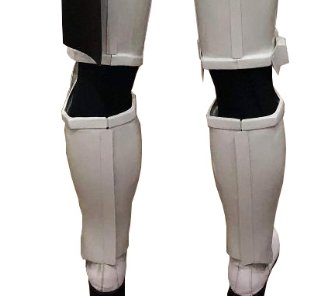
Personally I would try to lift up your thighs to give you some more room, you do have a lot of black showing. But yes you can, they are called mobility cut outs, a lot of the costumes had them, gallery here Please note from the CRL: THIGHS Any mobility cuts on the back do not extend beyond the top of the raised ridge. SHINS Any mobility cuts on back of piece do not go past raised ridges.
-
If your tube stripes are stickers you should be able to apply some tape on top, then gently lift the corners and lift the tape slowly, they should all come loose with some care, then just reapply in the correct position and remove tape. References on placement here
-
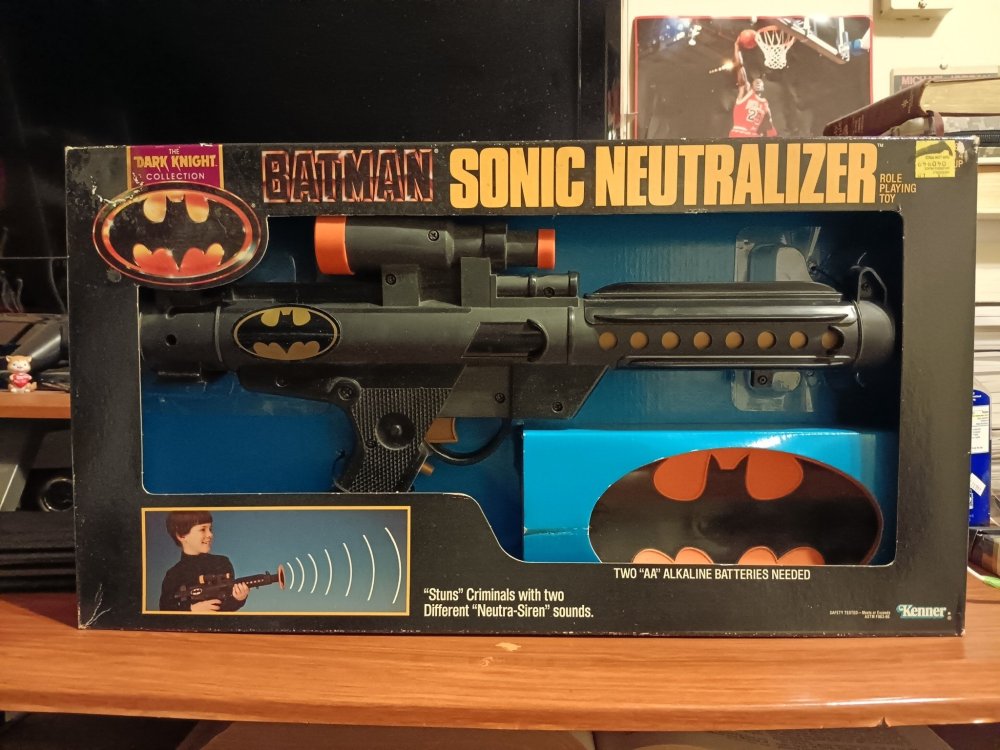
Can't Find an E-11 - Just Light The Bat Signal I must admit never seen these down under, albeit there's a lot we don't see here, you guys don't know how easy your have things LOL A lot of them on eBay https://www.ebay.com/sch/i.html?_nkw=batman+sonic+neutralizer&_sacat=0&_from=R40&_trksid=m570.l1313&fbclid=IwY2xjawObQnBleHRuA2FlbQIxMABicmlkETFjcXlacFQ5SzBLNENZYjQ2c3J0YwZhcHBfaWQQMjIyMDM5MTc4ODIwMDg5MgABHqK9n5fmZjA4JuFvD898RXBANjOdsORdBNXMcdghn2AdslCtswBvhZ96KH0S_aem_0k8eIB3vwEVfHOaqfIGv9A&_odkw=batman+sonic+neutralizer&_osacat=0 Always interesting to see toys which have been rebranded for another franchise
.thumb.webp.aef886f2592879c21c3ac0520ee8f99b.webp)

-
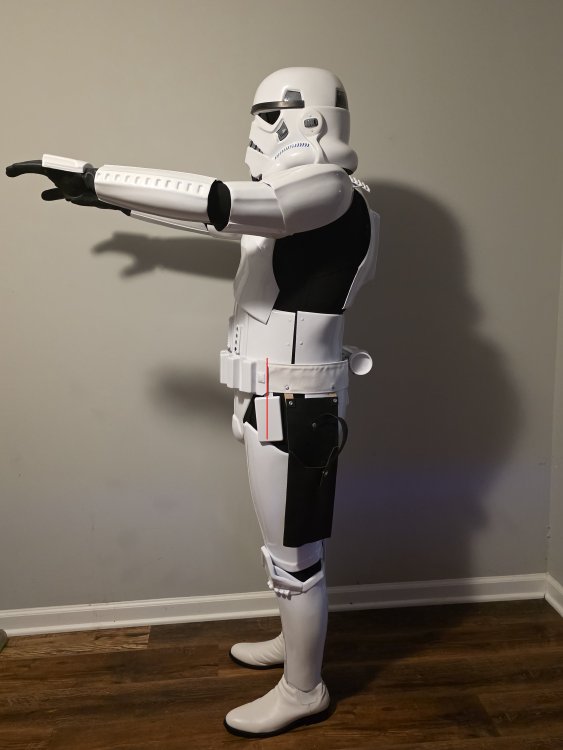
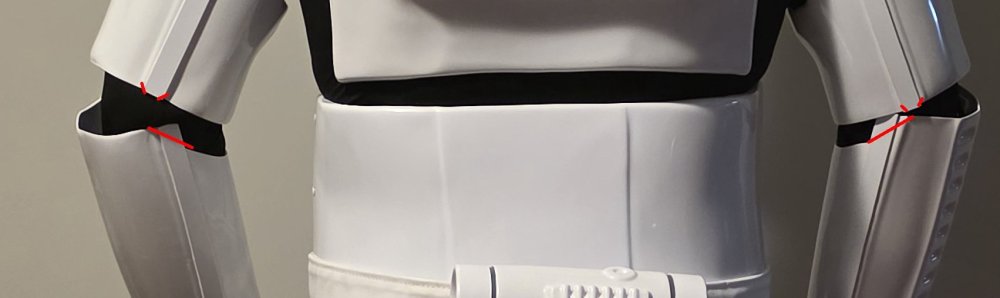
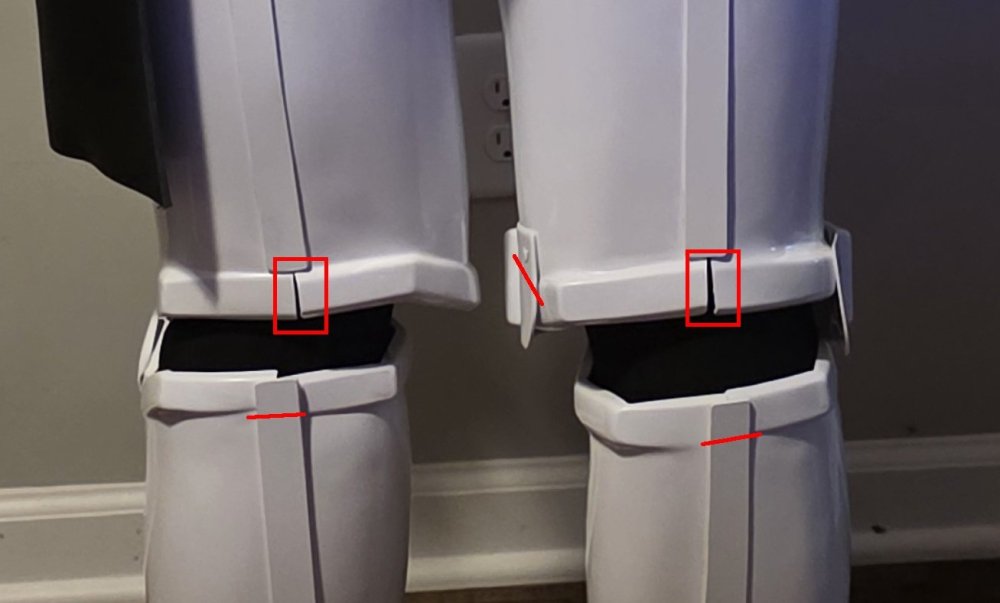
Hi Shane when posting images we usually try to add them all (showing) to your post, a great how to here Overall looking good, there area few things for basic, and a few adjustments will be needed for higher level 2 and 3 (EIB and Centurion) Belt should come up at the back. Detonator end caps, gaps and panel incorrectly sized Top of rear calves cover strip should stop under the top ridge You can also remove the sharp corners on the rear of the forearms, if you wish. Also nip the corners (cut or round off) so they don't catch when moving Tighter strapping between the back plate and kidney may reduce the gap shown. For higher levels Shoulders could come inwards at the front to reduce the gap Belt could come up a touch The top of the ABS belt shall sit at or just above the bottom of the central and vertical ab button panels. A slight overlap is suggested, but not required. You could cut the extra material from the ends of your forearms under the biceps, they can catch when moving. You could also bring the down a touch just to give you a bit more room. Thighs could come up a touch, will give you some room at the knees. Also adding some stiff foam behind the sniper plate can push forward to stop catching on the thigh. Also noticed the left leg thigh is on an angle, as I have very thin legs I added some foam to the insides of the thighs to keep them central. Also match gaps between forearms and gloves/handplates Drop boxes should stop at the end of the plastic belt For Level 3, the corners of the plastic ammo belt shall be trimmed at a 45 degree angle that meets the outer edge of the cloth belt. For a more screen accurate look, it is suggested that the top of the rear ridge of the sniper plate be aligned with the top ridge of the calf. Also note that the sides are angled rather than curved. Shoulder straps on the rear should sit on the backplate, elastic loops can help this but you may also need a hot water bath You could add some scrap material behind the gaps in the lower ridges, also fill the seam with ABS paste or miliput or silicon (or something similar). Looks like your inner thigh ammo strip is attached incorrectly, it should be mounted to the lower ridge just like the outside Front views Back views You may need tighter strapping on the sides to reduce the gap, doubled over elastic can help. Han snap should not be painted should be silver Also for L3 you would need silicon handplates Hand guards shall be latex or latex-like, solid white or painted white, and affixed to rubber gloves with no visible strapping or stitching. A few other things on the helmet Vocoder should be sharper Hovi tips rim painted, also white inside Tube stripes should be the same gap from the cheek, yours angles downwards towards the back A little hard to make out some other helmet details. So a few adjustments for basic and I would highly encourage you to also seek the higher levels approval once you've been cleared for basic. Good luck

.thumb.jpg.b6f4230567e16cf11ba11ead599ac14b.jpg)

-
As others have said you can hide your face as well as any contact information, make sure you mention it to your GML (garrison membership liaison) or GWL (garrison web liaison) "If a member does not wish their picture to be made public, please use one of the appropriate framesets out of the Classified Framesets " This is what should be seen for your head photo
-
Hello and welcome, posting some photos is a great way of getting feedback prior to submitting for approval There is also a pre approval area here https://www.whitearmor.net/forum/forum/193-request-tk-pre-approval/ Good luck and hope to see you approved soon
-
File Name:[ Gingerbread Tree Ornaments V2 Designer: thereallagnor69 Last Update: 30/11/2025 File: Tiefighter - https://makerworld.com/en/models/2058870-star-wars-gingerbread-ornament-tie-fighter?from=search Deathstar - https://makerworld.com/en/models/2058918-star-wars-gingerbread-ornament-deathstar?from=search Description: Star Wars Gingerbread Collection Images:
-

Yellowing Stormtrooper
gmrhodes13 replied to AdamDoyceTransue's topic in Getting Started - Read this First!
My helmet started going yellow on the top, after some research I found a thread on Retr0bright, all the ingredients I can source at local store, it works well BUT you have to keep applying over time as the yellowing will come back. https://www.retr0bright.com/ -
Looking good so far
-
TheSwede’s Night Trooper build.
gmrhodes13 replied to TheSwede's topic in Night Trooper Build Threads

-
File Name: Gingerbread Tree Ornaments Designer: thereallagnor69 Last Update: 29/11/2025 File: Stormtrooper - https://makerworld.com/en/models/2054945-star-wars-gingerbread-ornament-stormtrooper?from=search Vader - https://makerworld.com/en/models/2054896-star-wars-gingerbread-ornament-darth-vader?from=search R2D2 - https://makerworld.com/en/models/2054920-star-wars-gingerbread-ornament-r2d2?from=search C3P0 - https://makerworld.com/en/models/2054821-star-wars-gingerbread-ornament-c3po?from=search Yoda - https://makerworld.com/en/models/2054966-star-wars-gingerbread-ornament-yoda?from=search Chewie - https://makerworld.com/en/models/2054874-star-wars-gingerbread-ornament-chewbacca?from=search Fett - https://makerworld.com/en/models/2054854-star-wars-gingerbread-ornament-boba-fett?from=search Description: Star Wars fans, listen up! Give your Christmas tree a unique Star Wars touch with the Star Wars Gingerbread Collection. If you like this or have any other requests, please let me know. Ornament Size ~7.5cm Images:
-
- 1
-
-
Looks great, nice work and display
-
Hello and welcome aboard, make sure you post a build thread, great way to get feedback and tips on how your build is progressing. Nothing better than a BBB (big brown box) can see the happy dance now Great info for your you build in this thread Good luck
-
With some acetate/super glue you can submerge in warm salty water and soak, same thing happens when get glue on your fingers, it's the warm salt/sweat that helps soften the glue then you can use something to scrape off. I have also heard but not tried leaving the part in the freezer, then pry off the glue free. Worst case scenario would be to sand but that also includes a lot of fine sanding wet then compound and polish to get the shine back. Just one of the many threads on removing glue
-
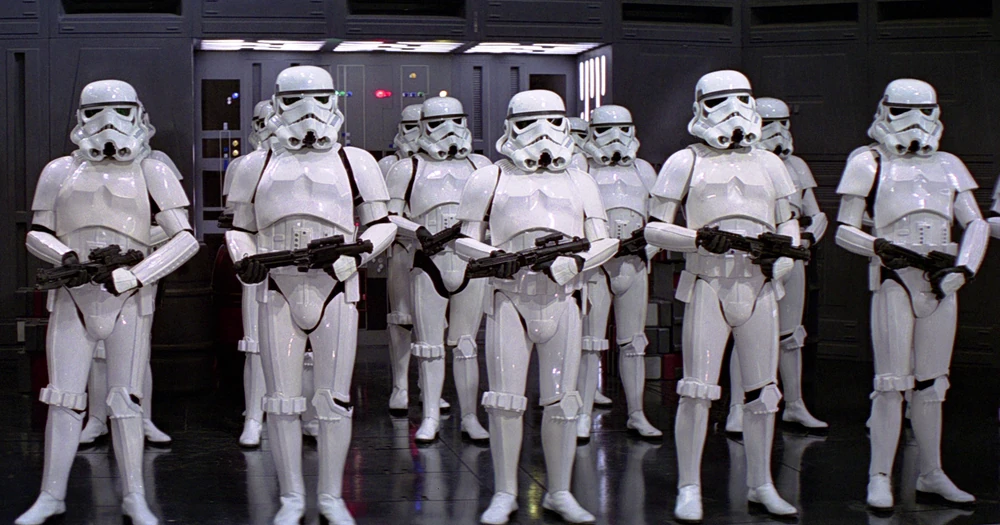
When in doubt always check the gallery references
-
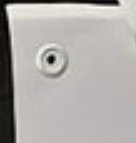
I have not had to purchase any as yet as most of the kits I have assembled usually come with the screws, I haven't seen locally but did find some on AliExpress.
-
You can also request TK forum access here, instructions in first post
-
Congratulations and welcome to the ranks trooper
-
Looking forward to seeing the progress. You may find this helpful, differences between OTTK's https://drive.google.com/file/d/10tEVteIreh6AHMogW010cuH_Bf8TBfU6/view
-
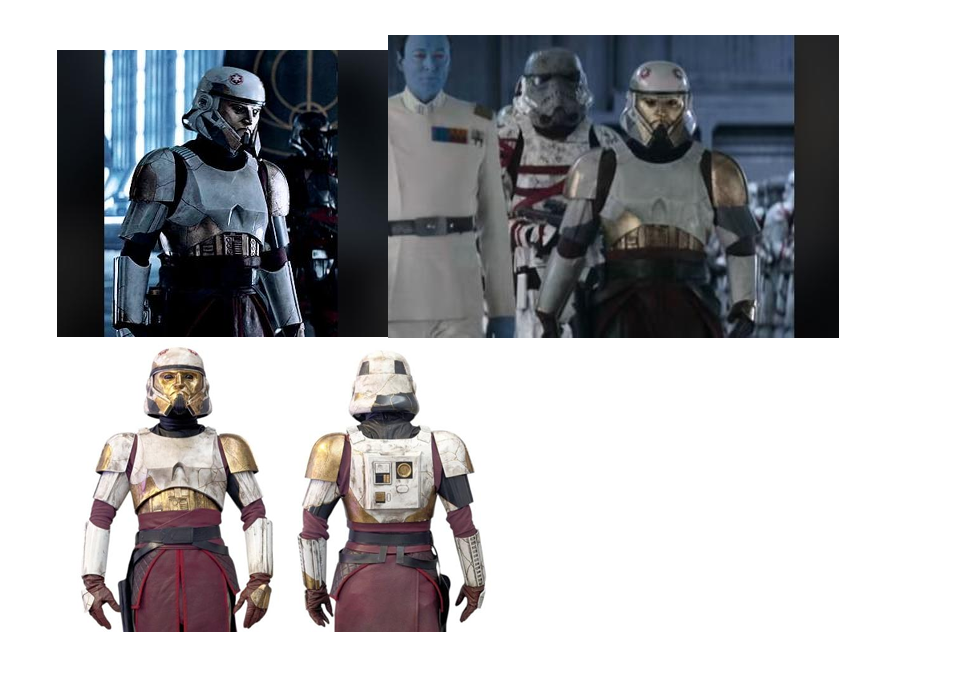
This came up in the GML section of the legion forum I have noticed and a member who has made this costume have pointed out the CRL model seems to have the Biceps opposite and back to front compared to the live action version. May need a model image update, a simple fix
-
Hopefully we shall see you with a TKID very soon
-
Very nice, on my Santa wish list
-
Looking forward to seeing some photos

.webp.bbb69b2b9ef56ccd443ae2db8a67d409.webp)

.jpg.65d8f28fcc74f54de84b4e25f74a551c.jpg)