gazmosis
-
Posts
4,043 -
Joined
-
Last visited
-
Days Won
23
Content Type
Profiles
Forums
Gallery
Articles
Everything posted by gazmosis
-
??????????? huh?
-
Bottom line is that ebay is good for some things....armor is not one. There are two sellers that are on here (MTK and CAP) that sell on Ebay to make a few extra dollars. Due to our experience here, it allows us to know the difference. Other Ebay sellers will say anything true or false to sell their items. You can be assured that whatever armor you buy on here will be supported, will be accepted as accurate, and you will gave the support of the seller and the guidance of most every member on here. No one wants to see you regret an investment like this. This is an story we hear all too often from Ebay purchases. As for armor type, RT Mod might be a little big for your frame. AP might be a little small. RS, TM, MTK, CAP, ATA, are good for your frame
-

Pic of RS Prop Masters ABS Suit
gazmosis replied to tckoolaid125's topic in Hard Armor (General Discussion)
The differences in color are minimal. Although the PVC is more flexible, it us not damage proof and will crack given the right circumstance. -
Red_2's NE ANH TK build ...
gazmosis replied to Red_2's topic in Build Threads Requireing Maintenance
NEGATIVE ON THE LENGTH TRIMMING!! You want that little bit of return edge on the bottom. If anything, take a little off the edge that sits against your chest. That plus making sure it is up all the way to the top of your shoulder will make it come up. Your final goal should be to have it close to touching the ribbed shoulder bridge when you install that. BTW, the shoulders are interchageable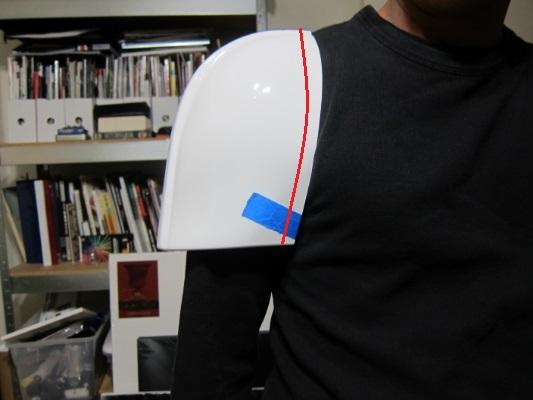
-
Getting worried here (Ata)
gazmosis replied to deadvision's topic in Hard Armor (General Discussion)
ATA fits a size 38 waist around the belly button with no shimming. Even if you have a 40 waist, it might be a squeeze, but I think you would still fit into it. -
Legacy Fem Trooper Build progress help and advice
gazmosis replied to supa troop's topic in Legacy Stormtrooper Build Threads
Don't panic if the gap doesn;t fill in the first time. Certain gaps will take a couple coats. Have patience, sandpaper, and polishing compound. -
You have two choices....as of right now, as far as I know, Troopermaster and RS Props are the only two armorers offering suits built to your specifications. If you look in the "for sale" threads, there are people willing to build it for you for a fee. If you are willing to build it, I would strongly consider it. ANY tutorial on how to build armor can be found here in the build threads section. There is a definitive award when you say "I built this". Research the build threads. There are only a million of them. After doing that (which we ALL have) you will have an idea of what supplies you'll need and what procedures you will need use. If you get stuck, don't "willy nilly" anything.....ask a question. Start your own build thread, add lots of pictures. WE LOVE PICTURES!!!!! Plus a picture says more than you could ever describe in words. The only bad question is one you never asked.
-
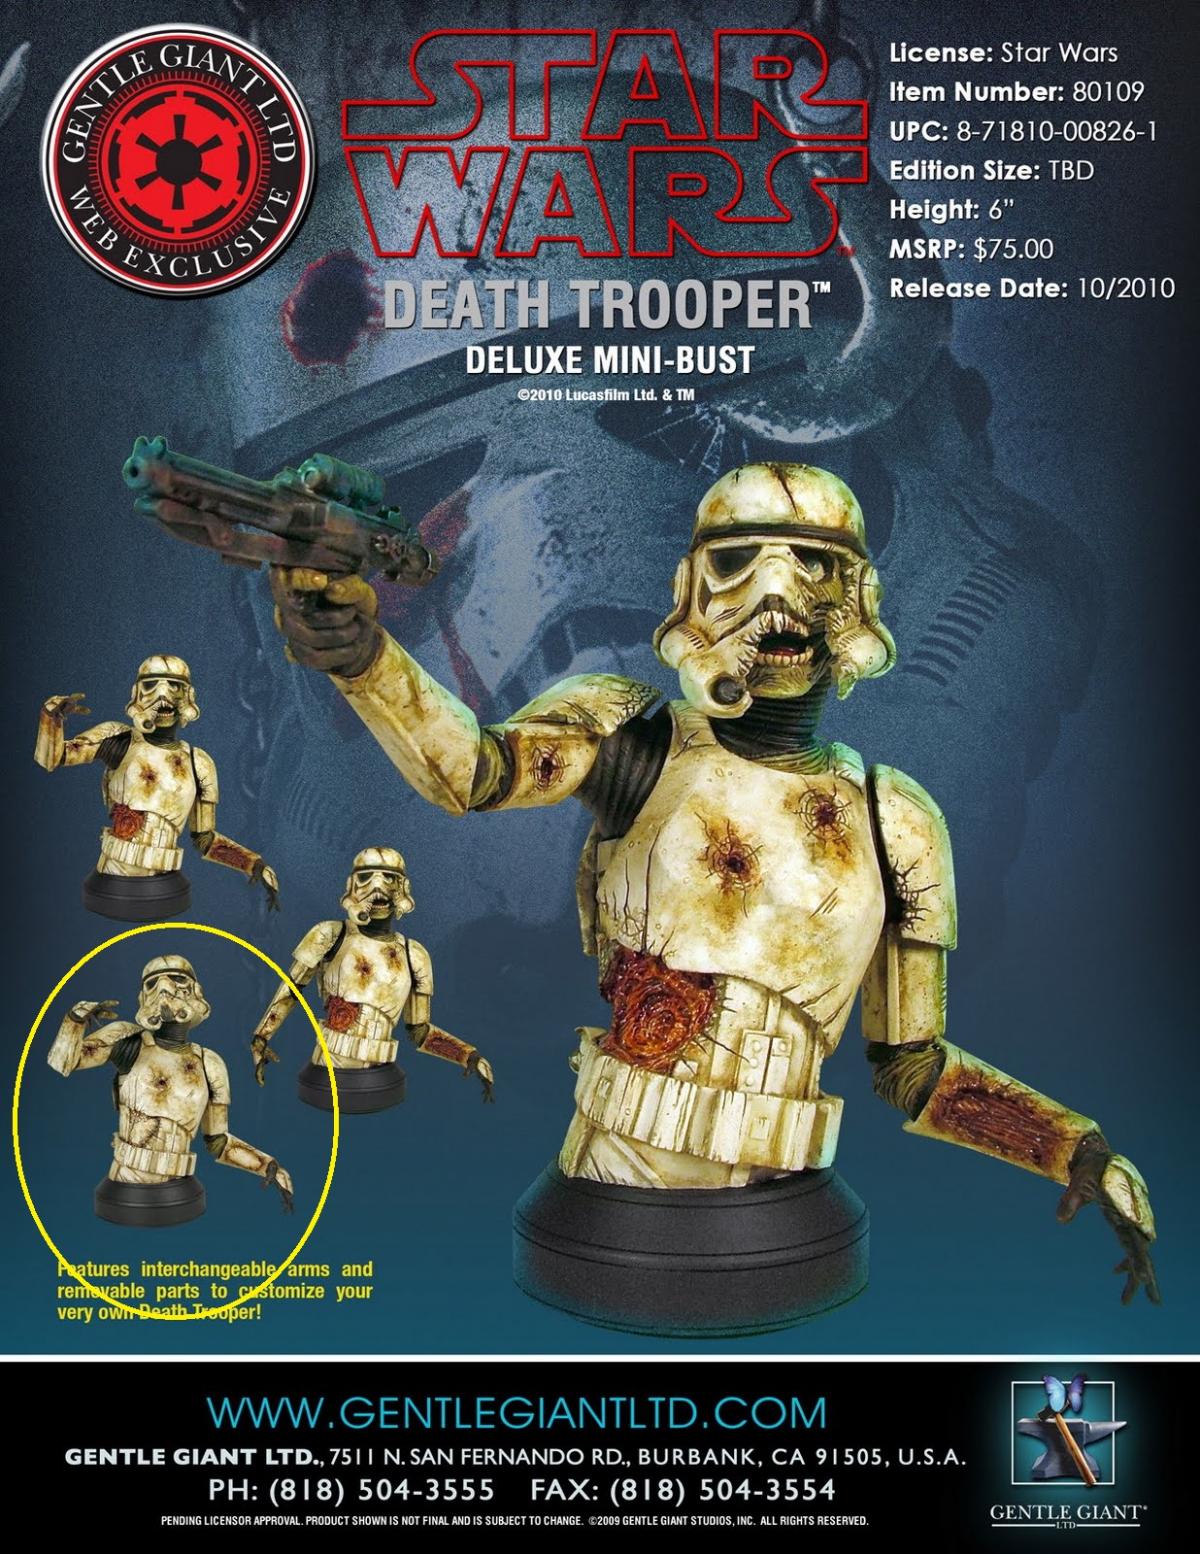
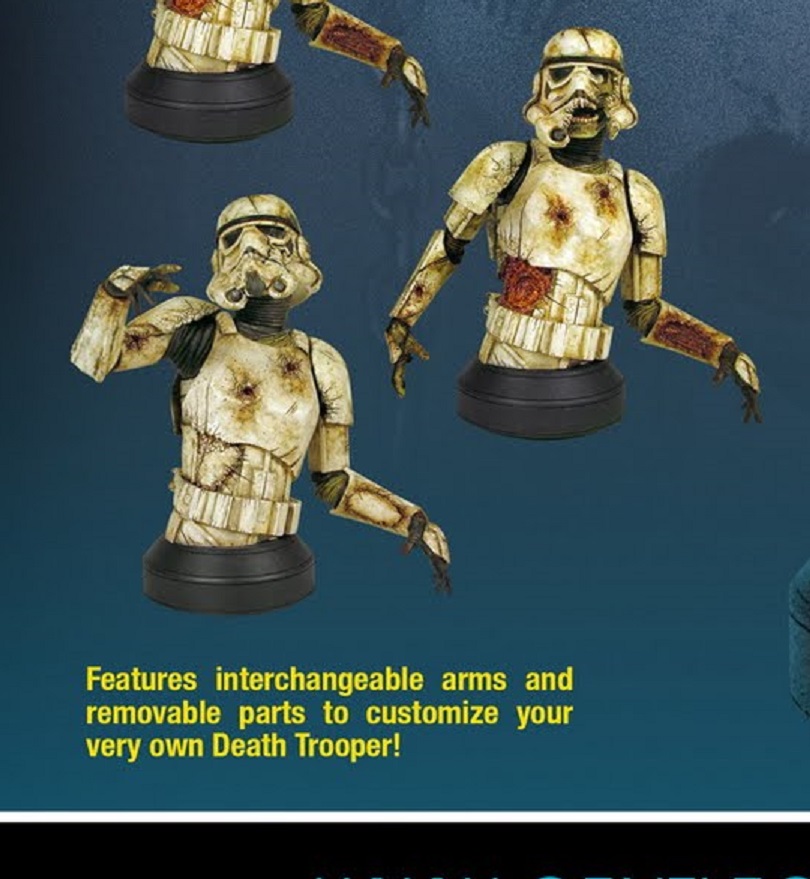
TK-6647 Requesting Deathtrooper EIB Status [APPROVED] 7th
gazmosis replied to Toddo's topic in Request Expert Infantry Status
Hey Todd: We have finally arrived at the point that we can review yet another addition to your museum of costumes!! This one should be up front!!! Let's take a look!!! CRL and EIB Application Requirements: All required submission photos have now been posted. The Death Trooper mostly appears as a costume of novelty. There have been some incredible examples floating around, but few cross these pages. Whatever level this costume is taken to takes incredible artistry. The damage, blood, and weathering needs to be done right or it just isn;t believable. In my opinion, you have nailed it. In reviewing other Death Troopers, and comparing them to yours, it is obvious that your goal was to duplicate the "Gentle Giant" statue. Typically, the Death Trooper is seen as a gory mess. Your goal was a "less is more" approach. As you stated, your trooper has died from his chest blast wounds, but because of his mostly in tact helmet, he hasn't had the chance to "dine" on anyone nor has anyone "fed" on him. The lack of blood and duplication of the statue almost mark for mark emulates this perfectly. From our standpoint here, I need to look at the technical aspect of the build. The DT armor was based on the ANH TK. As a result, the proper details must be contained. Two things stuck out to me: The multiple rank bars on the ears and your original thermal detonators. The rank bars I will look by in lieu of a Centurion application (which you have stated is NOT your intention). However, although both the rank bars and upside down and mostly solid thermal detonator are on the statue, I believe that these are both oversights on the part of the artist paying more attention to DT details than ANH Stunt details. You have repaired the thermal detonator to stick with the proper base construction of the costume and that was appreciated. All that stated, I would like to congratulate you on yet another EIB!! Well done and well though out!! Centurion Suggestions: Although Todd has replaced mostly the entire costume with accepted armor parts, the FX torso still remains which makes this ineligible for Centurion. It was not Todd's intention but I needed to explain it anyway. Congratulations again!! Go scare someone!!!!!

-
TK Helmet kit. Spray paint or just polish?
gazmosis replied to inquisitot785's topic in Hard Armor (General Discussion)
You can also use standard automotive compound and a little elbow grease and you will get a mirror shine out of your helmet. As for the paint coming off, don't worry about it. It adheres pretty nicely. Just make sure to care for your helmet during storage. Wrap it up in padding or a protected helmet bag. -
TK-5632 Requesting ANH Stunt Centurion Status [TM][137]
gazmosis replied to Burn's topic in Request Centurion Status
Yes, Yes, Yes Well done!!!! Thank you for making this small adjustment and with that I would like to welcome you to Centurion!!!! Congratulations, Sir!!! -
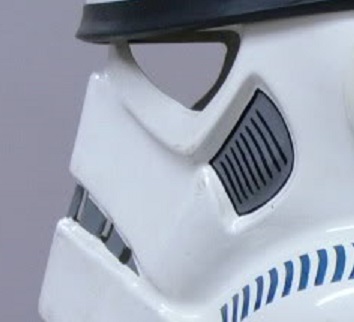
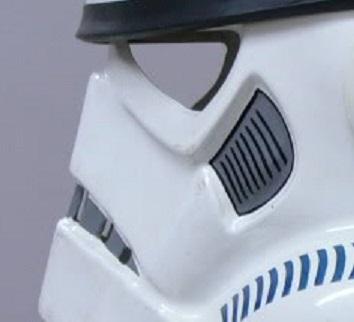
Alright! Thank you, Joe, for following up. On to your armor!! CRL and EIB Application Requirements: All required submission photos have now been posted. Helmet details are always important. The "Hero" helmet has to be a bit more specific. This is yet another stellar example of TM armor in its glory. Well built, well detailed, and well deserved of an EIB award!! Congratulations on your second EIB badge!! Other-Armor Fit/Assembly: This is the section where myself and your fellow troopers provide observations for slight changes to improve the overall look of your armor. These will not affect any application. I do not have much of anything to contribute here. If you were to threaten me with a hot poker to list something, it would be with the trap and tear vent lines. Now, I applaud anyone who takes on the task of hand painting. You did a great job!! Looking at the vent lines on your tears, (here is a side by side with a screen used lid) Maybe its the spacing, the positioning within the tear, the thickness of the vent lines themselves. I don;t know. Perhaps I am just splitting hairs. With the rear traps, here is the screen used lid:Yours:and a small adjustment I did with my kindergarten "paint" skills to make them just a tad shorter: Again, this is just what catches my eye. I am not requiring a change here. It is more just an observation. Centurion Suggestions: Just make sure to post all required pics from the list. Unless your submission pics show something not seen here, I don;t note anything that would stand in your way. Fantastic work!!!

-
What about the red body filler we all used to use on the TE buckets to repair the brows? Spot putty
-
Thank you, Joe!
-
TK-5632 Requesting ANH Stunt Centurion Status [TM][137]
gazmosis replied to Burn's topic in Request Centurion Status
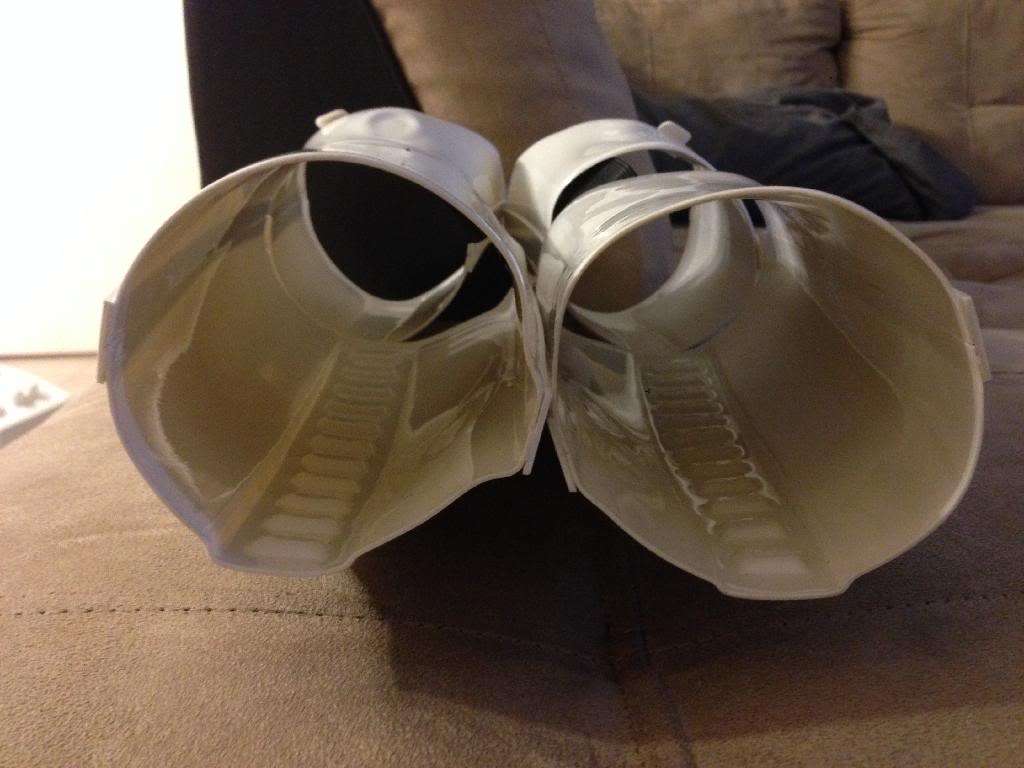
Great to see you finally made it to Centurion!!! Rushing into these things is never suggested. Let's look at your armor!! CRL and Centurion Application Requirements: I can't think of a word other than "Delicious" every time I see a TM set of armor. Yours, Peter, is no exception. Awesome attention to detail, Stellar construction, on point helmet details, and top notch hardware locations are what Centurion is all about. You even have the kidney notch.....oh wait...TM already comes with that! Look how funny I think I am!!! HAHAHA! ANYWAY......... There is just one thing that I will ask you to change and post a picture of before I put your Centurion award through. It is a requirement that the wrist opening of the forearms have NO return edge. This includes the ridge with the square indents. Here are your openings: Here is the way they need to look: This is a 5 minute touch up and pic and we will be good!! Other-Armor Fit/Assembly: Let's remind ourselves here folks: we are all not built the same. Some have longer arms, shorter torsos, long shins, short thighs. We have to work with what nature has given us. In the case of Peter's shins, nothing ever jumped out at me as a fit issue. The sniper plate seems to be hiding a bit under the thigh but that is just camera angle and I am sure it clears when his leg bends. Raising the shins would make it hit for sure. If the height of your shins is at all a concern, Peter, I would take a little off the bottom or just leave it as it is. As for the rivets on the thermal detonator. Would I prefer and suggest that you had the slotted screws? Yes. Will I make you change them? No. This is a specific detail that until it is put into the CRL as a necessity, I will only suggest and encourage the change. My only other comment, if I was to make one, would be that your scope rail on your blaster boarderlines on being a little high off the receiver body. But I am not requiring a change with this. I am just making a note. Your armor is on point and your Garrison should be proud to have you beside them. Please do that one little change with your forearms and you will make them envious!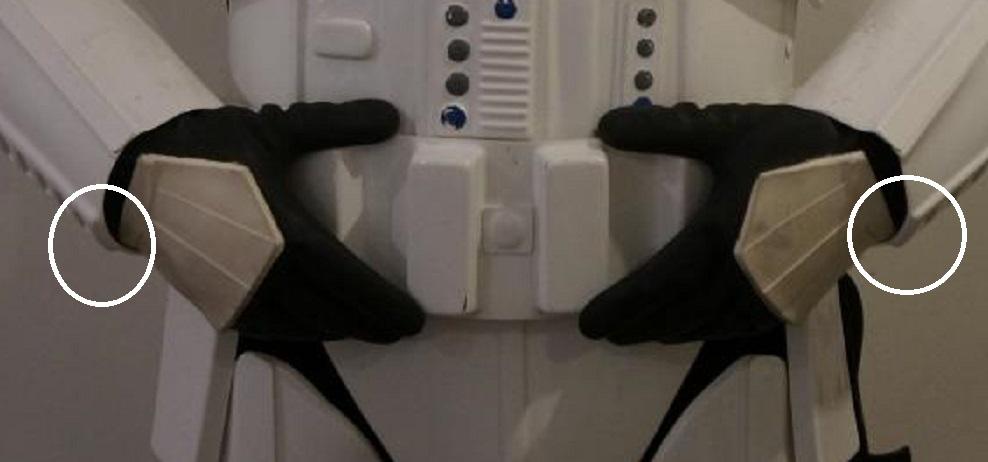

-
Child's Undersuit
gazmosis replied to DarthBrute's topic in Boots, Soft Parts, and other Accessories
Look in a store that supplies clothes for dancing/figure skating/ballet. That is where we got ours. -
TK-6647 Requesting Deathtrooper EIB Status [APPROVED] 7th
gazmosis replied to Toddo's topic in Request Expert Infantry Status
Alright Todd! This is a great one to add to the never ending growth of your costume collection!!! You should open a museum! Anyway, any EIB application needs to be complete with the correct set of required photos. Here is the list to reference:http://www.whitearmor.net/forum/topic/22583-expert-infantry-application-guidelines/ The Deathtrooper is just a rotted, blown apart version of the standard ANH Stunt armor. All CRL requirements for the construction should be present and documented. A couple things I have noticed off the bat is the lack of bloodstains. I will go into total detail upon the application completion, but I would highly suggest you consider repairing your thermal detonator. Your control panel is upside down and there should be space between the outer caps and the control panel. Please go back over all the CRL requirements. Congrats on this armor. This must have been a real challenge! -
Hey Joe!!! Great upgrade with your armor. It's always nice to have yet another version you can rely on. Before I do a full review, you are missing a few pictures to make your application complete. Please post the following shots: Cod and butt plate hardware, interior strapping, hovi mic tip close up and back of helmet detail pics. It looks like everything should be in order, but the application itself needs to be complete. Please get these posted soon so we can get to this great armor!!
-
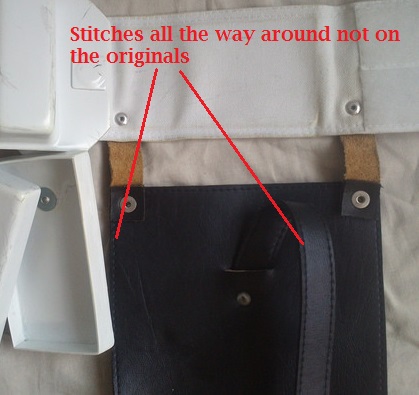
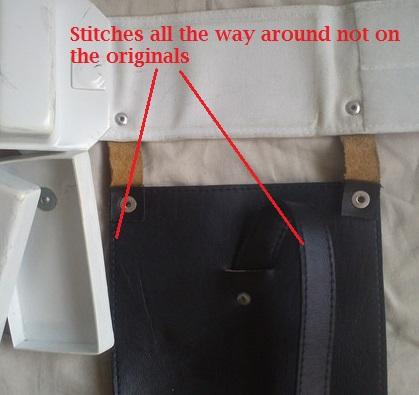
Well, Germain, I can say I have been looking forward to this for a long time!!! Thank you for your application! Let's look at your armor! CRL and EIB Application Requirements: I will go forward with the full review. Please take and post a shot of your hovi tips close-up. I can see that you properly replaced the ones that originally came with the AP kit, but it is a required photo. Your body type paired with your skill and attention to detail really make your armor look awesome!! Little details make this a joy to look at: perfect ears, return edge seam alignment, top class handpainted details,...nice! Your armor contains all the required features for EIB. With that said, I would like to congratulate and welcome you to Expert Infantry! Other-Armor Fit/Assembly: This is a section where myself and fellow troopers make suggestions to improve the overall look of your armor. These suggestions will not affect your applications. There is not a whole lot of things I can contribute to this section and that is a good thing! The only comment I would have is actually in regards to your blaster and holster. Your scope rail boarderlines an being a tad high off the main receiver and the front caps and nuts on the power cylinders are big. Here is a comparison to what I see: Cylinders used for the film: and yours: the other item is the "stitchyness" of your holster. Typically, the holsters only had stitching on the one side where the leather was folded over and bound. With your great attention to detail, these little things surprised me but don't take away from the overall build. Great job also conquering the notorious AP sniper!! Centurion Suggestions: Unless your complete Centurion photo page shows a detail not seen here, I don't see anything that would keep Centurion from you. Nice work incorporating the notch into the kidney! Congratulations again!!! Well done!

-
TK-71940 Requesting ANH Stunt EIB Status [MTK][408]
gazmosis replied to 2thin's topic in Request Expert Infantry Status
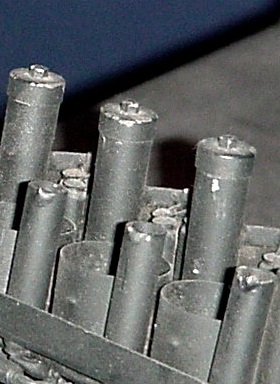
Hey Chance!!! MTK is quickly earning its place here, I agree! Your armor is a great example of how good this armor can be. Thank you for your application and let's look at your armor! CRL and EIB Application Requirements: I will go ahead and do a full review on your application. I would like you to take and ad a close up of your ab details and your crotch hardware. I can see them clearly in several shots, but they are part of the required photo list. Please edit them in as soon as you can! As for the overall build of your armor, your attention to detail is apparent. Your hardware placements are darn near perfect. Well done overall on the build!!! With that, I would like to congratulate and welcome you to EIB!! Other-Armor Fit/Assembly: I like easy reviews like this! There are a couple things that I and your fellow troopers have suggested. These are suggestions to improve the overall look of your armor and won't affect your applications. First off is your left bicep. On any build, I look for balance between the two sides. The need to size this down shows most in your side shot with your arms raised. You can see just how much extra room there is to eliminate. Your back shot also makes this point. It will do so much to put your armor in balance. Hopefully, you used E6000 and this will be an easy trim and re-glue. The next thing is not necessarily a repair, but something I just want to mention for the record. This is in regards to your belt's drop boxes. The originals there very thin:From nearest measurements, ABOUT 10 MM. Yours are good. But they are right at the boarderline of what I would consider too thick. Centurion Suggestions: I cannot see anything at this time that would hold you back from Centurion for the exception of the notch in the lower corner of the kidney. This is a requirement that needs to be implemented into your build. I would suggest the bicep adjustment. Although this WON'T hold you back, it would just make you look that much more awesome. Make sure to follow the Centurion photo checklist. Since we don't have a pic (but I know you will post one soon ) of your cod/butt hardware, make sure these are not painted. Congrats again on a great set of armor!!! BTW....don't get too used to sitting. This is just an accident waiting to happen. -
Holy .......! Really nice job!
-
Manzilla's ESB AM 2.0 Armor Build
gazmosis replied to Manzilla's topic in Build Threads Requireing Maintenance
You asked earlier if the gaps in the ears against the helmet are acceptable. Yes. Many of the on screen helmets had gaps. However if you wanted to eliminate the ones you have, all you need to do is move the ear down ever so slightly and massage that little corner to nestle into the curved crease between the cheek and the tube. Although you can't increase the hole size in your ears to slide it down, you CAN increase the holes underneath the ears on the main helmet body. Using the same drill bit you used to make the original hole, place it back into the hole and with a little downward pressure on the drill it will open the hole a little below the original location allowing the screws to drop just a tad. You will be able to trim those ears darn near perfect. Watch the back side of the ears as well. One side does affect the other. -
I didn't see anyone answer regarding the main button plate. It should be trimmed so that a small portion of the raised area it sits on us visible. Same with the smaller 4 button plate. Ron hit it right on the head regarding your thigh fitting. Just make sure when your helper is marking the back of your thighs that you have them pulled up high into your crotch.
-
TK recruit soon to be out of boot camp
gazmosis replied to inquisitot785's topic in Getting Started - Read this First!
There is no protocol for build order of your armor. Many build their helmets as inspiration to move forward. However, building your helmet first will not give you more insight on how to proceed with the rest of your armor. The color of the plastic is the only thing that is similar. Research on the build thread section is your friend. You will find a host of ATA build threads to help you. -
Black is what's most commonly used. Try both and see which you like best
-
Are you sure it wasn't Dave M? In that case, it would be Trooperbay you are looking for.