Leaderboard


Popular Content
Showing content with the highest reputation on 01/12/2019 in all areas
-
Haha okay, I’ve submitted my photos! Thanks for the push3 points
-
Thank you very much I am very happy to get the IE in my second suit, thank you for your time and help to achieve this achievement.Thank you very much for all the comments and recommendations so that my AFP armor gets the centurion level.From today I start working on it. Best regards.2 points
-
Thank you! I just signed up for it!1 point
-
Wait till final fitting before trimming anything.1 point
-
Congrats Luis! Eres un crack1 point
-
Go for It! Good luck!1 point
-
Congratulations Luis. Very good job! Ha quedado genial, enhorabuena!1 point
-
Great job Bro!!! Goodluck with your application!!!1 point
-
That's the spirit, Luis, nice to hear!!1 point
-
I envy your electronic know-how; keep up the great work [emoji1] Sent from my SM-G390W using Tapatalk1 point
-
Nice work, a couple of things I would suggest, move the brow up a little, the Hero helmets had the lower brow where the Stunt versions you could normally see a little white under the brow trim. I would also remove some of the extra grey paint on the teeth, you have some extra on the gums. Also looks like you could remove a little black paint from your vocoder on the sides, compare to the image below. As mentioned your ears don't appear to be back far enough on the bottom, not just for the angle of screws but you can see some bumps and recess areas on the back of helmet, ears should cover these areas. Normally there is a gap between the cod snaps Good luck with approval1 point
-
Well done, Luis. Great job. :-)1 point
-
Haha. My FB banner... Sent from my iPhone using Tapatalk1 point
-
ill check1 point
-
Congratulations trooper1 point
-
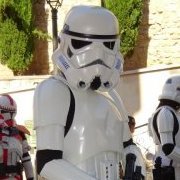
Hi Luis, and thank you for your EI submission! CRL and EIB Application Requirements: All required submission photos have been posted, and I am very pleased to announce your armor displays all the necessary elements to qualify for ANH Stunt Expert Infantry. On behalf of the entire D.O. staff, congratulations! Other-Armor Fit/Assembly: In this section we review observations made by your fellow troopers and ourselves. Some observations may lead to suggestions to improve the overall look of your armor. First, really nice job on this armor, sir. Since this is your second EI submission, you are familiar with the fact that the higher levels are all about the details, and we have just a few to go over so let's dive right in! Starting at the vocoder, the top looks a little squared off. A few minutes with a round tip "Filbert" style artist's brush would really make it look a lot more defined. Reference image Filbert brush Your right shoulder bell is sitting much lower than the left one. This looks to be a simple matter of tightening up the elastic that connects it to the shoulder bridge so that it matches your left one. Reference image Your posterior (butt) plate is riding over your kidney plate quite a bit. Since you used the "classic" strapping system, I recommend tightening up the elastic on the bottom center posterior/kidney connection. This should tighten them up and keep this from happening. Reference images In your main photo your ABS belt is in the ideal position, (covering the bottoms of your ab-button plates), but in your "action shot" it appears to be much lower. You may want to check the snaps that hold it in place. Side note: AWESOME job on those ab button covers!! Reference image Your TD should be a LOT lower than it is right now. It looks as if it is not pushed all the way down, but even if it were it would still be higher than it should. The top should be at the same level as the top of your canvas belt, so we are suggesting that you reposition or replace the clips. Reference image Reference image You did a fantastic job on your left rear calf connection, but the right one needs some work. The cover strip should be a lot nearer to the center as seen in the reference image. Reference image You have a sharp looking blaster there, but a few minutes with some spray paint could really make it look a lot more screen accurate! Having some brass coloring on the scope is nice, but there is quite a bit more than needed. It may be the glare of the photo, but it looks like there is also some on the barrel below the charging handle area. It also appears that there is weathering on your T-tracks. Since these were made of black plastic, there should be none. Reference images Lastly, note that the handles (grips) on the Sterlings used were also made of plastic, which should have a shiny black finish and no weathering. Reference image Centurion Suggestions:In this section we prepare you for Centurion. More photos may be requested that allow us to make better decisions on possible adjustment etc. If there are any areas of concern they will be discussed here. Because Centurion photos show much more detail than EIB, items pertaining to Centurion might be seen there and not here. We try to point out all we can from what is seen but the final accuracy is the responsibility of the trooper. As per the CRL, "The plastic shoulder straps need to be held down in the back via a white elastic band to the white fabric that connects/bridges the chest and back piece". Reference image Unfortunately, the rivets on your ab plate will need to be moved, Luis. As per the CRL, Rivets are equally spaced along the depth of the armor and about 10mm from the edgeThe ones on your kidney align correctly, and are properly spaced from the bend at the return edge (blue line). However, since your ab plate has no return edge they need to be much closer as shown in the reference image below. Moving them and filling the holes is actually not as difficult as it may seem, and there is a great tutorial on how to make ABS paste to accomplish this. Reference image Since you obviously have the talent, I have every confidence that you can make these changes, and I look forward to seeing you add yet another Centurion award to your profile!1 point
-
Update!1 point
-
That's really wierd. That photo does make it look like its cross-head - it must be the light as they are definitely all slotted. (edit: looking at this some more I wonder if I accidentally uploaded an old photo of my very first screws? I cant understand how else that photo looked the way it did) Anyway - here's a better picture. Thanks1 point
-
Thank you for your submission, Luis! One of us will be with you shortly. While you are waiting, it may be the photo, but it looks as if the paint has been pretty severely scratched on your left cheek trap. Could you post up a new pic of this, as well as one of close-up, clear side view of the inside of your sniper knee plate connection? Thanks!!1 point
-
Cool. A great armor and a great job Congratulations.1 point