Leaderboard


Popular Content
Showing content with the highest reputation on 11/25/2024 in Posts
-
having previously built a Jimmiroquai fotk I second the information here. I wouldn’t sand before base coat paint above 800 grit. Anything higher can lead to runs. Also I’d highly recommend using a gloss polyurethane based clear and protective coat for the shine. another thing I’ve done with wet sanding here and there is use a dab of dish soap alongside the water it helps the sanding process be a little more smooth, but overall just water is plenty fine too.2 points
-
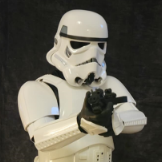
I proudly can announce It's approved.2 points
-
Mandatory Information Costume = Stormtrooper, The Force Awakens Costume CRL Link = https://databank.501st.com/databank/Costuming:TK_-_First_Order Name = Justin R. TKID = 61490 Forum Name = TheRascalKing Legion Profile = https://www.501st.com/members/displaymemberdetails.php?userID=26076 Garrison/Squad = Southern California Garrison, Orange County Squad Armor = Denuo Novo Helmet = Anovos, Standard TFA Optional Information Height = 5ft 11in, or 180cm Weight = 175lbs, or 80kg Neckseal & Gaskets = Sheev's Emporium Forearms, Cod, & Belt Boxes = Imperial Surplus, TFA Belt Pouches = Denuo Novo and Trooperbay Holster = Dantooine Props (functional) Hand Plates = Dantooine Props Gloves = Endor Finders Undersuit shorts = Geeky Pink's Boots = Imperial Boots Blaster = Branfuhr Studios F11-D, TFA Armor Photos Helmet Off (unadjusted) Front / Back Right Side Left Side Action Pose Detail Photos Helmet Neckseal Chest Plate Back/Yoke Thermal Detonator Shoulder Gaskets Shoulder Bells Biceps Forearms Gloves/Handplates Abdomen Section Codpiece Posterior armor Belt Thighs Knee Gaskets & Plates Shins Spats Boots Optional Accessories F-11D Blaster Thank you for your consideration, @Deployment Officer Team! Huge thanks (and Armorer credit should they desire) is due to @equuspolo for the hands on assist with adjustments and to @KC Grim for taking my full armor photos.1 point
-
Hi everyone my name is Dave or TK25097 I live in Sunderland. Life long fan obvs. It’s have taken me around ten month to get to this point and my TKID and my stormtrooper ESB to be cleared but I’ve made it. Still have to get first troop done but due to working oversea it will not be until the back end of Jan. just wonted to say hi and see if there is any one from up north UK garrison. Looking forwards to making new friends.1 point
-
Thank you Glen! I will take a rear one within the next couple days , I appreciate your input as always , thank you very much!1 point
-
Congrats and good work!1 point
-
Looking Great Justin. ! One of us will be with you as soon as possible1 point
-
Welcome to the ranks trooper!1 point
-
Hi Keith have you reached out to troopers in your local area, you can find them here https://www.501st.com/maps/ A couple of Youtube videos you may find helpful Thigh elastic A few different ways to strap thighs You could also make a build thread, great way to get feedback on your build https://www.whitearmor.net/forum/forum/80-anh-build-threads/ For adding images most use a free online image host, how to here1 point
-
Everyone has their own way to prep, I prefer using bondo for larger filling and blade/glazing putty for smaller imperfections. Also be careful using too much blade/glazing putty as the thinners in the paint can seep into the putty while the paint is drying and cause imperfections. Are you wet sanding?, wet and dry sandpaper with water, helps the sandpaper to last a little longer, less clogging. I normally use 240 wet and dry, after that I use a primer filler and sand with 400, then paint over. 1500/2000 is normally used for cutting and polishing final coats, very very fine and it's a lot of work using with blade/glazing putty.1 point
-
My pleasure While waiting for the @Deployment Officer Team I would change your hovi mesh as the WTF is very fine, many use the mesh from a strainer EIB approval 1060WTF1 point
-
Welcome mate! Always great to see an ESB approval, and we look forward to hopefully seeing you at Expert Infantry! Sent from my iPhone using Tapatalk1 point
-
Updated @AndreasSjodin @Dave newbie1 point
-
Welcome to the FISD David! Whilst you're waiting to be able to do an induction and things now would be a good time to gather up the photos you probably already have and see if you are good to go for Level 2. https://www.whitearmor.net/forum/forum/95-expert-infantry-program/ Sunderland's the far end for but maybe see you around at a Con in the middle.1 point
-
The first few ab for providing you guys with flexible and very robust material built to last are ready. Here are the details for those interested. I will post the purchasing details on my FB page. The first one below is the first out, but the others are much better (see picture in thread below and the one after) Dimensions 105cm long x 30cm high x 6-9mm thick. There is a lot of material, prep and consumables to create this ab. I want this piece to be available to everyone, so I'm not really counting my time much in this mostly want people to get them as it is really not easy to do. I have tested to wrap it tightly for several days to see if I can ship it in a small footprint and it doesn't deform, so all good. I will probably ship them in a hard 3D printed cylinder to protect that you can use for carrying afterward just like I have. This is a raw casting, you will need to trim it to your size with a very sharp razor blade (recommend that you don't cheap on them and use multiple to trim it completely to your size) The wax used to release the rubber does create a bit of surface finish unevenness, but I have rubbed it on the other casting with some dishwashing soap and it gets way better. I'll try to take pictures of how I added straps and velcros on it. To have a nice joint on the right side to keep them together, I did make a special velcro with rigid sections. The Ab is flexible, but not too much as you don't want any deformation while wearing it. I used a balance between rigidity and flexibility so that there are no 'pockets' while wearing. NOTE: The pictures below are with the worst lighting condition to expose the variations to a maximum, it's way better/ not noticeable with standard lighting, and when it's on you with the armor overlapping. This is a rubber casting so there are always tinny defects (the ones in the movie are way worst from up close :). The color is even everywhere on the casting, but the surface finish variation in these light conditions show like a bit of variation of color but is not showing when wearing . Also, don't forget that the bottom 5cm will not show, as the belt is overlapping it all around, same for the top portion. The dust can easily be cleaned with soap and water of course. Try not to put water on the back side, as the foam rubber is porous and will retain water. Enjoy!1 point
-
Before I forget, a BIG thank you to everything that helped me with advice along the way (including my build partner, who is not a part of FISD/501st, just an absolutely solid friend). @gmrhodes13 @Doggydoc @dblcross @TKSpartan & @FN1313, you guys get a special callout for answering multiple questions for me. I trying appreciate it as I hit a real rut when I got into my own head when I dorked up my first set of ears. I am not done yet, I still have the EIB process and my blaster to build, but will likely not make much progress on that until after the holidays.1 point
-
Quick reference guide for armor used in ******** Otherwise known as the OT (Original Trilogy) ******** Whether you are aiming toward Basic 501st approval, Expert Infantry or Centurion level, the FISD Gallery section is an invaluable resource for information containing hundreds of images of screen captures and film used armor. However, searching for the exact reference you are looking for can take a lot of time, especially for those seeking higher levels of accuracy or approval. This thread contains edited versions of those images and is designed to be a quick reference. It also contains notes and CRL (Costume Reference Library) requirements as applicable, but does not contain them all. For complete info. you can view the various costumes here: CRL IMPORTANT! Please be aware when applying for higher levels that the Deployment Officers do not depend solely on the CRLs when reviewing submissions. Screen caps and reference images are also taken into consideration. When in doubt, always feel free to contact any member of the D.O. Staff for assistance... we are here to help! The costume categories are shown as ANH (A New Hope) Stunt, ANH Hero, the Empire Strikes Back (ESB) and Return of the Jedi (ROTJ). Items for Basic 501st approval will be listed as Basic Items for Expert Infantry approval will be listed as Level 2 Items for Centurion approval will be listed as Level 3 Requirements from the various CRLs will be shown like this: bold, italicized in white, and may be paraphrased for brevity. Comments will be listed as Notes: or Important: TO SEE A PARTICULAR AREA, JUST SCROLL OVER IT BELOW AND LEFT CLICK ON IT! HELMET ARMOR BOOTS/HOLSTER Brow Trim Chest/Back Plate Boots Ear Placement AB/Kidney/Posterior plates (including strapping Holster Ear Screws Belt (ABS-Canvas) and Drop Boxes Ear Bars Shoulder Bells Tears/Traps Biceps/Forearms Frown Thighs/Lower Leg Armor Tube Stripes Thermal Detonator (TD) Hovi Tips Gloves/Hand Guards Vocoder DOWNLOADABLE PDF for PRINTING: Courtesy of Caleb (MaskedVengance) https://drive.google.com/file/d/1BbwWkC8nwLgH-jvU634IUcrO2mf4Yovb/view This will be an ongoing project and more photos will be added. I have locked the topic, but if you have any reference images you would like to see added, please feel free to PM me. Thanks for looking, and I hope this helps! SHOUT OUT to Mark (sskunky) of CFO for providing me with some great photos of his screen used ROTJ armor. THANKS!1 point