Leaderboard


Popular Content
Showing content with the highest reputation on 02/28/2023 in all areas
-
Tk 24062 Costa Rica Garrison eproductor spanreproductor spanr eproductor span
 4 points
 -
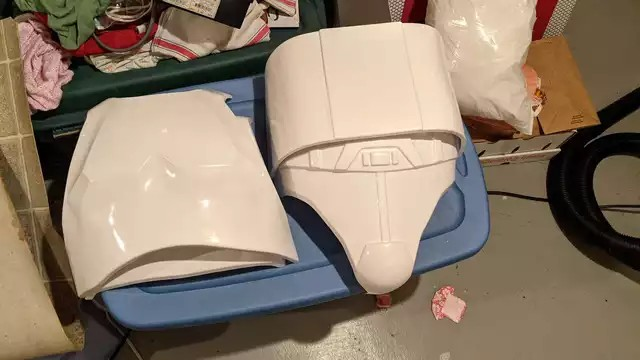
My TK armor has a crack- what can I do now? Hello there! In this simple tutorial I will show you how to fix cracks in your beloved TK armor. Finding a crack for the first time is super scary, but don’t worry, they can easily be fixed! What you need: Leftover scraps of plastic from your armor build Aceton A jar (preferably made of glass and not plastic) with a lid Something to stir Sanding paper Cottons swabs Paper tissues/ wipes Reminder: Aceton is quite stinky and unhealthy so make sure to work in a well ventilated area! Starting off: Break your leftover scraps into many tiny scraps so they dissolve easier. Put them in your jar (I use a jam jar) and pour in some Aceton over them. Be careful to not pour too much as you don’t it to be too runny. Close the jar, wait and shake it around a bit. Take your tool ans stir the mix. You want the whole thing to be viscous and thick. Applying the goo: When you’re happy with your little mixture, take a look at the cracks. For huge cracks in places with lots of pressure on them, I strongly recommend adding a piece of plastic as support. I just glue a little strip of the leftover plastic on the backside of the crack using the Aceton paste and then cover the plastic strip in Aceton to get a smooth transition. As you can see in the picture, I used strong magnets to help the plastic strips stay in place while the Aceton paste is drying. Adding the plastic strip for support is really important because otherwise, the cracks will come back. It’s not pretty yet, but we’re getting there! On the front side use less Aceton paste but make sure you cover the whole crack! Sanding it down: When the Aceton paste is completely dry and hard, you can sand it down. Take some sanding paper and start sanding. Do that until you’re happy with the look aka welcome to sanding hell! Make sure you start with a coarser sanding paper and make your way down to a really fine one! You want to have a really smooth surface! In the picture, the crack is still visible, so I had to do more sanding. Finishing touches: When you’re happy with your surface, you might see that the shine of your armor is reduced in the areas where you worked with the Aceton paste. My armor is one of the really shiny ones so I wanted to bring back the shine. What you can do for that is to put some (really just a little) Aceton on a tissue or a cotton swap (depending on the size of the area) and give the area you want to make shiny a quick wipe. This has worked really well for me. I sadly don't have a picture of the finished repair because I wanted to get over with it after hours of sanding. But you'll get the idea! And voilà, your TK armor is fixed again! Keep trooping! The repaired parts will still not be as sturdy as they used to be, so watch out and don't do stuff like breakdancing or going down slides in armor (yes, I witness both of these)! Additional tip: Keep the jar and write the Trooper you used it for on the lid! In our household, we have armor kits from different makers so we label the jars to not confuse them. Also, you can just use the same glass jar over and over again! This tutorial was brought to you by TK-508933 points
-
(this rhyme took WAAAYYYY too much thought )3 points
-
Who knew there were so many buttplate pick-up lines out there?3 points
-
There was some discussion amongst the staff this morning about TK pickup lines... I thought I'd immortalize some in meme form.3 points
-
Hell Dave! Thank you for your request! Added to the process line.3 points
-
Gael’Phoenix TK15803 Spanish Garrison And the two little jawas are my baby girls [emoji7] Enviado desde mi iPhone utilizando Tapatalk3 points
-
That's hilarous! I knew the memage would begin shortly after the buttplate pick up line2 points
-
Ok, I think I figured out a workaround. Thanks, all. I'll also get the desktops version figured out for when I start editing and uploading images.
 2 points
 -
TK-26590 Spanish Garrison Pic with commander and incinerator are all women’s so Commander is TK-14102 Incinerator is TK-15803 Mudtrooper is TX-611792 points
-
TK87227. Star Garrison/Imperial Rough Rider Squad.
 2 points
 -
Hi, everyone! This will be a day long remembered...BBB day! After years of contemplating and months of waiting, I finally received my armor kit, thanks to Dave from Dave's Darkside Depot. Next, assembly. I know this will be a long process, so I'm starting a thread to document the build. Based off the research I've done, it seems that the typically recommended starting point is the biceps or forearms, so that may be my jumping off point. Any additional advice, resources, or words of encouragement would be greatly appreciated! Thanks all, and I'm excited to enlist in the Empire!1 point
-
Name: Dave Bristol FISD Forum Name: HardcaseNZ Legion ID: 17278 Garrison: Outpost 42 Legion Profile: https://www.501st.com/members/displaymemberdetails.php?userID=17278 Height: 6' Weight: 103kg Costume Information Armor Maker: RS Props Helmet Maker: RS Props E-11 Blaster: RS Props Canvas Belt: RS Props Hand Guards: RS Props Gloves: Rubber Chemical Gloves: RS Props Neck Seal: RS Props Holster: RS Props Boots: Imperial Surplus via RS Props1 point
-
HEY HEY Women of White and Chrome!!!! International Woman’s Day is around the corner!! (March. 8th) With the upcoming announcements of the FISD Women Unit Valkyrie section for the Detachment, what better way than to kick that off by showcasing our ladies in armor!!! Please do send me photos of yourself in your armor. Your TKID Your Garrison/Squad/Outpost All photos in to me please by March. 3rd. (Also collecting for Legion posting as well!) THANK YOU!!! [emoji175]SoulArt/41307 Sent from my iPhone using Tapatalk1 point
-
I’ve scoured the forums, and there doesn’t seem to be any consensus on what type of armor to use for the TKC. Does anyone know the best type? ANH, ROTJ, ESB? Is there anywhere that sells the TKC armor without the need for modifications?1 point
-
Nice work trooper1 point
-
Good luck Dave!1 point
-
BBB day will be this week. I've got a tracking number. Sent from my SM-G781V using Tapatalk1 point
-
Some more return edge stuff during a zoom class Forearms Outer Inner Biceps Outer Top Outer lower I wasn't sure if to remove these on top of the other edges I've removed, but I was following the return edge guide. It's a lot to digest, but we're getting somewhere. Biceps Inner upper Inner lower The arms is what I've been told to tackle first.1 point
-
Awesome photos coming in ladies!! thank you for sharing.1 point
-
Will these be sufficient for the replacement?1 point
-
Good luck with the build. Hope to see you join the ranks soon. Couple of tips. Mark before you cut, and post your marks before you cut. These guys are awesome with speedy replies saying yes or no that your marks looks good or not. Remember, cut less, you can always cut more but can't add it back.1 point
-
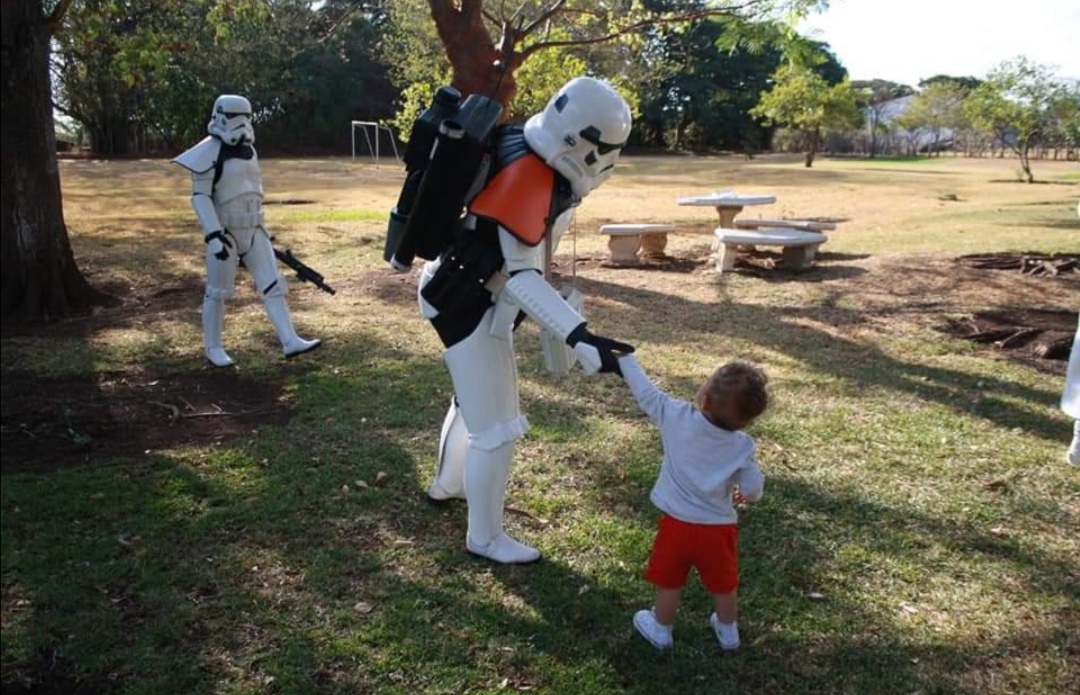
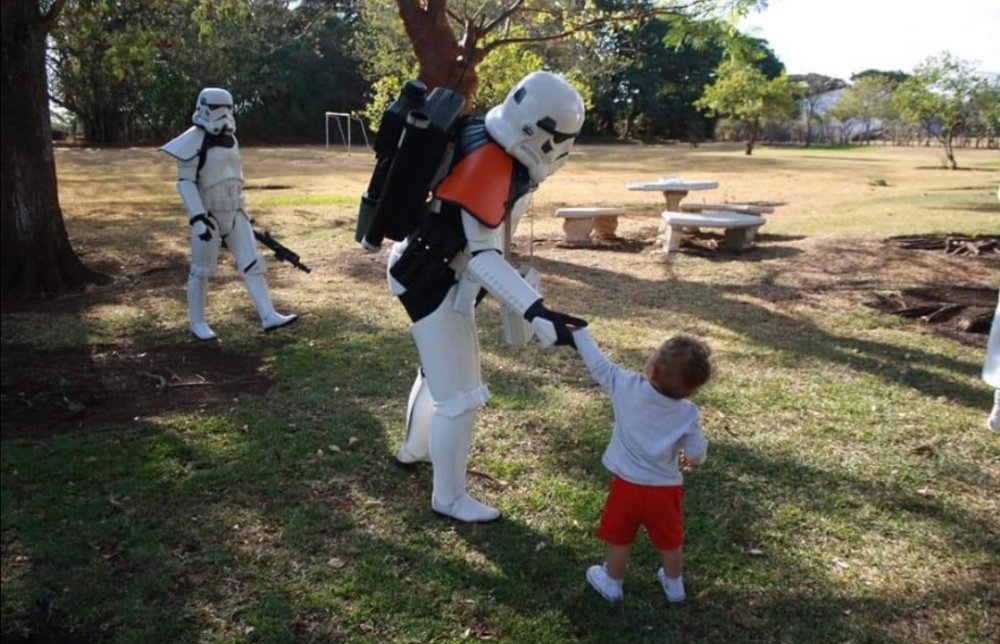
Totally ready for this Journey. Can't wait to make kids smile!1 point
-
Hi there I’m also a new member and have fallen into the same trap as dblcross. Could admin please delete all my attachments and I’ll try not to stuff this up again. My apologies.1 point
-
Just got word that he's done with trimming and will be sending me a tracking number soon. Sent from my SM-G781V using Tapatalk1 point
-
I would agree with an additional Disney Park CRL than make a change to the current CRL standard. I will be building my DN kit at some point and as daunting as I feel about doing the should seams, it is in line with what we see on screen and looks correct.1 point
-
and as for me...1 point
-
+ GERALD too! I made this one several days ago.1 point
-
I may not be able to sit, but I can drink.1 point
-
1 point
-
I just saw this template and thought a MadeMeSmile meme was worth doing. stay shiny, fellow TKs.1 point