Leaderboard


Popular Content
Showing content with the highest reputation on 02/09/2023 in all areas
-
After some months of back and forth, I'm back on the bandwagon. 2 weeks in and I'm down 7 lbs. Changed the diet, added some additional walking and light exercises. Now to keep the momentum going. I've got a long way to rid myself of the 50 extra lbs I've put back on, but I have to continue to tell myself this is a marathon, not a sprint. Sent from my SM-N981U1 using Tapatalk6 points
-
In other news, I miss trooping.3 points
-
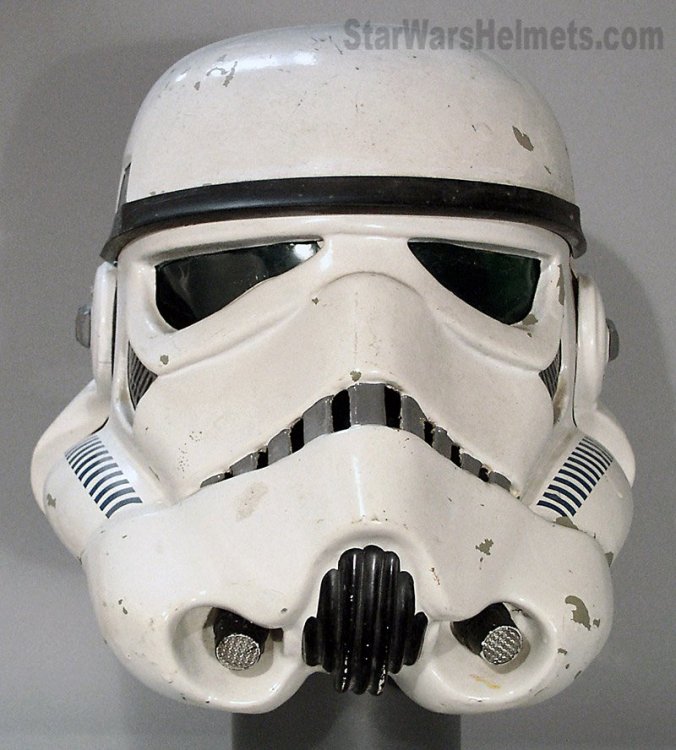
I decided that I wanted to get rid of the eggshell texture, so I did some research and ended up buying some white Carfidant Ultimate Scratch & Swirl Remover. I wet sanded with 1000 then 2000 grit, being careful not to burn through the paint. Then used the scratch remover to bring it to a smooth polish. Once that was done, I attached the ears, tears and traps, brow trim and teeth. I attached the lenses I had purchased from Paul Prentice. I decided to drill holes in the chin to attach the mic tips (don't remember where I purchased them from) and the vocoder with fasteners and nuts. And lastly ended up using US52 rubber U trim (OT TK brow trim) for the neck trim. I have to say in the end I was pretty happy with the result. Finally I had my beautiful, factory new R1TK helmet!! This build was waaaaaayy more work than I anticipated, but I'm pretty proud of the finished product! It has become my flagship piece in my collection. I hope you enjoyed the journey along with me. Please feel free to comment and let me know if you have any questions3 points
-
I just saw this template and thought a MadeMeSmile meme was worth doing. stay shiny, fellow TKs.2 points
-
After hours and hours of wet sanding, I was finally able to get the texture and sagging paint removed and got it back to paint-ready. I applied some of the lessons I learned and watched some YouTube videos and gave it another go. It turned out pretty well in comparison to the first go round and aside from some minimal eggshell texture I was happy with it. So I decided to mock it up to see what it looked like with all the pieces attached at this point. (aside from the lenses) Also thought I'd do a side-by-side with the Nico helmet on the left and a black series helmet on the right for comparison. Keep in mind, the black series does have a modified brow trim.2 points
-
Hi Scott, Sorry for the delay in responding to your thread but I am truly sorry to feel that you will not be continuing on to Level 3. Being a commission build we realize that you have no control over most of the items listed in your review. If you look at past reviews for troopers with commission builds from this particular maker you will see the exact same issues are present. As is stated in the "Getting Started..." section: COMMISSION BUILDS Please be aware before purchasing a "commission build" (assembled by any of our vetted sellers listed below) or a completed costume sold by reputable members, does not mean an automatic pass at our higher levels of approval. As with all costumes, the armor will be under the same level of scrutiny as one you assemble yourself. It must fit well and follow correctly the requirements as set out in the current CRL. Please also bare in mind, you could be requested to make modifications and corrections when applying for Expert Infantry and Centurion levels where additional reference materials are used over and above what is written in said CRL's. Some example are sniper plate positioning, rivet placement and the finer details scrutinized at Centurion. Let me add that (contrary to popular belief) we in the D.O. office are not here (nor enjoy) pointing out issues. It's also important to note that we are not the RPF (Replica Prop Forum). Unlike the MEPD who insist that higher levels mimic a particular trooper, we are aiming for the "Ideal" trooper.,, (think fresh out of the Academy). We are well aware that there were lots of differences in the armor seen in ANH... no stripes, bad fitting parts etc. However, the CRLs are there for one reason. Continuity. Any changes/updates are voted on by the members before being implemented, and when new updates are suggested they must be backed with proof of what was seen on the majority of the TKs seen in the film(s)/ As has been quoted and is seen in all reviews, we consider both text (CRL) and pictures (screen caps/reference images) when reviewing submissions. As D.O.s, we have studied literally hundreds (if not thousands) of references. All can be found here on the FISD or sites like starwarshelmets.com, but often folks may miss them. The only time we use that caveat is when we note something that was indeed screen accurate and seen on the majority of the TKs seen in the film(s). It's also important to note that after being completed (but before posting), all submissions for higher levels are peer-reviewed by the entire D.O. staff prior to final approval. We are not perfect, and this allows for a second and third set of eyes. Even then we occasionally miss things because we are, after all, human. "When you look at the CRLs, the only thing I am missing for Centurion is I need to fix the 45 degree angles my belt. "However, the other items come down to people’s personal preference and the certain reference pictures selected". Not exactly. For instance, some of the other items noted are not personal preferences or marked as "ideally" in the CRL but are stated quite clearly with no ambiguity: Drop boxes are vertically aligned with the end of the ammo belt with minimal gap between belt and box. Canvas belt must be firm / sturdy in appearance. No creasing or sagging Lower thigh ridge joins (front and rear) shall butt-up flush against each other. Any gaps must be backed with ABS or filled as not to be noticeable. Lastly, when we do note an issue we do our very best to offer advice on how to get it ready for the next level but that is up to the trooper. Will the general public notice these small details when posing for a pic with a "real" TK? Not at all! In the end it's all about about getting out there in your shiny white armor, having fun and putting smiles on faces!2 points
-
Hi folks. I’m just getting started. Though I feel like I’ve been trimming ears for a decade or so.
 1 point
 -
Thank you!!1 point
-
Thank you! Good luck on your build. Let me know if you have any questions1 point
-
"I can't wait to build this Stunt kit to at last EI. CENTURION."1 point
-
Awesome! great work1 point
-
Very very nice!!!! My brother Mike is printing Nico's bucket for me as we speak. I will hope it turns out this great. Thanks for sharing your work, helps tremendously!1 point
-
Spot on brother! Absolutely true!1 point
-
Probably would, but in my opinion not needed as the helmet looks great as is Looking at the pic Mario provided I would be tempted to raise the brow though Totally just personal preference so just ignore me if you are happy with it1 point
-
To me it looks good as it . As you said more authentic1 point
-
On mine I found the shoulder bells gap on the front would open up when moving the arms and then returning to rest so I made the elastic shorter on the front than the rear, this helps pull the shoulder bells in at the front when at rest, see how you go when you are all kitted up1 point
-
Shoulder strapping turned out good: Next I trimmed the side opening so I can get into the chest/back easier. While I had it on I determined how much I could trim off of the under chest and back, then marked it with pencil: I’m taking more off of the under chest than the back since the outer chest overlaps. Cut it off, looks good for now: With the outer chest just held in place:1 point
-
Like a lot of things practice makes perfect, I used to do some automotive spray painting but swapping back to spray cans can take some trial and error. I did find using automotive acrylic paint the best as you can apply a little heavier without creating runs as it would dry quite quickly, for a lot of enamels you just cant do this. With auto acrylic paint you can also sand, buff and polish which is a bonus if you have any dry areas or runs. One thing for sure is I'll never use rustoleum again, I've tried that a few times on droids and it's terrible paint to get a constant coverage, no matter how much you shake in between. Not sure if I've mentioned it before (I loose track of build comments) any paint sanding I find is easiest to do wet, with wet and dry sandpaper, helps to not clog as fast and makes the paper glide a little easier, a few drops of dish washing liquid can also help glide the sandpaper. Hopefully your next go over will do the trick, looking forward to seeing the progress1 point
-
Worked the shoulder bell straps, using elastic and snaps. Glued on the shoulder plate side, snaps with snap plates on the bell side.1 point
-
I don't know if I'd say "wizardry," Jim, but thanks for the sentiment! So this is something that will be documented in my build thread once I complete it, but since you asked, below you'll find a quick write-up of that eventual ab-kidney reinforcement and hardware section. I was very pleased to receive compliments on the reinforcements from @justjoseph63, but I'm not sure if you're asking about that or the rivet hardware and caps. First, I knew that I wanted to reinforce the edges of the the ab and kidney pieces so I began by cutting some spare black ABS. I used black to minimize visibility through the ab-kidney seam. I used this same plastic for my v-tabs between the kidney and posterior armor pieces. I then positioned the reinforcement strips how I wanted them, and added tape guides. This would help my rough sand the ab and kidney pieces appropriately, as well as placement when gluing the strips down. Here we have the edge reinforcements after several days of letting the E-6000 cure. An additional benefit of adding these plates was that it mostly straightened out the ab and kidney pieces, which initially had some misaligned curvatures. At this point I then glued down the strapping kit that I received from Justin (Rascal). I don't have photos of this process, but essentially I taped the ab and kidney pieces together to keep them static and then glued one side of the ab-kidney connection. Once the glue had cured, I glued the other side. In case it's not obvious in my other photos, I used the non-stretching nylon strapping on my right side, and the elastic on my left side with the rivets. Here we have some close-up photos of the actual hardware I used. Taking a page out of AJ Hamler's book, I sourced some screw caps (will add purchase links later), but unlike AJ, decided to also use the snapping base. However, doing so required that I find smaller diameter washers that still had an appropriately-sized inner hold opening, since they needed to fit inside of the cap base. After spending perhaps hours at multiple Ace Hardware stores, I finally find the right size (brass washer shown on the left). The result after using a small chisel as a rivet wedge: Moving onto the alignment tabs, which I actually haven't completed yet (have one finished one of the two). I wanted a system that would foster flush alignment of the ab and kidney pieces while also accommodating some flexibility. I thus landed on a triangle tab, which would enable some verticle movement the further away the ab and kidney pieces moved from each other. The triple photo below illustrates this, with the center photo being the default "ab-and-kidney-touching" resting position. If the kidney were to pull away from the ab, it could shift up or down as shown in the first and third photos. At the end of the day I had to implement a miniaturized version of what I had initially envisioned, due to strapping placement. For a full-sized version I could have build this into the actual reinforcement plates, with a single triangle tab sized nearly as tall as the kidney piece. Detailed progression photos of the two ab-kidney retention systems. On my left rivet side I would use the triangle tabs, and on the right side just some basic tabs to keep the ab and kidney from bulging out (but no protection against vertical misalignment). And here we have the final results. Hopefully this helps you out with your build and submission, Jim! Please don't hesitate to reach out if you have any additional questions! Go get that EIB!1 point
-
Wow! Thank you Mario, and thank you for all your help through this whole building process! M1 point
-
For shoulder bridges, I’ve filled the big square hollow and the first three narrow hollows with ABS paste to for more surface area contact when I glue them to the chest plate. Been trying to check references and I think that, in general, four thinner hollow/bumps were positioned over the chest plate tabs with the rest free-floating. Still trying to gauge the measurements for mine. Later I will cut the last square hollow off the back end. I’m not a huge guy. Pretty sure I won’t need it and I do want to be as screen-accurate as possible.1 point
-
That’s a great idea. Thank you. Sent from my iPhone using Tapatalk1 point
-
Exciting times, you may find once you start adding some strapping you may have to make some slight modifications just to tweak the gaps and fitment.1 point
-
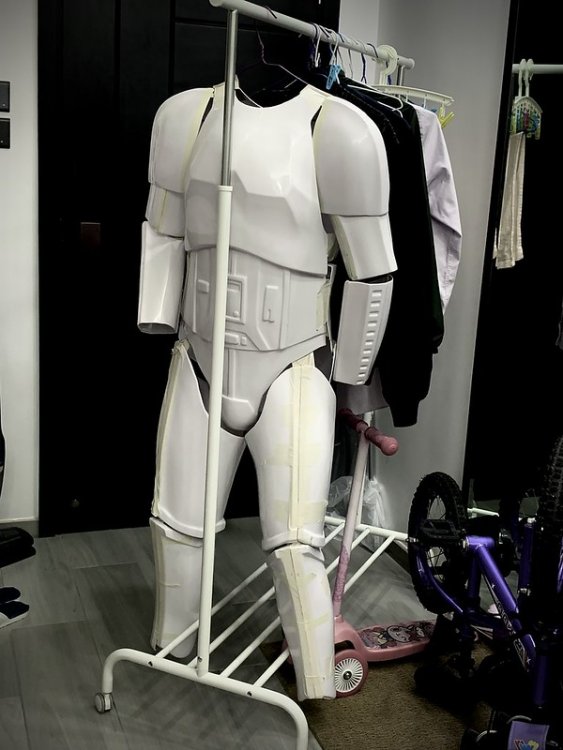
Taking it for a test fit. Held together with masking tape and gaffer tape only. No strapping. And dressed by myself. (Don’t judge me too harshly!) Shoulders are a bit floaty as they’re held by one piece of tape running across my shoulders and they probably need a slight trim on the width. And gloves are just placeholders with ABS plates while the glue is drying on my rubber gloves with flexi plates. Sent from my iPhone using Tapatalk1 point
-
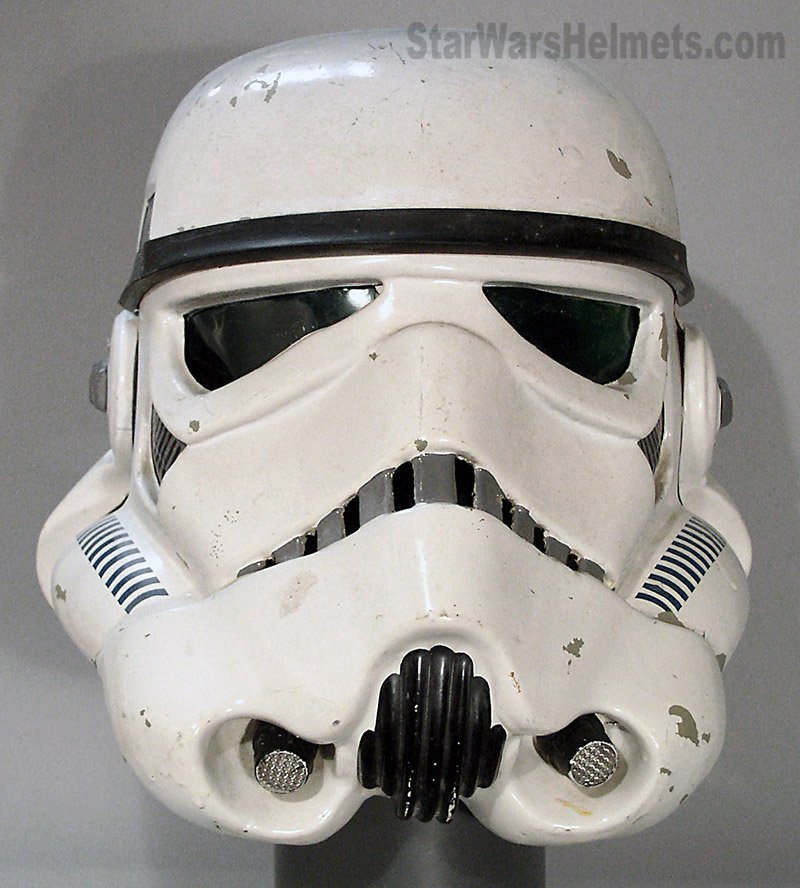
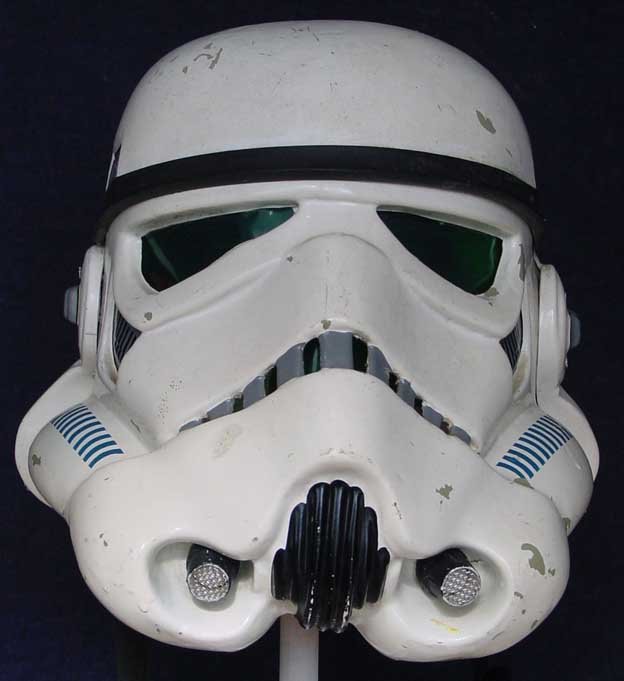
Hi Joseph. I took another look at the Dave M helmet. I feel I’m actually pretty close to it, eye-wise. There are a couple of areas I want to fine-tune but, largely, I’m quite happy. Would you mind taking a look at the images below and see if you stand by your comments? Thank you so much. (Temporarily installed lenses to test the effect.)1 point
-
]I accidentally painted my helmet at the weekend. What I mean is, I hadn’t really psyched myself up for it and didn’t prep properly. Was just toying with the idea of doing it. Next thing I know I’d painted the frown and so I just kept on going. Still haven’t painted the tube stripes or the ear screws yet. And I have a LOT of cleanup to do on the black pinstripe outlines on the tears, traps, etc., plus some other touch ups. I also inadvertently pressed the vocoder up against my t-shirt while it was still wet, so I now have a great print on my shirt and a furry-looking underside on by bucket, which I will have to totally redo. Hideously wonky lines that are way too thick. I may totally redo this using masking tape. Have already started cleaning up some spills through the mask template, using a toothpick dipped in rubbing alcohol.1 point
-
Nice job, James! That looks as if it may be about as close as you can get, but that's up to you. Remember, it doesn't have to be perfect. I was looking at your bucket pics, and before you attach the lenses it will look much better if you even out the sides of the eyes a bit more. I wouldn't suggest a Dremel tool for this. A much easier method is to wrap some sandpaper (120 grit or so) around a pencil (or better yet a marker) and use it to sand down those areas. Should take about 10 minutes or so and will give you a much better look. Keep those pictures rolling in if you have any questions, especially before cutting or gluing.1 point
-
Hi Joseph. Here it is, all put together (from a few different angles):1 point
-
My build is progressing in fits and starts. In resolving a problem with the left & right sides of my ab plate not being the same length (thread here: I’ve shortened my kidney plate, butt plate and back plate to better fit my 5’8” frame. Shortening the back plate was terrifying as I knew I wanted to keep some return edge on it. I needed to take just over half an inch off it, as indicated in the markings below. The lower pencil line was my cut line. The upper line was where I wanted to create new return edge using a heating iron. Given the extreme curve of this piece, I was expecting a lot of buckling as I folded the material under. And the result was every bit as disastrous as I feared, with pronounced buckling all along the curve. Despite the horror show above, I’m still confident I can save it now that I have the basic shape I wanted. (Btw, the overall fit is so much better now. The straps no longer stick up over my shoulders.) After letting it rest for a day or two, my first approach will be to heat it up again, small portion at a time and try to flatten each part with a clamp before moving along. If that doesn’t work, I will let it rest again and try plan B: making small cuts so that i can fold the layers slightly over each other (like tabs in paper engineering) and again try to flatten them by squishing them together with clamps. Plan C is to fill the hollows with ABS paste and grind it all out for a nice smooth curve. The only thing part I’m really concerned about is the “dent” about 1/4 of the way along from the left, where I folded the material too high up. I’m hoping to correct this very slowly in a few passes, pressing against a round buck that I have.1 point
-
Just make sure you give those eye sockets a light sand so you dont have sharp edges or any lose material. If you put fans in your bucket a a small piece drops in it can get spun out of a fan and into your eye. Not a pleasant sensation at all, and you dont want to have to remover your helmet in public and spoil the illusion for the kids. Build is looking good so far, keep up the great work James.1 point
-
OK. So, I’ve trimmed the eyes out quite a bit more. Took the DaveM helmet as the inspiration.1 point
-
Looks good, some nice references http://www.starwarshelmets.com/original-ANH-Stunt-Stormtrooper-armor-helmets.htm
 1 point
 -
Here’s where I’ve got my ears. Does the angle look ok? I’m a bit worried about the backside bottom of the right ear. I’ve trimmed three sets now and they’ve all ended up this shape. Is it acceptable?1 point
-
I’m really just getting started. Would love to get your feedback on my WIP bucket. Have I trimmed my eyes and teeth ok? Do you think I’m ready to start painting the frown yet? Thanks in advance for your words of wisdom.1 point
-
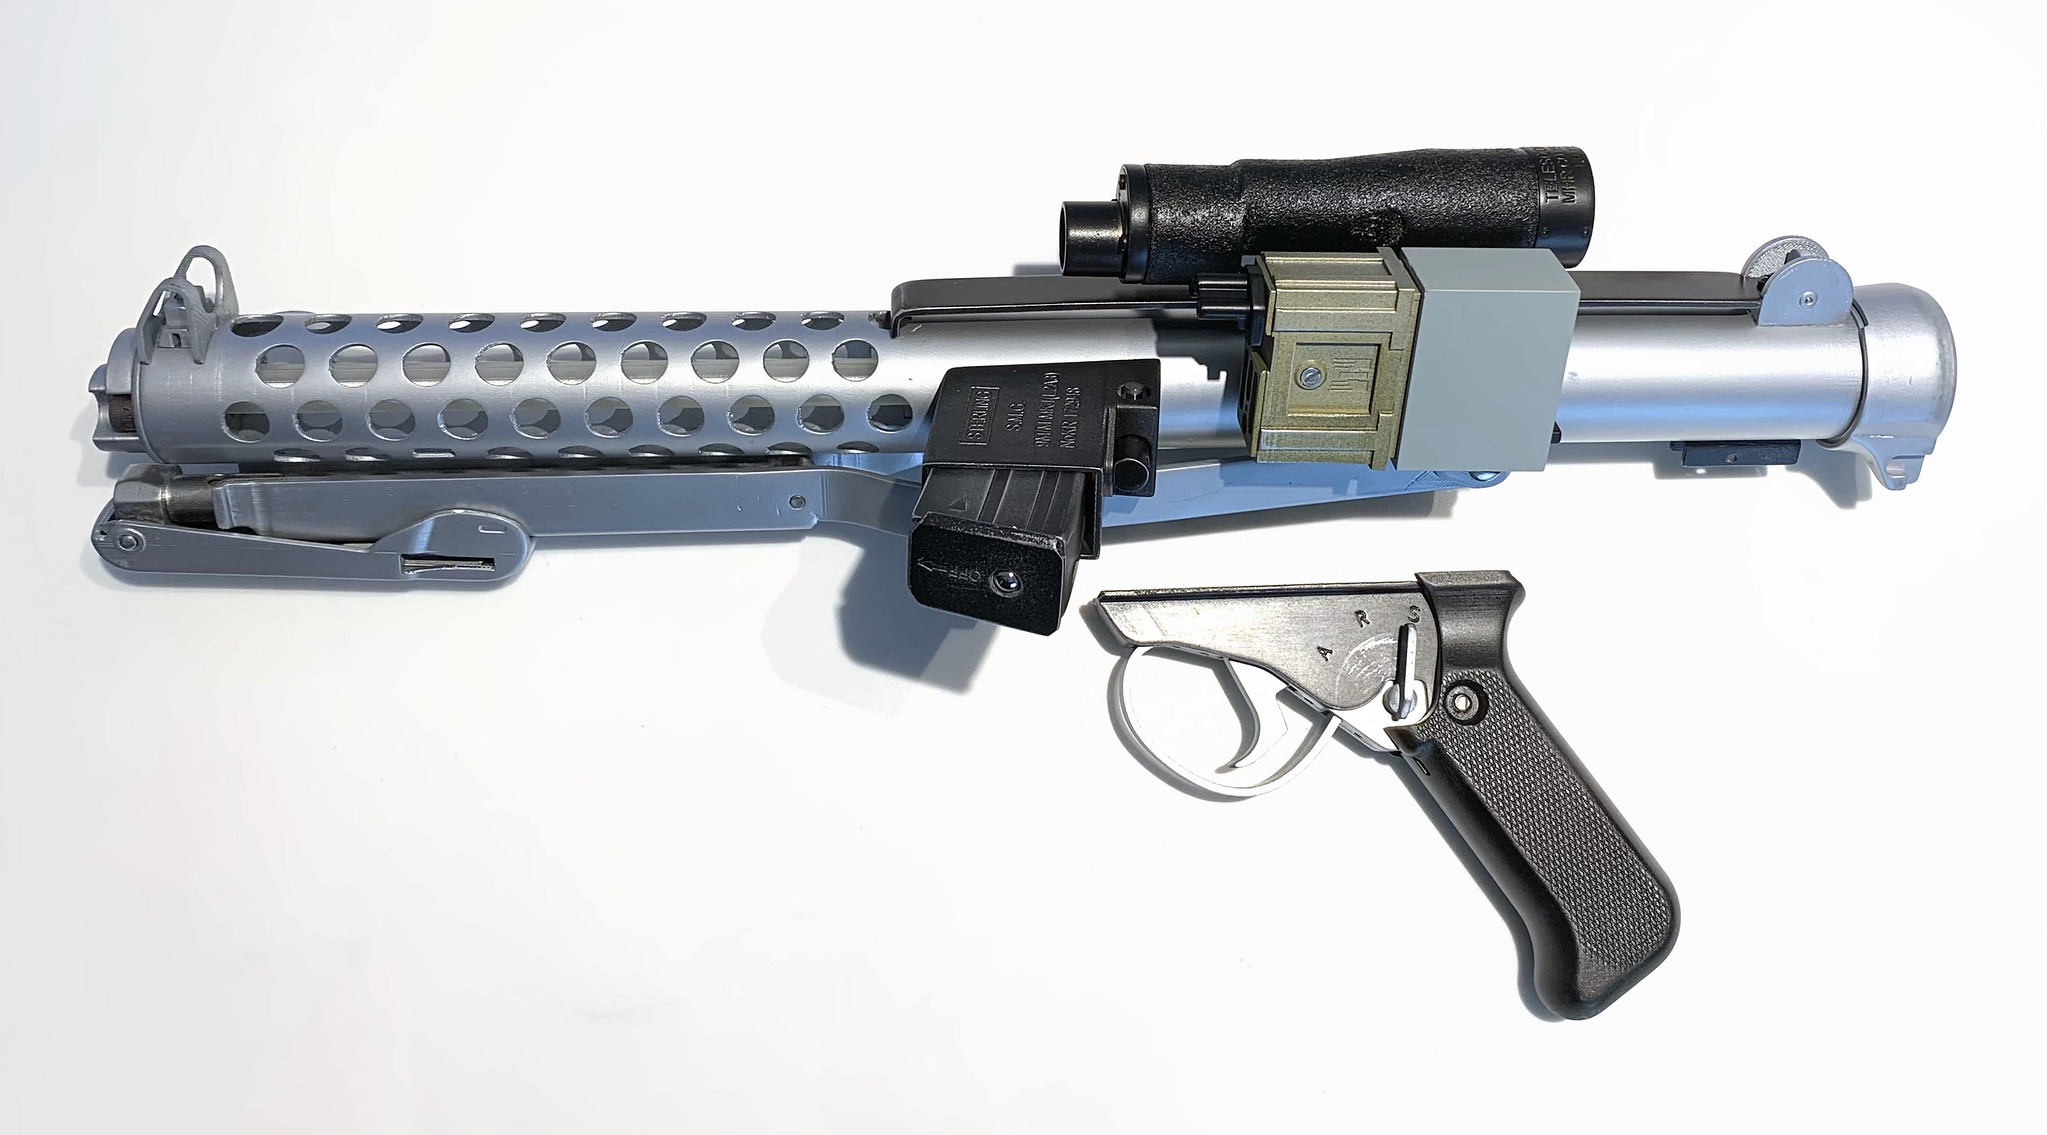
To start off, here’s the E-11 from Kassaraptor that I’m working on on the side.
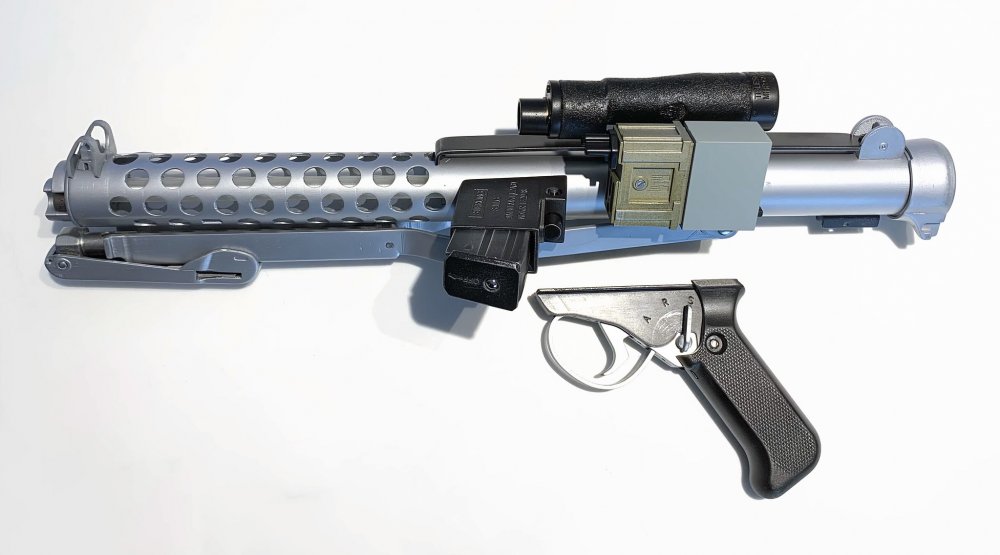 1 point