Leaderboard


Popular Content
Showing content with the highest reputation on 01/05/2023 in all areas
-
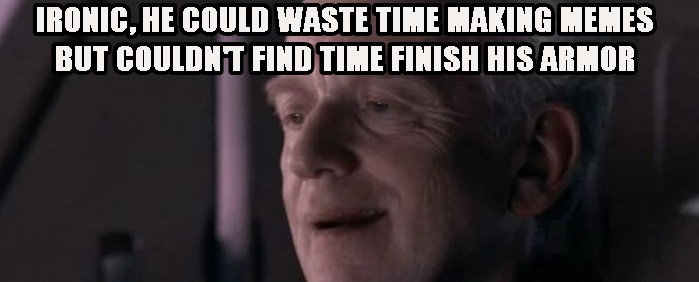
Oh, right, it's Meme-o'clock already. Happy 501st Day everyone! Me, all day: A huge thank you for everyone who has joined in so far, it's been a blast5 points
-
5 points
-
Ironically, last night I was served notice by my wife that our five-month-old infant's nursery must emptied of all TK build items so the room can be used for it's intended purpose. I thought it already was. Also...4 points
-
4 points
-
3 points
-
2 points
-
YEEEEESSSSSS!!! Another ROTK/ Anthology/ New Generation Build thread. Alright Adam, there's tons to unpack here, but let's get to a few of the big ones. Nico Bucket vs. Jim's Bucket: I'm a little tossed here. I think we all agree that Jim's helmet is a nicely modified BS helmet, but Nico's was designed from the ground up and he didn't miss very many details. Jim's helmet is great and I'm finishing mine up right now, but it needs a few modifications to get it up to EIB or Centurion level. For Jim's helmet, you'll have to add the eye bump and even though it isn't listed as a requirement for any level certification, the inside corners of the eyes are very pointy. This only requires slight modification, but it was enough to bug me. The rest of the helmet is awesome and my only gripe is that the neck opening has a built-in trim that precludes you from using separate rubber trim if you want. Again, rubber trim isn't required, but it's one of those little things that really set the helmet apart if you do it. Nico's helmet is beautiful if finished correctly. Initially I wasn't even considering doing one, but after printing a Mando and Shoretrooper helmet with Carbon Fiber filament, I couldn't pass on the opportunity to do a TK. You already pointed out Nico's separate tears and traps which are totally accurate, but we've already seen the props department pivot with how these parts are done. In the Anthology movies and the Mandalorian series, the separate details were adhered to a black backing and glued onto the bucket's tear and trap recesses. However, it Kenobi, we've seen behind-the-scene photos of TKs holding their buckets clearly showing that the tears and traps were cut out and backed with black fabric for additional airflow. Honestly, I'm more of a glue them on kind of guy because cutting those out is a nightmare. Next Nico's bucket has all the EIB/ Centurion details added in. Some will argue whether the eye bump is there and that's the point. That asymmetry was so minute on the buckets that you really need to study it to see it. Additionally, Nico's has separate ears, brow and chin piece which are all clearly noticeable in the references, and it's intended to be finished with rubber neck trim. If you grab a set of Paul Prentice's eye lenses, or form some yourself using Nico's buck, you're all set. Here's a gripe though: Nico's Hovi Mics are ugly. Get an accurate set and use those instead. If you just want to get your bucket on, add the little details to Jim's, paint it and throw it on, but if you want something that's as close to accurate as possible, finish Nico's. Belt Boxes: I'm really happy to see people printing these off. Again, Jim's boxes meet all the requirements, but I was really after those crisp edges and the accurate detail on top of the middle box. The Fast/ Tenacious mix is great and still serves as my primary resin, but I'm now leaning more towards Siraya Tech Blu for small pieces like this. Blu is advertised as an "impact resistant" and so far I'm finding it to be more durable than the aforementioned mix. However, if you need any kind of flexibility in your prints, I still reach for the Fast/ Tenacious combo. Here's a new belt I just put together a few days ago Another cool thing about the Fast/ Tenacious and Blu resin is that you can drill a pilot hole in them and use screws to attach them directly to the belt. The last time I did this with PETG, the plastic stripped out a little bit which lead me to fasten them another way. But, with that said, here's one of the cooler things you can do with this resin: M3 Heat Set Inserts. This really opens the door for tons of possibilities. If you want to grab some, you can get them here: https://www.amazon.com/gp/product/B07D683Q26 What Am I Building: Almost endless possibilities. Of course, the CRL already exists for the ROTK, so yes, you can move from there. However, if you do decide to move forward with one of the many New Generation variants, we've started discussing the CRL here: Personally, I think the Mapuzo trooper is perfect and exactly what I want out of a TK. The artillery trooper is pretty awesome, but other than the Hot Toys collectible, the accessory references are lacking; this is the same for the incinerator trooper. The paint scheme for both is obvious and apparent in the shows, but I wish we saw more of their packs and weapons. Overall, if you're just going for shiny white, just be aware that there's a few different paint elements on these as compared to the ROTK, i.e. end caps on the TD. Ultimately, I wish you happy trails and a smooth build. Hit me up any time you have any questions, and I really look forward to seeing this come together. Oh yeah... I'll be posting my new kidney plate in the 3D repository soon. Mwaaaaaahaaaahaaaa...2 points
-
This is a Jimmy kit that I got 2nd hand from the 501st forum. I paid about retail, but got it NOW and basically free shipping. It's a very pretty kit. The details are SO sharp. I mean, them abs. Look at that 9 pack. So sharp. And tons of pinholes and low spots, but so sharp. MMmmmmmm. Bucket! It came with all the good jimmiroquai stuff. Visor, Mimban visor, etc. And it's ITCHY. Omg. Every time I pick up a piece I'm itchy for the rest of the day. I hate haaaaate fiberglass. So after the armor recently came back out of the BBB, the first thing it got was a light coating of Justin's Fibreglast 1110 vinylester flexible resin on the inside surface. Just one coat. I know it'll need more, especially after some parts are trimmed, but now I can at least pick up armor panels without itching for the rest of the day. I also have a rather beat up Black Series bucket that's gonna get sliced all apart and turned into something more accurate. And, as the background hints, I've got a shiny new baby resin printer just kickin' the parts out for various projects. I bought Nico's helmet print files. I'm not sure I'll print the entire thing, but having key parts on hand to help bring this toy into Screen Accurate Land (tm) will be nice. I got these prints out of it last night. Just lovely stuff. I've also printed a set of @BigJasoni's belt boxes. Using his suggested Siraya 80% Fast / 20% Tenacious resin mix! It's an amazing resin mixture. I've thrown several of these boxes across the shop and watched them bounce off the wall with no damage. I hollowed the boxes and hope to actually have them be functional on the belt with a combo of magnets and elastic. The sharp edges and perfect finish are just incredible to me. I've been printing filament for about 10 years. Never got into resin till after this past Black Friday. I was missing out. So. WHAT am I building? That's the question I keep asking myself. I don't necessarily want to have this armor set be a Rogue One TK, but that's the most logical first step. I'll get it approved for R1 and then go from there. I really like the Mapuzo troopers from Kenobi. They had just the right amount of filth. They weren't partially dressed like many of the Mando remnants. So I might try to do that after finishing the kit. MAYBE help with or at least follow in the footsteps of a CRL creator? I don't have any burning desire to blaze paths or be the first for a given CRL, but I do wanna help with them. I also really love the yellow guy. The Artillery/Mortar/Shell Trooper. I have indeed purchased the 3D files for the mortar pack and launcher and they may be printing on 3 of my 4 printers at this moment... This armor could end up with some yellow stripes. One bucket will almost certainly stay yellow. I also like the R1 Incinerator TK. So red and angry! This armor might stay red at the end of it's build, but that flame gun would take soooooo long to print. I dunno. All I know is I have to build a Rogue One TK first. And I have to get off my butt and do a build thread. So here we are.2 points
-
Three build threads on FISD? Not counting blaster builds? Yeah. I did this meme shortly after my BBB day last September. I got this right about the same time that I started my HWT build. And while I was (and am) super excited, I didn't want to get distracted and have a partial HWT pack thread. And then like 3-4 months passed. So here's my R1TK build!1 point
-
Thank you everyone for the amazing compliments and thank you Chemi once again for everything. Appreciate it very much1 point
-
If it is any consequence I'm going to ultimately be using an over the shoulder harness for the thighs too instead of a belt. Bart1 point
-
1 point
-
1 point
-
LOLed at this. It’s perfect with me not yet being an approved TK.1 point
-
End of the year? Let's aim for end of the month1 point
-
This entire thread right now:1 point
-
1 point
-
1 point
-
1 point
-
Hello and welcome, these may help, it's not too much of a gap and some GML's will allow a larger gap than others for basic approval you could reach out to them as they will be the ones looking after your approval Here are a few threads on filling that gap L2 and above OPTIONAL Level two certification (if applicable): Any gap between the abdomen and kidney armor is no more than 1/2" (12.5mm) wid You would need to adjust the clips as they are hitting the control panel so you won't be able to trim that. Note the angle of the plate/detonator to belt Notes: The top of the TD should should sit level (or slightly) higher than the top of the canvas belt. I use a belt around me which also has shoulder straps, there is no real correct way, just a belt is fine if you feel the shoulder straps aren't working I have back issues so I use a compression belt for my harness Originals use a belt and thick straps1 point
-
It's settled then1 point
-
1 point
-
Hope your build is coming along. Just wanted to mention that using fabric with stretch didn’t work all that well, atleast not for me so I ended up sewing the zipper straight to the velcro and that gave a much better connection1 point


.jpg.aedf65a49a72eaf9526c517ffbcdcc24.jpg)