Leaderboard


Popular Content
Showing content with the highest reputation on 08/20/2022 in all areas
-
I cut the left side (as you wear) now! Looks good! And the right side (as you wear) actually turned out pretty good. At least passable I think!2 points
-
It is with great sadness I make this announcement as we have lost one of our own. Unfortunately Terrell Reber TK-1787 (SuperTrooper), know by many as ATA Affordable trooper Armor has passed away. If you were ever fortunate to have spoken with Terrell, you will know he had an affect on people. He had a way with words that made you feel like a lifelong friend, he was intelligent, talented, and believed everyone should have the opportunity to live out their Stormtrooper dreams. Terrell is a huge loss to our community in many ways. His service to FISD our members and the Legion at large will never be forgotten. Rest in peace good sir, and may the force be with you always.1 point
-
Hello troops! I am a long time star Wars fan and new-ish to white armor. I have been researching and studying for a while but have decided to mix it with my love for the iconic Stormtrooper. As of today I am a proud owner of a beautifuly crafted suit by Mark at AP Canada. Starting this weekend I will be starting the helmet mods (lenses and electronics). I have taken advice and inspiration from many on this forum and I am looking forward to sharing my progress. Thanks for the add1 point
-
Thanks for the consistent info and encouragement. I will take a look through these other threads. I will do my best to trim only what is "necessary" and will fill the void with foam. I purchased the armor with Centurion level in mind and as goal. You all will be seeing a lot of me for a while.1 point
-
Indeed just in case the wearer adds some extra weight or if you want to on sell your armor, this is why I don't trim mine too small, I just ran into a problem selling my TKC, although the wearer was a little larger (took out the padding) the thighs were just too tight, I ended up having to add shims to both sides of the thighs, fill with ABS paste, sand and paint to match, it's a lot of work, so not trimming too small is definitely the way to go.1 point
-
You may want to add some stop fray liquid to the edges of the belt. I don't think they would have an issue how it looks now. Just note all of these minor details are for higher level clearance, for base 501st approval you could contact your GML at any time, just fix up some of those dressing issues and you should be fine. Once approved you can then apply for Expert Infantry status and after that on to Centurion.1 point
-
This may help you a bit. This is my own strapping. All of it is nylon strapping with the exception of the center strap on my back plate. That one is elastic and allows for bending. Well, the cod strap and white shoulder straps are also elastic. All the rest have no flex and are double snapped. Nylon strapping keeps things tight and in the right place. And the cod strap goes just right up there in your business. No room for the breeze if you know what I mean.1 point
-
That looks like some good trimming. I would not suggest you spend much more effort on the ab/kidney armor. My own AP armor fits me very similarly to what you've got now. I'm 5'11" and 160 lbs, so quite similar build. The AP armor is just not extremely sleek in the midsection without a lot of reshaping. Anovos fits much differently, but AP fits about like what you've got. And what you've got isn't bad. It can go to Centurion that way. It's just not as sleek as some other armors you'll see online. For your thighs, do all of the adjustment and trimming in the back. Since Mark got the front glued together, just leave that. Remove the rear cover strips (inner and outer if both are installed) and get the thighs to the height you want (which is VERY high). Then overlap them and tape the crap out of them so that they hold the shape. Several more test fits and then see if you feel like they need more or less room. Then slice a straight line up the center back and re-glue the halves together. Thighs really help to have an assistant. Shins are done in a very similar manner. Get the front glued and happy, then slice the back up the center.1 point
-
Trimming that ab bit will improve the look. I would concentrate on getting the strapping from the chest to ab and back to kidney sorted. And then tightening the cod to butt strapping (this might include trimming the cod a bit). That and the arm strapping (tightening up the biceps and shoulder pieces) as mentioned above. The armour will be large, but it should sit a lot better. The gap in the legs does look excessive, but depending on how that pic was taken you might get away with just padding.1 point
-
Hi Code! Based on what I can see, it looks as if this armor is a bit too large for your frame and will more than likely need some adjustments. Not all troopers are the same build of course, but as stated in the CRL for Basic approval: Requirements for all 501st costumes are proportional to the wearer in scale, fit and size. In photo 1, it appears that your posterior plate is sitting pretty far away from your... well... posterior. I realize that you (as I do) have a slender frame, but the armor should be more "form fitting" as seen in the reference images. This photo surprises me the most. A general rule of thumb is that you should just be able to slide your hand in between the top of the thigh armor and your leg (give or take a bit), and it looks as if the circumference is way too large. The shoulder bells are riding kinda' high and sitting out pretty far away from the chest plate, and I believe this is due to the strapping. Without a picture I can't be sure, but I'm thinking that the bell strap is glued too far down below the top edge (yellow arrow) causing it to ride up. Gluing it all the way to the top should eliminate both issues. This will also help to hide the tops of the biceps, but those could (should) be raised as well. Note in the reference image how far they sit under the bell. We are here to help every step of the way with any specific adjustments you need to do, Code, so not to worry! Will it take some work on your part? Yep, but we are here to guide you and make sure you end up with a spectacular set of armor! I would concentrate on one area at a time, and posting up some photos wearing the complete set before you start would help immensely. Let's do this!1 point
-
Ok, here is the end result of the reglueing of the new sniper knee. To me, it looks 100% better than the damaged on I tried to fit.1 point
-
The armor is great. Definitely needs some dialing thanks for the guidance. Have been combing this forum for months. Much of this research prior to ordering is why I made a solid choice in armor and knew it needed some work. Will be posting every update possible to ensure I don't miss my mark1 point
-
I got mine from Mark @ AP a few months ago and I had to do some return edge cutting on the thigh and shins, to include mobility cuts (There is a thread on this), since I am a short guy. Also, I had to do some adjustments on the sniper plate with a new one since I buggered the last one.1 point
-
Armor itself looks good, but you should take a look through something like our EIB Honor gallery for some dressing tips to get you looking your best! It also definitely helps to have an additional person take your photos and help adjust you and measure/mark stuff. As mentioned, the big one that sticks out is that the chest needs to cover the ab panel, which looks like it needs to be raised significantly. I also see a LOT of return edge left on, so you'll likely want to remove and smooth much of it. The more you wear it, you'll identify the pinch points to address first, but the inside of the thigh and back of the knee are most common. Hope that helps! Armor is looking good, it's just time to dial it in (Also, please combine photos in one post, not multiple - you can press return and paste in additional links - thank you!)1 point
-
Weekly update! Starting weight: 191 lbs Goal weight: 150 lbs Current weight: 182 lbs I'll be seeing an endocrinologist on Thursday to hopefully get things figured out once and for all!1 point
-
Thank you! I will be re posting the original pics plus more I have taken. I am really trying to get this complete by debut time (couple months).1 point
-
Yeah, your assessment is right. It is a bit large. For the arms and legs I would suggest trying foam padding. The strapping from the chest to ab is surprisingly loose - tightening these straps is easy. The mid section is big. It’s hard to tell from pictures, but I almost wonder if trimming and redoing the strapping/clam shell might be worth it.1 point
-
Looking good, I also left a lot of the return edge, even though gaskets will take up some of this room I do have skinny arms.1 point
-
You would be better of using a free online photo host so the images show in the thread, many of us use Imgur, a how to here Correct, adjust strapping from chest to ab, then backplate to kidney, then take another look Many of us with skinnier arms have to add some padding/foam into some sections, biceps, forearms, thighs and on some occasions behind the ab plate, this helps take up some of the slack when you tighten your belt, if you tighten too much your sides can overlap so the foam helps.1 point
-
Congrats on your kit! Post pics… we like pics. You’ll be happy with your AP kit.1 point
-
Honestly, adjustments are required 99% of the time. Some parts always need adjustment on pre-built armor. If you post pix, we can help you more easily.1 point
-
Welcome aboard Code, looking forward for some photos1 point
-
"Before I begin, I do want to let you know that the current CRL has the following requirement: The armor parts shall be made from one of these types of materials or like materials: White fiberglass, ABS (Acrylonitrile Butadiene Styrene), HIPS (High Impact Polystyrene), or Polyvinyl chloride (PVC)." Just to add some info to this statement, it has been discussed to add 3D prints to the CRL's BUT it was decided as nobody to date has provided and been approved in a full costume it won't be added for the time being, this is not to say you couldn't have a 3D printed costume approved but you would need closely match references, we have a gallery section full of images for referencing https://www.whitearmor.net/forum/gallery/category/21-starwars-story-reference/1 point
-
Hello and welcome to the forum, looking forward to seeing some photos, you can post a build/update thread here to show any progress pics https://www.whitearmor.net/forum/forum/80-anh-build-threads/ This is a great thread full of info which may help you along your way1 point
-
Will Jarvis34677EIBLetter sizeChemi Here you are, Will. Way to go! https://www.whitearmor.net/eib/certificates/34677-eib.png1 point
-
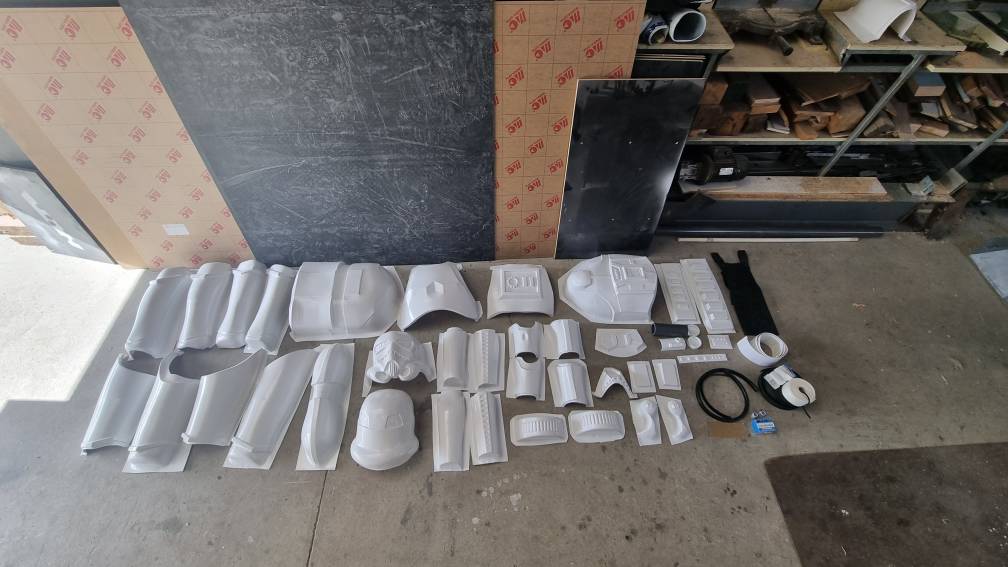
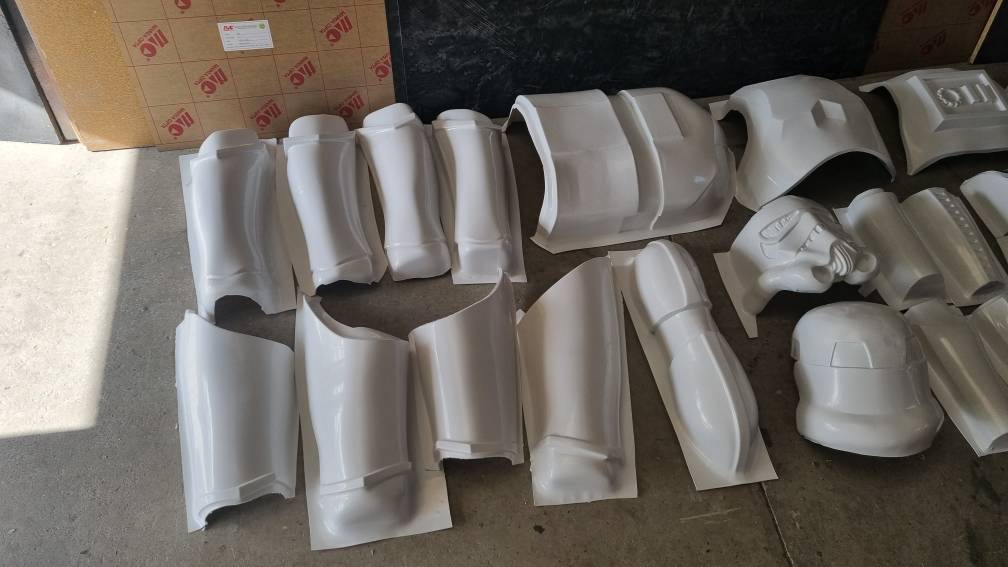
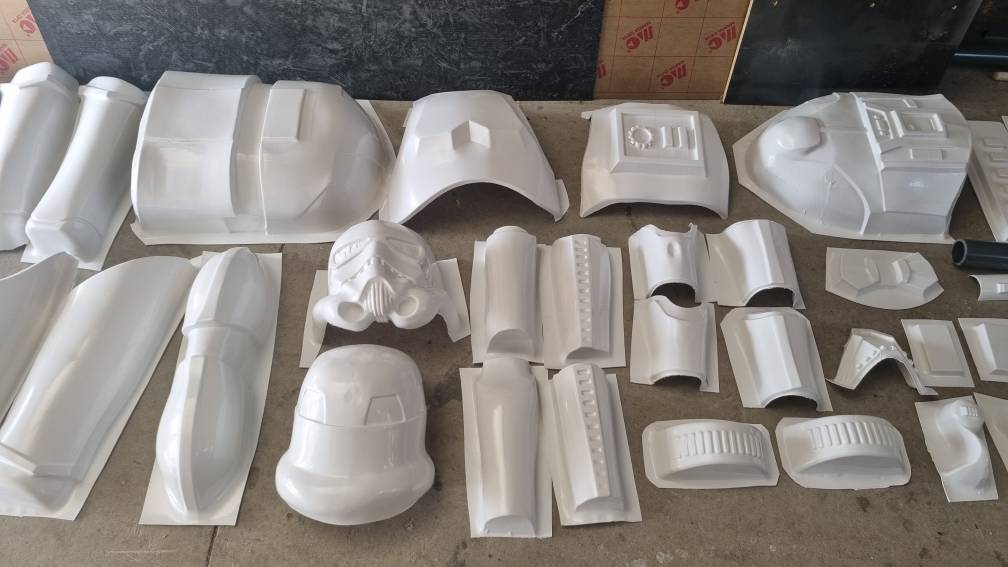
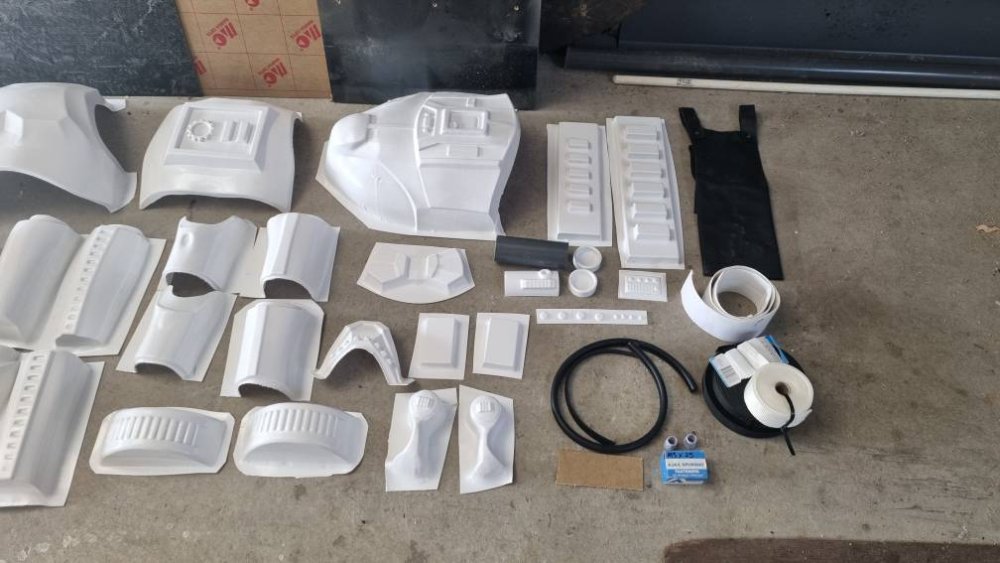
Today's the day! Last mould done and dusted. I knolled all the parts out to get a look and I'm excited to put one together. Will do that this week if I get time. Sent from my SM-G991B using Tapatalk


 1 point
 -
More cutting… Spine plate before: Spine plate after: Cod and butt before: Cod and butt after: Torso front/back before: Torso front/back after. I split the back in order to make the sides seamless. And I haven’t cut out the middle tabs in case I need to widen or shrink the torso: Torso pre assembled: Inner chest before: Inner chest after: Chest before: Chest after: Back before: Back after: Shoulders and pouch cover before: Shoulders were really thick so it was a soft pull with really no guide lines on the lower edges (both at the center of the picture), I ended up using the one with the barely visible guideline as a pattern for the lower edge where there was no visible line. But I cut these pretty far off of the guide lines to be safe. Shoulders and pouch cover after: And rough cut is done. My hand hurts.1 point
-
1 point
-
Keep at it guys, this hard work takes time but will pay dividends when you hit your targets.1 point
-
I have a tk based on the kit from RWA. All great but the canvas belt frays a lot at the edges. I've just tried this stuff (from Dunelm, UK) and, touch wood, it seems to have sorted it without discolouring or otherwise negatively affecting the canvas Here's some pics of front and back of the belt. One edge is treated, the other not. I didn't trim loose ends before applying and smoothing the 'glue'. It's comes out of the tube like white latex glue, but dries rubbery and clear. I applied a thin coat across the edge and on the back side, but none on the face (just in case), then smooth and flattened with my fingers as it started to dry.1 point


.thumb.png.69856e02550a2e6d07e44a2b1bda020c.png)