Leaderboard


Popular Content
Showing content with the highest reputation on 06/28/2022 in all areas
-
Close but not quite3 points
-
Alright, 1 week down, many more to go! Current Weight: 246.5lbs Im down 8.5lbs at the end of my first week, which is quite a lot of weight, but as many of you know, that’s to be expected in the first week, I expect that to slow down pretty considerably. I’ve cut my caloric intake in half, keeping it below 1500 calories per day and I’ve kept up with jogging a mile every night. I’m gonna keep this going, while I know this kind of weight loss won’t be consistent every week, I’m going to allow it to motivate me to the end of another week. Progress Troopers, Progress!3 points
-
Though I haven't trooped that long, I'm now on my third iCOMM battery. Since they're hard to get, hard to change, and a general bummer of a power source, I decided to change it out using Andrew's excellent tutorial. There won't be any new information or techiques in this post. I'm copying exactly. This post is mostly for me so I can remember what I did in the future. My iCOMM board complete with a nearly-new TL-2450 battery. Note that it shows polarity. The center post is positive and the outer (right side in this view) post is negative. My new battery showing 3.537 volts. My dead battery showed 3.63 volts before I tossed it. These things don't vary in voltage very much. It's just the lost mAh. I drilled a couple tiny holes in the back case and ran the wires through. Since my iCOMM was already covered in loop velcro, I stuck some hook velcro to the battery holder for attachment. I've also removed the stock battery. Probably needless to say, but the shot above doesn't show that. It just pulls out of the board, even though it appears soldered in place at first glance. I used the same 3.6V battery that @Sly11 did on his mod. Bought it directly from UltraFire for about $23 shipped per pair. I have a spare to put in my helmet bag in case of emergency power failure... which is what prompted this mod. It's a bummer to do a troop without the fancy speakers. I could have wired around it on my last power failure, but would have needed to shift all my padding around. With this rechargeable, replaceable battery I'll never have that problem again. 4.1V with a fully charged battery. Popular belief is that the iCOMM is very picky about voltage and really likes to have the 3.6V power source, but Andrew and others have had this mod working for many years. That track record made me feel confident in doing this to my own unit. Installed back in my bucket. Hardly any extra space is taken up at all, and it's still comfy sitting just above my right headphone pad. I downloaded a free decibel measuring app (Sound Meter on Google Play) to see if there was much or any change in volume in a before and after. In my own experience, the iCOMM amplification decreases quite a bit as the battery ages. It's pretty quiet before it starts the click of death indicating it needs a new one again. Anyways, having some test data seemed important. The app also allowed pausing between sample sessions to compare data on the screen. Before: I saw between 53 and 70 dB while saying my test phrase (kitty kitty kitty kitty kitty kitty). After: I saw between 55 and 73 dB while saying the same phrase. I didn't expect much of an increase in volume and was hoping to not see a decrease (or magic smoke come out) after the mod. A tiny increase is very welcome. Fingers crossed that this is my final iCOMM battery change and case opening. Just a recharge once in a while to keep the battery topped up should be enough.3 points
-
James, I’m right up the road if you guys ever need a running buddy/ coach. I’ve got over 30 years distance running experience and would be more than happy to join up with you in RVA. I can’t wait to see how this works out for you and congrats to Jarod!2 points
-
My son Jarod (TK-12140) is scheduled to start the local police academy on 1 Oct 2022. This weekend he and I sat down to work on meal plans and exercise schedules. We are starting out easy. The goal is 3 miles a day, two independently and 1 together after dinner each night. We'll visit a couple of the local gyms next week to see what they have to offer. My first appointment with the Medical weight loss group is Tuesday 5 July 2022. This program is 800 calories per day no more than 50g of carbs. It is a Medically supervised keto like plan. I'm hoping in the 3 months we have until he starts the academy that we can get him ready for the academy PT and get me at least 1/2 way to my goal. This program is rapid weight loss, it was originally designed as an alternative to Bariatric Surgery for folks doing large joint replacement (Hips, knees, etc). They found if they coupled it with a maintenance plan after the original rapid loss they had a 90% success rate of keeping the weight off after 5 years. It worked great last time, except I wasn't able to start the maintenance plan, so I hope that I'll get down to weight goal, and start the maintenance plan to keep it off this time!2 points
-
Thanks. Hoping to make Centurian.2 points
-
Slopping the paint on there and then carefully cleaning up the edges with a toothpick covered in a bit of thinner-soaked paper towel was my method. It worked well enough. For very tiny fixes, I'd just dip the toothpick directly in the thinner and worry away the offending paint edge that way. That worked great on the frown.2 points
-
Thanks very much for the encouragement!2 points
-
Welcome to the Club Daniel and Yes!, very difficult to leave the bakery and Ice cream but is it possible ? Yes!, little by little you can reduce the portion till your body and mind get used to. Believe me ,Now I love my No sugar Black coffee every morning (I used to add 3 sugar teaspoon !! So go step by step and you'll see. Best luck and looking forward for your advances !2 points
-
I'll be posting photos once I've gotten up the nerve to take them, but here goes. In late February/early March of this year a medication I'm taking regularly for an endocrine issue was increased and I started gaining weight incredibly quickly. My starting weight was approximately 155 lbs and as of the day I'm writing this (27 June) it's sitting at 191 lbs. This is despite walking nearly 3 miles to and from work 5 days a week and some serious dietary changes made in the last two months. I've yet to speak to an endocrinologist or my family doctor about this weight gain, but I'm hoping they'll be able to help me nail down the proper dose of my medication. I haven't actually got my TK armour built yet, partly because I haven't known where to start and partly because I've been feeling a bit insecure about my weight, but I'd love to get closer to my goal weight while working on putting it together. My current weight: 191 lbs Goal weight: 150 lbs Exercise plan: Elliptical & stationary cycle 10km each, 4 days a week, lane swimming 2 days a week (no set distance goal yet), possibly free weights, but I'm not sure yet Lifestyle plan: eat more healthily and try to cut most added sugar out of my diet (I love ice cream and my partner's mum is a habitual baker, so this might be a bit difficult, but I'm here to give it a shot haha!) Anyways, thanks everyone for sharing your stories and goals. I'm feeling even more committed to getting in shape and sharing my progress with you all Cheers!2 points
-
I finished my first full week of workouts yesterday... with a rest day. But that's okay, rest days count too. And then I started the new week today with a big workout. It felt good. 1 week down. Gotta keep advancing.2 points
-
Some amazing images1 point
-
Nice work Cam and James!!!1 point
-
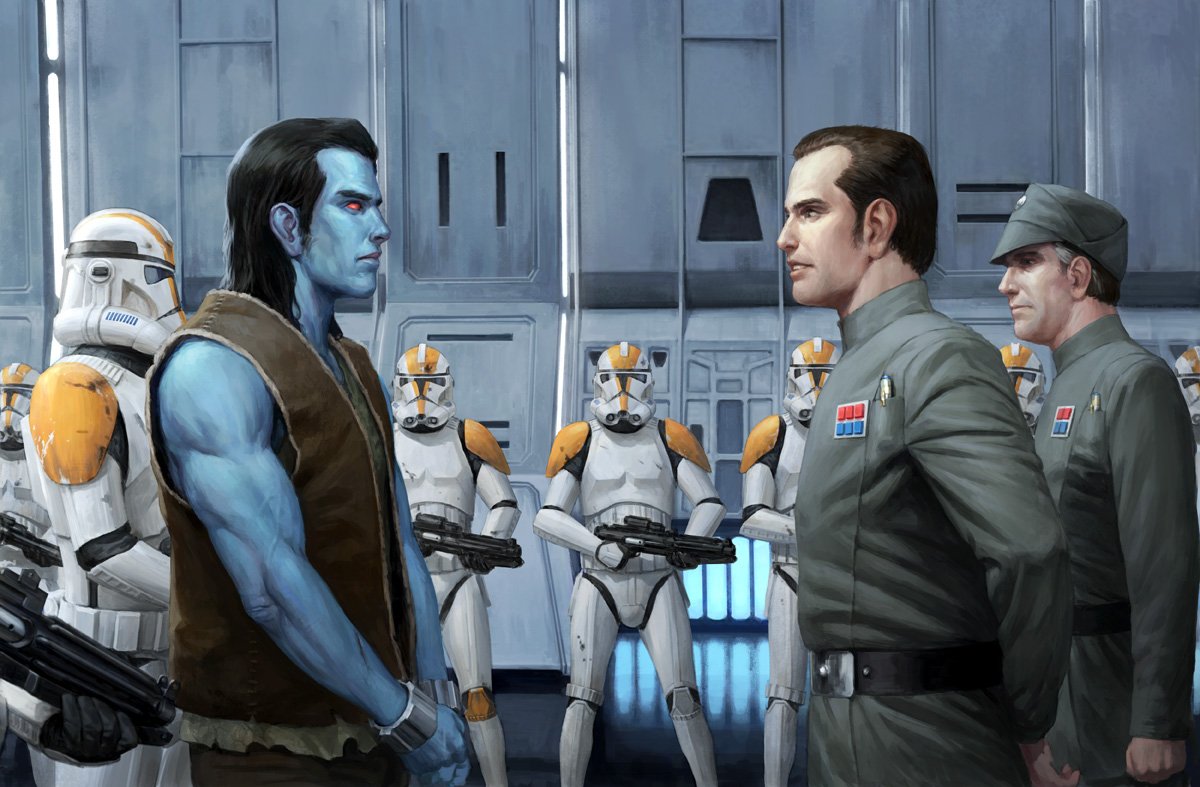
Fun mockup. There was an illustration from a book documenting the original capture of Thrawn that had 212th looking intermediate troopers as well, as attached. I thought it would be a fun costume to do, but it was just not quite enough a complete view to do so. :/
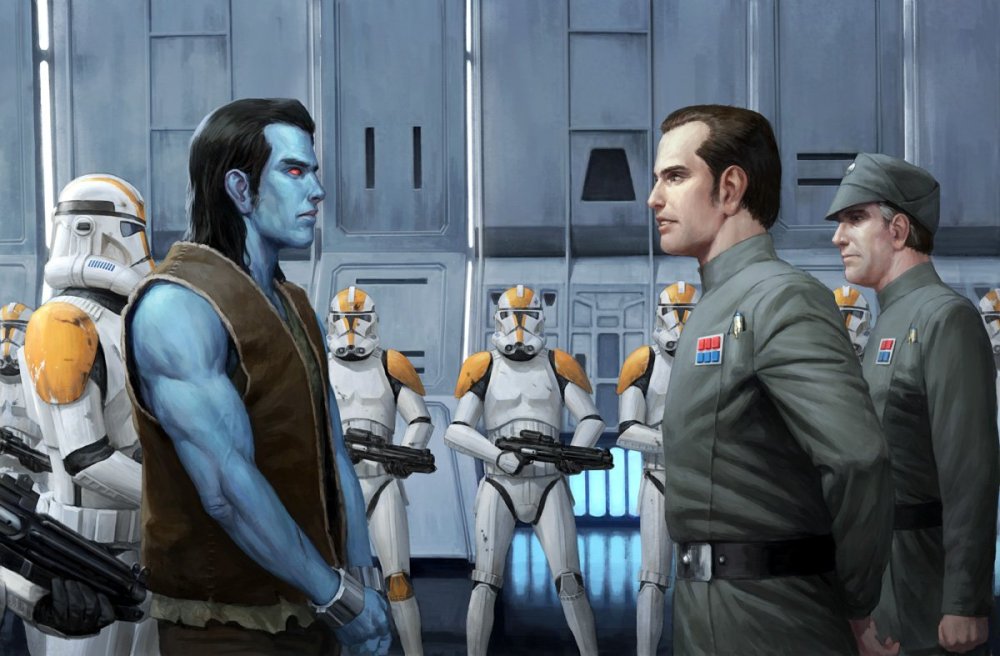 1 point
 -
nice work.1 point
-
Great to know this James! Having a training partner is a great way to keep the motivation high. Good luck !!1 point
-
Awesome Cam, keep it up. !!1 point
-
Glen, You beat me to it. I was planning on going over guide coats tonight. This is a technique typically used in auto paint which would be especially useful on a large piece with minimal contours like the chest. Awesome tip.1 point
-
Chatter sounds can be found here other blaster sou d effects can be found here https://github.com/Protonerd/FX-BlasterOS/tree/master/Sounds Also these http://play.starwars.com/starwars_soundboard/asset/audio/BSR_blasters/blast_01.mp3 http://play.starwars.com/starwars_soundboard/asset/audio/BSR_blasters/blast_02.mp3 http://play.starwars.com/starwars_soundboard/asset/audio/BSR_blasters/blast_03.mp3 http://play.starwars.com/starwars_soundboard/asset/audio/BSR_blasters/blast_04.mp3 http://play.starwars.com/starwars_soundboard/asset/audio/BSR_blasters/blast_05.mp3 http://play.starwars.com/starwars_soundboard/asset/audio/BSR_blasters/blast_06.mp3 http://play.starwars.com/starwars_soundboard/asset/audio/BSR_blasters/blast_07.mp3 http://play.starwars.com/starwars_soundboard/asset/audio/BSR_blasters/blast_08.mp3 http://play.starwars.com/starwars_soundboard/asset/audio/BSR_blasters/blast_11.mp31 point
-
Great progress, well done. I know it can drop fast at first then can slow but every bit counts.1 point
-
Stunt and kill sounds are in the post prior to yours. I'm not aware anyone has F-11D sound files. F-11D file I ran across First_Order_F_11D_Blaster_Rifle_Sou_(getmp3.pro).mp3 Phasma/Cardinal version Star_Wars_Captain_Phasma_F-11D_Blas_(getmp3.pro).mp31 point
-
Thanks for the input. I read his build but missed the paint1 point
-
I had a busy weekend, but was still able to complete a few of those items that don't seem like much, but add up to a lot. Additionally, I finally decided that I needed to organize my mess a little which I can't emphasize enough as a good practice. Additionally, I know a lot of people out there don't exactly have access to a spray booth or dedicated paint area, so I'm going to go over a lot of these steps outside before I set up a make shift booth in my garage. Because of this, I expect to run into a bunch of common issues and hopefully can give a little insight into how I handle them. Let's get started with the organization part first: I wanted to cover this because over the last week, I've had conversations with two different people who picked up unfinished TK armor at incredibly cheap prices. I'm talking about $400 for an untouched Anovos ANH Hero kit kind of cheap. When I asked these guys how in the world they found these kits, they both indicated that "the original owner was overwhelmed with the amount of work involved, so I was able to grab it for cheap." I have to admit that when you first open the BBB there's mixed emotions. First is excitement that it's arrived, but then it's like "where do I begin?" However, what I've come to understand is that these costumes are sort of a "how do you eat an elephant?" type scenario. In case you don't know, the answer is "one bite at a time." So, anybody who's seen any of my builds has likely noticed that I typically have multiple costumes piled up in the background of my shots. Currently, I have 7 unfinished kits. Because of this I knew I'd have to set up a "staging area" in order to keep myself on track. The other thing I've found is that when you actually start setting your armor out where it's visible, the task doesn't seem quite as daunting as when it's sitting in the corner of the room in a BBB. Here's a couple shots to show how I'm tackling my unfinished costumes: First, the tote on the far left is my TK tub; that's why it's open. My finished costumes are in the other two and one "off stage." I typically keep them in there, or on display in my Star Wars office, so that they don't get mixed with the WIPs. I picked up this folding 8' table to stage my work, plus I'm trying to get a few of these for future armor parties. Again, just having the stuff laid out off the ground helps. Additionally, when these tables are on sale at Lowes for $65, they're not a bad deal. Next, I set up prep and finish tables. In this picture, both are being used as prep tables, but the way I have it set up is that I'll use the paper covered table for bondo, sanding, filling etc. then place stuff over on the card table when the part's ready for primer. I end up mixing this up a little later on, but that's primarily because I end up painting a little more than the card table could hold. From here, I move outside to spray the primer. Finally, I used to keep all my paint in a stupid box on the floor which always kind of got kicked around and really just made a big mess. I grabbed a cabinet just to keep stuff organized. This is a huge help. Ok, so with that all aside, let's get to some armor updates. I grabbed my hand guards and just started "sharpening" the edges. I can't tell you why, but these are the smallest parts of the armor, but had the most pin holes and "boogers" on them. I had previously sprayed them with filler primer, but followed that up by filling everything with the Spot and glaze putty. I also finally found a good use for the angled edge of a sanding sponge. Ultimately, they came out smooth and are ready for final primer. The next thing I got to work on was the back armor/ shoulder strap trapezoids. Over the weekend I said that I was going to cut these out in order to facilitate a pass-through for my flexible straps. This was a little unnerving to say the least. After some "surgical precision" with the Dremel and a shop vac, I was finally able to punch through and get the straps passing through freely. I got a little crazy on that right side, but everything's pretty easy to smooth out. Here's the straps in place: This actually works exactly as I wanted it. Once I get the trapezoids smoothed out a little bit, the back will be ready for primer. So, on to the resin arm parts: I wanted to post this so you can all see how I used the UV resin to "glue" the pieces together. Even though I have a fairly large resin printer, the forearms were just a little too tall. Basically, I brush resin on both halves, hold them together, then flash them with a UV light to tack the parts together. I then put the forearms in my wash and cure station to fully cure the new seam. After some bondo filling and sanding, those sea,s come out pretty smooth and are nearly nonexistent. Here's a trick you can do to save some elbow grease. It's dirty, but this is a maroon Scotch Brite pad. Get it wet, then wring it out. After about 15 minutes, you can lightly rub your primer just to get off the dusty grit. Here's a picture of that "Grit" so you know what I'm talking about: Some times rattle cans just spray bad. Atmospheric conditions do this but the distance you hold the can away from the part also contributes to a dusty finish. Here I am running the pad over the surface very lightly. Keep in mind that this was only about 15 minutes after spraying the part. Damp Scotch Brite and light touch. It looks a little "scratchy," but that's actually really smooth. I brought the parts outside and laid another layer of filler primer on them. Of course, this is when I ran into a couple issues. The first one, which is fairly common when you're painting like this, is I got a little Turd Fergeson who decided to land on my fresh paint. This is one of the "tips" I wanted to cover in the thread. When this happens, the absolute worst thing you can do is to try picking off the bug while the paint's still wet. Just let it flash for about 15 minutes, then you can brush it off. He left a little guts streak behind, but that little dot will sand out easily. By the end of the night, I was able to lay down the filler primer over the chest, forearms and shoulders. I would have done the biceps, but I need to reshape one of them first. Regardless, I have these totally smooth. Tomorrow night, I'll take care of the biceps, run some 600 grit over the surface, and get my sealer primer over these pieces. I'm also hoping to smooth out the back piece traps and get the back sprayed with filler primer. Once these tasks are done, I'll essentially have everything "north" of the belt ready for paint. So, thanks again for viewing. More to come this week.1 point
-
I did also order some new boots!
 1 point
 -
Yeah I think UK will be my main reference. Thanks buddy!1 point
-
Here's a 4.5 For a good base build even though it's 1.0 you can't go past Ukswrath1 point
-
Thanks all! You're fast with those references! Exactly what I needed. Definitely a learning curve for the painting. Using a toothpick seems to be helping with the edges. Also, got my new decals coming from Trooperbay as I couldn't cleanly take the other ones off! Sent from my Pixel 4a using Tapatalk1 point
-
Great news, we should be seeing some BBB photos soon1 point
-
Almost there !!1 point
-
Yes, I updated the FISD one in here before rolling out the mass mail and have the other one as well: https://cdaniel-lauber.de/FISD_pics/IMG_6872.JPG1 point
-
Looks like Darkside Dave wins the race. I just got a message asking for a deposit for this week. I'm so excited. I'm even more excited to share the journey with you all. I forgot about this feeling of happiness when you're building a new costume. Thinking about all the kids you can help and all the fun times you can have in it.1 point
-
My last job had a fantastic gym attached to it. Almost always empty. It's where I started working out after my Crohn's diagnosis. To keep myself on track and motivated, I used an app called FitNotes. It's free and has auto backup to your gmail account. You can enter custom exercises and track things, even light stuff like PT movements or walks. I continued to use it when I quit that job and joined a public gym, then stopped when I got into crossfit classes. No need to log crossfit since the workout is on the board everyday. Anyways, I re-downloaded it, logged in, and opened it. All my workouts and saved custom exercises were in there with my last logged workout being in 2018. I've since logged 3 more. http://www.fitnotesapp.com/ No affiliation, just a user for the past many years over about 4 phones. I was beyond pleased that the app still existed and worked.1 point
-
@revlimiter @jsilvius @Order and Justice and anyone who joins the club.1 point
-
‐---- peers in ------- Hey buddy!!! If you build it... they will come... Muah haa haaa1 point