Leaderboard


Popular Content
Showing content with the highest reputation on 06/10/2022 in all areas
-
4 points
-
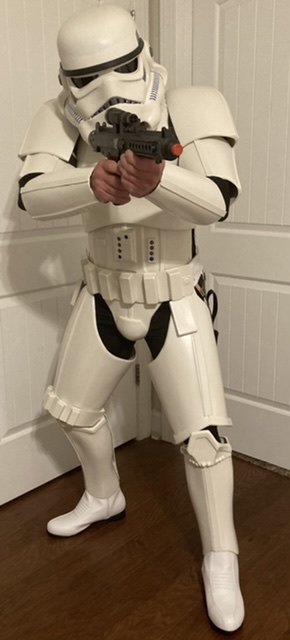
I really didn’t know where to post so please move if necessary! so excited and absolutely love it! got a little fitting to work out and some minor other things to finish but big thanks to RWA and this forum for the guidance.
 3 points
 -
Denuo novo delivers as promised3 points
-
People are starting to receive their soft goods after all... Man I hope this is for real FINALLY, but things are looking promising with Denuo! Boots and gloves look great, just a little more textured of a grain leather than Imperial Boots' offering, but hopefully they start offering the soft goods separate (and delivering them) as well. Would be nice to have more options! Photo credit to Javier if he's on here!2 points
-
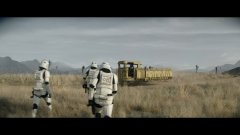
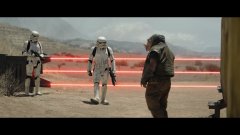
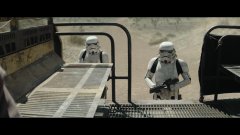
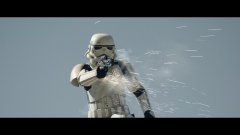
References from the Obi-Wan Kenobi series1 point
-
-
That’s to bad Mine had just a few ”lines” only visible in certain light…but they are clearly rushed as the leather portion is angled incorrect. I’ll remove it and reposition it, not a big deal even though 199US should mean one wouldn’t have to…..I’m just happy to receive something after all those years so perhaps a bit more content than I should. Better than nothing anyway.1 point
-
Thank you! I'll be sure to fix this soon!1 point
-
Valid, and bummer Keep us posted.1 point
-
These names are gold. Somebody needs to print these on those metal blaster plaques for display with our E-11s. I'll take a set. lol. And fantastic job with this research and build; I can't believe I'm just now seeing it! If your project end is not in sight, then what does that make my armor build that I began in 2019...1 point
-
Awesome, Jonathan! HERE IS A LINK to a section here on FISD where you can post some pre-approval photos of you in your kit for feedback, if you so choose. You could also reach out to Cricket or the other Georgia GMLs (Garrison Member Liaisons) to ask if they'd be able to clear your boots. Additionally, below is a link to the Georgia Garrison's approval process: https://www.ga501st.com/joinus/ Exciting times ahead!1 point
-
This is going to be epic.1 point
-
Excellent! thank you good sir. I did a search on my forum name but nothing came up so assumed it had all been filed away. Cheers!1 point
-
I wish I could say I did it. It was a great body shop.1 point
-
Decided to powder coat my thigh holster bracket. It will hold up better than paint and clear coat Missing some screws but working on that1 point
-
Nice work on the color matching1 point
-
This is the same with a lot of makers ears, has not held up anyone for centurion to my knowledge, these are normally suggestions for a more accurate look and not a requirement1 point
-
You already have 501st access1 point
-
Hello and welcome back. For the last two years we have been working through the forums trying to replace any missing or watermarked images, BUT with members own build threads they have been asked to updated them themselves, for any that have not been updated they have been moved to here: https://www.whitearmor.net/forum/forum/241-build-threads-requireing-maintenance/ But in your case after checking your profile this thread comes up still in ANH Build Threads Blaster here1 point
-
That looks fantastic to me! I'm not the most knowledgeable, but yeah. Amazing work. And the angle looks spot on. I do know that many of the screen-used ones had nothing like this nice an ear fitment.1 point
-
That LOCK screw is so annoying. On this handle it tightens fully at FREE. Since I have to put electronics in it and wire stuff up later, I'm not gonna Loc-tite it on LOCK just yet. As for that red wire... not sure if it's correct, but it sure looks right compared to the screenshots. Trying my best to make this screen accurate. Onto an update! I got the power cylinder JB Welded into place. No going back now! But I can change out various parts of it. Next step was some T-tracks. I've never had to do these on any blaster before, so this was pretty fun for me. I snipped to 5x 6.5 inches and 1x 7.25 inches. The measurements worked well for this Fieldmarshall build. Work area. The snips help to re-angle the track cuts as necessary. They need a pretty sharp cut and most of mine were done too wide at first. Low heat while spinning to evenly heat all three spars of the Tee. If only the bottom gets heated, it won't bend... and will lizard-skin the bottom side. I used a small screwdriver to help shove the pliable plastic into the hole and it worked amazingly well. I was able to get a very sharp bend on all the tracks and most don't need glue. The top one looks a little loose because that's how it is on the screen version. You can see a little light between the barrel and T-track behind Leia. I tried to replicate that here while still keeping it in place. All starting to come together! The T-tracks and counter just add so much. I've started some light weathering to match the screen version as closely as I can as well. For the time being, I have the counter held in place with a screen-accurate wire. It's also supported by some strong double sided tape. However, the wire attachment creates the perfect height, position, and angle by itself. So very awesome to not struggle at the counter positioning. None of my other blasters have extremely sharp molds at the top of the scope. The accurate white crayon lettering is just chef's kiss. I also got the chip installed on top of the scope. I tried the socket only version first and then compared it to the height with a chip installed in the socket. I think the chip + socket is most accurate. Now I just have to figure out those wires running from the counter to the power cylinders...1 point


.jpg.266de113ff531c1cb1c7e7a29cdc5c75.jpg)