Leaderboard


Popular Content
Showing content with the highest reputation on 05/01/2022 in all areas
-
OK So here's the hard work that's been happening this last week. Cape! I got the following pattern from the Captain Phasma Builders FB Group. Super helpful, if a little difficult to figure out without a legend. The measurements were originally in mm, I converted to cm and reduced by ~10%, since i'm not 6' tall. I used a white charcoal pencil to map out the placement of my panels - doing this I was able to triple-check my measurements and min-max my panels/fabric. With only slight adjustment, I managed to fit all 4 panels on 4 yards of fabric, in this orientation. I sewed the panels together, keeping a bit of length on them just in case. This is after extensive steaming/ironing. I used my pencil and roughed out my curve, this really helped a lot. The cats also helped a lot. I ironed & pinned the hems, following the CRL to make sure my sides were 1.25-1.5 inches, the bottom hem was double folded and roughly 3/4". I seamed all the pockets/straps (missing one in this pic). Then I sewed them down, doubling up the top stitches. Pinned the pockets down, ensured placement matched references as best I could. Yes, i'm adding a 2nd strap. Painted the long hem using cheap red gloss acrylic paint. I know some people use fabric paint, but I felt the acrylic looks better/more screen accurate. It took two coats. I then used Liquitex clear gloss gesso to give the shiny/waterproof look. This pic was after a first coat using 8oz jar. I should have just gotten the larger jar, I ended up going back and getting a 2nd for full coverage. On the second coating I mixed in some black acrylic paint, so I didn't get the hazy look - it's now full dark. Took the cape to a small build party, and had some garrison guys help pleat and clip some folds in to the neck area. Next i'm going to iron the pleats a bit more, clip my cape a bit more, and start to whip-stitch the pleats together to make sure they stay in place.2 points
-
Hello Dan! Thanks for responding. I honestly don’t know my maker, only because I was gifted the kit a few years ago. I for sure know it’s ABS but not sure if it’s acrylic capped or not? So I’m shopping around to see if anyone has any extra for sale. But yes I understand finding the best to match my armor is important.2 points
-
Good to know. Looks like the old video I was looking at has the incorrect blue. Thank you!1 point
-
You may also want to check the colors as from memory I think RS use a darker blue1 point
-
Just read through your build, and it’s so darn cool. Good job!!! I can’t wait to see the next progression1 point
-
I don't know where I got that "AM" from when I started this thread, it's an RS Propmasters kit. Perhaps I was thinking of ANH... I dunno.1 point
-
You don’t need to thin them1 point
-
I’ve decided to mod my BS stormtrooper helmet for more wearability so my glasses will fit inside I’ve taken most interior and electronic parts so far. I’m considering making this RO accurate but seems like a lot of work1 point
-
Wow, the cape is looking awesome Brit1 point
-
Most solvents with burn plastic if left on straight from the bottle but mineral spirits is a little gentler. I have found a touch of general automotive thinner has worked for me.1 point
-
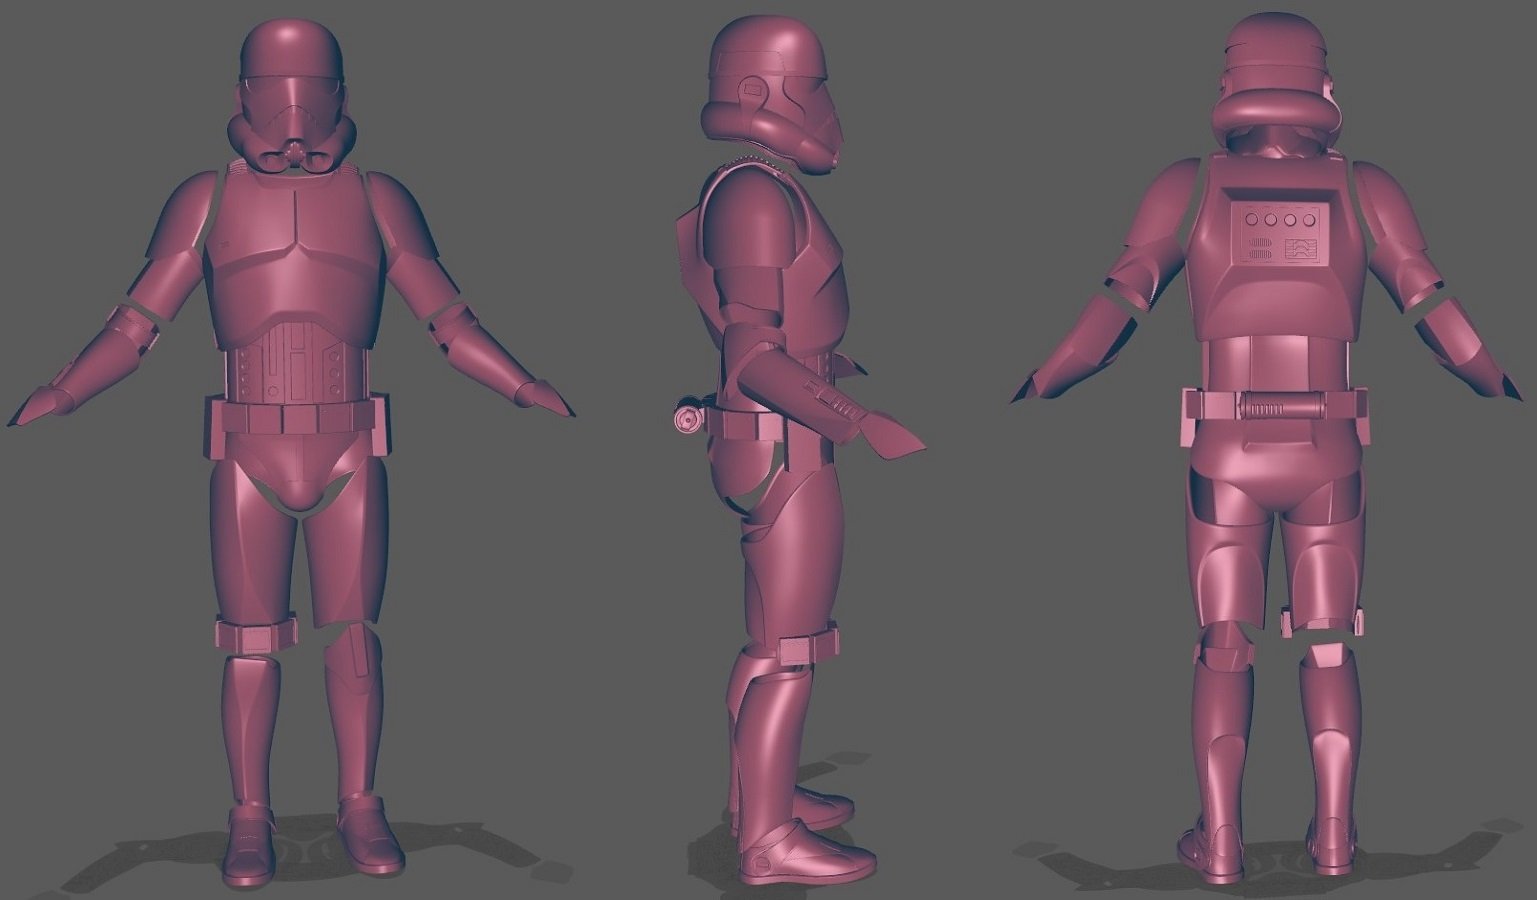
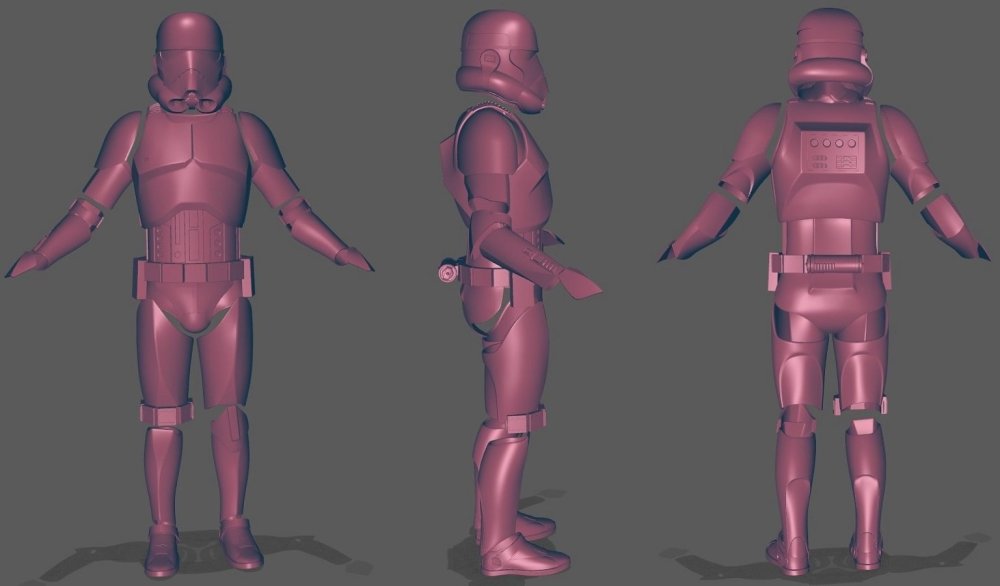
"I like to "translate" between artstyles. I don't adhere to an artstyle 100% when "converting" to realism or vice versa, hence the liberties I took." Don't worry, I wasn't knocking it! I wish I had started dabbling in 3D earlier though, I could have contributed when it was needed! Made a mock-up using all the files. some needed to be re-scaled to work but a full suit is now possible. As I improve my own 3d modelling I will improve upon the parts I made and maybe add more bespoke parts but for now, between you fine members on this thread who made the helmet, myself and the creators on Thingiverse who made the Clone, Scout and TK parts used we have the full suit.
 1 point
 -
And I noticed these images weren't in the gallery section so they have just been added1 point
-
Lots of great folks in the Krayt Clan Detachment that helped me immensely. Lots of little details involved, but a really fun costume.1 point