Leaderboard

.thumb.png.69856e02550a2e6d07e44a2b1bda020c.png)

Popular Content
Showing content with the highest reputation on 02/22/2022 in all areas
-
I'm going to point out the major stress areas of the armour from a wearing it perspective. These areas I see as almost impossible to be able to duplicate with a 3D printed set of armour and have last any period of time without repair rebuild or even complete part failure. Before I go into this, I would recommend anyone looking to attempt a 3D set of armour, take a good look at a correct ABS kit, understand how flexible it is and where it needs to be able to flex when worn. Shins: These need to be able to flex open to get into them, They need to be assembled in two hemispheres like all other limb pieces but they clam shell at the back. With ABS plastic at 1.5 mm you get the flex you need to be able to open them up and get your shin in. Printing in a hard medium will not work for this, rigidity is going to send the stress strait to the front join and it will fail at the weakest point. Shoulder bridges: these flex when putting the chest/back torso armour on. Even with the flex of ABS they still tend to crack over time. 3D printed could break on the first outing or so. Agian a rigid material like PLA or ABS filament will fail. Chest piece has a degree of flex just from moving your arms around and taking certain poses. it needs to have a small degree ot twist and flex. But plate: this also needs to flex when you strap it to the Cod piece. Remember, these files were designed to use as a bucks for vac forming, not necessarily to build a functional set of armour that is 501st approvable, that would come from the bucks and refining them until Chris could vac form something that is functional and how the original suits were constructed. His 3D printed helmet looks ok but the vac formed version he does from the buck looks much closer to on screen as an example. Not only will you need to be prepared to sped a lot of time and money on printing and trying to make this actually work, you need to then refine it so it looks like all the vac formed TK's out there. No one is going to give a guarantee a GML will ever approve a printed kit unless side by side it stands up to all the kits available that look identical. I can't wait to see someone try, but be prepared for disappointment, i can't be more honest than that.3 points
-
I'll work on it soon! The kit I bought was previously Centurion graded2 points
-
1. First Name: Kris 2. Last name: Typolt 3. 501st ID (TK number) : TK-23410 4. Paper size: Letter size 5. The name of the DO that did your final approval. : Chemi Thanks so much! You are VERY welcome! https://www.whitearmor.net/eib/certificates/23410-centurion.png1 point
-
More than welcome, dms always open. Look forward to hearing from you. Sent from my SM-G991B using Tapatalk1 point
-
Thank you very much! Hopefully the Deputy GML is able to get it reviewed and sent on! I'm happy to begin this journey after soo long. Just wish I could've been in costume for all the new releases we had these past few years! Oh well, there shall be plenty more if Dave Filoni has anything to say about it!1 point
-
Thank you! I hope to get basic approval in the next few days! If all is well, maybe I can begin to submit for EI after I do my first troop in the armor. Break it in, so to speak. Can't wait to just be an official member of the 501st after 17 years of window shopping and drooling! Being L2/L3 would just be icing on the cake! I'm definitely gonna have to make some minor adjustments for EI, but nothing major. RS Prop Masters does a really good job.1 point
-
I used plasti weld for the small space on the center rib and used poly flex for the cylinder seams1 point
-
Worked on the TD. Did a mock up and looks pretty good. Starting the glueing process with CA There was not much to glue to so I added a shim.. Next up is the add filler and sand down.1 point
-
Congrats! You have done a great job steering the ship these past couple years and I look forward to this term, as well.1 point
-
Nowhere on the ad does it say 501st approved just a heads up. It reads as "made to follow 501st spec" so long as you can finish it correctly. Made it very clear on the ad that it's not guaranteed. Sent from my SM-G991B using Tapatalk1 point
-
Just a note Chris as we do with any vendor that mentions 501st approved, nothing is effectively 501st approved until built to the CRL and approved by a GML of a local garrison. Might help you avoid any noise or negative responses to your hard work by removing anything that sounds like 501st approved. I think it is OK to mention you are working with the 501st to get these as good as they can be. To explain further, a member could buy any armour on the vetted sellers list and completely make a hash of building it, bad trimming, miss aligned parts etc, and be knocked back by a GML, 3D printed armour would undergo the same scrutiny, in fact maybe more if an applicant doesn't finish it to a suitable standard, like visible print lines bad paint job and the like. I look forward to seeing your V2, you know where to find me if you need any more assistance.1 point
-
The vac forming moulds just mea. They're a bit sharper, considering you will fill and sand it you can go over edges to smooth it. V2 will be free for those who bought v1. Sent from my SM-G991B using Tapatalk1 point
-
Thank you very much, Tino! Of course you'd know best (aside from myself) how much love went into this suit -- at least two messages a week regarding this white plastic over the course of half a year might have given you some idea Ohhh, I'm very much looking forward to it. After all, I need a lvl 4 blaster for lvl 4 armor Soooo... If this is all the feedback and improvement you guys have to offer on here, I'm looking forward to receiving my Centurion certificate with a "nothing to add" for armor improvements... or to some lengthy comments about small details (best before I apply) Actually, my goal was to only get Centurion without any DO remarks regarding further improvement (not that that would stop me from small improvements, haha) but now that you're basically challenging me, I might need to re-think my stance regarding the first lvl 4 approval1 point
-
Not sure why I had added the raised edge on the biceps or why I'd missed that. I probably assumed it off the forearms and legs and was going off my kit I had on hand. You can use some bondo to blend it flush and it shouldn't be an issue. Sent from my SM-G991B using Tapatalk1 point
-
Hey guys, thanks for tagging me. No hard feeling so far. I've gone over it in another thread but I'll reiterate to get everyone up to speed. When I designed these I was by no means a tk expert, I worked with Andrew franke our dl to get it as good as it could be but with all things it's easy to overlook some details especially when you're trying to replicate something uneven. Also these were designed to be for vac forming. I had lost the source files and only applied a smooth modifier to the saved stls to get some "roundness". I'm currently working on some v2 files but I'm always looking for feedback on these things. Sent from my SM-G991B using Tapatalk1 point
-
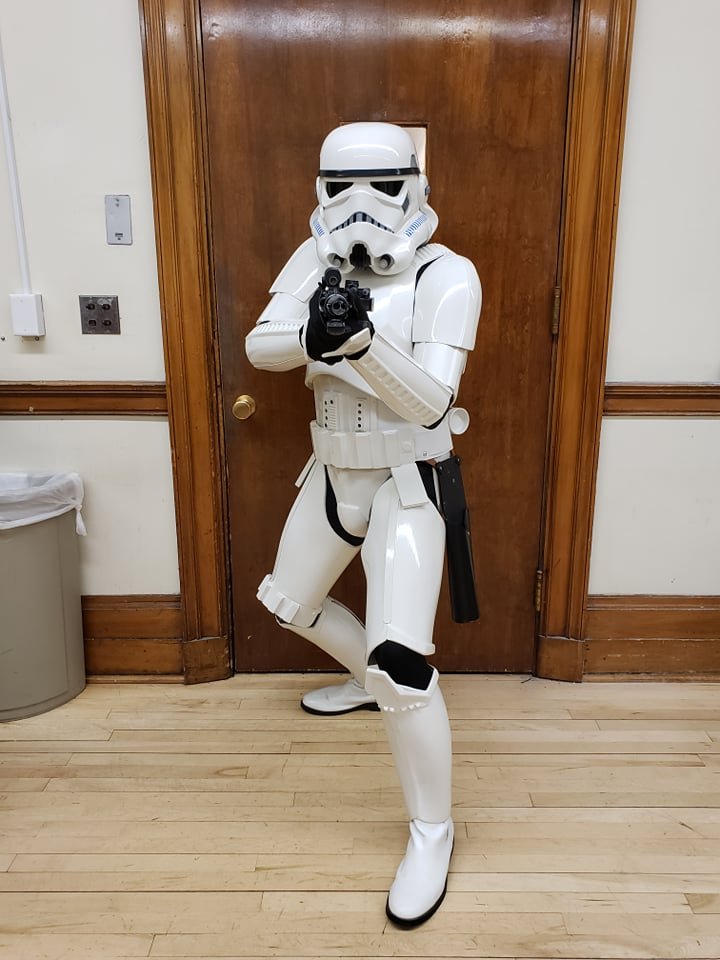
I got approved by my GML in person at a troop last night! TK 10527 reporting!
 1 point
 -
Congrats Andrew! Here’s to another great year at the helm!1 point
-
Congratulations again Andrew !1 point
-
Handle detail of the RotJ blaster . MGC made an all metal replica Sterling machine gun ( goodness knows what for) and these were used to create all the hero weapons for RotJ . Sent from my iPad using Tapatalk1 point

.thumb.jpg.2b17f3f414db0884f3c65bbc26f9b5f1.jpg)