
Leaderboard


Popular Content
Showing content with the highest reputation on 02/19/2022 in all areas
-
I hate to be the bearer of bad news, but just in looking over some of the ab-plate details alone you may have some issues. I may be mistaken, and it could very well be the image supplied on the site but both ab-button panels may be too different for even Basic approval. Some GMLs could very well pass this as is, but some may scrutinize it more. 1. The right indented vertical panel looks awfully deep, and the rectangle inside it should ideally have rounded edges (not squared) and should sit higher (in line with the second button from the top). 2. The raised area that the large button plate sits on looks to be a separate piece instead of being molded into the chest plate. 3. The small ab-button plate appears to be set too deep, and the top gray button on it should be aligned with the top gray button the large one. Again, I don't mean to rain on your parade but these are just few things that jump out at me. Would the general public notice these crazy small details? Never, lol, but it's just a heads-up, and hopefully you may be able to alter the 3D designs before printing them if you want a set of armor that more closely matches those seen onscreen. Although the site states that "You will not find a more accurate set of files" (which may be true) it does in no way guarantee 501st approval.2 points
-
This is the last one.2 points
-
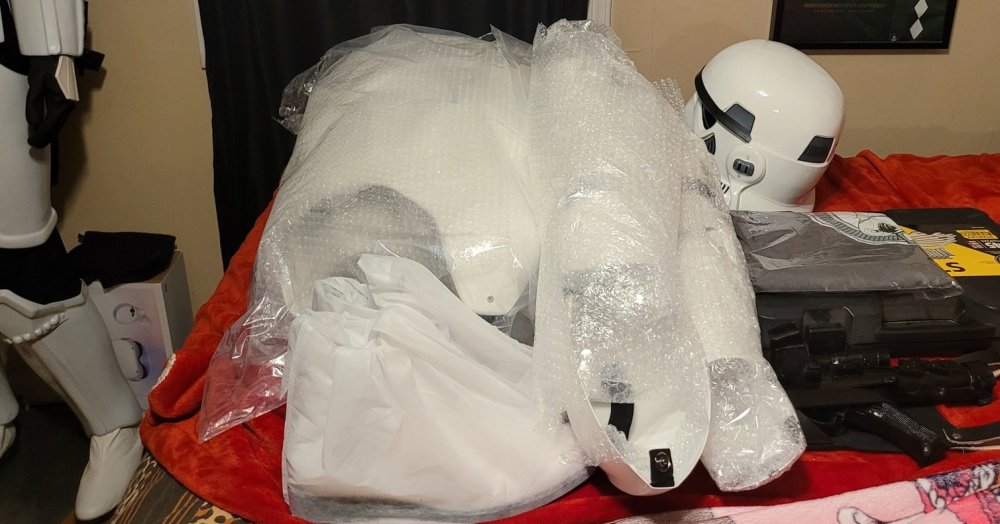
Ok, I acquired a TK helmet from a friend so I can practice on inserting helmet padding. The helmet is a Shepperton Designs TK helmet and I am trying out different types of padding so when my Armor and other helmet arrive, I will have an idea what to use. How many of you have tried using baseball helmet padding in the Bucket? Any recommendations would be appreciated, and I will keep updated to see how the progress goes. Thanks1 point
-
You need to add a link to your legion membership profile, have a look at the other posts1 point
-
These are OT and not R! but could give you an idea, I have pretty skinny arms and forearms had been trimmed to bare minimum for standard cover strips
 1 point
 -
Be aware that there have been some recent CRL updates to certain items: Thermal Detonator- ANH Stunt/Hero and ESB (Basic 501st approval) The raised ribbed section of the white control panel faces the rear, with the round washer detail closest to the right end cap. Vertical (straight) sections of clips do not extend past the bottom of the canvas belt. End caps shall be approximately 20 mm in width. Thigh ridges- ANH Stunt/Hero and ESB (Centurion) Lower thigh ridge joins (front and rear) shall butt-up flush against each other. Any gaps must be backed with ABS or filled as not to be noticeable. Any mobility cuts on the back do not extend beyond the top of the raised ridges. Large ab button plate- ANH, ESB and ROTJ (Centurion) The large Ab plate detail shall be a separate piece attached to the raised center mounting area. Plate does not overlap the edges of this area and should show a definite straight cut edge around all sides. Ear placement- ANH and ESB (Centurion) Ideally, placement of ears (and screws) should closely follow the rear angle of trap above them. ESB hand plates (Centurion) Curve at front of hand plates shall be positioned to sit directly over the knuckles. If silk or satin gloves are worn, the hand plates have the correct visible stitching with a 5 point/star pattern, equally spread out with 2 on each side and 1 in the middle front, double stitched with 2 holes at each point and sewn to the glove at each one using black thread E-11 blaster - (Centurion) T-tracks and grip shall be black with no silver/metallic weathering allowed.1 point
-
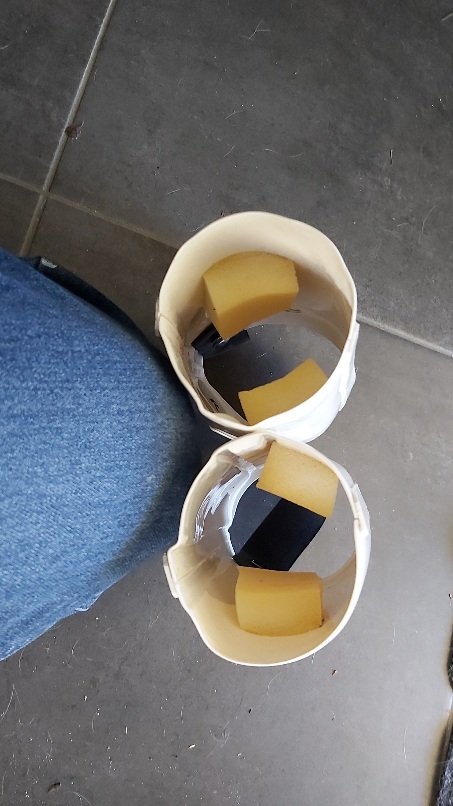
When adding padding to the interior, it's important to figure out how much (if any) you want in the top. Many times we see troopers with pads that are too thick, causing the helmet to sit too high (as seen in the first image below). Our field of vision is not the best to begin with, and you may find yourself constantly tilting the bucket forward just to be able to see. Not just inconvenient, but potentially dangerous- as you can trip. Note in the second photo how low it sits on the chest plate . If I could suggest one more thing it would be to use pads that are removable. Even if you have a fan system (recommended) it gets hot, so during a troop we sweat. Sometimes a LOT. Being able to take them out and wash them as needed will prevent a smelly bucket.1 point
-
Well ladies and gents, it begins tomorrow, I will setup and submit my basic photos to my GML tomorrow. Once I have my ID I'll apply for EI then begin the road to L3!
 1 point
 -
Connection is the same as for the other OLED depicted on the wiring diagram. Only the size is different, for the scope you need 64x44 dot OLED. The software is prepared for it, see: FX-BlasterOS/Variants.h at master · Protonerd/FX-BlasterOS (github.com) #define OLED_DISPLAY #if defined OLED_DISPLAY //#define OLED_STD #define OLED_SCOPE #endif1 point
-
Hello and welcome aboard trooper, from west of down under1 point
-
It was explained over here in your original thread that there is no such thing as "501st approved" files or armor. It all depends on how they are assembled and fit - including Chris'. And I'm unsure what you mean by "work with originals to produce?"1 point
-
FYI (assuming there may be a miscommunication) I only textured and rendered out the helmet. Thanks again for these amazing helmet models, DeltaReynolds, Skylu3D, Nico Henderson (Titanantinium). I'm not sure how I'm going to add the vents or the 501st markings in Blender accurately as I generally use procedural textures and the helmet is very high poly. I hope to have a nice full body model to render from some time this year.1 point
-
It's been a while and my skills with Blender got better and tinkered with the helmets again. Still a WIP.1 point

.thumb.jpg.2b17f3f414db0884f3c65bbc26f9b5f1.jpg)


