Leaderboard


Popular Content
Showing content with the highest reputation on 10/29/2021 in Posts
-
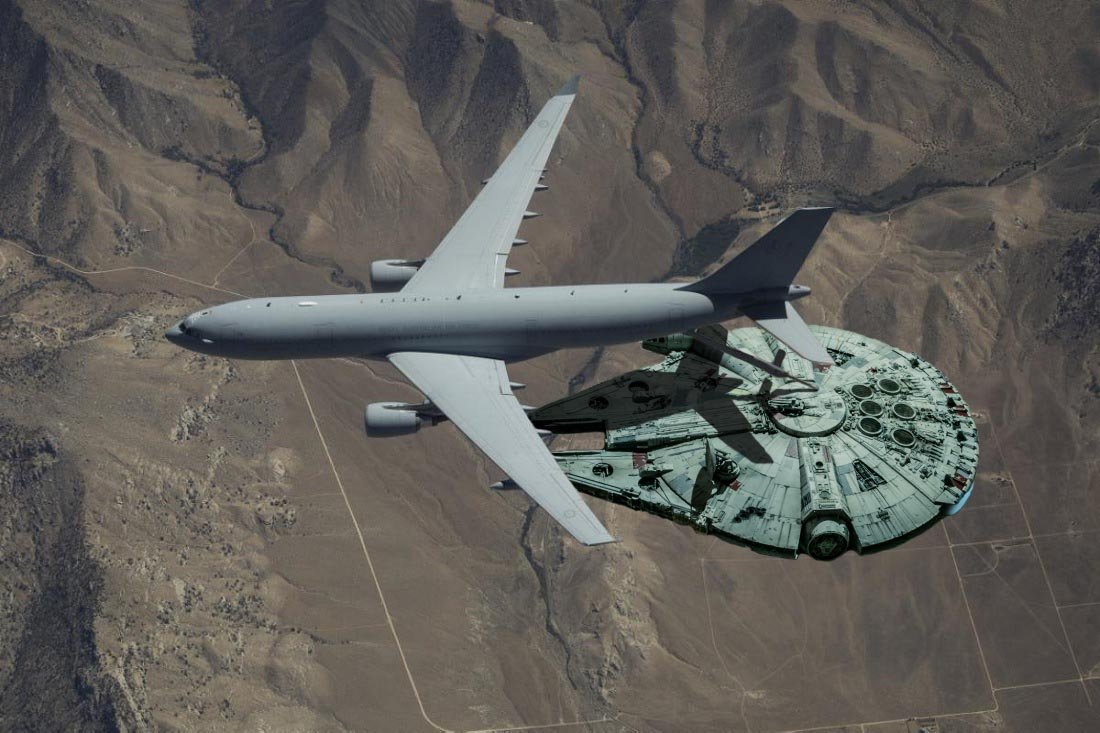
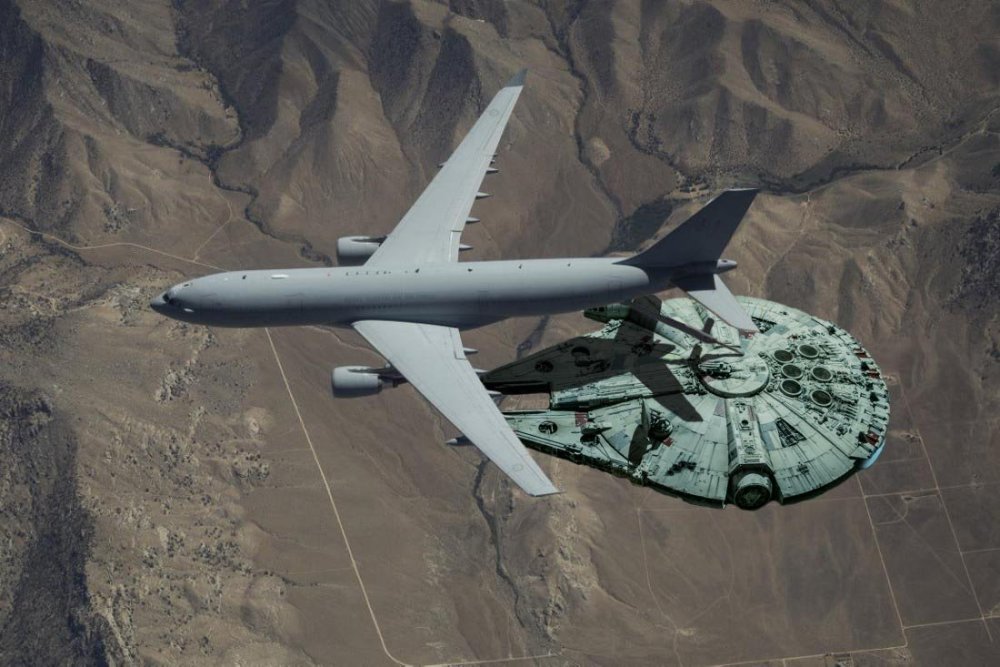
I started a new hobby outside of my model making, it still involves my Star Wars models, but I photoshop them into various scenarios, sort of a “What If?” similar to the Marvel series. Check out @starwars_multiverse on Instagram for more of my edits! I may work on creating some scenes with my stormtrooper armor on, but the set up, staging, and lighting is pretty complicated doing it on my own.
 3 points
 -
A picture is better than words. That’s the way I installed the strapping of my arms:2 points
-
Hey Steven, looking great and easy pass for basic approval ! Some details for higher levels you may want to check: The right ear's screw is too close the rank bar and would need to be moved up . The traps need a bit more paint to reach the border. You would need to shorten the shoulder bells straps to reduce the gap and I would recommend to remove the return edge from Bells to make then closer to the chest. You could adjust the forearms height to be levered each other References2 points
-
Hi folks! I've had lots of people ask about various details regarding how I did my helmet interior. So, I thought it may be wise to just summarize it all so others may learn things or try to replicate some/all aspects of what I did. My goal was to have all my electronics systems embedded inside my helmet, with individually switchable systems, whilst all being very clean and hidden along with a blacked out look. No problem right? For reference, this is what the interior looks like. Note that inside there I have 3 battery banks, four fans, a powered condensed microphone, the iComm unit and an Aker amplifier, all attached to a switchbox: Ok so I quickly found out that it would take quite a wall of text to summarize how to do this build, so I decided to throw a video together to summarize it all instead! https://youtu.be/eYeUpAHOSHM The basic gist is this: 1) Black out your bucket as you desire, I used 1/4" thick neoprene to line it. 2) Create a junction box by leveraging your hovi bolts onto a custom backplate which your switch box also get screwed into. 3) Refine your project box so it has the right size and number of switches for your application (I have 3 subsystems, others may have more or less). 4) For every one of your systems make a custom harness where the electronics run through your switch to its power source, ensure that the switch is the only mechanism to turn it on (so if the electronics had their own switch keep it stuck in the on position and let the switch you use at the project box be the one that controls it). 5) Using high quality velcro, mount all your electronics up at the top, and/or your fans at the bottom. 6) Route all of your wires that need to run from your electronics down to the switchbox in a clean loop, and everything else tied down neatly at the top. Use tubing to wrap the wiring with the least amount of wire and tubing required. 7) Add velcro to the bottoms of your electronics at top and add black padding to hide it all and make a comfortable fit. 8) Use any extra helmet padding as necessary to ensure you have a solid and snug fit. 9) Optional step: You may want to do this at the start but have your eye lenses done up in a manner that will work well with the clean look of your interior (see my other howto to check out how I did mine). Here are some helpful detail shots that highlight some of what I was referring to within the video. One shows all the bare electronics before any lining or hiding was performed at the top. Another shows a detail of the swicthbox at the bottom to show how the hovi bolts and the project switch box mount into the backplate. Here are some links to the more unique or non common materials I used: Project box: https://www.amazon.com/gp/product/B0002BBQNM Flip switches: https://www.amazon.com/gp/product/B001JT7D0G Neoprene lining: https://www.amazon.com/gp/product/B00488DB10 Helmet padding: https://www.amazon.com/gp/product/B00A4TNQ8A 12V fans: https://www.amazon.com/gp/product/B015S5XFJE 12V battery box: https://www.amazon.com/gp/product/B00VE7HBMS All right folks, enjoy and I hope this helps you with your own helmet builds. Post any questions or your own interiors!1 point
-
Looking good. A couple of things you could address: Cut off the extra clip material from your TD. Also rotate the detonator so you can see more of the O detail. A solution from @Chemi in another thread 1. Remove the clips and trim off the ends (you can use a hacksaw). 2. Trim end caps. 3. Move the clips to where the ends meet the bottom of the control pad and next to the end caps. . 4. Drill holes in the clips for the new screw position. 5. Re-attach the screws. Also adjust the alignment of the tops of the Ab/Kidney as they are stepped at the moment Good luck with approval1 point
-
I could probably tweak the armor for another month, but it feels pretty good and solid. It was time for basic approval pix before I could put it off any longer. To do: - magnet boxes on one side of the torso - something to align the other side slightly nicer - finish weathering the blaster - mobility cuts in the legs1 point
-
Nice work, just to add to Mario's items, perhaps add tighter elastic on your sides ab/kidney as they are coming apart a little, this is more for higher levels you may be fine for basic. From the CRL for L3 ldeally there is no gap between the abdomen and kidney armor. Abdominal and Kidney Plate align horizontally at top. Also note the drop box is not quite aligned with the end of the plastic belt in this image, this is for higher level clearance. Just check the corners of your plastic belt, they should meet the edges of the fabric belt, for higher level clearance, bit hard to tell from the images. The corners of the plastic ammo belt shall be trimmed at a 45 degree angle that that meets the outer edge of the cloth belt. One other thing your butt plate is being pushed backwards and is overlapping the kidney plate, again perhaps tighter elastic or V tabs may help. With a heat gun , hot water bath or oven, you bend strips of ABS plastic into the shape of a V, only glue one side and the other remains free to allow movement when you bend. Just helps stop the butt plate from pushing back from the back plate. Great work, looking forward to seeing you with a TKID soon, good luck1 point
-
Excellent! I'm not sure how I didn't notice that the ear screw was so low. That one will be a little challenging to fix since the scrap pieces I have for making the paste are a slightly different color. I've shortened the arm to shoulder straps a bit already but I still have a little more room I can bring them in with. Removing more of the return edges might help allow them to pull in more, also. Unstretched, the center of the snap is only around 3/4 of an inch outside the shoulder bell. When I add straps to keep the forearms from twisting I'll make sure to check that they are symmetrical and adjust them as necessary. I have the paint for the traps, so that should be a fairly simple fix. I also have fabric glue being delivered today to help with fraying, especially on the belt. Random thought... the scrap from removing the return edges from the shoulder should work perfect to patch the hole from moving the ear screw, so easy day there. I appreciate the feedback!1 point
-
Thank so much for the feedback, this is all really helpful. I'll look into white e6000 for sure. When we get back to it, I'll post more posterior pics. We will for sure trim, parts properly. Didn't pick up on that at all. Also found out about trimming the extra at the end of the cod piece as well as the posterior. Cheers, Matt1 point
-
Hi Steven, congratulations to your armor! From here I don’t see a point against a successful approval. For the next level(s): The only point i actually can spot is that there are no elastic bands at the shoulder stripes. The plastic shoulder straps need to be held down in the back via a white elastic band to the white fabric that connects/bridges the chest and back piece. For the problem with the forearms: I installed a black elastic strapping on the inside between the forearms and the biceps. That prevents twisting. Great work trooper! Cheers Christian1 point
-
I have added all the strapping to the front and back of my torso. I think I need to bring my backplate down a little bit as there is a bit of a gap between the back and kidney, but I am pretty happy with the rest of it. I did a test fit of the torso and see a few things that definitely need to be addressed, sooo many questions. First I think I need to shorten the strap between the cod and butt plate so it pulls the butt plate in a bit more. Second the butt plate really flares out. I was reading some other build threads and think I may need to do a hot water bath? I don't know if the "V" tabs will be enough? Third is that everything feels like it is just a little "big". It almost feels like everything needs to be tailored in a little. Maybe I need to put on the legs and arms as well, or maybe when the butt plate comes in it will feel and look better. As you can see I am pretty skinny which also probably plays a part since I am not wearing the legs and arms. I will also most likely need some padding around (already planing on thighs and arms). Lastly is the position of the back plate. Where it is in the picture feels right, but looking at pictures from the movies I think it may need to sit a little bit lower on my back? There is also that really big gap you can see when looking from the side (you can almost see all the way through to the other side) Should I wait to attach the kidney/ab rivets? Are some of these pieces going to need more work? Or is it really just the butt plate which I can detach from the kidney? If a full suit up of what I currently have would be helpful I can do that and post some pics. I could pretty much put everything on except my shoulder bells and bucket. Pictures of the Strapping Test Fit Pictures Thanks, M1 point
-
Awesome job! Can't even see the repairs. Keep it up!1 point
-
Bobby, if you're at all handy with a solder gun you can build a lot of those things for yourself. I have fans in my helmet and live in Arizona. The moment I put my bucket on my head the lenses will fog up without the fans. Problem with my fans are they are so loud I can't hardy hear anything else. So I also wear noise cancelling earbuds that are plugged into a hearing assist system I built for myself from a Vellman kit you can find online usually for less than $20. For a speaker and chatter I built a TK Talkie which has many options such as a voice changer, background loops, and the ability to play sounds that are cued from buttons. There are very good instructions and support to help you along no matter which options you decide to go with.1 point
-
Hello and welcome to the forums, there is a black version FOTK, came out as a toy and not seen in any movie or literature, as it's a specialist it falls under Spec Ops Detachment https://databank.501st.com/databank/Costuming:TX_TFA_elite From memory I think this armor was from KB props who you can find on Facebook1 point
-
With the patching complete, I drilled and placed the rivets in the new positions. I have not added any of the elastic yet as I am finishing up the rest of the torso strapping, then will complete the strapping that goes with this. Once I attach the Ab side elastics, I will trim out the bottom corner to match with the kidney as @TKSpartan suggested and then complete the connection to the kidney. Here is how it looks now. Thanks, M1 point
-
Here you go Most polishes will be fine, I use one called T cut, others prefer Novos or Maguiar's1 point
-
That's exactly what some people do with white E60001 point
-
Hiya, Yes, I’ve used both Green Stuff and Milliput in the past, both work really well. It starts soft and allows you to shape it to the parts, then dries hard ready for sanding. Dan1 point
-
Attention all Imperial citizens of the FISD We have been working on a project which has been under discussion since the start of this term and are preparing to move forward with this initiative. It will form part of our 15th anniversary celebrations and part of detachment history. We can't announce exactly what it is as yet, but we are sure you will love it. We want your troop photos from around the world. Local troops, Cons, Celebration etc. If you are a TK and 501st approved, you can submit photos. Photos of TK's both OT and First Order, any of the costumes in our CRL to be honest. Can be a single trooper but group photos are very welcome. What you consider your best troop photos or most memorable can add more meaning to this project so select carefully. Ultimately we are after High quality or resolution photos, but for this thread, you need simply only add a lower res version using Imgur or other photo sharing 3d party services. Just make sure you have a good version to supply for the project if requested . Based on how many submission we receive, the final selection will be made by the staff. We are looking for the best and most varied photos old and new. If selected, you will receive a PM from myself or one of the staff requesting you email, share the high res version image (email will be supplied in the PM) Google doc or other sharing services can be used. What info do I need to supply with my image post? You may post as many photos as you like. Date or year the photo was taken and location. (state or country etc) Photographer name if known for each photo. Garrison/Squad/Fire team name. Photos must contain TK's predominantly, we are Stormtroopers after all. Both old and new photos are welcome, history is a great thing specially in our anniversary year and we can't wait to reveal what this is all about in the coming months. If you have any other questions, please ask in this thread to benefit others. Looking forward to seeing some awesome Troopers on assignment.1 point