Leaderboard


Popular Content
Showing content with the highest reputation on 10/03/2021 in all areas
-
Confidence and ability come from a big pile of mistakes in my experience. You should see my "failures" pile in my work room!3 points
-
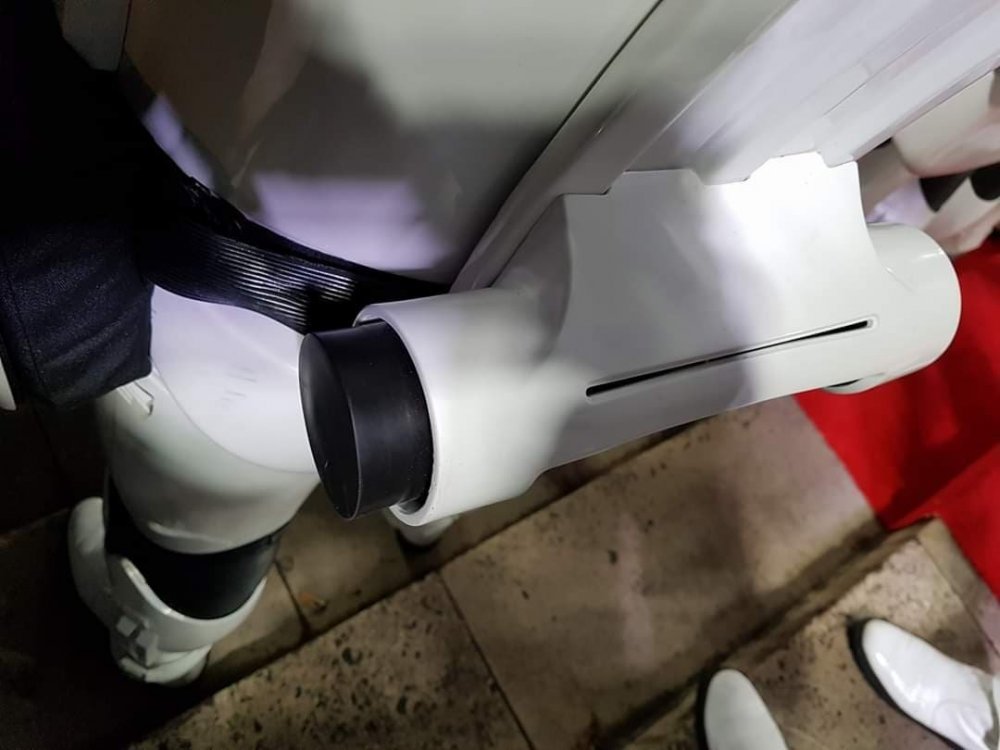
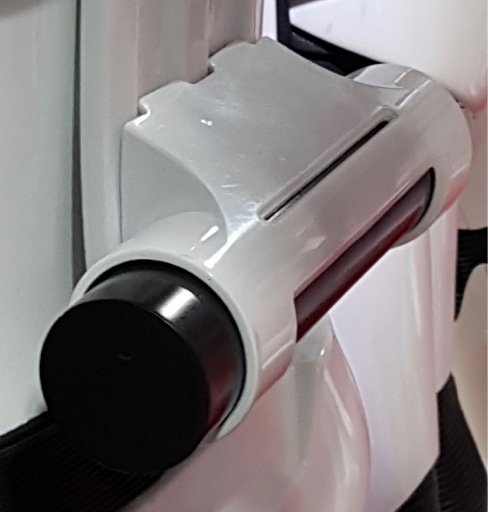
Nice work on the TD, a few images for length of tube, I think you are a tad long at present.
 1 point
 -
Great work! I just found your post as I was investigating battery solutions for the blaster. I tried 18650 cell and it fits well in the raise section and powers 3.3v arduino well. I was looking at using this, https://www.thingiverse.com/thing:2847497, before I saw your solution. I like your idea of the endcap magnet to connect to the main blaster. One suggestion on the magnets/screws, if you use non-stainless screws, you can align the magnets to attach directly to the screws instead of having magnets on both sides. Paint should cover the resin, might need a couple coats of black to remove the see through nature of the resin. I am using resin and tested with just adhesion promotor and 1 coat paint/clear and seemed good enough. I am currently working on modifying E11 blaster electronics to add F11 sounds and options for light and stuff.1 point
-
Awesome work Chris, you are inspiring me to do something with the F11 D I printed 2 years ago and it has sat in a box ever since.1 point
-
Daniel has shared with personal cell number with several members who have had conversations with him over the past half year, and members of the SoCal and Imperial Sands Garrisons have also had dealings with him in recent months. Hopefully he comes through for everybody who still has active orders with him; I know he’s has lots of life issues, though that doesn’t excuse the lack of communication. Sent from my iPhone using Tapatalk1 point
-
Definitely having luck going one layer at a time, just going very slowly! Trying to finish up house stuff this weekend so my garage can be (relatively) dust free again.1 point
-
One of the many things that I've been doing over the last 18 months, not this clearly, is electronics projects. So rather than messing about with strip board for the electronics on this I've designed a board. Nothing to complex, just a simple hub that makes connecting it all up easier and means I have something to put the LEDs on. I ran a quick test of the LEDS and battery I plan to use and its all very bright. I actually swapped from these clear LEDs to some red colour ones after this as they better diffuse the light so should light up more evenly, and are even brighter. The button will be behind the main trigger so I can easily use the torch for short periods of time and not worry about battery too much. The red LEDs are pretty bright, but hopefully the paint will stop them shining through the resin parts! I have been trying to paint some of the blaster parts over the summer but it seemed I was inept and managed to drop parts with wet paint into the mud, on the floor and scratch bits that are done. I'll get there eventually, I just hate painting.1 point
-
Requesting Centurion Certificate (Centurion 500) 1. First Name: Maria Katrina 2. Last name: Maloom 3. 501st ID (TK number) : TK18112 4. Paper size: Letter size 5. The name of the DO that did your final approval. : Andrew (April 2021) Thanks! https://www.whitearmor.net/eib/certificates/18112-centurion.png1 point
-
Hi Brandon! A fellow Georgian here, though I am on the opposite end of the state up north right outside Chattanooga, TN. As for bucket electronics, and ICOMM with Aker amp is another option you may consider, and I have a section on helmet internals in my resource thread below. Though the thread is primarily for ANH builds, it has lots of generalized information that may apply should you need to make alterations to your ESB suit to make it fit you. Or as Glen said, you can very easily use your ESB armor as a base suite and gain approval for an ANH Stunt and Hero, or HWT, with the appropriate mods. Quite a few people have done that, and I know @TheRascalKing has documented his conversions pretty well. EDIT: I think we'd all also love to see your BBB photos!1 point
-
I wish I had the confidence and your ability. Would you consider delivering some in person training?1 point
-
Ooo, can’t wait to see your build, Tino. [emoji16]1 point
-
Can't wait to build one of these some day. And it is already in transit right now. Following.1 point
-
Canister in the carrier, not too tight (still need to fill out the lip around the outside) Rough cutting the yoke/back, comes in 4 pieces. One piece is a reinforcement for the shoulders. The front is done like a tee-shirt, I am having difficulty getting it over my head much less trying to get my arms in there. In the picture I have already increased the size of the opening, will probably have to modify it further to be more open in the front. Chest piece has three parts, idea is you can measure and cut the return wings (more on that later)1 point