Leaderboard


Popular Content
Showing content with the highest reputation on 05/14/2020 in Posts
-
I AGREE !!! It’s TOO LOW [emoji1787]... [emoji38] Sent from my iPhone using Tapatalk3 points
-
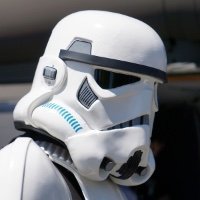
So, first off, nice to have found this place and all you awesome people! I have decided to embrace my inner geek. My inner geek has been telling at me for some time to get some armor and begin trooping. Well, now that is the plan! So, first step is to get a kit. I was going to get a pre made armor from RS props but once they found out that I am 6'4" 240 they told me that their stuff wouldn't look right on me. So, now I will be scouring the forums for a kit so I can modify it to fit my rather large frame. I thought that introducing myself was a good start. That way I am not as much of a stranger when I introduce myself to the Carolina Garrison. Well met troopers! Hail the emperor!2 points
-
I’m in love with Star Wars from the first time I saw Star Wars in the theatre in the late 70s. I look forward to being a part of this community that shares the love and magic of Star Wars with each other and especially with those who are less fortunate.2 points
-
Excellent, thank you all for your responses. It seems based on the CRL and what others have done that extending the kidney plate with an additional strip of ABS on the inside is the way to go. Also, since Centurion approval requires that there be no seam, adding ABS paste to the exterior and then sanding and painting will set me up for success in the future. As always thanks again for the quick responses, I have some work to do.2 points
-
UPDATE: After taking the TK out for it's first major walk around a neighborhood, its become clear that my TK still needs a lot of work in the leg department. I got REALLY bad bites on the back of my legs and right thigh, but not my left. I'm going to make mobility cuts and alter my legs a bit. I'll post updates when done.2 points
-
I think I have the positioning set right for the helmet. Posting before I drill the holes for the rivets.2 points
-
Thank You1 point
-
This is where the fun begins.1 point
-
Hi Charlie, welcome to FISD. Both helmets are ok for basic approval and with minor adjustment in the Anovos one. For levels 2 (EIB) and 3 (Centurion) The crl states specifically for the Vocoder: The vocoder must be integrated into the helmet, and not a separate piece As I know, the Shepperton Battle Spec has the vocoder as a separate piece. (Can you confirm this with the vendor?) The Anovos Helmet will need a few adjustments for L2 and L3 too but they're easy fixes like change ear screws , modify the hovi tips mesh and some paint details. In my personal opinion, the Anovos one is easier to upgrade for high levels. Cheers.1 point
-
I am just getting started as well. Currently searching for the right kit for me. I am also here in S.C. in the Greenville area. But used to live in Charleston, mt pleasant, and West Ashley. Most of all, welcome1 point
-
Hi Joseph, Yeah, the original armour was designed for troopers about 5'10 and about 160 lbs - so some of the vendors' kits will look small on you. There are a couple vendors who make oversized parts. RT-Mod and AM come to mind. Check out the below link. Also, browse through the build section - there are a few builds completed by troopers your size using various kits. Good luck.1 point
-
coming along nicely mate!! you're doing great . For the belt, I use a leather one, why? in my case I started using the nylon one it didn't hold firm and it bent in half making more pressure on my hip , using a leather one asures a better fit and stay firm.1 point
-
Thanks, Ill just use the included one for now.1 point
-
To be completely honest I got distracted by a new helmet electronics project. I've taken my bucket from film accurate foam and chin strap to fully loaded with iComm, hearing aid, and a four fan cooling system. Also I went ahead and replaced my eye lens strip and that foam with a hard hat liner. None of this is getting me any closer to EIB status, but it's a lot of fun. My next step will be getting my hands on a good non-acetone paint remover for my cod piece buttons and acquiring some extra ABS and paste for making my kidney plate shim. I'll keep this thread updated as I move forward, thanks everyone!1 point
-
Keep us in the loop, Cameron. Looking forward to seeing some photos of your progress! One thing I would mention about ABS paste, though... don't go overboard when filling/covering the seams. Put on just enough to cover them, which will save you a lot of time when sanding them down smooth.1 point
-
Perfect photos, and THANKS! We will be with ya' shortly, sir!1 point
-
About the belt, I use a normal nylon one. I bought on Amazon a kit to make 10 belts, the kind that you cut to the size you want ... But you can use any belt that is comfortable for you...1 point
-
Well, I guess it's been 2 days since I've updated the build. I've done a few things armor related, but not much. I fried a hard drive (new power supply, old power cable, they weren't wired the same....... guess I'm getting a new hard drive ), went to a sunflower farm, and helped my wife sew a few more face masks for friends ($1.50 each if anyone needs a mask. pm please), and Ive been working hard at printing a clanker head for a few clones in the squad. Back to TK stuff The thighs are done except straps. I'm debating on how to strap them, and how high to put them. The kit came with 2 3x16" elastic pieces for the thighs, seems like a lot but I wouldn't know. I'm thinking of either sewing loops in the end, or using velcro to attach them to the provided nylon belt. Once I get the torso finished I can get the length figured out on those. I haven't paid too much attention to this specific point, but what kind of belt do most people use to hold the thighs up? I have the biceps and forearms glued together, I don't have the shoulder bells fixed yet, I was waiting for everything else to be ready to size. I think Ill use magnets or tape to make sure they are 100% in the right spot before cutting or shaping any more. The shins are still in the same spot, I haven't looked at them since the pictures I took. I'm not sure if a hot water bath will help or not but Ill look into it for sure. I haven't gotten the holster yet, I just need to go pick it up. I did poke holes in the belt and semi-attach it as you can see above. It fits to the armor, but I think the chicago screws are a bit long so I plan on sanding those down on the belt sander by maybe 1/8th of an inch. about 3mm for @TKSpartan . I want them tight so the belt doesn't sag. The positioning looks good to me. I think Ill remove a tiny bit of return edge on the large button panel to make it match a little better, but I'm waiting to glue that until I get the shims done. Haven't touched the helmet, hopefully I can start that this week sometime. I talked a little to @Jeklynhyde about her helmet and she took some good pictures on her trim lines. I'm definitely studying the RS helmet pictures and whatever else I can look at to get a bit more confidence in the helmet trim. I don't want it perfect, but I do want it correct. For the belt boxes I plan on using chicago screws, Ill E6000 the inside one so it stays put just in case my elastic sags over time. Well, that's it for now. sorry, no pictures to post at the moment unless you want to see my ugly mug or my magnet collection again haha1 point
-
When I can get into the game again, I’ll take several up close shots of the helmet so I can figure it out. The whole thing seems to be symmetrical like the R1 helmets, but the tube stripes appear to be “decals”. I might end up having to modify a BS helmet.1 point
-
"The time has come!" My Headshot Props R1 Bucket arrived today. I'm very satisfied with how it was packaged and molded, everything looks clean and in place. The work it needs is exactly as advertised. The last puzzle piece! On the right is the Hasbro Black Series TK helmet.1 point
-
From the CRL: Any shims used to achieve this effect are of a similar material and color as the abdomen and kidney armor. Shims fit flush and seams are allowed. So would it be accurate that an approvable shim could be anything from a cut out piece of ABS Velcro-ed or hot glued into place on one side and long enough to slide under the armor plate on the other side, to a piece glued in with E-6000, pasted, sanded, and made to appear seamless? would either of these options hypothetically be acceptable, or is there more strict guidelines that I'm missing somewhere? Per the CRl, any shim must appear similar material and color, shim should sit flush, so yes you may have a seam. Some add a piece behind then butt another piece on top so it is in the same alignment as the kidney plate. For Centurion L3 there can not be a seam so most will use ABS paste to fill the gap.1 point
-
I followed the video of the link and had no problem... Just one thing... I didn't use the abs paste to cover the joint. I used a two-component putty(apoxi sculpture, but another brand can work the same) which is much better for sanding and modeling. Then I painted it and it looks great ...You can see the final appearance in my centurion application...1 point
-
luckily we glued them together with E6000, the arms are glued with an ABS Glue, which would very likely split the plastic if we tried to sepereate them. Good thing my arms are put together right1 point
-
If you have survived 4 daughters, armor is not a problem for you .... Just kidding... Welcome to FISD ... Here, you will find all the help you need and more...1 point
-
Hummm. I don't know... I don't like that brow height.1 point
-
Wow. This is nice! Thanks for posting it.1 point
-
FYI, if you trim ~1.5mm off a split rivet you can set it inside a line 40 snap:1 point
-
Thanks! I'll have to look into them. Hopefully my current boots can get me past approval, getting closer to finishing, right now just waiting around, since our belts are being stiched as I type. Then once the helmet bits arrive we will have a painting day when we go in and paint all that needs to be. Very exciting! Also love your profile picture, looking badass1 point