Leaderboard


Popular Content
Showing content with the highest reputation on 05/07/2020 in Posts
-
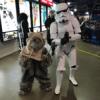
All accounts that I have heard are that she is not a member.3 points
-
TI-80914 reporting in! I've been trooping with the North Texas Squad for about six years now as a 181st Pilot. But now I'm finally taking the plunge with my wife, DS-71017 (Seventh Sister), to build TKs. We were going to wait until I was back in the office again after this virus passes to purchase our armor. But WTF has a good deal available on May 4th that saved us a good a good chunk of change. My goal is to build an ESB TK simply because that's my favorite film of the OT films.2 points
-
Yeah, they certainly drag their feet, but I have never heard of anyone that never received the product. The last kit I ordered from them took over 2 months! After 60 days and zero answers to my inquiries I contacted PayPal. They intervened and the next day I received an email and the shipping info.2 points
-
So cutting into the vents, I can see that the few layers of resin and the cloth pretty much doubled the thickness! It proved to be a bit more work, but I feel much more comfortable with its strength! Hopefully the thinner tear and trap vents hold out too. The first tube vent went well, so I kept going...and the cutoff disc flew off in pieces! Switched to a metal disc for the remaining vents and it lasted the whole time. Used the Dremel to cut out every vent. You can see the resin that didn't quite get cut through, since the cutoff disc was as deep as I could get it without cutting the vent edges. And here's after a quick pass with a few files! I think it's a great start. I ran out of free time today, but I'm stoked with my progress! I'll file a bit more later on, but I think I'll focus on cutting all of the vents out first, and then focus on filing them all.2 points
-
Hi Greg. Thank you for your post and I think I can speak for many that your ultimate gesture is positive. However, this video has created some negative feelings when it got posted on our Facebook Page. Some of the news out there is speculative at this point. The facebook posts have since been taken down. I am going to lock this down from comments and if people contact you personally and this is something you would like to look into then by all means do so.2 points
-
Hi John. No confirmed info from my side, but I experienced the same a while ago already (before the lockdown). Since I know DoopyDoo's, they have always been very low on communications, but always shipped what one ordered. Let's keep fingers crossed, it is just a temporary production pause... I am on their waiting list, too.2 points
-
ONLY 5, 4, 3 2 1 SPOT LEFT, TROOPERS, SO TIME TO STEP-UP! 1000 Expert Infantry reached! Now that many of us are unfortunately stuck at home and boredom is beginning to take it's toll, it's time to wipe the dust off of that armor bin and become a part of FISD history! Instead of binge-watching re-runs, we are suggesting that you put the D.O. Staff to the test and spend some time on that white armor you miss wearing so much by applying for your Expert Infantry badge! As you may be aware, we are aiming to have #1000 approved by the end of the year. We only have 2 to go, so in order to reach that goal we are asking that you read over the CRLs for your particular armor, (this thread will help) make any necessary adjustments and post up your submission! Photo Checklist- Link here Apply Here Questions: 1. Not sure if I have what it takes to get my EI badge- You don't know until you try, and you have not only the D.O. staff but an entire Detachment to help! 2. I need some repairs/fixes first- This is why we are here! We honestly want you to succeed and are here to help in any way we can. 3. I am happy with the way my armor looks, so why bother?- It not only makes you look more screen accurate, it instills a sense of pride and "esprit de corps"! 4. What if I don't make it? No worries, we will provide detailed suggestions on how to reach your goal! Benefits: 1 Bragging rights for being one of the "Original 1000" 2. You get a cool badge under your name here on the FISD. (Street cred). 3. Access to EI rocker badges (coming soon) to go above your FISD patch (also coming soon)! 4. Access to coin runs for EI awardees only. 5. Certificate for your accomplishment. 6. You will have a more screen accurate looking set of armor, and be one step closer to Centurion!! 7. We are planning a VERY special piece of one-time-only FISD Exclusive merch to honor hitting this milestone! Know that the entire Staff and those who have reached Levels 2 (and 3) are here to help in any way we can, and that you are more than welcome (and encouraged) to ask any and all questions you may have here on this thread, or contact myself or Sha Sha. You can do it, Troopers. Let's turn this "anno horribilis" into a banner year for the FISD!1 point
-
I've fallen behind on my updates, so this will be a longer recap of Tuesday and Wednesday's progress. Shins! I started with trimming the fronts of my shins down to create a 20mm ridge for the cover strips to lay upon. At the ankle, I marked how far I'd need to trim inward to create my intended taper, drew a straight line with my ruler, and made my cut. Then, I clamped the two ends together, mimicking the final overlap, and I used the edge of the armor to trace my second cut-line. I found this resulted in a more seamless butt joint than tracing a line with the ruler twice. Here's the result pre-gluing my cover strip Plastic peeled back, cover strip ridges all sanded (110 grit) and ready to go. Clamped, magnets applied, and taped down. I then completed the same steps on the other shin. Back to the biceps. I knew I would have to create some more space in this piece, so some shimming was in order. I didn't want to go too wide, otherwise my cover strip would look too big. I settled on expanding the cover strip from 15mm to 25mm, and I would use a 15mm wide shim (I used the original cover strip). I started by creating an inner cover strip to help bridge this new 15mm gap. I sanded all pieces and glued the "used to be the 15mm cover strip but now is my shim" to the inner cover strip, allowing this to sit for 10 min so that it wouldn't move too much. You can see my new outer cover strip on the right. Gluing everything together. Magnet setup and final taping. The next day I applied the outer cover strip. Back to the shins! I cut up some scrap pieces to use as the inner cover strips, reinforcing this joint that will be repeatedly stressed each time I don and doff my calves. I chose thinner, more flexible scrap pieces for these strips. All faces were sanded, E6000 was applied, then clamps and magnets. Both shins were left to dry. And lastly, I jumped over to the forearms. After cutting the back joint edges to capture my intended taper, I found that this piece still had a gap in the middle that made me uneasy. So I started with an inner cover strip, which will make application of the outer strip a lot easier. At this point, it was 11:30pm and I had used 40 N52 and 12 N40 magnets, so I called it a day. I'm going to finish off my biceps and forearms (I need to shim both remaining pieces), and I'll come back to the back of my calves later (going to try Cricket's magnetic shin approach). I also will be leaving my thighs until I have my shins and torso ready- I want to make sure everything measures correctly before I cut there.1 point
-
I ordered mine about 6 months ago and I'm in the middle of building it. Their response to email is slow or absent. Be persistent until you hear back.1 point
-
Looking Great, Good luck trooper!1 point
-
Haven't got any in ages as I stocked up a few years ago from a supplier on eBay, I don't think they operate now but most of my fellow troopers use RWA now, I will send you a pm Sent from my SM-A310F using Tapatalk1 point
-
The 'E6000 plus' is completely different, it is a 'general adhesive', the E6000 commonly used on armour is 'industrial strength'. Someone gave me a tube of the plus once, as soon as I opened it I knew there was something different as it didn't have the strong smell, it does say 'odor free' on the packaging but I thought I better do a bench test piece before committing to using it on a prop. I glued two pieces of scrap ABS with 'plus' and left it 3 days to cure. When I came back I tried pulling the two pieces apart, they came apart easily. I would not use the plus on armour. Once when I was working on a project I had run out of E6000, I happened to have a tube of 'shoe goo' original in the studio, it smelled the same as E6000 and was also an industrial adhesive, I used it and it worked great [emoji16] Sent from my SM-A310F using Tapatalk1 point
-
Good looking kit well done! and look after it.1 point
-
All good advice as above, but a simple suggestion that might help too, don’t holster the blaster leave it out of the shots, it only drags your belt down, do the action shot with it but that’s it.1 point
-
ANKLE SPATS PART 2 First, I drilled 2 holes slightly larger than the intended magnets. Then I backed up the 2 holes with a thin piece of acrylic. Glued 2 magnets from the inside where the holes are. Then glued the 2 corresponding magnets to the other clasp, and this is how it looks like completed.1 point
-
My two cents : Your E11 Blaster , perfect Overall armor , considering at this is the Painter's Tape stage, looks very good, you're on the right way . for the Bells I think they're going to fit better when you add the straps. "The emperor will be most pleased" keep it up1 point
-
I placed an order on March 10th and have not received my kit. I emailed their sales account 3 days ago asking for an ETA but I've not received a response. While I'm in no rush it would be nice to know I can expect it. Oh, well.1 point
-
Trust me, you are doing exactly what I wish everyone doing a build would do, and that is to ask questions and post photos before moving ahead! So many times we see folks trying to speed up the process and forge ahead with no guidance, only to find out that in their haste they have cut or glued something that will be a pain in the posterior plate (or impossible) to fix. Posting photos is a bit of work, and some folks may be embarrassed by asking for help, but the FISD is a "judgement free" zone and we actually encourage questions of all sorts. Your build thread and others like it are a shining example of how it should be done, and for that I applaud you, Caleb!1 point
-
Well, all I can say is looking at that armor she was definitely not a member of the 501st Legion. While I honestly appreciate her enthusiasm, no GML in his/her right mind would pass that kit even at Basic approval. .1 point
-
What do people think of these as far as hole postioning? I printed a test "hole" and 1" + 2mm works for the width and 3mm works height wise. Allows for a 1" tab of 1.5 Aluminium and also some 25mm elastic with some Velcro on (I dug through my left overs and tested it would fit)1 point
-
@T-Jay is 100% correct, John. They make a fantastic product, but they are horrible at communication. Even after you buy one, be prepared to wait a month (or more) for delivery, sad to say. I suggest going to their page that lists the item here and then adding your email address in the box on the top right of the page (example below). They will (eventually) send you a notification, but it's VERY important that you order it immediately. I waited one day for my second one and they were sold out again... it's just that fast.1 point
-
I have used Plasti-Dip spray on all my buckets (including my Tusken Raider) and LOVE it! In addition to Chemi's notes, here are a few of my suggestions: 1. Before applying it, sand down as much of the surface as you can with 120 grit sandpaper. This will give the product a better surface to adhere to**. 2. Clean it thoroughly afterward with alcohol and let it dry. 3. Do this outdoors, and I strongly suggest wearing a respirator or at least a decent mask. This stuff is pretty foul smelling, but has no odor when completely cured (think several days). ** This is really important. Since the inside of the bucket normally has a gloss finish, roughing it up will help prevent it from peeling off in the future. This is especially important when you go to install components like fans, battery packs, etc. using Velcro. If the Plasti-Dip does not have a surface it can grip to, whatever you attache to it can cause it to pull away from the original surface. (Trust me).1 point
-
The first layer should be very, very light ... Wait 10 or 15 minutes between layers... I gave it about 5 layers I think ... Shake the plastidip well before using it and spray about 20 cm from the helmet. When finished, spray face down until no more plastidip comes out.1 point
-
A nice article here https://www.e6000.com.au/e6000-blog/did-i-buy-genuine1 point
-
If you cut the tops of the thighs following the blue tape, you will lose the original shape. I have seen many people do this and their thighs look bad. The best way is to mark out the tops of thighs by following the tops vertically, so you keep the original shape. This way your thighs will look the same shape they did before you trimmed them, just shorter.1 point
-
I had a PM asking me the details I'll just copy what I said in there might as well have the process in here too for others. I'll also include this picture which shows the snap placement on the shoulder straps. Hope this helps If you have any questions please feel free to ask! Justin1 point
-
The highly useful tutorial HOWTO: Assemble AM armor shins ---------------- by RogueTrooper is great, but due to recent changes in the AM armor the method used to differentiate the left and right shin greaves and their A & B parts is no longer accurate/applicable. The previous method of identifying the shins was to use the location of the molded/integrated back cover strip. As the tutorial pointed out, the integrated cover strip was on the wrong side from where it should be, and thus caused many builders to put the shins on the wrong legs. As such, the integrated cover strip was removed from the mold (Note: I'm not affiliated with the AM manufacturers, just using my own assumption for it's removal.) So this method no longer works. In addition the tutorial describes the natural contour of the human shins/calves and uses that to confirm the correct leg for the shins to be situated on. The new AM molds "have been belled out / widened at the ankle to fix an issue with previous AM version". (source: http://www.whitearmor.net/forum/topic/26954-fs-am-armor-master-kits-are-back/) With this widening the natural contours of the calves is still present, but I know as a new builder I stared at them until I went cross-eyed and couldn't really "see" the difference. Okay, enough backstory, picture and identification time: All parts laid out to match tutorial layout: Untrimmed front view of taped left & right shins: Quick, which is the left and which is the right? If you can tell from this angle you've got a better eye than I do for the differences. Now let's take a look from a different angle: Notice anything? I did: (If this is common knowledge, I hadn't run across it before. And I don't know if this holds true for any other versions of AM, or any other armor manufacturers for that matter, so your mileage may vary.) Armed with this knowledge, the previous picture with identification lines: Now, seeing as I had the good fortune to receive duplicate left shins in my original shipment, it was easy to play "One of these Things is not like the others": So from this, the 45° side goes on the outside and the 20° angle goes on the inside. Now that the left and right are correctly identified, RogueTrooper's instructions covering assembly can handle the rest.1 point