Leaderboard


Popular Content
Showing content with the highest reputation on 03/09/2019 in all areas
-
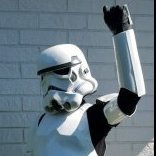
Initially worrying about thighs and shins but seems to have turned out ok, now to test fit and mark up the backs for trimming Sent from my iPhone using Tapatalk2 points
-
Fab, thanks for that, works for me Sent from my iPhone using Tapatalk2 points
-
So (after what seems like ages), you finally received your official 501st I.D. number and signed up for your first Troop. Now what? Depending on the event, there may be a few differences in protocol. For instance, a "Canon" event (usually one authorized by LFL or Disney) may be more serious in nature and regimented, while other times we are there to make the occasion a lot more fun, (parades, movie premiers, etc.). Here are a few basics to think about in regards of what (and what not) to do on your inaugural appearance with your local Garrison. Of course, all events are different.. some will be indoors, some will be outdoors, or a combination of the two.. some will have just a few members, others may have over a hundred, but the basics stay the same. This list is by no means meant to be complete, so all Troopers are welcome to add their own ideas, tips and fun things to do! 1. Before you leave- If you have not had the chance to wear your armor for any length of time, put it on (including your bucket) and wear it while walking around the house and maybe in your yard for a while. This will give you an idea of your range of vision, movement limitations, and let you know what you are in for. Walking up and down stairs will help. 2. Be prepared- Double (and triple) check your armor to make sure you have all your accessories and all your connections are secure before leaving your house. I would suggest carrying a small repair kit in your bin as well. I have a thread here which will help: https://www.whitearmor.net/forum/topic/48390-emergency-trooping-kit/?tab=comments#comment-674403 2. BE ON TIME- I cannot stress this enough. When you sign up for a troop, they will have an arrival time, (usually an hour or so before), and a "step off" time when you should be completely suited up and ready. The hour gives you the chance to get your armor on, and make any adjustments. There should be "handlers", but any fellow Trooper will be glad to help you out. The POC (point of contact) person for the troop or event coordinator will give you any details you might need beforehand, (directions, special notes). Feel free to ask them any specific questions. If you have any concerns, let your handler or the person in charge know about these. They are there to help. 3. Be aware of you surroundings- Due to the limited visibility in a bucket, watch out for curbs, steps, obstacles, etc. Small children will often run up to you and stand close, so be aware that they may be right below you and cannot be seen. When raising or lowering your weapon, take it slowly as not to clock anyone in the head. 4. Photos- You will be asked (sometimes hundreds of times) "Can I take a picture with you"? Be patient, and get used to it! But be aware of where your arms are to avoid touching anyone inappropriately by accident. Often, people will ask "Can I hold your gun"? That is entirely up to you. A lot of us have spent a great deal of time building our weapons, and they (especially the resin cast) can be damaged if dropped. Many of us carry Hyperfirms for this reason. If you don't want to let someone hold it, you can say something to the effect of "The Emperor forbids it" or "It's against Imperial regulations". Side note: Never, EVER point your blaster at a child for any reason. This is just in really bad taste. UPDATE: In this day and age it's not a good idea to point your blaster at ANYONE. This includes those trooping with you (even Rebel types) and anyone taking the photo. 5. Hydration- Another item that is VERY important, especially in warmer areas and extended troops. FISD legend Steve (gazmosis) wrote a great post on this subject, and it is used here (with permission): "Big troops, big crowds, lots of kids, lots of chances to show off your hard work. With the hot weather, there are also lots of chances to be become quickly dehydrated and sick. Don't let this happen!! There is no greater cooling system than hydration. But drinking a ton of water is not the solution....it's how and when you drink it that is. Let's be clear here!!! We are talking about WATER! Not soda, not energy drinks, not juice. WATER...H2O. Leave the Gatorade in the cooler for after the troop. Proper hydration should begin a full day prior to a hot troop. Steady intake of water (8-16 oz. an hour) is fine. Too much water at one time can actually be harmful but a slow and steady intake will allow the body to properly absorb and distribute it until you are hydrated down to a CELLULAR level. Yes, you will be in the bathroom a lot. But when the pee is clear...you are there! Continue this until just before bedtime. On the day of your troop, avoid coffee and other caffeinated drinks that can dehydrate you. Your bathroom trips will have evened out overnight. Have one more bottle or serving of water before suiting up. Once in your suit, you will sweat. No matter what fans you have in your lid....you will sweat. THIS is your cooling system. If you are properly hydrated, you will have the fluids so that your body will adjust to the rise in temperature and cool itself properly. If not, your body will use the water in it twice as fast and without the proper reserves, you will risk not only dehydration but elevated internal temps, dizziness, and possible heat stroke. The long and short of it is be safe and smart. We need out troopers vertical!!!!!" On that subject, if you do feel dizzy or need a break, tell your handler immediately. It's nothing to be ashamed of... safety first! 6. Changing areas- Most events will have a secure and private changing area, but some may not, so ask ahead of time. If it happens to be an outside area, you can wear your under suit to the event underneath your clothes. 7. Armor bin storage- Again, most troops will have a secure area designated to store your armor bin, away from the public. If this is the case, you are fine. Some have asked "Do I need to keep it locked during the troop"? That's up to you. We tend to be a very honest bunch, treat each other's belongings like our own and keep an eye out for one another. (I have never felt the need to lock mine). If it is a parking lot suit up and your bin will be visible to the public while you are away from your vehicle, that's a different story. 8. Conduct- Have a blast on your troop, but keep it civil. Some Troopers clown around a bit occasionally (myself included) depending on the circumstances, but remember, you are a representative of the 501st Legion, the FISD and your Garrison/Squad, so act accordingly. When in doubt, ask someone who has done that event before. Side note: If you happen to be a smoker or vaper, please do not do it in public view while in armor. 9. Handlers- Handlers are an absolutely integral part of a troop, and make our lives much easier. They take photos for the public, warn us of obstacles, escort us to the restrooms/break areas, pick up fallen armor pieces, protect us from kids smacking us with toy lightsabers, guard our stuff, bring us water, keep us informed, and a myriad of other things. After your troop, be sure to thank them for all they do to make an event possible and allow those in costume to have a better time. 10. Trooping in other Garrisons/Squads- Once you have your official TK #, you are welcome to troop with any 501st unit in the world. You may need to sign up at that Garrison, as many do not list their upcoming events for the general public to see. Once you have access to their site, you will need to sign up for the particular troop that you want. Most importantly of all....... HAVE FUN!!!!! UPDATE! The thread below was posted by Caleb (Thrawndike bar), and contains some awesome responses/TK chatter while in public. https://www.whitearmor.net/forum/topic/47603-howto-talk-like-a-stormtrooper/1 point
-
FANTASTIC Work! Well done!!! Wont be much longer now Andrew1 point
-
1 point
-
Brassed out the rivet and got rid of the bubble!1 point
-
Nice work, just try to get the bottom ridges to fit together with little to no gap as they are not covered by the cover strips.1 point
-
Ok. I’m back in basement today. Should have shin pieces assembled by end of weekend. I’ll add pics of progress later when log into computer. Posting from phone now. I definitely like the cover strip method over the FX over lap method. Cover strips only FX are Loki g good on my FX kit. I’m glad I took time to go this route. Thanks to trooperbay more abs is showing up By Tuesday so I can get thighs done with cover strips as well. I got a lead on belt I want. I just need to figure out fit for torso. I’m trying to find an extra set of hands and eyes to help.1 point
-
We’ll be with you shortly1 point
-
Yes buddy. next week I will upload a pic. Not at home for a few days1 point
-
Vaaamos Candi...ya estas ahi !1 point
-
Hi Chris and thank you for your EIB submission Before we can get started I need you to include the following pics showing: # The fixings of thigh ammo pack - inside/out. # Shots of sniper knee - left/right/front. # Outside posterior snaps. Thanks in advance and just to clarify - the EIB photo check list has not yet been updated to reflect the all the requirements set out in the CRL L2 Another small thing: the split rivet on the cod is not ment to be painted white (originals were brass) so if you feel like amending that as you provide the other pics you could1 point
-
Not sure I’ve seen one used by a screen used TK, but always happy to be proved wrong. :-)1 point
-
Congratulations Jordan! Well done!!1 point
-
Thank you and let us know if you have any questions at all. Andy1 point
-
True, But just need one or two people in a garrison to have one, make life easy =P1 point
-
Done. Actually, that was pretty easy, since I had originally painted the outer edges white when I did the helmet (the helmet was the second thing I did in my build ages ago), but was told later that those edges should be black, so I painted over the white. A few seconds with some sandpaper not only brought out the original white underneath, but it looks more naturally weathered. A.J.1 point
-
I’d highly recommend this for even added strength. I did both fiberglass and supports for mine. Sent from my iPhone using Tapatalk1 point
-
The past few weeks have been quite busy so not much progress. I trimmed my shoulder bells like Paul said and glued some straps (no pictures yet...). I also almost finished my belt. Just need add the rivet covers. Ab buttons are also glued. Interesting how my belt seems to be skewed (not in the middle) but this is probably the purpose? The hole spots were pre-marked by RS.1 point
-
Not to worry. Some pieces have "critical" ends, and the thigh is one of them. The bottoms have that flared ring around them, and that's what you want to get even. The tops are 100% trimmable, especially if you've removed the return edges there (which you'll want to do for comfort and mobility). Your thigh looks pretty good, but I'd re-tape it so that the bottom is even, then cut off the points at the top for a smooth transition up there. Save the pointy things you cut off to give to someone you know who has that "other hobby." A.J.1 point
-
Words cannot decribe how excited I am! After many setbacks, a lot of frustration, it is finally working! This is my personal cast with a test insert piece that I just did after I modified the mold Next week, I expect to get a lens test. If that fits, shipping out kits will follow immediately I learned a lot during this project, made (expensive) mistakes (note to myself: When Luke says "it will not work" , it will not work) but as always, the result matters in the end :) I want to thank @sni9er for the constant support, @Mr Mold Maker for giving tips as well and all the supporters who helped, bringing this project to life!1 point
-
And Cleared Sent from my LYA-L09 using Tapatalk1 point
-
Welcome, and GREAT to hear that you are aiming for Centurion! Here are some answers that may help, but always feel free to ask as many questions as you like! 1. "What I'm finding a bit difficult is if level 3 certification is something that happens on top of level 1 or 2, or if there are times when I skip certain items in the level 1 and 2 checklists and just jump to level 3." Always build to level 3. 2. "I should have all of the proper materials except for the "Correct 'Hovi mic' aerator tips." I believe AP's hovi tips are good to go, as long as the inside is white and the screens are correct. If you can post a close-up pic we can let you know. 3. S-trim: https://trooperbay.com/trooper-helmet-s-neck-trim 4. "Just one for now; Level 3 certification says that "Tears/traps shall be hand painted or use decals that emulate hand painted (with correct ANH TK details)", and from the kit I ordered, it looks like the decals do just that, however, after looking at a few threads of those going for Centurion status using the AP kit, they all seemed to hand paint them. My question is "Are the decals for this kit adequate? or do I need different decals? or should I just hand paint it?" The decals that you have will do just fine for all levels. You will need to paint the ear bars/teeth yourself, though. If you have the time and talent, I always suggest painting everything yourself, though. If you decide to do that we can offer some tips! It looks as if all the hardware for the helmet assembly is correct, and since the eyes, teeth and ears are already trimmed you are way ahead of the game. Going over the CRLs is a fantastic idea, but I would also highly recommend looking over some the the approved Centurion submissions in the Advanced Tactics forum. You can really learn a lot about what we look for there. https://www.whitearmor.net/forum/forum/72-request-centurion-status/ Bets of luck on your build, and as mentioned, ask lots of questions and be sure to add as many detailed photos as you can.1 point


.thumb.jpg.a76e0f48e0bb54184765760e710c5f96.jpg)