
Leaderboard


Popular Content
Showing content with the highest reputation on 07/21/2018 in Posts
-
I'd like to make a few points here. It's nice to offer help when you're a master builder here but take in consideration that this recruit is new and nervous and is dealing with a commissioned set. So his building expertise is limited. Your post came in kinda HOT and didn't end well with saying another Troopers idea is " Stupid" Remember, Troopers helping Troopers! My other point is I have a friend who commissioned a set from RS and I helped him with final fitting for approval and I had to restitch all the snaps for him. RS doesn't put much stitch to them. Really just enough to get it out the door. Learning to fix your armor will come in time. Good Luck with fixes and approval!4 points
-
Complete kit are in the works,,, getting closer3 points
-
Hi guys, about a half year ago, I started to browse in the FISD and read all the builds of you guys. Many of you put a lot of effort and extra work into the blasters which is (still) very impressive. When I saw, that some guys even added electronics to their blasters, I decided to build a blaster with electronics as well. After reading the forum again, I came across the thread of Andras. He is providing a fully integrated Arduino Board which comes with several features. Thread where you can order the Arduino Board: http://501st.de/forum/viewthread.php?thread_id=2941 Demonstration Video of what the board provides: https://www.youtube.com/watch?v=U7UXT-VAbzM Once I saw his Arduino board, I ordered one. This led me to order the Doopydoo’s E11 kit and the T-Jay Completion kit as well. In addition to that, I ordered some 3D printed pieces as well. Unfortunately, I decided too late to document the build, the electronic stuff has been completed already. Many thanks to Andras again, who helped me a lot, when I am stuck with the project! In general , the support for the board in case of questions and help is very good! Let’s start with the current status: Here you can see the electronic, which will be added to the blaster, in action (This video is made by Andras, when he tested the whole electronic after a problem): First step that I did for the build was, printing out the Blaster Reference. I really can recommend that to everyone who does his first Blaster!2 points
-
The bells are always a problem with RS commissions. I believe the problem looks to be that they trim them flat when they should be curved, which allows the sides of the bells to come in closer to the chest plate. They also look to be on the big side too. Take a look at these bells to give you an idea of how to trim them if you feel like it. I can also get some measurements for you to maybe trim them down a bit.2 points
-
Safety levers and switches will be ready to ship next week......2 points
-
Well, I have another project that will require some mad graphic art skills, and since my computer skills are famously lacking I need some help! I have the artwork and ideas, I just need a creative soul to help me make them come to life. It's not a huge task, but I simply don't have the ability to tackle it. If interested, please PM me and I can discuss the details. Payment for services can be money or swag. THANKS!1 point
-
Nice solution [emoji106] I have the same speaker to install on the blaster. I will put it in the end clip, so i can replace it as well. Gesendet von iPhone mit Tapatalk1 point
-
Yes, the different blaster modes can be chosen with the trigger. There are 5 modes, so it would have been complicated to put them on the switch with 3 modes. The shop of the 3D printing parts is named shapeways. Today i was able to go on with some blaster parts... Tomorrow pictures and descriptions will follow. Marko Gesendet von iPhone mit Tapatalk1 point
-
Thanks again to everyone for the advice. My application was approved. With some additional research, advice, and time permitting it's time to work towards the next level.1 point
-
I would go with at least 5 or more. You can get them pretty cheap online: https://www.ebay.com/itm/4-inch-Heavy-Duty-Plastic-Spring-Clamps-Tips-DIY-Small-Tool-Clip-Jaw-Opening-P1/263439219641?ssPageName=STRK%3AMEBIDX%3AIT&var=562461783249&_trksid=p2057872.m2749.l2649 You will also need Neodymium (rare earth) magnets. I recommend getting no less than a dozen of this or a very similar size, but NOT ones that are ant thinner, as they can (and will) break/shatter easily. https://www.ebay.com/itm/8pcs-Super-Strong-Neodymium-Rare-earth-Magnet-Disc-for-sale-3-4-dia-x-1-10-thick-/281060567699?hash=item417083ea93 There is a link under my signature below to my tutorial which may help with the magnets.1 point
-
And I only searched from my phone sorry couldn't tell which section I was pulling up1 point
-
If this blaster build comes to an end one day, we will need a video clip of all the features of this master piece.1 point
-
Very true, if we can't make it work you can either a) get new shins b) get new boots. Obviously we will try to get you with the least expensive option which is to get your current shins setup correctly. It we need to get new shins I cannot recall if there is a thread that compared the different makers abs colors...1 point
-
Forgot to include this pic..it seems like I already had a back pack at work, the first aid kit1 point
-
Congrats, you earned it.1 point
-
You’d never know unless I said anything, it’s well hidden, and besides isn’t every trooper a variation of the last one, I’m just starting the trend for the FOTK Sent from my iPhone using Tapatalk1 point
-
Yesterday was a BBB-day containing a Sandtrooper field pack and today was a mediumBB-day containing this: The FOTK back pack Wasen`t sure how many parts is should be so took a look at FB of BSP (backstage props) and all pieces were there, they also have a guide to build it but we`ll get to that...decided to glue the yoke and back together and spend alot of time lining them up or rather tried lining them up, it could be a falty technician (me) but coulden`t get a good fit This was all good though Got a nice flowing neckline, right chest piece is under the yoke to show how it lines up and also drew lines to see were to put snaps connecting them, other ways of doing this is to use magnets or velcro. I was initally going with magnets but as I will have my phone in the chest I decided not to, not too sure about the magnetic field doing any harm but better safe than sorry. This is were it gets troublesome, don`t look like it perhaps but it took some serious brute force closing that gap Decided it was time to glue anyways and had a think of what to use - plastic weld or epoxy and went with epoxy for no other reason than it`s the same brand as the filler I was going to use. I said "was going to use" because I simply had the thought to use ABS paste, don`t recall anyone else using it as a filler for FOTK so I guess we`ll see if that was a good idea So...I glued it and it came out not to bad, the gap I can live with as it will be filled and hardly noticed This however...those indentions are far lower than any I`ve seen so far and frankly don`t look good (or that`s just OCD kicking in) but if I were to lift the center portion up it caused the flaps/wings of the yoke to rotate inwards making the hole torso fall out of allignement and the outer secions were no were near in touching...pretty hard to glue when there`s nothing there Not saying there`s something wrong with the armor though, it`s most likely to do with me missing something...but i can live with that So I put on the first layer of paste and sat it aside to start with the back pack So the pack,,,the build guide had 6 pics but not really showing or explaining were to cut so I decided to start on the easy stuff and that was the inlays of the side pieces They have the shape of a wedge so don`t be tempted to cut from the inside After initial cutting it`s easy to see how to sand it down And you should end up with something like this Repeat for the other side and test fit (only showing one side, this is the right) Sand the edges and glue Does you OCD kick in when you see this? Not to worry, it`s hidden by this piece and yes it should have this golf ball like texture on it It goes right up to the edge like so And that`s all I have for now….yeez that was a long post so read it with care as it might be some misshaps along the way1 point
-
Well it`s mine and you can`t have it! Kidding aside the TD was a pretty easy build and pretty accurate so I can recommend getting that1 point
-
Definitely well deserved Germain, thank you once again for helping others, trooper helping troopers1 point
-
Congrats Germain! No one else will ever be the first, and this is a special honor that you will have forever. There was full support for this and it is very well deserved. While "service is its own reward", its still nice that we can say "thanks for all you do" in this fashion.1 point
-
**As he holsters the smoking gun**1 point
-
I don't see a big problem with reinforcing the shoulder bridge, A.J. It is not a CRL requirement, so you would be good to go al the way to L3. BUT.. For aesthetic sake, I would definitely make those seams disappear, (you could file or Dremel them down on the edges). Another thing you will need to consider is the fact that once you glue those together, there will be no way to bend it any farther. You may want to find out the correct angle you want, bend the shim and then glue it at with the correct bend.1 point
-
Hey AJ, a couple issues I see by adding a "full length" strip is, the front 1" or so may need to be flexible to correctly follow the contour of the chest plate or it won't look correct. The other is concealing the double thickness of plastic so it still looks correct. My suggestion, covers are most prone to cracking in the peak and valley areas, maybe place the the extra material in just that area. That said, this is your armor and you want to protect your investment. So long as the area looks correct from an exterior view of point, have at it1 point
-
Thanks guys! As I said to Andrew it's a great honor for me of being awarded this very first 3D contributor badge. Especially directly the golden one. It's very generous and I'm much grateful1 point
-
1 point
-
The equipment that is used to create the blaster: After reading the Blaster Reference and T-Jays description i started with the handle. Adding the screws was one of the easier things... then, the switch of T-Jays kit was on. With the Dremel i hollowed out the needed space. For the trigger and its electronic switch, i will follow the way that has been done by someone (cannot find the thread anymore), in the forum.1 point
-
ah gotcha. I get it now.1 point
-
Key words here: Minimal gap and no overlap is what were looking for. Didn't say mandatory.1 point
-
CRL allows for minimal overlap? so im confused. I have always seen the NO Gap commented on the apps. so im confused. if the overlap is not wanted, it should be removed from the CRL OPTIONAL Level two certification (if applicable): OPTIONAL Level three certification (if applicable): Back plate shall have no, or minimal overlap of the kidney plate. AM v1 back plate must be replaced with a more screen accurate version.1 point
-
Minimal gap and no overlap is what were looking for. The tighter the connecting straps between the sections the less likely you have any issues. That said, it doesn't have to be perfect. Keep up the great work1 point
-
Thanks and yeah it’s super-awesome just arrived for another session as it happens1 point
-
Worked on the TD and as it`s made of resin it`s not much glueing involved, however the left side is solid and makes the hole thing very unbalanced so decided to drill it out as much as possible - yeey for work perks The resin very quickly became hot so I went slower and the fumes and resin debris got me thinking - so I made a safety rig After initial drilling it still felt heavier than I would like so found a larger drill bit and went at it again, better but not perfect. Had planned on drilling a ledge into the tube and ad a plastic disc but had no drill that worket so did this: Traced the thickness of the plastic to the tube (probably not necessary but did it anyways) Used another perk to cut it. go slow or the blade will bow out. Trace the disc, cut, glue Sand and done. Did some sanding of the whole piece and glued it to the back piece, it has a curvature to match the screen used ones, did some tests and by using strong magnets I think it will pull the kidney to meet up with the TD, might sound a bit weird but i will elaborate on this when it comes to attach it (ooh cliffhanger)1 point
-
That reminds me I never showed the butt plate, I cut it to look like the Anovos one but apparantly was a little sloppy and made the center tab a bit small, it should be about the same as the outer ones as it helps adding snaps to either side of the kidney plate which will be cut along the seam, I can make it work but ..oh well.. And as the ab plate now is molded to fit taller people it dosen`t line up to the kidney plate, my guees to why that`s not altered too would be that the kidney is easier to shim hight-wise. Anyways...was gonna leave it but decided to cut it, it`s enough plastic with this torso Construction as it is and forgot to take a pic when done but just used some tape to make a straight-ish line and the cut..apparently didn`t learn any lessons to be more careful after the butt-debacle aslo removed that top lip from the kidney portion. Neat storage. except for forearms, one bicep and one shoulder bell (they`re not trimed yet) everything is in there, sort of like a Stormtrooper-bowl1 point
-
Protective gear is important Shoulder bell and tab support - trimmed/untrimmed Thighs The back pieces were just a big cylinder cut in half and I could not see any indications on what was up or right/left so eventually (after testing every way) just figured they weren`t specific The back piece sticks up quite high so that had to go before first test fit Looked at various ref pic and tried to emulate the shape best as I could Here`s the sanded and cleaned up pieces taped together, ready for final fitment.1 point
-
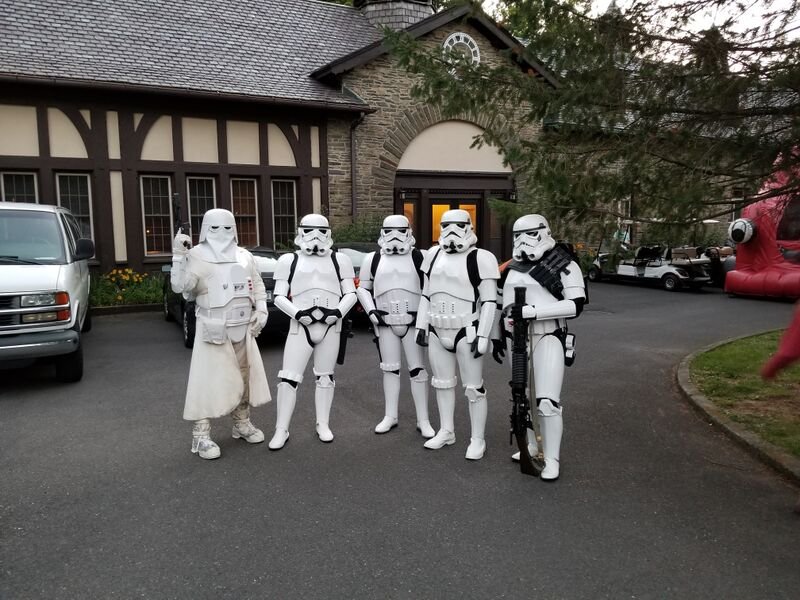
Hey Guys, I'm Dave C (TK-34288) from the Empire City Garrison. On of the most memorable troops for me was at a place called St Pat's Kid's Camp in NY. During this troop there were 5 of us White Armored troopers. This was great to see at one our local events on a warm Sunday night in July. During the troop we were not given a place to set anything up or have a banner to take pictures, they just asked us to walk around and mingled with all of the participants. This was the last day of their week long camp and we were the finally of there science day. There was about 200 kids, plus their families and staff at the camp. After we were out for about 1 1/2 hours we heading back to a cottage house that they had for us to change in. This is the time during the troop that it was made to be so memorable for me. While there, one of the staff came back to thank us and this is when I found out about the program which floored me. This program is a week long camp for children with cancer and other blood disorders which are terminal. Being told by the staff and what it meant to the kids, their families and to them to have us there, where we were the finally of their science section of the camp was so amazing. We were told that some of the kids will not make it through the year for the next camp. This in itself made me realize what kind of difference and joy we can bring to a group of people or just one individual by just donning our imperial trooper armor for them. It doesn't matter whatever the temperature, the day of the week or what we have going on, to be able to do this for them can change that one hour, minute or second of the day for someone and make that memory for those that may not be here tomorrow or the ones that are left behind. This is just one of my memories since joining this incredible organization. Thanks to all that want to put these costumes on and make a difference.
 1 point
 -
I thought I would show you guys my new ANH shoulder bells. Well, they not exactly new as I made these several months ago and some of you may have already seen them on my Facebook page. But for those who have not seen them, enjoy1 point


