Leaderboard


Popular Content
Showing content with the highest reputation on 07/11/2018 in Posts
-
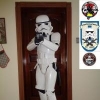
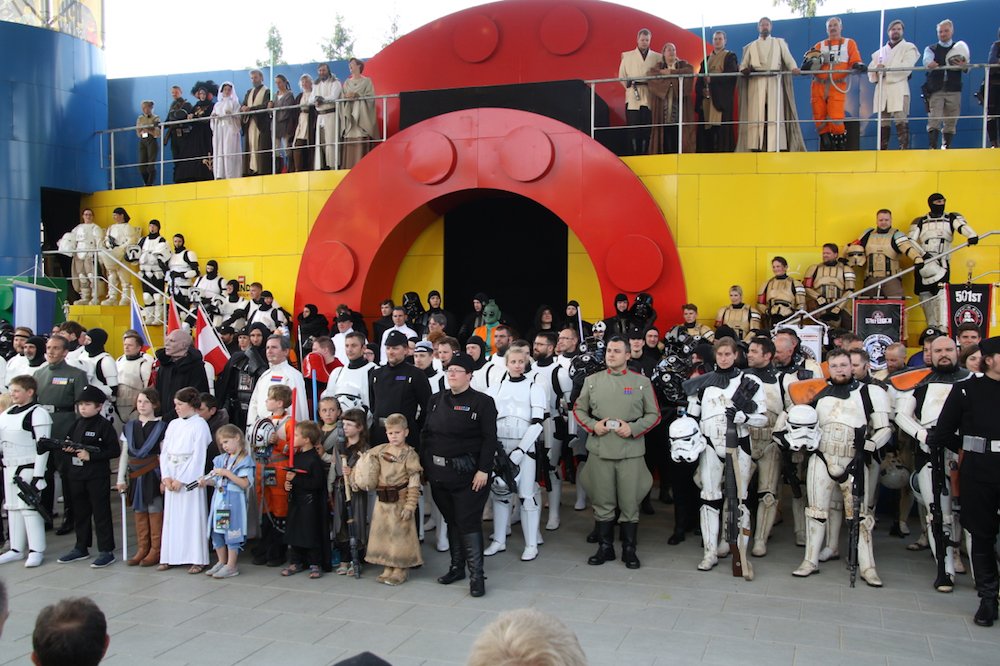
I'm probably too late, but I'll still try since that book looks awesome! I'm Vicky (TK-50893) from Germany! I joined the German Garrison in October after a long time of going to conventions and events and always being fascinated by the people in the 501st. My boyfriend (also a Trooper) convinced me to ignore my doubts and fears (I have some years of experience as a cosplayer, but I never built armor like this before) and to start building a TK armor (well I helped him build it as good as I could, but still, that counts!). And finally, at the end of May/ beginning of June, it was Legoland time again (it's our biggest event here in Germany with people from 13 different countries participating) and I could join my fellow Troopers for the first time at Legoland! And it was amazing, the kids and parents loved our costumes and everybody was so welcoming and friendly! It was not only a great opportunity to meet all my friends in and outside the Legion but also my first time on that huge stage in front of all these people. And I felt so proud, even more because I was allowed to stand in the first row that day. Nerdy little me standing there in that shiny (well not so shiny after the two days there but who cares ^^) armor and seeing the children staring at us with excitement. I could have been one of those kids a few years ago since Star Wars always was and will be a huge part of my life. When everybody started applauding, I felt so happy and when all the people on stage shouted the "who let the Troops out" I felt as a part of the huge family that is the 501st. On the picture, I'm the blonde Trooper girl far right in the first row of Stormtroopers, just behind the Officer lady with the glasses and all the little ones!
 3 points
 -
Name: Jordan Garrison/Squad: Star/Imperial Rough Riders TK-21523 Armor = AM Helmet= AM Blaster= E-11 Hyperfirm Optional Height = 6'1" Weight = 215 Boots = TK Boots Canvas belt = unknown (Second hand) Hand Plates = Justjoseph63 Electronics= Voice Electronics Maker Neck Seal = Darman's Props Holster = Unknown (second hand) Here we go!2 points
-
Some touching up and minor work to do but almost done with the blasters, they are not perfect but I put them together as trooping-blasters. No electronics in the blaster riffle as of yet but I can take it apart if I would like to ad that in the future2 points
-
Hey Guys, I'm Dave C (TK-34288) from the Empire City Garrison. On of the most memorable troops for me was at a place called St Pat's Kid's Camp in NY. During this troop there were 5 of us White Armored troopers. This was great to see at one our local events on a warm Sunday night in July. During the troop we were not given a place to set anything up or have a banner to take pictures, they just asked us to walk around and mingled with all of the participants. This was the last day of their week long camp and we were the finally of there science day. There was about 200 kids, plus their families and staff at the camp. After we were out for about 1 1/2 hours we heading back to a cottage house that they had for us to change in. This is the time during the troop that it was made to be so memorable for me. While there, one of the staff came back to thank us and this is when I found out about the program which floored me. This program is a week long camp for children with cancer and other blood disorders which are terminal. Being told by the staff and what it meant to the kids, their families and to them to have us there, where we were the finally of their science section of the camp was so amazing. We were told that some of the kids will not make it through the year for the next camp. This in itself made me realize what kind of difference and joy we can bring to a group of people or just one individual by just donning our imperial trooper armor for them. It doesn't matter whatever the temperature, the day of the week or what we have going on, to be able to do this for them can change that one hour, minute or second of the day for someone and make that memory for those that may not be here tomorrow or the ones that are left behind. This is just one of my memories since joining this incredible organization. Thanks to all that want to put these costumes on and make a difference.
 2 points
 -
First pull. Coming along faster than we thought!!!!2 points
-
EIB has been submitted. Thanks for your vote of confidence and I hope to reach Centurion soon!2 points
-
EIB is required before applying for Centurion.2 points
-
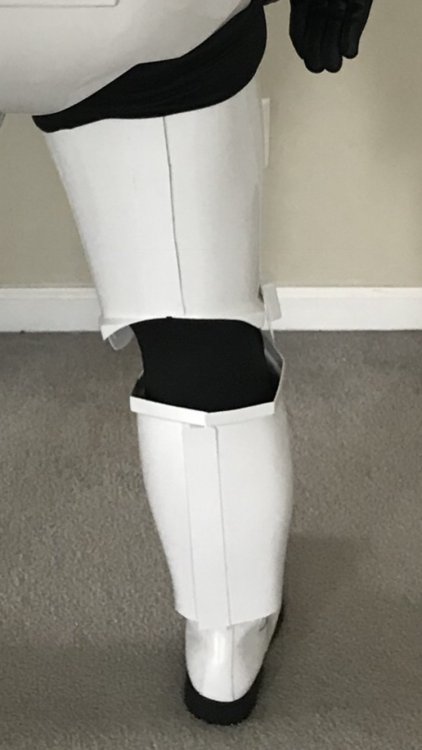
Basically make sure your cover strips are in a straight line. Also if your thighs are strapped to your ab it’s gonna pull your ab down. Trust me I’m fixing that problem as we speak. I have (soon to be had) mine down that way. As for the knee cutout here is a pic of my armor knee cut, you can see the trim job on the lower half of the thigh. It helps with walking and reduces armor bites. If your not having problems then you can always wait on that. I’ve gotten a few troops in and that’s why you start feeling the bites and what not. I literally went to work the day after my first troop and had huge bruises on the inside of my elbows. Everyone kept asking what happened. Sent from my iPhone using Tapatalk
 2 points
 -
Ok cool. I already took a Q-tip with thinner and started taking off just that one extra stripe that's under the ear. Ill just go ahead and remove just that one. As for my GML, I received an email from him regarding the basic steps to submit photos. I told him I would be submitting mine soon. One of my other friends who are also working on this same type of kit has already submitted his photos to the GML. He is in the approval waiting queue. So far, the only thing the GML mentioned that might be an issue for basic was the Velcro showing on his belt when it was on and all closed up. Now he is just waiting to hear back.1 point
-
Nope. Even amounts are not a requirement. Between 9 and 16 stripes per side. Mine are one out side to side. :-) Edit - purely to keep it looking nice, I’d try to stick to a maximum of one or two different. It’ll start to look odd otherwise.1 point
-
Thanks for the feedback, it’s appreciated. I submitted already via the Canadian garrisons webpage and emailed the GMLs, now just waiting to hear back from them.1 point
-
I cant really tell, but it looks like you may still have the return edge on them. Taking that off will help a lot. Only things I can really see right off (and this is for L2/L3) is that you will need to bring your belt down a bit, so that is sits at the base of the ab buttons, not across them, and you may need to pull your biceps up a little to even out the space between the hand/forearm and forearm/bicep. Cant wait to hear that you have submitted for approval and then we can slingshot you into EIB and Centurion! keep up the awesome work1 point
-
These photos are much better. looks great. I see a few issues for the L2/L3 but mainly has to do with trim and armor placement. You should be able to nail basic without any issues. but if something does come up, let us know and we can help you fix it. The GMLs are generally pretty good about telling you not only what to fix, but how. if you are in contact with your GML, could even help to shoot him over some photos before submitting and he/she can tell you if anything stands out right away.1 point
-
I don't know if you can see it well, but the metal is a little rolled up on the edges. At that angle, it makes it look like more of a gap than it really is. I'll take a more straight-on shot when I go for L2/L3, so it's not as misleading. Thanks for the heads up! - The Captain1 point
-
Exactly! the things being looked at are the spacing of the clips, there should be little to no space between the clip and the end caps, and the screws should be pan head and painted black. that looks pretty good to me. If you can get that left clip closer then the better. but ultimately that will be up to the ones deciding your L2/L3 approvals.1 point
-
Like this? - The Captain1 point
-
Nice work Greg . Regarding the Chest to Ab plate placement, I wouldn't be concerned with that as I much as maybe the weathering when you get to that stage.1 point
-
It is funny how these things come together. After picking away at little things for what seemed like forever - I started adding some strapping and voila, I can see the light at the end of the tunnel. I just need to finish some arm strapping and the basic build is done. For various reasons I am not using the original bracket strapping system for the chest. So I glued in some snap plates about 4inches up from the lower return edge. Added snap bases near the top edge of the ab. Taped chest to ab to double check alignment. Realized I need to shift a snap base. Test fit. I’m trying to get the placement if the chest with relation to the ab to match the reference but still fit okay. I did need to redo one chest to ab strap. Reference Left side (mirror) pic. More gap than I would like, but not terrible. Right side mirror pic. I’m using a plastic reinforced nylon strap for the right connection. It doesn’t overlap but it does cause the two haves to offset like this. May need to revisit this. And back. The gap between the back plate and the kidney plate is a lot less here than on my first TK. I’ll need to hot bath the shoulder tabs at the back to bend them down a bit - they are sticking up about half an inch or more above my shoulders. Sent from my iPhone using Tapatalk1 point
-
I personally would feel that this falls exactly in line with screen shots of screen used armor, and think that should be acceptable. But I will refer to @justjoseph63 or @ukswrath as they will be the ones to approve or deny due to this. I will say though that I can suggest if it worries you that much, let it be for now, then when you are going to take submission photos for approval/EIB/Centurion, lay down a coat of paint on them making them fresh for the photos. shouldn't hurt at all!1 point
-
I gave it a hot water bath to help stop it from pointing straight to the floor. The strap will also help for sure!1 point
-
Nope that's not it That's more like it!1 point
-
You can try switching from elastic to webbing, reducing the return edge under the shoulder bell, or both. It's possible that if you have a bicep hook, it's pulling the bells down and away from the shoulder bridges too.1 point
-
Also, the other things that kinda stuck out to me that may not have been mentioned, and for your furtherance into L2/L3 is your Hovi Tips, they should be white interior with white around the rim to show wear. As far as I can tell, your belt looks great. the TD (thermal Detonator) photo should actually be showing the connections of the clips to the TD, ie the screws used. the should be pan head screws that are black/painted. the placement of the clips looks to be right from what I can see, but that underside photo will be key for that portion of the approval (again this is for L2/L3). if you have any other questions or concerns, or get kicked back for whatever reason, have no fear/worry, we are here to help you and get you approved!1 point
-
Winston, you have done great so far. If I might add one thing to what has already been said, and something you hit on. If you can get in contact with a garrison member, someone close to you, to help with you photos, that will make a big difference. That person will most likely already be approved and will know exactly what to look for. I got lucky as my wife is a theater teacher and has an eye for detail, so I told her all the things to look for that might be wrong, or need slight adjustments for photos, and she was on it. Having a trooper help you out could be huge because you wont be able to exactly tell whats wrong until you look at the pics. That person being there could fix it before the photo is taken, and thus save you a little bit of time and get your submission in. We will be waiting excitedly for your announcement of acceptance and your further process to begin your L2/L3 application1 point
-
I happened across these guys when I was researching my first build. The armor looks pretty decent (as per their webpage). I believe the parts were sculpted / cast by a guy named Cal Pierce - who I believe went on to work for Anovos. But yeah, I agree with Luc, I think a person would be better off buying a R1 kit.1 point
-
Congrats trooper and good luck!1 point
-
Nice work, Jordan. Best of luck for approval. :-)1 point
-
Congratulations!1 point
-
Well done, Sal. Definitely an improvement. As pictured below, the line of the back cap usually runs parallel to the top line of the eyes, and yours is much closer to the now. :-)1 point
-
Thanks for the tips Reaper! I ended up using one of my original holes and then measuring out the exact distance on the other side for the second hole. Then once I had the faceplate on, I tilted it until I got the desired brow. I also tool the dremel to the bottom of the cap to reduce the overall high of the brow. It looks nice and straight to me now. And now the ears are equal distances from the cheek tears. If you look at some of my previous photos, the right ear was way closer to the tears than the left. Overall I’m happy with it. It was a real struggle to get it back together again. I didn’t realize I had to re-trim the ears to get them flat since I changed the shape of the faceplate. The new ears have a slightly bigger gap than before, but I can live with it. Thanks everyone for the advice and tips. It is little subtle changes, but I hope the effort is noticeable to you guys haha Sent from my iPhone using Tapatalk1 point
-
Congrats and welcome to the ranks of the FISD and the 501st!!! we are always happy to welcome new members!! we look forward to your EIB and Centurion applications although you could go straight to Centurion. I dont think you need to go through EIB to get to Centurion. Good luck and let us know if we can help you in any way1 point
-
You’ll get a better feel for things after a few hour troop Sent from my iPhone using Tapatalk1 point
-
Great work Winston! You've done a lot of work. The staff already pointed out the required list. Looking forward to your progress and application photos.1 point
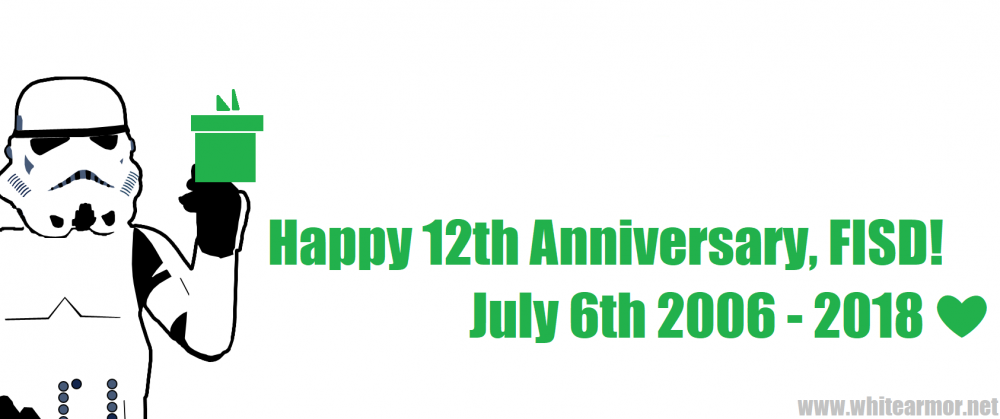
-
Better late than never but yes, 6th of July marked our 12th anniversary, why not celebrate the whole month. Thanks to Ripper for his quick mock up art work, and here's to the next 12 years "HOOAH"!!!
 1 point
 -
Did some more work on the strapping. Glued the snaps in the upper legs And started on the belt to attach my upper legs to: The snap-bands are still quite spaceous, so I have enough space to play around with them.1 point
-
Just to quell the rumors.....It was suggested, that I recast the td I am now offering, this could not be farther from the truth... Here is the 3d model I made in Solidworks. I 3d printed it on my Raise N2+ 3d printer . I did state in a previous post that I had seen the mouse's version and I did upgrade my molds with better details to be more accurate, but recast.....please, I have no need to......
 1 point
 -
Only one entry? Is this a bug in the forum? I'm not even a TK yet, I'm just an ID at the moment. I'm not sure if this qualifies for this contest. Anyway, I haven't had many troops yet, but one of them was pretty awesome. It was during the "Fantasy Basel" Convention in May 2018 in Switzerland. Brian Muir (yeah, the guy that sculpted Stormtroopers ) had an interview panel on one of the stages. Together with the organizers of the convention, our Garrison planned a little surprise for him. After he finished the talk, the Star Wars theme began playing and the spotlights switched to the area in the back. Everyone turned their head to the back and saw ~10-15 members of the Rebel Legion entering the room from behind. After that it switched to the Imperial March and ~25-30 members of the 501st entered the room and the stage. Our XO gave him some little presents ( I don't remember exactly what he got, but I believe it was a coin and and a patch from our garrison). Brian was quite overwhelmed from our surprise. I've talked a bit with him after the show and he told me, that he really liked what we did. Group picture: http://www.fantasybasel.ch/en/cs_gallery/gallery-2018/#prettyPhoto[gallery1]/92/1 point
-
Yes, for the thigh, just glue in some scrap and then fill with ABS paste. The other option is cutting out the knees for mobility, which you might need to do anyway. Saves you the trouble. I don't think you should have many issues with basic. Sounds like Frank's GML was pretty strict. My guess is that we would let misalignment fly in our garrison, as long as it wasn't too bad.1 point
-
This is what I got shot down for. I highlighted your pic. It’s a simple fix but even the slightest misalignment and I’d got told to redo pics. Make sure it’s on straight line. Sent from my iPhone using Tapatalk1 point
-
Most issues have been brought up already, so you should be in pretty good shape for submitting to your GML, Winston. You can apply for level 2 right after your basic approval, but you will need to apply for legion access here at the FISD first: https://www.whitearmor.net/forum/topic/16-501st-trooper-status-requests-include-link-to-your-501st-profile-in-your-request/ which is pretty quick. I would also take some paint to the frown points and open up those teeth a bit more: Reference image Your large ab button plate is spot-on, but the smaller 4 button one needs to be trimmed at some point. It should be fairly easy to get it off with an exacto knife and a bit of patience, but it should look like the one below. (Note that it is flat and has square corners) Reference image Best of luck on your basic approval, sir, and I look forward to seeing your EI submission!!1 point
-
Hi Cap, Once you have your approval, you’ll have to then start a separate EIB application thread for L2. As you say, you’ve clearly built your kit with higher levels and I’ve no doubt that you’ll be able to reach them, however they have to come one step at a time, and in order. Based on previous EIB/Centurion applications, little suggestions might include trimming the return edges off the smaller ab plate, perhaps extending the frown paint a little, the gaps that you’ve mentioned etc. I’m not sure if the seam lines on the back of the thighs will come up as a concern: I’m not sure I’ve seen that before. But that will all come up when you start your L2 application. Those would be very small, easy changes but really add to the out and out look. Best wishes, Dan :-)1 point
-
Hi Winston, as Frank mentioned, it looks like you're aware of all the isues/potential issues. I think that the only thing that will hold you back from the basic is the left shin being open. You'll need a solid photo of you wearing it correctly, otherwise your GML will be unable to verify that it does close and look correct on you. The main things that stood out to me are the shin (as mentioned), your back plate/kidney being a bit crooked, and the gap at the back of your left thigh. I'd prioritize these for your fixes/adjustments. Of course, as you troop your first few events, you'll find other things to adjust.1 point
-
Nice work, Winston. Looks like you’re well on track to basic. If you’d like some tips on L2 and L3, let us know. Best of luck for clearance, Dan1 point
-
Looks like your aware of all of the issues and fixed most of them already. As for the photo submission. I got shot down for things like pieces not sitting properly. I think all garrisons are different but in mine it had to be perfect. If my thigh rotated I needed a new pic, not just a your good but rotate it when your trooping. Sent from my iPhone using Tapatalk1 point
-
There has been a bit of a debate going on on FB (maybe on here as well?) about whether the drop boxes were attached to the elastic with pop or cap rivets. Thought I'd add these pics of the RS original belt I took last year to clear things up: it's the same style of cap rivet used to attach the belt to the vac formed front piece. FISD team: Feel free to add those pics to the reference gallery1 point
-
Yeah, the plastic guys will love me1 point
-
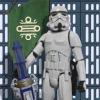
Hello everyone, I'm Bas (TK-32294) from Indonesia (Garuda Garrison Indonesia). my experience was pretty luke-leia moment(no,it isn't about sibling kiss) haha. So it was Monday, 21st May 2018. I joined the "Solo" screening troop at one of the cinema hall. At one moment, a woman came to me. She looks like on her 30 and she said "kamu stormtrooper tapi kok pendek ya" that means "aren't you too short for a stormtrooper".I literally got ANH flashback. That night before I went to sleep, I did google "what is the male average height in Indonesia". I'm 167cm(5'5.75) btw. Turns out the average is 159 cm(5'2.60). The good news is I'm above average, bad news is I'm not that tall either. Heart > Height.#BadGuysDoingGood Thank you for reading my story TK-32294 Bas Here's a bonus pict!
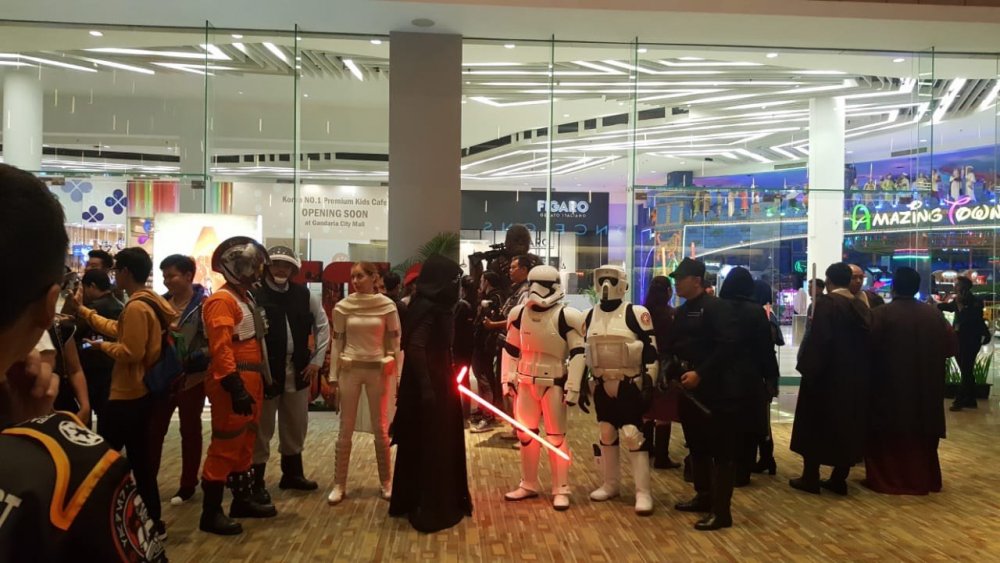
 1 point
 -
Couple of things so I will put in bullets: The angles cut on the ABS belt are much too large. The hand guards look too large as well. The TD clips look a bit small, but you will probably be able to make them work. The buttons on the ab plate look quite big as well. Painting them smaller should help with the appearance. Kidney plate's top side should swoop upwards. Hard to tell in the photos if this angle is present on either side. It's definitely too large as per your observations. The notch should be cut where you pencilled it in, but note that it is not a requirement. Your butt plate is also too large as you have already observed... ...but before you go trimming these, you should cut keeping extra material to reform a return edge on these pieces.1 point