Leaderboard


Popular Content
Showing content with the highest reputation on 02/24/2018 in all areas
-
Ok...so...I started chucking some paint at the blaster today...[emoji4] Sent from my iPhone using Tapatalk3 points
-
No, if you need a bigger than the Canon width of 20 that`s ok - for all levels of approval....I would however try and avoid going bigger than 25 though. Here`s how I did: I trimmed the rough edges of the thighs and using tape overlaped the front so the raised edges were 20mm, then butted up the the back (also rough trimmed, only removing the flashing) and taped that up, sliding the thighs on (with undersuit), checked the fit and needed to go bigger so ended up with a 22mm coverstrip (front and back, I wanted the strips to match), also trimed as much that I could from the upper return edge, more from the inner part than the outer to maintain the illusion of thickness. I maxed out on my thighs so the back has a gap at the top so to strenghten the joint I used a small inner strip at the top. The Anovos suit has pre-cut (at least my shadow did) strips so that makes things more challenging, idealy the strip hides the raised edge but there`s room to "cheat" a little meaning it`s fine even though if a few mm is showing - keep going Fredrik, you`ll get there in the end RS suit for reference2 points
-
Yey . Finally i can continue . Got round to ordering my boots from RS . Realy comfy and soft . Sized shins yesterday . Sniper knee attached to left and 25mm cover strip added to rear right . Will leave min of 24hrs before adding the velcro . Will post pics later In the mean time here are the boots . Well boot . Only took a pic of one Sent from my GT-I9505 using Tapatalk2 points
-
Woo, first steps! Started some rough trimming tonight on the forearms. I have 2 really expensive hobbies in one picture here! Sent from my SM-G950U using Tapatalk2 points
-
Thank you all whom took the time to review my build for the feedback, it was all very helpful. Made the changes this morning after work, hard 45* angles on belt and drop boxes lined with outer edge, luckily magazine with easy to turn around since it detaches to hold my batteries for the electronics, mic tips painted white all the way to edge, snaps/strapping added to biceps and hopefully I adjusted strapping enough in shin to keep it forward (won’t know for sure till am when I test it after e6000 dries. My lenses are doubled up, light green acetate for color on outside and dark green inside. Will have pics of changes posted this weekend. Hoping to make it to pensacon tomorrow and hang with Parjai Squad for a bit, after a quick fit check in am.2 points
-
TD tube is perfect2 points
-
I put mine right behind the ab button plate (I'm skinny and have a lot of room in my armor). I formed a piece of ABS and glued it on so that the speaker could clip onto it. I'm also using a bluetooth mic (the bluetooth receiver is in the picture). The extra velcro was when I had a larger wireless receiver and icomm which I don't use anymore.2 points
-
Hi Troops, This has probably already been done before but I took some photos of the three prop makers side by side for comparison. Hope it helps anyone weighing up the choices on which to buy.1 point
-
Hey everyone, as most of you have probably noticed the boards were upgraded last year, and now some of the old assets look outdated (or outright broken). We also can't find the source files for a lot of them, so long story short, I've been tasked by Paul (Daetrin) with doing a refresh on the various icons/awards/etcetera peppering the boards. This thread is to serve as a PSA as well as for gathering feedback from the membership. I have two goals in mind with this refresh : 1. Hi-Res assets - with the explosion of super-high PPI displays we want to future-proof by creating any new art at higher resolution (this also opens the door to potential print and other uses down the road). 2. Streamlining/Consistency - All of the art has been made over the course of several years by multiple people, so what exists right now isn't as consistent as it could be. I'll do my best to get everything to 'gel' together better. Where possible, I will show the new images in regular and 2X (hi-res) versions. Before I dive in, a brief detour into some of the consistency stuff, namely color... there has been an attempt to clean up the "color coding" going on with user ranks and the various awards and other art that tie into them. Here's a brief run-down of the colors I'm using and where they come from: (I may eventually go through the effort of converting these over to Pantone colors, but it's a lot of work so this will suffice for now.) User Rank Images These are the first thing I will be tackling, and the new (proposed) art addresses a few issues. The "classic" FISD logo has been replaced with a (revised) beret flash, AKA the simplified shield logo. This has the benefit of looking better at smaller resolutions as well as being more OT/FO TK agnostic (no helmet!) - a goal of the detachment this year is to make FO TK's feel more at home so I'll be doing my best to help where possible. I am also switching to the same font used in the forum header (logo) for consistency. These are the proposed user title graphics - there is now a "Guest" title which we may or may not use, but completes the set of user groups in current use: Updated Red 7/1/2021 Added 8/1/2021 -- Updated 9/1/2021 -- Service/Achievement Ribbons (Part I) Much like the user titles, we can't find the original files and they had to be re-drawn. The current ones are ever-so-slightly off-center, which I will be fixing: First off, I'm proposing some slight color tweaks to the ribbon colors themselves in the interest of consistency: The Achievement Award Ribbon's center blue strip has been adjusted to match the "official" FISD blue (it also stands out better on the dark gray forum background): The Service Award Ribbon's center lilac strip has been changed to the staff "burple", this way both Admins (Red) and Staff ("Burple") are represented: The ribbons have been redrawn at high res, and the stars have been redone to match the new user titles: Next up will be tackling the other two ribbons (Master Armorer and Attaché Achievement)... stay tuned.


 1 point
 -
At the encouragement of @ukswrath, here is a post I originally made a year and a half ago on the Anovos FB build group, which is handy for all makes of armor, not just Anovos. ABS Paste?!?! WTF is THAT? I've seen variations of this question over and over. So perhaps this will be helpful. ABS paste is homemade glue for your ABS plastic. It literally melts and reforms the plastic into a solid piece, so it's more like welding than gluing. But as the warning phrase "it literally melts..." foreshadows, you should be careful. Making couldn't be easier. Get a GLASS jar. Don't be that person who makes it in a plastic cup. You know... the one that puts plastic melting stuff into a plastic cup. You've met that guy. Don't be that guy. All you need is a jar, some ABS scrap, and some construction grade acetone. Nail polish remover is NOT strong enough, even though it has "some" acetone in it. Pick up a bottle at Home Depot or the like. (For people in other countries, like the UK, where Acetone is not readily available... you have my sympathies) For containers, I feel a glass baby food jar is ideal. It's just the perfect size (unless you doing something epic!), stupid cheap (if you don't already have one somewhere), and easy to work with. I'm going to assume baby food jar, so if you choose a 2 quart mason jar, scale as needed. In general, ABS paste is practically free, other than the price of a tiny bit of Acetone and maybe a buck for a jar of baby food, if you don't have a suitable container already, since your source material is scrap from your own build. (never toss that armor scrap!) A NOTE ABOUT FUMES: Pure Acetone is nasty stuff. You really don't want to be breathing Acetone fumes. A whiff here and there likely won't cause lasting harm, unless you have existing pulmonary issues, but still, do your best to avoid breathing a lot of the stuff. At a minimum, you can end up with a NASTY headache. At worse, you can actually cause damage to your lungs. Use your own level of protection that feels best for you... some want to wear a full respirator (with a volatile organic cartridge), others, like myself, are content to work outdoors and minimize breathing it. (Once the jar is capped, it should be fine to bring indoors.) FILL the jar with the tiniest scraps if ABS you can get. I literally used the curly-que and powdered scrap from under my belt sander, after all my rough cuts, in addition to cutting up a few pieces of scrap into 1/4" square pieces, with scissors. And now the magic. Add approx 1 teaspoon of Acetone (and remember, I'm assuming a baby-food size jar... scale accordingly if you're trying to go big and make enough for your entire squad to build with!). Cap the jar, wait 15-20 min (or more, no worries) and then check on it. Poke it with a stir stick. (You can literally use a stick. Although IMO, a wooden coffee stir stick (free at Starbucks!) is ideal, and Popsicle sticks have their proponents, too, as does the toothpick crew, for detail work.) If you literally do not have a stick, a strong piece of scrap you don't care about will do, just be careful where you set it afterwards. But poke at it. Get an idea where it's going. Then add about 1 tsp more Acetone. Re-cap it again, wait 15-20 min, then check again, and this time, stir it a little more seriously. Note the consistency. You'll probably want to add some more, perhaps 1 more tsp, perhaps less? You may be starting to get a feel for it by now. Let sit for a good 1/2 hr, then check and stir AGAIN. We're going slow. Slow is good. Watch some TV or read a book. You have better things to do than watch ABS melt in super slow motion. At this point, you SHOULD be close to ready to go. If not, I recommend letting it sit overnight before checking it again. (in fact, that's not a bad idea in general, but it's not strictly necessary) Only add more Acetone if you still really think it's too thick and clumpy in the morning, after stirring it some more. Repeat until you reach that magic mayonnaise moment. Correct consistency is *roughly* mayo-like. I'd say somewhere between Elmer's glue (a little too runny?) and Toothpaste (perhaps a little too thick). Too runny = bad. Remember the "melting plastic" part? You don't want that running down your armor. Too thick and you may get air pockets. Shoot for the Goldilocks zone. ) When you're ready, apply with a stick. Let it dry (duration depends on thickness... maybe 20 min, maybe overnight?) and sand it down. Repeat until pretty. Relatively small amounts (read: the small patches that ABS paste is generally best for) should be relatively safe to use indoors, just be aware of the fumes. Larger projects (or sensitive spouses... not that it smells too different from the nail salon, in my mind) are probably best to work on outdoors. The beauty of using the same plastic your armor is made from, to make paste, is you get a dead-on 100% perfect color match. No painting needed! (note: The level of polish/sheen will not be the same, but the color itself will be a match. ABS paste isn't really good for large area applications... and trying to do that will likely end up causing warping from too much acetone anyway) (2nd note: ABS paste is not as strong as the original plastic. It's not actually a glue, even if it looks like one. For connections needing a very strong join, use CA glue, as usual.) (pre-sanding... but note that color match to the Anovos armor!) The paste doesn't really go bad, but eventually it'll harden and you'll need to add more Acetone. Keep it capped, and it'll last longer, of course... you can dry it out quite fast if you leave the cap off for more than a few hours. Future batches you can probably go faster (read: add more acetone, sooner), but I recommend the slow approach when you're starting out, until you have a good feel for it. Good luck!1 point
-
My BBB was yesterday! Thanks Mark at AP for all of your help throughout this purchase. What a great experience! I was very impressed with the quality of AP's product.....even though I've never handled armour before. I was definitely not disappointed with what I received I wanted to work on the helmet first as my under-suit is still in transit....and already found out how scratchy this stuff can get on bare skin1 point
-
Hey Dan FWIW I was planning on dialing down the cartoonishness a bit anyway (less stroke), thanks for the feedback!1 point
-
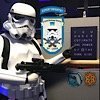
Hahahahahahahahahahahahahahahahahaha You don't know my wife. She's take my lovely Centurion suit, my ATA #1 helmet, my double-signature Paradise edition TE2 TD helmet, every coin, every patch, and throw it all in the rubbish bin if she could. No way that stuff will ever get displayed anywhere in the house. Not even in my man cave. I have the Celebration Orlando poster on my office wall, and that's pushing things.1 point
-
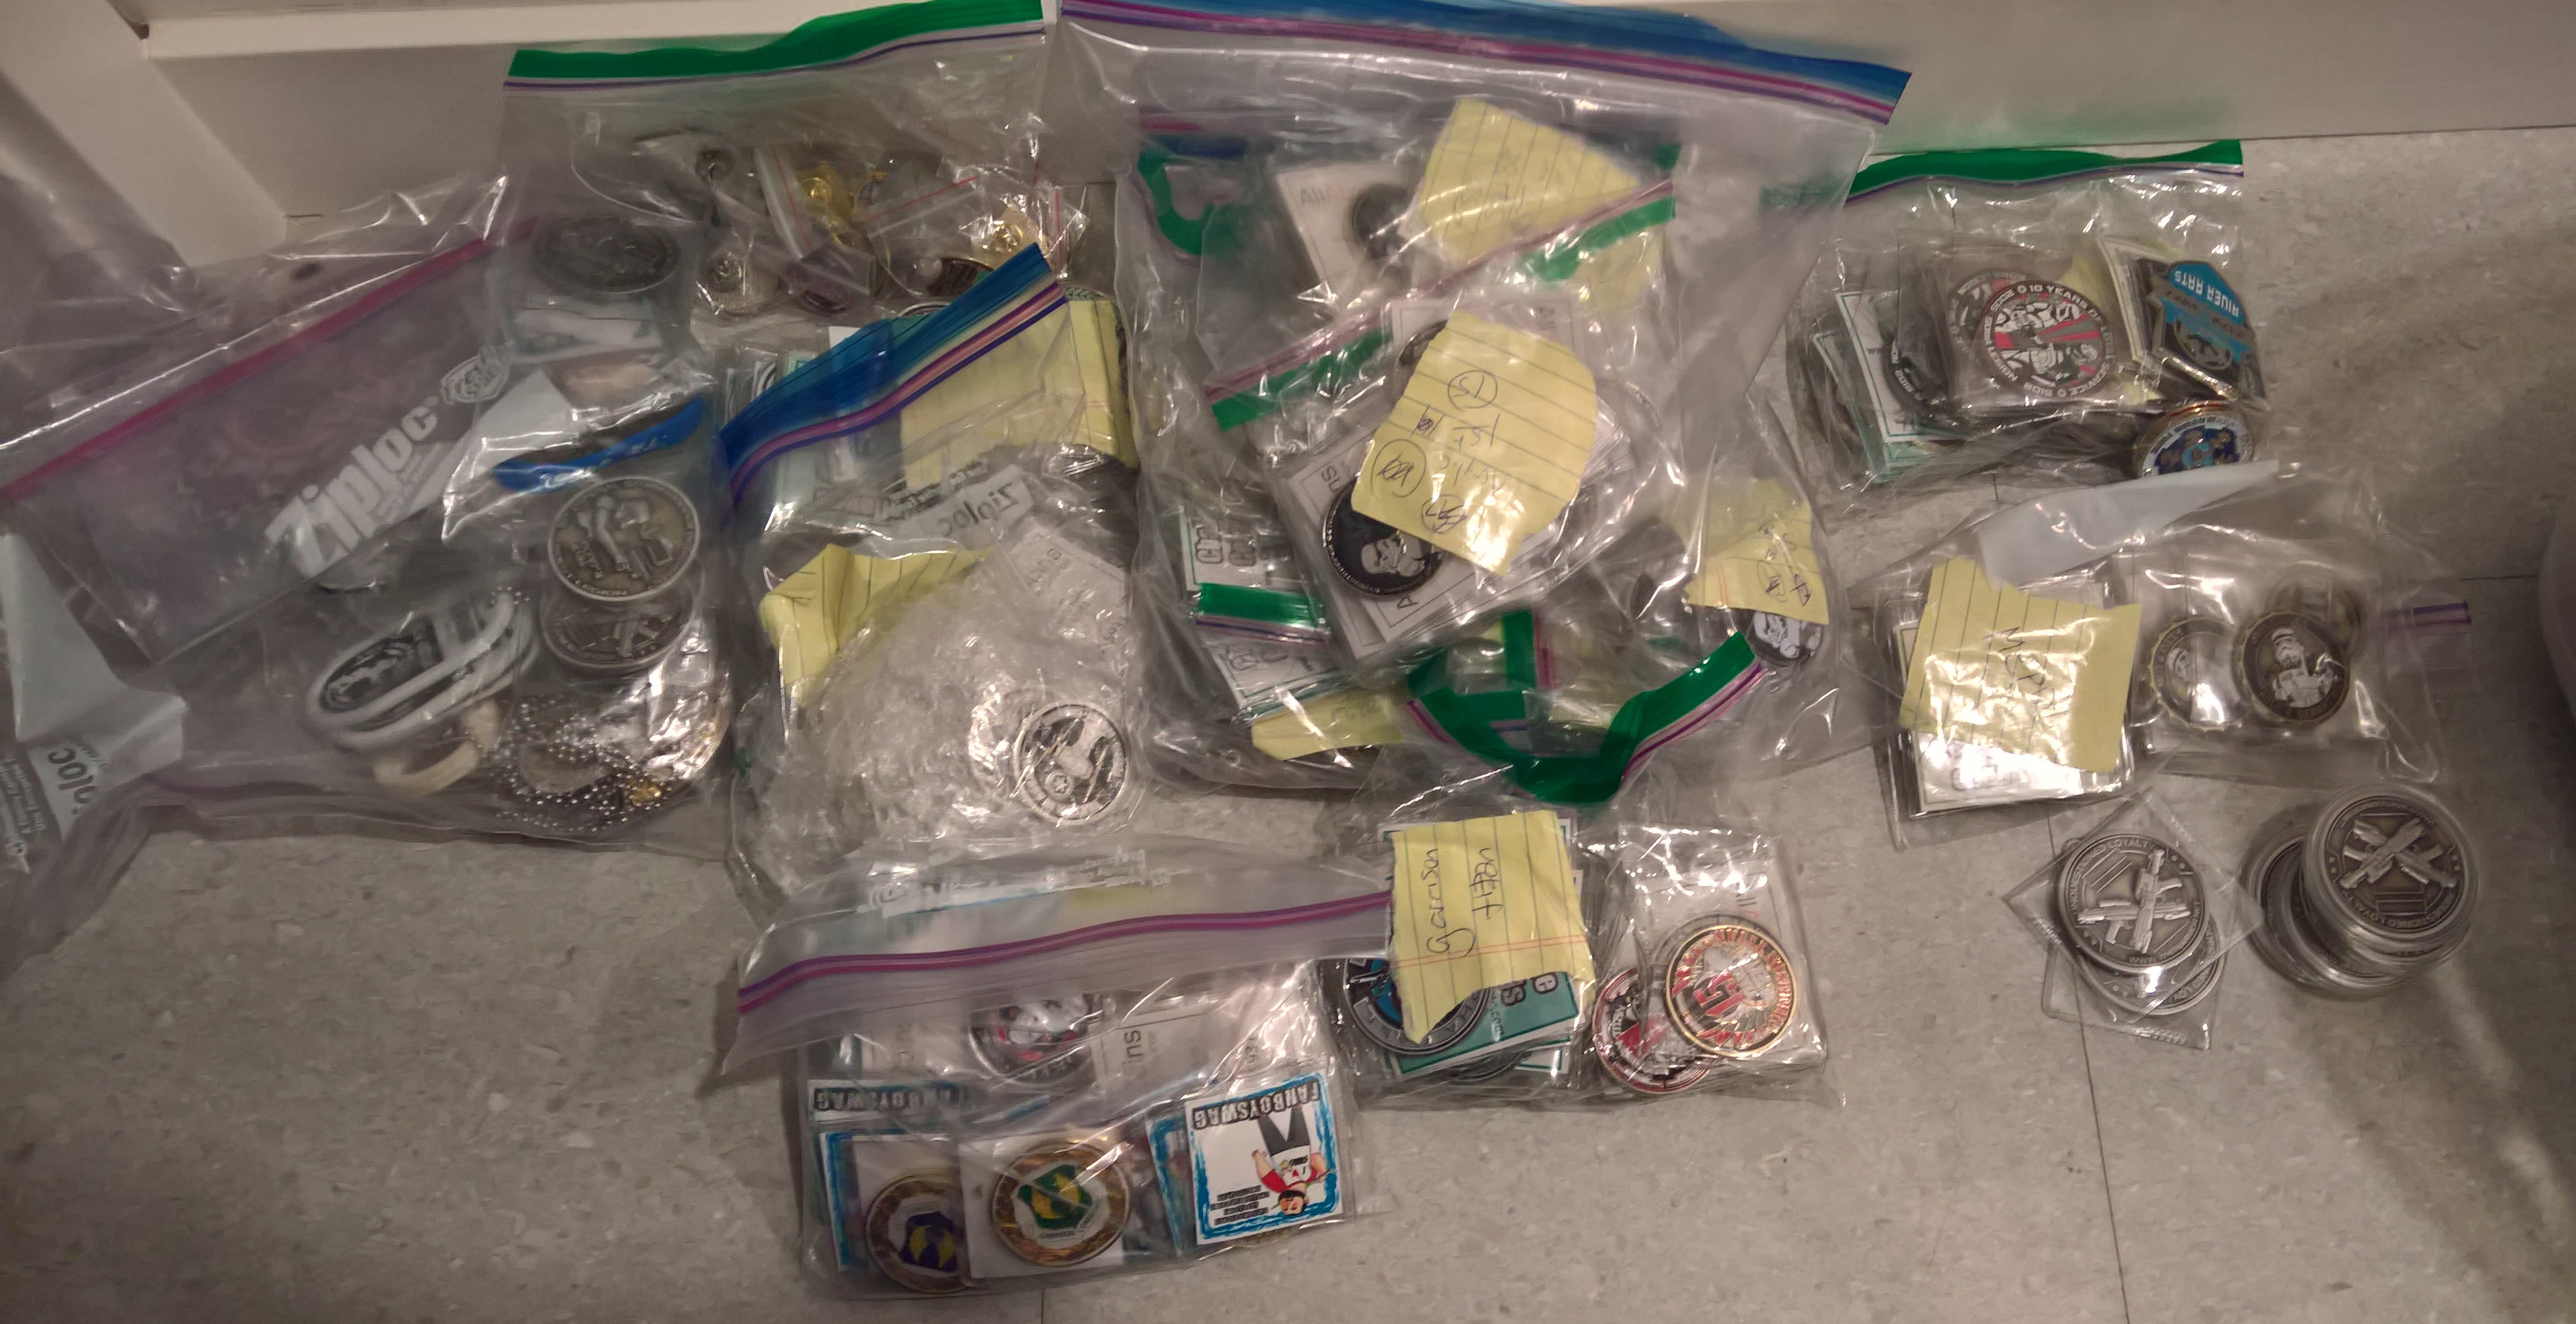
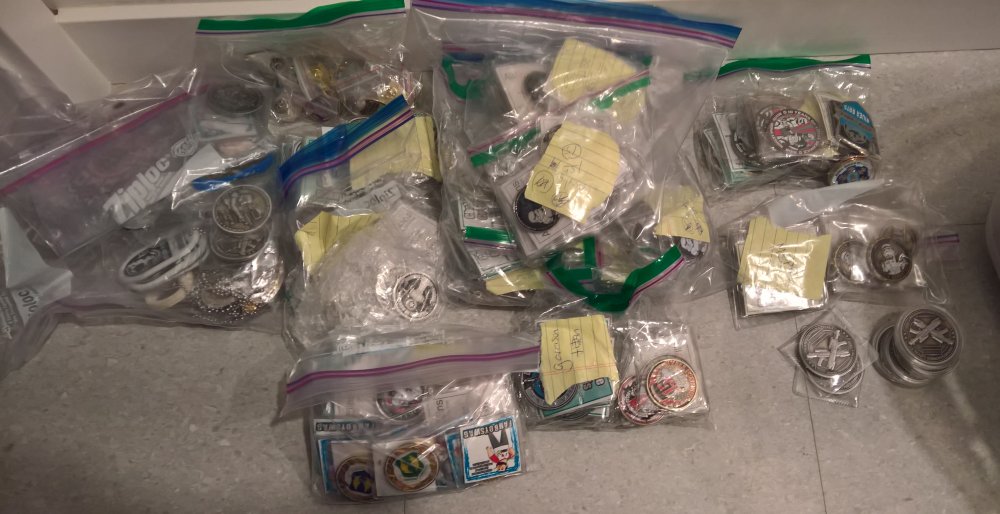
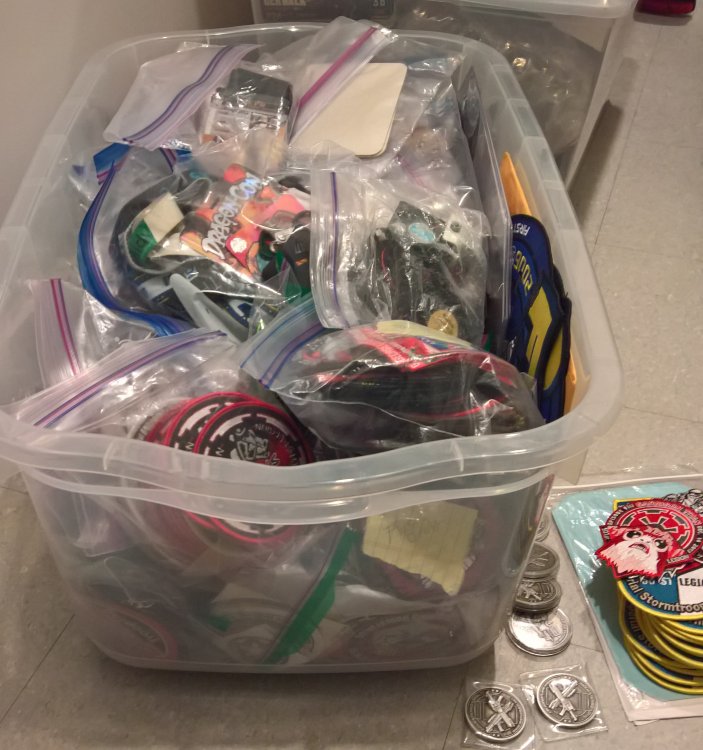
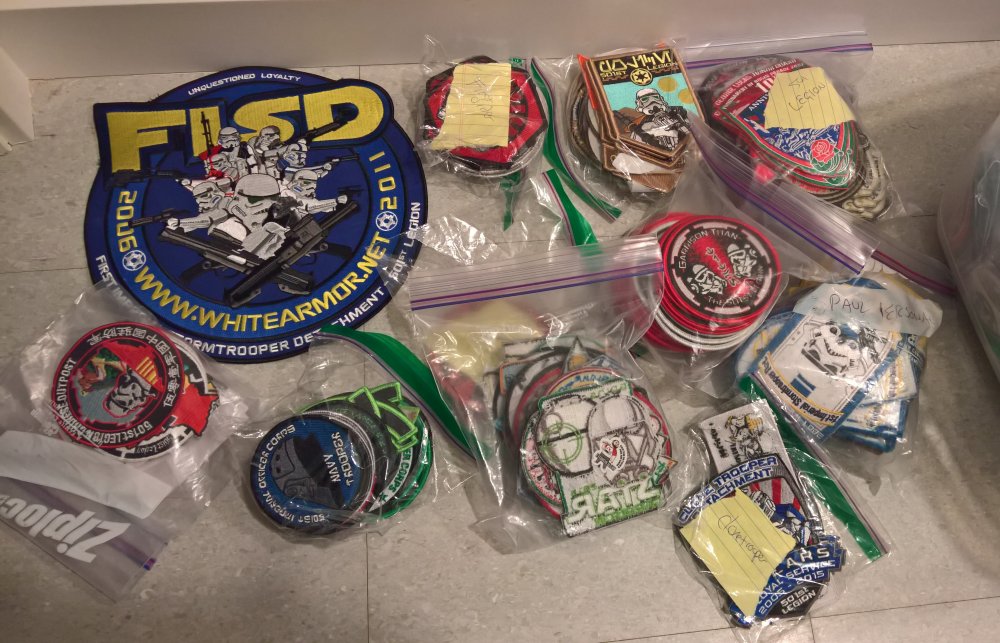
Here is what 10 years of coin collecting looks like. Realize that for FISD coins at least, I usually have 4. Two for me, 2 for the archives. I also tend to buy a lot of FISD coins as I mail them out as "thank-yous" and "atta-boys", being the founder and what-not. Plus coins from other detachments I used to be heavily involved with in the past (MEPD, IOC, CTN) and coins people just send me. Then your patch collection starts looking like this: For the same reason. Sooner or later your wife makes you put it all in a bin under the stairs.
 1 point
 -
That first coat really brings out the detail. Good work, matey. :-) Sent from my iPhone using Tapatalk1 point
-
I loved this part of my build, it's exciting getting near the end! Sent from my SM-G925F using Tapatalk1 point
-
No apologies needed. Nothing is final yet, and everyone should always feel free to share opinions. Else what's the point of having a discussion board?1 point
-
Thanks mate . Been around . Just had to put on hold untill boots were sorted [emoji6] Sent from my GT-I9505 using Tapatalk1 point
-
Hi all, Just some constructive feedback here (again, not meant in a derogatory way). Whilst chatting with my wife about the FISD updates, I showed her these newly proposed designs and her first thought was that they were nice, reminiscent of “Mario Kart”. I am not suggesting that anything should change as a result of this comment - it is just meant as valid feedback from another pair of eyes. To me, personally, the existing designs look a little more military. These new designs are lovely in a more fun way. As Brein said, to each their own. Also, I’m partial to the dark blue. As stated by Glen, this adds a special quality to it. Almost a royal blue, adding to the quality feel. Out of interest, are we planning on choosing from a selection of designs over time or is this the design we’re following? I only ask as, if this is the chosen design then I’ll roll with it. Best wishes, Dan1 point
-
Yea that settles it. I’m going to do the honorable thing and tell her the kids were screwing with it Sent from my iPhone using Tapatalk1 point
-
I am an Imperial Stormtrooper and I would not hesitate to sacrifice myself in order to save my brother (play Imperial march for effect)1 point
-
Second the straps/hooks combination. If one fails, your whole arm won't fall off To my knowledge no. No one will care what the inside of your helmet looks like, as long as your lenses are dark enough.1 point
-
Prefer the darker blue, it was made like that for a reason so it stood out from the other FISD awards. The current run off attaché patches also has the darker blue, once again this was for a reason so it did not resemble the FISD standard flash used on berets. Just like fonts, the blue does not need to be the same for everything. Also used on the troopers helping troopers decal1 point
-
Bc part of the fun of building a TK is the “fun stuff”, I got my microphone/Aker amp in today with the components to make my TrooperTalk app work. My whole family is essentially fighting over playing with it. So cool! Now hoping to get a bucket (close to) finished by tomorrow night. Sent from my iPhone using Tapatalk1 point
-
How about vests. Funny story, most of my family members are Disney freaks and most of them have a vest. I told everyone "That's lame I'll never do that". I now have 5 vests and counting lol1 point
-
Coming from someone who took early overlap AM/FX armor and custom built a SWAT Cantina Captain here's my thoughts. The fact remains a few years ago we removed the FX helmet from the approval equation for a very obvious reason. The FX armor itself does not have the same issue as the helmet IMO. There's armor out with very soft details, do we ban them next? All out ban on FX at basic is a NO in my book because as Danny mentioned if any expired members want to rejoin the fold it shouldn't cost them another arm and leg. That said it's time for "overlap construction" to be excluded from anything above basic (outside of ROTJ). As for armor intending to be built a specific way I believe it should fall under the same reasoning as the Kidney notch. If it was produced to have a specific component then it must have it.1 point
-
When I joined the legion I told myself I wasn't going to collect coins or pins. Since that time I've collected around 20 coins (although several of them were bought by my wife who is also in the legion). Rather than have them sit in a drawer I wanted to display them, so I got a display box and put it on the wall. I still keep a coin in my wallet and another in my helmet, always ready for that challenge.1 point
-
I am one with the force, the force is one with me I got the buckles in but one came in smaller than the others Decided to use it though1 point
-
My entire build had been a battle with comfort zone. Everything with time, asking questions and research helped alot. You just have to make the calls with what will make you happy1 point
-
I do one heavy coat and work fast so the paint will self level and dry to a nice smooth finish with no brush marks, but for that the paint has to have a certain concistancy and not too liquidy, my vocoders people think its masked and airbrushed on its so smooth looking, I guess my many years of model building experience paid off lol! Mark (AP)1 point
-
I had the same problem with my Hero bucket, Shane. I ended up buying a small tube of 2 part epoxy from Lowe's and have had no problems since. I removed all the E-6000 first and actually took some sandpaper and sanded out the slot before applying it to help with adhesion. If you decide to go that route, I suggest getting the "instant mix", which comes with a long thing applicator ideal for getting inside the slot of the S trim without getting it all over the place. Here is a link to the product I used: https://www.lowes.com/pd/LOCTITE-Epoxy-Instant-Mix/32188451 point
-
Hi all! Just discovered something on a trip to Lowe's, it's called SUGRU. It is a glue that you can knead like Play-Doh, and worked perfectly for attaching the hard lenses inside my bucket. It comes in small packets of 4, and was located on the paint-desk counter. Since the inside return edges (pre-cut) on my eye openings were not symmetrical, I thought this might work, and it certainly did. You just knead it for a few seconds, roll it into a strip, place it around the edge, put the lens where you want it, and press it up against both tightly. Like E-6000, it takes a 24 hours to dry, though, (as if we aren't all used to this), but it does not drip or run! The only thing is that I would recommend that you check the outside of the eye opening right after, in case some gets squeezed through, and wipe the lenses immediately. I did find that although it adheres really well, it is MUCH easier to get off than E6K. Hope this helps someone! Addendum: (Thanks to Locitus, It is advisable to leave a small gap somewhere around the lenses to allow for air flow, so that they will not fog-up.1 point
-
I used some foam spacers for the amp to sit on (no sound vibration) then using some off cuts, 2 inch elastic and a good lot of E6000 made a strap loop, the Velcro is there for my wireless receiver to stick to -----------1 point
-
I have my aker amp facing outwards up against the chest plate, doesn't sit flush so there is enough sound coming out, also gives it a nice muffled sound. I have two small angles of abs glued so the amp and icomm can't fall down and I use Velcro to hold them in place.1 point
-
This is helping me... http://www.tonybarnett.plus.com/snaps.html1 point
-
Had a little time this morning so I decided I would do the mundane task of making my snap plate holes. First off I set my soldering iron up using a small vice. Despite what I've read, I had no issues keeping the iron clean of melted plastic. A wee sponge every now and then kept it clean. Beware though, the widows should be open as the fumes are not good. Centering the 40mm plates was easy. Just fold in half and away you go! Simples! The 50mm doubles were a little trickier but not an issue. Again, just fold in half, and then fold the first half again and that's your mark. Do the same for the other hole. About an hour later and all the plates are done and ready to go! I also found that by looping an elastic band through my roll of webbing and tying it off gave me a more convenient way of cutting the plates as it kept it all neat and tidy. When I needed more webbing I just rolled the band backwards. May be my OCD kicking in but it worked for me in my limited workspace (AKA the kitchen counter!) Some sad news to report though, some of the little guys didn't make it. RIP chaps. Marc1 point