Leaderboard


Popular Content
Showing content with the highest reputation on 12/25/2017 in Posts
-
Merry Christmas and/or Happy Holidays, Everyone!!!
 3 points
 -
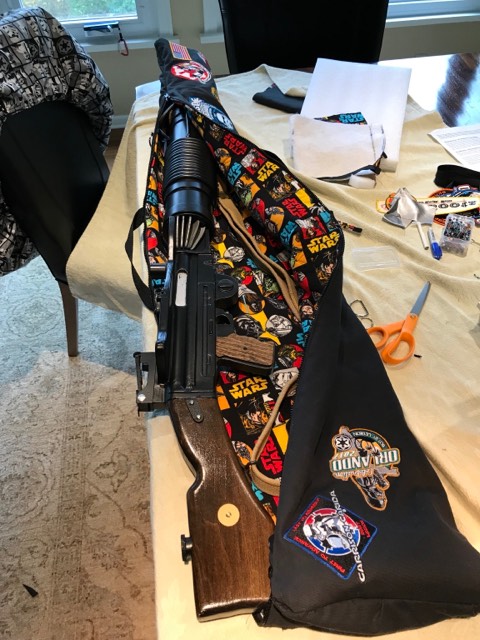
I was using a ski bag, but it was too long, so I finally just made this.
 3 points
 -
Sent from my iPhone using Tapatalk2 points
-
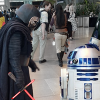
GARRISON TITAN Operation: Rule the Galaxy Hello Legionnaires! If you were brought here by me, then you already know why you are here! If you've tripped on this subforum, please allow me to thank you for joining us on this wild ride, and allow me to tell you a little bit about us and why we are here. My name is Kay, DS-52956 and one of Garrison Titan's Membership Liaisons. My flagship costume is Kylo Ren (as you have probably guessed). I troop about 20 events a year, and at the time of me typing this, we have about x1 First Order Stormtrooper for each Kylo Ren we have in the Garrison....which totals to 5 (give or take my spotty memory). As you can imagine, I was DISPLEASED by this! So I did what any self-respecting loyalist might do. I went recruiting. And here we all are. Garrison Titan is based in Washington State and is currently home to a little over 180 active members, making us one of the top 20 largest Garrisons in the 501st Legion. We have a tremendous relationship with our sister clubs in the area, and have made appearances at all sorts of events throughout the year. In 2016, we raised just over $58,000 for charity at just over 1000 events, and are well beyond that number for 2017. Our goal here is simple: have a First Order squadron ready for the release of Episode 9. That gives us a timeline of ~2 years -- plenty of time for experimentation and learning. For several members involved, this is their first armor kit build. For others, it isn't. We plan to operate using an assembly line system to get these kits trimmed and fitted by our target date. I will be documenting the process as best I can -- I am notoriously bad at remembering to take pictures of my builds, but hopefully with a support group of x20 other troopers, we'll get some helpful info here in case anyone else would like to start one of these in their own Garrison. On behalf of Garrison Titan, thank you for stopping in, and don't forget to CRUSH THE RESISTANCE! Kay Ahern DS-52956 Garrison Titan GML2 points
-
Best wishes from me and my family, to all of you friends of FISD, Merry Christmas and Happy New Year Tony Inviato dal mio iPhone utilizzando Tapatalk1 point
-
I use a dremel for pretty much all of my trimming except for the teeth, as stated before I drill in the corners of the teeth and finish off with files, much more control than using a dremel.1 point
-
This subforum is meant to be public so we can communicate with folks who have done this build before. (: We want to mention that any ordering we do here is Garrison specific just so folks dont accidentally wander into the topics expecting to receive a product lol.1 point
-
Hi Neil - we can make it 501st only, is that what you mean?1 point
-
I would be very hesitant to try and Dremel the screws off in situ my friend. They will heat up so much before you actually cut through them that they will most likely cause melting somewhere you don’t want melting! A while back I cut some screws for my F-11D down using my Dremel. I didn’t have a vice so I held them in a clamp. I now have a perfect screw shape melted into it1 point
-
I started to do that on my RS lid but found it too nerve wracking. What I found easier was to drill holes then open them up evenly with small files. I’m sure it can be done with a Dremel but as a first timer it wasn’t for me. I did attempt to keep the depth even over all teeth and I think I achieved that. Best of luck to you!1 point
-
Batmanmike's AP build thread https://r.tapatalk.com/shareLink?share_fid=44557&share_tid=41150&url=https://www.whitearmor.net/forum/applications/tapatalk/index.php?/topic/41150-Batmanmike%27s-AP-build-thread&share_type=t It’s slowly coming along! [emoji30]1 point
-
Link to enamel paint?1 point
-
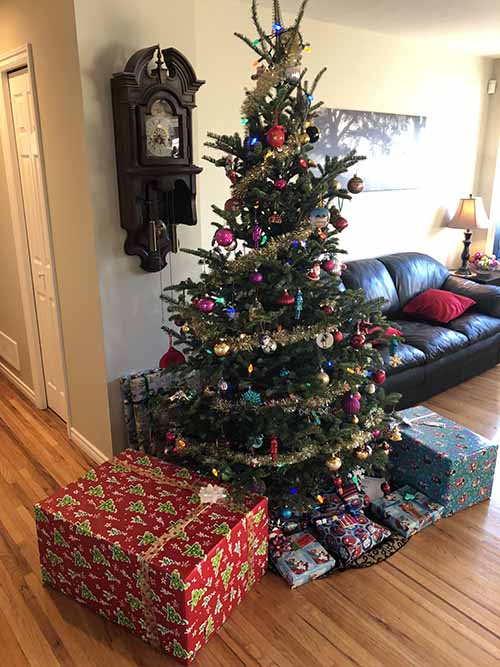
Christmas 2017 With my family Sent from my iPhone using Tapatalk1 point
-
PLACEHOLDER FOR SOMETHING I HAVEN'T THOUGHT OF YET1 point
-
Buy a dremel! A must have for armor building IMO.1 point
-
Congratulations! Welcome to the Ranks!1 point
-
You could have simply pop riveted the snaps in place and got the same look as the original belt. Use the snap as a backing washer behind the belt - works a treat1 point
-
Congrats, David!!1 point
-
Next up is the changing out the belt mounts for the holster From the EIB thread: "Holster mounts. Snap base mounts are too large, they should be smaller, similar to cap rivets or Chicago screws. If you stall want to make the holster removable there's a couple tutorials out there illustrating how to take Chicago screws and install them so they also double as snaps. " Alrighty, a bit too big. I decided to go with Chicago screws as they were more readily available. I still wanted to keep the snap functionality, so I decided to adapt the Chicago screws to the male snaps. I used two different punches for this. Here I am using the more pointed one to remove the snap backing. It was much easier than drilling them out. I was able to salvage some of the male snaps. Waste not want not. Here is the Chicago screw that I plan on using. 1/4 inch in height A wee bit too big, not a problem. Rather then use a drill (as I have seen in other tutorials) and go slow, I opted to use the pin punch to widen out the hole. This is the added benefit of self centering, and I was not worrying about crushing the the snap whilst holding it with pliers. Plus more material. You can't tell, but there is a hole below the punch, to allow the punch to sink in a bit. More art than science, but there is a fair amount of room for error. Tap it down with a hammer. Easy-peasy lemon squeezy Now I normally use an awl to put stuff through fabric. More threads means stronger grip, and an awl just pushes stuff out of the way. Not this time. The Chicago screws were a bit to wide to get through two layers of canvas and two layers of elastic. I had to use my trusty leather hole punch Now I used my larger, more shallow punch to widen out the hole on the Chicago screw to give it something to grip onto inside the male snap A couple of taps with a hammer..and Repeat as necessary Not in my hardsuit, but here you can see it holding up my E-11 In the future I will probably add a piece of plastic to avoid blaster droop. But that is a project for another day. Side question, anyone think this worth putting in the tutorials section?1 point
-
Happy holidays1 point
-
Besides that I also use the belt as a corset1 point
-
You're probably right. I've been tweaking my armor after every troop (fitment issues, things breaking, etc.) and this is after EI/Centurion. Plus, I keep finding things to put on the to-do list like painting the helmet interior black, electronics, a second blaster... It never ends.1 point
-
Congratulations and welcome to the ranks trooper1 point
-
Here is the pinned list of FOTK Resources: HOWTO: Using magnets for back/chest: Gaskets: Belt Boxes: https://www.whitearmor.net/forum/topic/32973-tfa-functional-belt-boxes-build-tutorial/1 point
-
1 point
-
Many congrats, David. What lovely Christmas gift. :-) Sent from my iPhone using Tapatalk1 point
-
Hey David, welcome and thank you for your EIB application. Let's have a look at our final applicant of 2017. CRL and EIB Application Requirements: All submission photos have been posted and we have great news, your armor displays all the necessary elements to qualify for Expert Infantry. Congratulations! Other-Armor Fit/Assembly: In this section we review observations made by your fellow troopers and ourselves. Some observations may lead to suggestions to improve the overall look of your armor. We have a couple minor suggestions to mention here. Areas to work on to enhance the overall accuracy and look of your armor. Starting at the top and working our way down the right side tear stripes could be a little thicker, especially when compared to the left. Little extra paint should do the trick. Left side looks ok Reference photo While in the area it looks like a single tube stripe is trying to escape the fold. We're suggesting get this critter back in line with the rest. Reference photo Next up it looks like your back plate is overlapping your Kidney, it should rest on top of it. A simple strapping adjustment should do the trick. Reference photo Nice work on the Ab button details, we only have one suggestion here and that is there's to be no return edge on the Ab plates, specifically the vertical button plate. The edges should trimmed similar to the reference photo provided. Reference photo Next up the Thermal Detonator looks a bit long. Total overall length should be roughly 7-1/4"-1/2". We've provided a reference photo with the TD component specifications to help guide you. Reference photo Not related to the armor but worth mentioning is the scope details on your blaster. There should be less brass showing. Were suggesting you darken the circled area to match the blaster body. Reference photo Centurion Suggestions: Because Centurion photos show much more detail than EIB, items pertaining to Centurion might be seen there and not here. We try to point out all we can from what is seen but the final accuracy is the responsibility of the trooper. From what we can see, the only item that stands out is your drop box positioning. They should be aligned with the outer most edge of the ammo belt and just below it with little to no gap. Gluing the drop box strap to the cloth belt should help keep them in place. For level three certification (if applicable): Drop boxes are vertically aligned with the end of the ammo belt with minimal gap between belt and box. Reference photo That's it David, congratulations on a great build . We hope to see you next year at Centurion.1 point
-
Looking awesome Trooper!1 point
-
Great job! Easy pass with this build!1 point
-
I'd like to switch mine up to armor only. Thanks, Neil1 point
-
Next up, the forearms. I didn't get dinged on it for my submission, but according to the CRL " No return edge on the inside of the front of the forearm is allowed. " Here is where we started from. No bueno A touch with the belt sander, courtesy of Ryobi and... I also cleaned up the cover strips in a few places that I thought stuck out a bit too much. Also, you can't really tell, but I gave it a minor dip around the wrists so it wouldn't dig in so much either.1 point
-
Next up, TD screws. I had black screws before, but I needed pan head, slotted for Centurion "The TD screws are to be pan head and slotted." So lets make it happen. Here is what I started with. No bueno. Proper screws, courtesy of justjoseph Got them lead in, mostly so I had something to hold them while I sanded/painted 200 grit sandpaper to give the paint something to grip Coat of paint All screwed in. You can probably get away with using a plastic butter knife so you don't damage your paint job. All done!1 point
-
Looking good!1 point
-
Hey Sha Sha welcome back and thank you for your Centurion application. CRL and Centurion Application Requirements: All required submission photos are present. Thank you for making the suggested improvements mentioned during your EIB application. Andrew and I are pleased to say your armor displays all the elements as set out in the Centurion CRL. Congratulations and welcome to Centurion Sha Sha Other-Armor Fit/Assembly: We have nothing to add here. Beautiful work on your armor build and nice weathering work on that blaster Good to see another Centurion in our GGG ranks. Looking forward to trooping with you some day. Carry on trooper1 point
-
Did the BBB get put in a closet and forgotten?1 point
-
These builds will end up giving my nightmares. thanks alot.1 point
-
I have no idea how many times I’ve put this in my cart now... it just seems like something that will never happen.0 points