Leaderboard


Popular Content
Showing content with the highest reputation on 10/08/2017 in Posts
-
Visit went very well! Sent from my HTC U11 using Tapatalk4 points
-
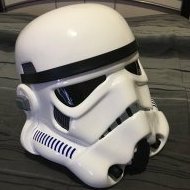
Oct 2017 Jim Tripon TK-82480 (aka jimmiroquai) has made substantial contributions to the Legion and FISD in particular by bringing to life the Rogue One Stormtrooper and The Last Jedi costumes as well. His creativity, energy, and dedication to stormtrooper costuming has earned him special recognition in service to the Legion community. In recognition, I am please to award Jim the FISD Achievement Medal. Well earned, and we as a costuming club are thankful to you and all you continue to do. With unquestioned loyalty, TK-8020 "Daetrin" FISD Founder | DL3 points
-
The first time I started working on a CRL was in December 2006, and FISD has usually been really good about getting CRLs going. We had a whole photoshop team in place back in the day to crank out all those images - it was a huge deal. But never have I seen 3 - yes 3 - CRLs go live in the same day. We are so very fortunate to have members around the world chip in and contribute their time, talents, and patience to helping get these through. Members of the Philippines Garrison in particular photographed a lot of parts and got them CRL ready which was a huge boost. I'm really stoked that after all this time, people can do their Rogue One builds in confidence knowing there is no longer a moving target. People who have already done an FOTK can see quickly what few parts/mods are needed to having a The Last Jedi TK ready to go with plenty of time to finish before the movie. Or, go full on TLJ Executioner. What a fantastic time to be a Legion stormtrooper, don't you think?3 points
-
Hiya, I’m not aware of a list, myself, but personally I ordered Tino’s (T-Jay) completion kit. It includes all of the main screws and parts to replace the resin ones. If you’re looking to source for yourself, I’d still recommend checking out Tino’s build and the E-11 reference thread. :-) Sent from my iPhone using Tapatalk2 points
-
Say nothing. If you have a TKTalkie let it look and do all that chatting. I’m invited to goto the local children’s hospital for Halloween treat give outs as a Stormtrooper. If you say anything keep it short and sweet Sent from my iPhone using Tapatalk Pro2 points
-
Pics just sent off to the GML. And now the fun begins!1 point
-
Hey Folks, I know were waiting (and waiting) for Anovos to ship our TFA suits - I was at New York Comic Con today at the Anovos booth and was asking about the ship date. The Anovos I was speaking with said he couldn't give me any concrete shipping dates (standard line they say) but he did say "FWIW the First Order kits are shipping sooner within the Fall 2017 window than toward the end." He also said its turned into a really slick kit and the delays are totally worth the wait. Take all that with a grain of salt (like I am) but I wanted to least share what I knew with all of you. It also corroborates Peregrinus said above.......1 point
-
No ignorance at all, Dan. All fine. The lens I am talking about is item #34 (reticle lens to install a crosshair into a hollowed scope) To get a clear reading of the engravings, they need to be magnified by the large lens in your scope. But this will only work, if the distance between crosshair and magnifying lens is correct. See red arrow in the second picture.1 point
-
Yummy gummy bears. ;-) (No worries - credit where credit’s due) :-) Sent from my iPhone using Tapatalk1 point
-
Thank you Dan for pointing Paul in my direction. He already contacted me and I will ship his completion set tomorrow...1 point
-
You may indeed be right. At least on the screen grabs they are all T21's, one with a black strap (no tan straps). The only place we see it is on the Hot Toys it seems. It's a great question for the Legion. We never see a single TI or AT-AT with a weapon, yet their CRLs have all kinds of blasters. What is the argument why they have them I wonder?1 point
-
Cool. Can’t wait to see your progress. :-) Dan :-) Sent from my iPhone using Tapatalk1 point
-
FISD E-11 BLASTER REFERENCE https://r.tapatalk.com/shareLink?share_fid=44557&share_tid=32111&url=https%3A%2F%2Fwww%2Ewhitearmor%2Enet%2Fforum%2Findex%2Ephp%3F%2Ftopic%2F32111-FISD-E-11-BLASTER-REFERENCE&share_type=thttps://r.tapatalk.com/shareLink?share_fid=44557&share_tid=32111&url=https%3A%2F%2Fwww%2Ewhitearmor%2Enet%2Fforum%2Findex%2Ephp%3F%2Ftopic%2F32111-FISD-E-11-BLASTER-REFERENCE&share_type=t1 point
-
Congratulations trooper and welcome to the EIB ranks1 point
-
Fantastic Frank, the transformation is amazing [emoji122][emoji122][emoji122][emoji3][emoji3][emoji3] Sent from my iPhone using Tapatalk1 point
-
I’ve no doubt you’ll nail this build. Your goal is very achievable. I’ll be here cheering you on [emoji106] Sent from my iPhone using Tapatalk Pro1 point
-
Traveling home today! Then hopefully it begins. Still have a day or two till my armor arrives so going to get as much done crafting on my ax as I can. Kind of setting a personal goal of being one of the first 10 people to be approved as an Executioner. I think I can do it once I have my armor in hand. Be prepared for so much progress coming soon! Can't wait.1 point
-
Hey Taylor thank you for your EIB application. Let's get cracking!! CRL and EIB Application Requirements: All the required submission photos and some are present. You armor displays all the necessary components as set out in the CRL for L2. Tony and myself would like to welcome you to the rank of Expert Infantry . Excellent job Other-Armor Fit/Assembly: In this section we review observations made by your fellow troopers and ourselves. Some observations may lead to suggestions to improve the overall look of your armor. If any suggestion affects any application, it will be listed separately in the above or below sections. We have a few minor areas to go over here so let's get to it. Two things with your Biceps. Maybe drop them down a touch to even out the black gaps between them and the other end of the fore arms . Secondly there is some extra material past the return edge that could be sanded off or trimmed away. Both only very minor adjustment. This one cis just an alignment or dressing issue, but your belt could be a little higher up in the middle so it is sitting on or over the bottom of the main button plate. Reference image As we look around to your back and kidney plates there is a considerable overlap of the two. Looks to be maybe an inch or so. These two plates should sit neatly on top of each other. There are two options to achieve this. 1. Drop the kidney plate or 2, and this is by far the most common approach, lift the back plate by trimming from the top section around the neck of the back plate. Better than trimming from the bottom of that piece as it allows the lower return edge to stay and have the parts butt up nicely. Screen shot One last thing for this section and not a deal breaker but a step closer to screen accuracy would be to trim some of the button plate edges back. The small button plate should sit within the raised section it's mounted upon as in the lower reference image. Reference image Centurion Suggestions: In this section we prepare you the best we can for Centurion. If there are any areas of concern that would effect a successful application this is where we discuss them. You have done a brilliant job of your armour and having the extra photos does make it easier for us to pinpoint certain correction. You only have two areas of concern and both very easy to remedy. Firstly, you will need to remove any and all of the return edge from the wrist ends of your forearms to meet the Lvl 3 CRL For level three certification (if applicable): No return edge on the inside of the front of the forearm is allowed. Reference Image Drop box alignment. The CRL states: For level three certification (if applicable): Drop boxes are vertically aligned with the end of the ammo belt with minimal gap between belt and box. This is an easy fix, if you glue the drop box straps to the waist cloth belt you shouldn't have any more issues with end alignment. Reference image That's it Taylor, you are done. Excellent application and a well deserved Expert infantry badge, Congratulations and see you in Centurion soon.1 point
-
Great job, looks awesome!! Lot's of goodies to give away! Soooo coool!1 point
-
This is exciting! Thanks for letting me contribute And to everyone else that worked so hard to get the developement rolling, you guys did outstanding! Actually, I can't believe how fast the FOTK Executioner CRL was put together1 point
-
Today I’ve been making the snaps to be fitted inside the arms and thighs First cut abs strips to hold the male snapper Drilled hole in centre Before snap fitted And after All done Then fitted the reinforcement to the ab and chest fir the brackets Then moved onto the drop boxes Measured where to drill the hole on the inner piece, one inch down and in the middle Fitted the elastic with the pop rivets Not too sure if they need a tad more trimming... what do you think? Thought it’s best to check before I glue And they are then fitted here Getting there bit by bit [emoji3] Sent from my iPhone using Tapatalk1 point
-
This all looks incredible! I hope you post a pic of him in full suit with boots and blaster now! I've been toying with the idea of doing something similar to a rubies. Maybe have to pull the trigger now! Great job! Sent from my SM-N920V using Tapatalk1 point
-
I bought a Rubies toy E-11 and while I was working on the shoes I decided to experiment with painting techniques on this thing. I went way overboard with the paint job on what is a kids toy but I had my reasons. I wanted it to look cool with his costume but I also wanted to test my painting/weathering on this toy because I have an E-22 being 3D printed for me which should arrive in about a week. I needed to work up my painting skills before the E-22 arrived. So, keep in mind some of what I did here was a bit of an experiment and some things worked while other ideas failed. In the end it came out pretty good though. Here's the blaster as purchased. Plastic in a nice white and orange color scheme...kinda like a push-pop. Tip: If you want a really nice finish, particularly a metallic finish on anything plastic, you need to really sand it down smooth. Most of this blaster is smooth but i should have sanded off the lettering and there are some bad areas on T-tracks that needed smoothing out. My original paint concept was as follows: Paint a metallic aluminum finish with a dark metal top coat and then use sand paper to wear thru that top coat for a weathered effect. Ultimately this technique didn't work well and I mostly abandoned it halfway thru the paint job. I ended up doing a lot of dry-brush weathering to get the effect. At the end, the product was a bit of distressing and dry-brushing. First I primed it black with Krylon primer. A couple good coats did the trick. It dries pretty fast but i let it sit overnight. I've taken to wearing a glove while I paint to avoid overspray on my hand. Next was to provide a base coat of metallic silver. I used this so that any distress marks would be really shiny. An aluminum paint wouldn't be as bright. I think a key step that I missed here would have been to apply a matte finish clear-coat over the black primer making it more durable and less likely to be damaged by the distressing. I painted everything except the grip which I believe on the sterlings was black plastic. Then I did some masking to paint the scope a brass color. I didn't have brass so I used gold figuring it would be close enough and not much of the color would be visible anyways. Now here's where things got complicated and a lot of experimenting occurred. I needed to figure out what paints and colors I would use for the top coats. I wanted a rich, multi-layered look simulating metals. I went to a hobby shop and picked up some metallic paints and I also swung buy an auto paint store to get a metal flake paint. Below are tests on some ABS scraps of (3) metallic paints to see the colors. I new I wanted a couple different tones on the blaster. Here are the paints I used. Some were Tamiya spray cans. One was a metallic paint. And when I really got crazy I used these ALCLAD metal paints which are amazing...and pricey. The pain I ended up using as the main base color was the auto paint. This was an enamel lacquer paint which was Graphite with metallic flakes. This stuff was really nasty and required the organic vapor respirator that I used with the contact cement. I thinned it a bit with medium reducer and sprayed it thru my airbrush. It took several coats to cover. Part of it was learning to airbrush again after 35 years. Here's what i looked like after that base coat. It had a nice metallic look to it but the metal flakes were a bit grainier than I'd hoped. So I used the Vallejo Gunmetal metallic to add some tone variety as it's a bit darker that the Graphite base coat. This paint isn't as bad as the auto paint but I still used the respirator. In this photo you can see that I've painted the back of the blaster with the Gun Metal color which is a lot darker. Here the whole thing has been coated except for the grip. Next I masked off to paint the grip. I used a Tamiya semi-gloss black that was left over from some other project. Now it was starting to look pretty good. Next step was to airbush a bit of Tamiya Smoke on to some areas to add more tone and start the weathering process. Basically I darkened the T-tracks and painted in dark areas in the crevices around the blaster. The paint jar is in the photo above. The photos below show the darkened areas. Next I started the distressing which was basically sandpaper scratching thru the various top coats to reveal the layer below. I used 400 grit but that seemed to chew all the way down to the white plastic. Could have been to low a grit or I didn't have the technique down. So I used 800 with various passes. I tried to knock down the finish at the corners and where regular hand holding would have naturally worn away the finish, also at moving parts. Many of the effects came out well. There was a lot of subtly now in the finish on various parts of the blaster. But I wasn't in any way successful replicating scratches that exposed the bare aluminum below. So I tried another paint experiment. I went out and got ALCLAD metallic paints which can create some amazing finishes. Again this was a bit of experimenting. I sanded down the folding stock area to be really smooth then primed it with the ALCLAD primer/filler. Then painted it with ALCLAD gloss black which is the recommended base coat for their metallic top coats. I then used ALCLAD Duraluminum to paint this area with some darker spots in Gun Metal. I was super happy with these ALCLAD paints. The finish on this area is much more realistic than the rest of the blaster. I'll be using ALCLAD on my E-22. I did a terrible job documenting the ALCLAD painting steps and weathering so I'll explain as best I can. The ALCLAD finish was great but needed to be distressed. I used a bit of sanding but then I decided to do dry-brushing to create most of the distressed/worn look on the folding stock. First I added dark grimy areas around the blaster with the Tamiya smoke color mixed with some matte black to darken it. I dry-brushed this into the grooves and joints all around the blaster. Then I dry-brushed Tamiya metallic silver spray paint to simulate scratches and heavily worn areas all over the blaster. This gave those nice bright and shiny pops around the piece. I also dry-brushed the gold color and the semi-gloss black over the scope to get the worn look. That part wasn't too succesful but I learned how not to do it I guess. Here's the final product. My Hyperfirm E-11 is in the background for reference. The photo below most accurately shows the color. It's not as black as my E-11 but I was trying for a more realistic metal look. Some of the other photos you'll see make it look much lighter or darker...all depends on the lighting. Well that's the end of the build. I hope you find it useful. On to the next project! For reference. Here are some of the reference photos i used when researching the finish.1 point
-
Prop maker at LFL must have shares in a torch company, seems everything gets a torch these days1 point
-
Hi Guys! Here's an update on the footware. I looked at lots of options from rain boots to kid sized chelsea style boots and decided to go the cheap route and make some shoes/boots myself. I took an old pair of shoes that are starting to get small for him and are really beat up. The idea was to form foam around them to sorta replicate real boots. I started off with a paper template. First step was to make the cover over the toes. This needed to be a separate piece from the back shoe cover so it can flex a bit when he takes a step. I made the paper patter, cut it out of 4mm foam which would be more flexible and less bulky than the 6mm. When cutting these foam pieces I always cut a bit bigger than needed and trimmed off material as I fitted it over the shoe. The back portion would have to wrap all the way around, meeting up with the front piece. And it would have to still allow access to velcro the shoe. Apply some contact cement, and a lot to the shoe as it soaks in the cement on the first application. I applied the back piece first. Now this was a good start but I didn't look right. Took me a few tries to determine the best option was to cut another piece and layer it over the ones that I had just glued down. This second piece would allow me to make a cover flap to hide the shoe velcro and allow me to add the side detail which is a design element on the real boots. Again, start off with a paper pattern and refine it as you go. Here I'm test fitting. Once I was happy with the general look I cut out the side area and glued in a scrap piece of white elastic. This was hot glued. Here's the back side. I glued all the edges too. Here's the piece contact cemented in place over the original pieces. Once this was set, I added a bit of detail around this white elastic by scoring some lines with my xacto to simulate a stitching pattern. Then I hit it with the heat gun to open up the score. I replicated the same for the left shoe. Back to the right shoe, I didn't make the elastic on this side as this was the original piece I had glued down...poor planning. So I just scored some lines to replicate the shape. I figure this is the inside of his foot so who's gonna notice anyways. Next I added some velcro to close the cover flap. Here they are ready for painting. I then used white Plasti-dip and finished them off with white Krylon Fusion spray paint. Nice and shiny. I also painted the edge of the sole black along with the toe tip. Here's the top flap, still allows access to the main shoe velcro. Nice and simple! That wraps up the costume. Next post I'll show how I transformed the Rubies toy E-11 from this. Into this.1 point
-
I thought I'd share some of my research as I look to create that vertical slit piece at the front end of the folding stock. Ducati has the housing for it described as a 'Front Pivot Bushi' in his pinned build thread entitled: Ducati's Build. Interesting to compare how different builders have gone to recreate this and that vertical piece of the folding stock. For a stock that doesn't unfold, like mine, I will see to mimic as closely as possible that vertical piece as shown in the FISD E-11 Blaster Reference.1 point
-
Hi everybody, Ah, the fun continues and quite happy about some results this latest go. In this latest round, I've cut out the latch on the inner rod of the folding stock and installed the latch itself. Hinge bolts also installed; folding stock now swivels and extends to the full back position. Although not pictured, it locks into place when pushed against the end cap, which was really exciting for me to see that functionality. I know I needed to be pretty picky about the screw used for making the latch piece. It was a screw with a width just over 4mm so there was minimal back and forth when placed through and against the vent hole notch. The screw was wood in type so that it will have maximum grab when screwed into the pencil. It's length was measured out carefully as well so that there's minimal gap between the folding stock and receiver tube. Here is a close-up of the latch cut-out. Haven't done much since the rough cut-out of it. I used my Dremel with Diamond Cutter to shorten the screw. Pliers were used to hold the screw during cutting; the screw gets really hot! 5mm black heat shrink tubing placed and heated with heat gun to shrink the tubing onto the bolt thread. Latch piece screwed into pencil. Seeing the latch piece installed was a moment of pride as I prepared a long way to get here. It is functional and able to slide up and down the inner rod =) I was initially pretty confused on how to use carriage bolts for this part of the installation. The folding stock hinges installed nice and flush, with a bit of tightness when swiveling the folding stock, which I like. Here are some pictures of the folding stock attached. Finally, I confirmed that my latch piece dimensions are correct as it is able to bring the folding stock fairly flush against the receiver tube with showing minimal gap. Thanks for reading!1 point
-
Before next newsletter. No way I'll get to it before end of month1 point
-
Another reason I cancelled my order of first order stormtrooper armor. Got it custom built and painted buy another vendor in a couple of months instead of a couple of years for a kit. Don't know what the deal is with an anovos, but they have major issues. Sent from my SM-G930P using Tapatalk1 point
-
What a fantastic idea! Man, wish I had thought of it back in the day - can you imagine having 1 photo from every troop, and then doing this? After a bunch of years, it will be even more impressive. What a great start!!1 point