Leaderboard


Popular Content
Showing content with the highest reputation on 08/04/2017 in all areas
-
So I've been doing a little trooping and contemplating a new costume build, maybe a scout. Not sure yet but in my ever expanding need to get more Star Wars references I just got the Star Wars Costumes book which has the major costumes from the OT. It's really an amazing book. I was stunned by the incredible detail, color and texture that all the costumes have. The movies really don't capture the quality of these pieces. It's also has a bit of history on the costume makers and variations over the three movies. Here are a few images for your viewing pleasure. Below is one of the Hero helmets from ANH. Here's the Luke torso from ANH. Here's the ESB storm trooper. Note the lack of exposed screws on the ears and the painted frown. Here's the ROTJ suit. Here are the ANH vs ROTJ helmets. ANH is on the left and Looks so much better than the others. And for you Rebels out there, some sweet pictures of various helmets. The detail and weathering is incredible. Finally here's a group shot from the Detroit Maker Faire last weekend. I'm the short guy in the back row to the left of the sandy....literally can only see part of my head. This was an awesome event. I went to this event last year and it's what inspired me to do my build. So glad to be part of this great community of people. Photo by Shawn M. Scott.3 points
-
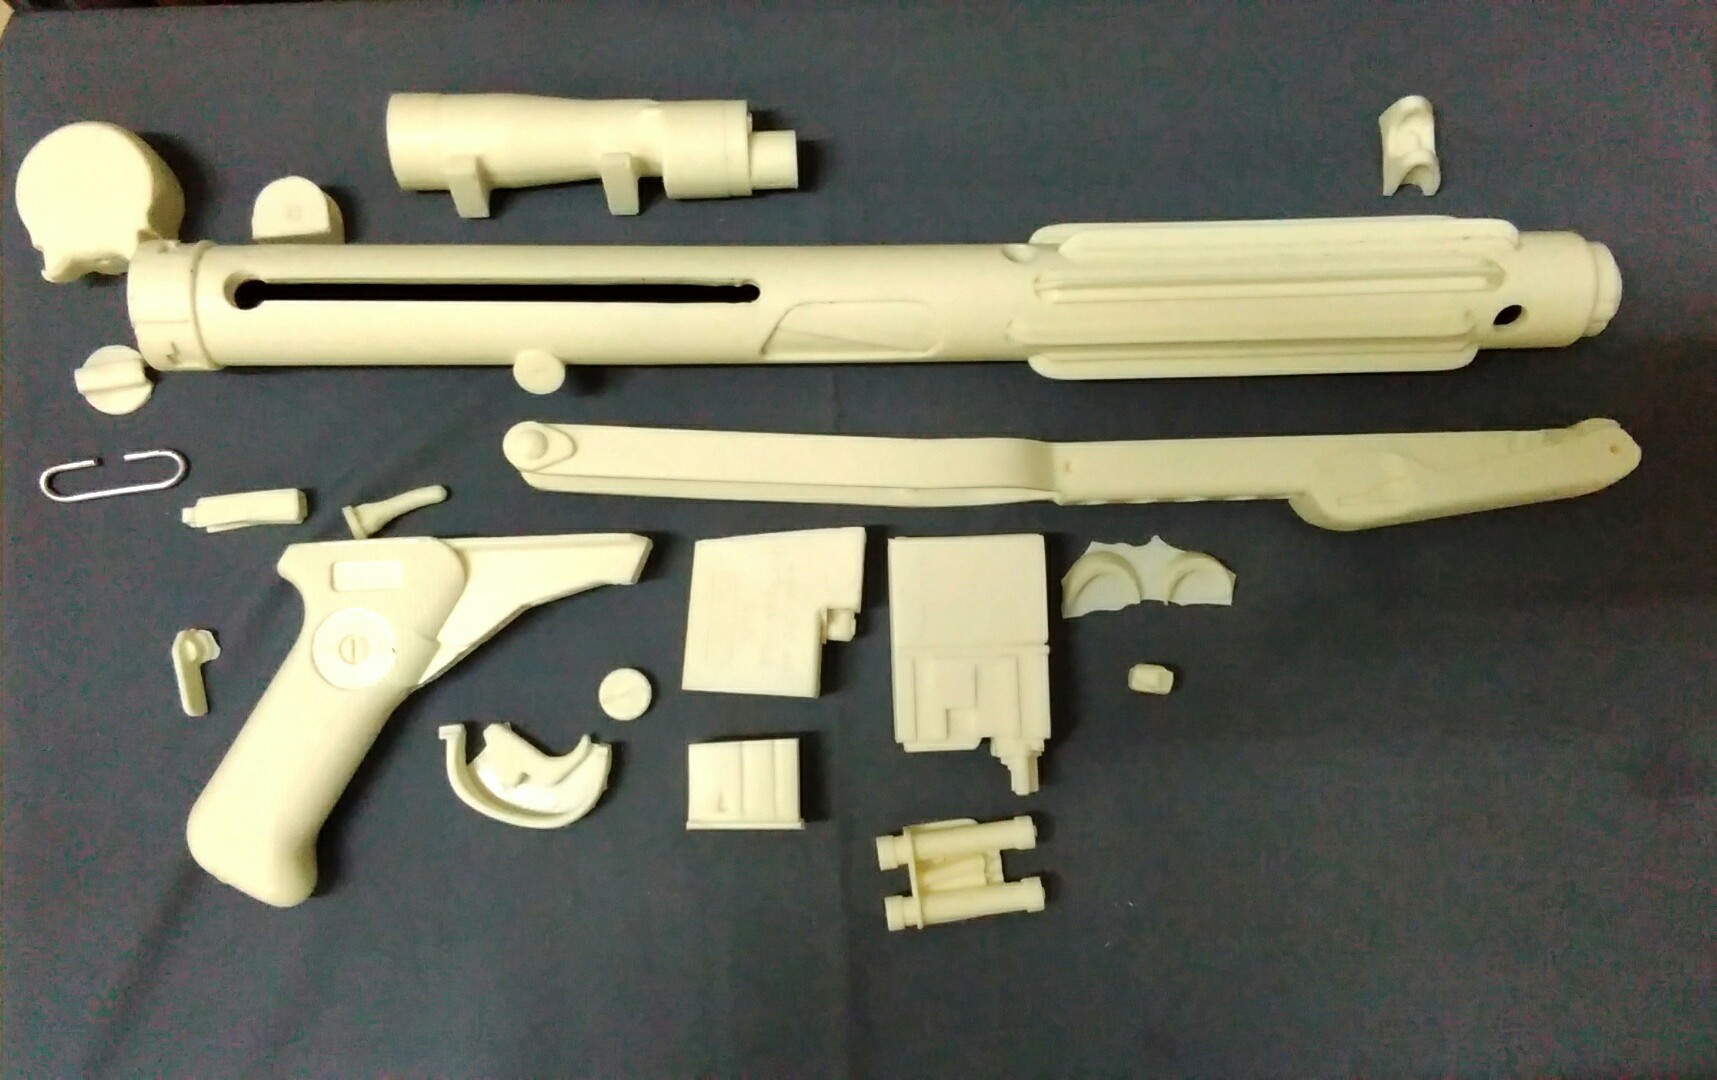
Last month, on early July, I decided to give Doopy Doos another chance. Reorder with them together with another Malaysia Garrison member. After a month waiting, I received the E-11 blaster kit.
 2 points
 -
First Order Stormtrooper Build Hello, FISD! I'm Taylor, a member of the Northeast Remnant here on the East Coast. When I was working on my first costume in the Fall of 2015, I spent a great deal of time here on these forums because of the helpful advice and great community. However, being that my first ensemble was a Sandtrooper and subsequent costumes haven't been TK's, I've never been a part of this Detachment directly. Well, it's time to change that up! In order to prepare for the upcoming release of Episode 8, I've decided on doing my first TK. First Order costumes seem to still be a bit less popular, so why not bolster the ranks! This thread will serve as a guide and a source for my own organization. It will be a lot of learning and discovery for myself along the way as the FO troopers are certainly no easy task, but I expect it to be a whole lot of fun. So let's dive on in! Contents 1) References/Resources 2) Parts List 2) Anovos Standard Line Helmet Helmet interior upgrade Additional helmet detail 3) SE-44c Blaster Pistol Assembly (part 1, part 2) Painting Final shots 4) Soft Goods Undersuit, gloves, neckseal Gaskets and boots 5) KB Props TFA TK Kit 6) Trimming Part I - arm components Part II - leg components Part III - torso components 7) Assembly Part I: Arm Components Biceps (part 1) Shoulder Bells Forearms Test fit / biceps (part 2) Part II: Leg Components Spats Thighs and shins Part III: Torso Components Abdomen/kidney (part 1) Back/yoke Abdomen (part 2) Part IV: Thermal Detonator Part V: Additional Details Detail cut-outs Thigh holster Left shin boxes 8) Preliminary Test Fit Completed assembly so far First test fit 9) Additional Details Abdomen/kidney magnetic closure Seam filling Greeblies: clips, forearm rails, and chest tabs Abdomen and posterior strapping cut-outs Thermal detonator panel clips Yoke sizing Shoulder brackets First Order TK Belt Belt box measurements Handplates (and a quick note on fitment) 10) Painting Sanding and surface prep Priming Gloss painting 11) Final Details Vinyl decals Gaffer's tape backing Belt finishing touches 12) Strapping Handplates Shins and spats Thighs and suspension belt Abdomen and shoulder bells Cod and posterior Gaskets and knee plates Chest-back-yoke connection Abdomen to belt snaps 13) Submission Photos 14) Final Tweaks1 point
-
Whoa! Looking good!1 point
-
1 point
-
I'm using IMGUR, no issues so far1 point
-
Yes a few names out there but nothing official I don't think. I'll be using the blue EL wire as same as I did on my baton Yes thank you I did notice, top isn't mounted as yet I left the top loose until I've worked out the blade attachments , also can just make out the slots of the magazine, seems to be a lever and another small section too. I believe from images I have seen that the blades are only offset so they will over lap each other once closed, more like this.1 point
-
I've since completed the weathering and put the lens in but I'm waiting on the blast shield decal from a friend before I post the final finished piece. I'm loving it so far!!!
 1 point
 -
Awesome work Q! Is it a Vibro Ax or a Force Ax ... we don't know yet! Get a whole lot of blue led wire between those blades and then you'll complete the look!1 point
-
Well do me a white ATAT driver this time. Lol1 point
-
M38 TANK TELESCOPE I have obsessed over the paint and weathering for this scope for more than a week! I used brass guilding wax as the first layer, sprayed satin black over, and used a cotton bud dipped in thinner to gently remove the black in areas where contact is likely, revealing the brass beneath. Here was my first attempt; My only references were photos I found online, but somehow I was never satisfied with the results. Fortunately, a buddy of mine recently acquired an actual scope and offered to loan it to me. Right way I noticed the brass color in the actual scope is less vibrant, so I ordered a bottle of AK Interactive pale brass online and got it the next day. In my second attempt, I scaled back on the weathering and focused more on the areas around the lenses. Here are a few side-by-side comparisons. Left one is the real scope. Here is the real telling sign between them and I can't figure out how to replicate the sharp letterings. Thoughts?1 point
-
Have no fear Robert! I've had my Anovos kit for over a year and I've had no problems at all with it, and I've taken it to Centurion level. There are also numerous other TK's in my squad with the armor that are happy with it as well. I also received the same bit of 'attitude' when I initially told people where I purchased my armor from, which happens more than it should unfortunately. I think you'll see troopers tend to prefer the armor they own, which makes sense. Another factor (and this is just my opinion) is that when this armor first came out, it was quite a bit cheaper than other makers and obviously that would annoy folks who paid more. It also opened the door to a lot more TK's joining the ranks. The vast majority of troopers are happy about this, but you'll always find a few that don't feel the same way. Anyway, don't worry about anyone giving you a hard time and good luck with your build!1 point
-
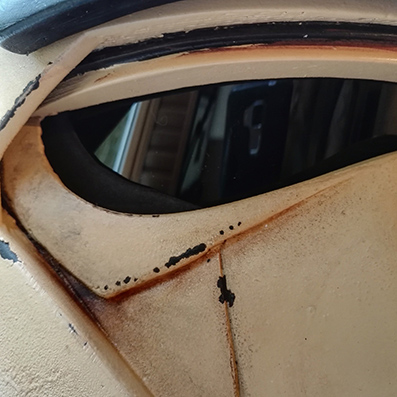
Hi all, Finally got around to finishing the outside of my lid. All I had left was to paint the ear screws and finish off the mic tips. As I'd seen others do, I used an AA battery as a size template: Marked around the battery, then carefully cut out a "circle". (As the mesh is flexible, cutting a circle isn't quite as easy as it sounds... lol ) Fitted the screw covers using a small dab of hot glue, then carefully applied them using a combination of a toothpick and a sticky fixer to lower the cover into the mic tip. Then carefully squeezed the mesh into the mic tip. The left one was a slightly tighter fit - as such, it looks like a closer weave than the right mic tip. I might change these later, possibly... Not much to say about the ear screws - used gloss white Humbrol. I also hear that my armour delivery is not too far away. I might be slightly excited about that!! :-)1 point
-
Found your thread when I was finishing up my bucket and you helped push me over the edge to hand paint the finishing touches. Thanks for a good painting thread.1 point
-
I had some cracks at several areas of my Anovos armor. I reinforced the area by laminating thin stripes of canvas with E6000 at these areas. That worked well so fare. Cheers Christian1 point
-
The white I think is just the gun stock and stand. Looks like the standard vest and the heavy gun to me.1 point
-
Hi, After talking with Brian he convinced me to set the lenses deeper into the scope and he hooked me up with some of the rings he's casted to complete the mod. I got the rings a couple days ago and went to work. First thing was to pull out the lenses which was easy since I had already left the sticking out a bit. Then I carved out more material on the inside of the scope to make room for the ring. Once I was happy with the test fit I made sure to blow out any remaining dust and debris from inside the scope and then painted the inside black. I also took my Dremel and cut off about 1/4" of the plastic lens housing as the whole thing would now have to fit deeper into the scope body. Here are the large and small rings from Brian. They are for the M19 scope. I gave them each a coat of gold (don't have brass color) and black paint. Here's the lens reinserted into the scope prior to installing the ring. Here's the final install of the large scope. No glue needed, it's friction fit and isn't going anywhere. The front small lens was essentially the same, just inserted the glass lens further down into the hole I'd already bored out and the fit the ring on top. I also wanted to add in real screws where practical. After a visit to the local hardware store I came away with the proper hex head screws although I used a shorter length than the real ones so I wouldn't have to drill too far into the resin. I started off with an inconspicuous spot at the bottom of the handle. Drilled out a hole using progressively larger bits until I got the right size. Then CA glued this screw into place. Next was to replace the molded screws at the muzzle. This was a little dicy and may not be worth the hassle as the originals looked pretty good. First shot is the original. Then started carving this piece out with a dremel bit. This was tricky not to accidently carve up the adjacent muzzle piece. Basically I carved away the original cast screw then drilled a hole for the new screw to be inserted. Here's the screw inserted. You can see the original screw on the right side of the muzzle for comparison. The problem with this mod is there's no good way to make a perfectly clean/sharp line when you cut out this material. Even with an Xacto it's still difficult to get rid of all the burs and tore up edges around where you cut/bore. Keep that in mind if you attempt this, in this case the screws look good but the area under the screw where I had to cut is a bit rough. I also bore out the muzzle hole a bit to make it deeper. Final mod on this is adding some cheese head screws to the front of the scope. Pretty simple once I got my hands on the screws. Just drill a small hole, route out the opening as needed to fit the screw head in so it's slightly recessed. These are friction fit and I did a thin wash of black paint over the heads. The last photo shows the finished end with screws and the small lens retainer ring in place. That's it. Only thing I may still tackle is the Hengstler counter but I haven't wrapped my head around how I'd remove it and then secure the new one in place. Hopefully some of you find this useful.1 point
-
I used the spray. Looks like it was meant to be there. TK-105961 point
-
Kman said it well. I highly recommend the cheesecloth. It gives the inside of the helmet a really cool "lined" look. When you apply it, make sure you have a lot of pieces pre-cut. Spread a layer of plasti-dip into the helmet. Work in sections. Don;t try to coat the whole inside at once. It will skin over before you get to it all. Anyway, Coat a section and lay the chesecloth into it. Dip your brush into the can of "dip" and DAB the brush onto the cheesecloth until it is all embedded. Don't brush it!!! The cloth will stick onto the brush bristles and pull out of the plasti dip. Once everything is done, you can speed up the drying time with a hair dryer on a low setting. Then one more coat and you are good!! http://www.whitearmor.net/forum/topic/28633-howto-ata-helmet-build-hand-painted-details-pic-heavy/ there are pic of my process here1 point
-
If you're going to reinforce with cheesecloth, you need to use the brush-on style, like Eddie shows above. If you're NOT going the cheesecloth route, the spray in plastidip works just fine, and delivers a lovely smooth finish. It's not thick enough to "hold" the cheesecloth, though. No particular surface prep is needed, beyond cleaning the surface thoroughly (I recommend rubbing alcohol so there is no residue). Light sanding/scuffing certainly wouldn't hurt, but plenty of people skip that and still get very good results. (I just cleaned with rubbing alcohol and called it good) Lots of pics of the spray process in my build thread, linked below.1 point
-
Update #26 - Hengstler counter The last thing attached to the rail is the Hengstler counter. This electromechanical device can be seen on some of the blasters in Episode 4. To get a different shade of black than on the scopes, I paint the counters in semi-gloss black before doing the weathering. In this specific build however, I wanted to go deeper into the details… During the last two years it got harder and harder to find cheap Hengstler counters. A good alternative are the conversion counters, a hybrid made from resin and a different counter with identical dimensions. From the ones I had in hand a year ago, the last and dirtiest was saved for this build. Since update #20, this thread covers the alterations from the prop-builders, which converted the Sterling SMG into the BlasTech E-11 for the Episode 4 movie. All additions are now complete and have been attached to Lucky#Eleven Time for a few daylight photos… Thanks for reading1 point
-
Holy crap! That's alot of wires! Sent from my iPhone 6 using Tapatalk1 point