Search the Community
Showing results for 'Geeky'.
-
 Name : Dave Galant 501st ID : 98695 FISD forum name : Helotech Garrison : Outer Rim Garrison, Canada Armor : SDS Helmet :SDS Blaster : SDS Height : 5' 10" + Weight : 180 lbs Boots : SDS Canvas Belt : Imperial Issue Hand Plates : Silicone, Joseph Neck Seal : Geeky Pink's Fantastic Gaskets Holster : SDS Audio system: TK Products EI Application Link: Front action Front Back Right Side Left Side Helmet Bonus Helmet Details Single Male snap, right side 6 Left Side rivets
 -
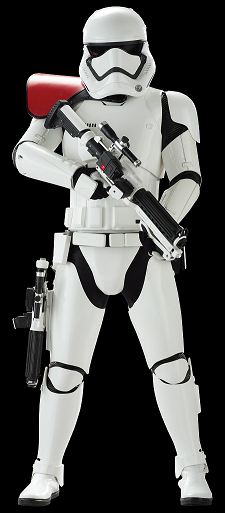
So last month I made a build thread in TLJ FOTK section about getting started on a TLJ FOTK. But I guess it was my bad to think I would get TLJ armor with my TLJ helmet. KB Props armor is TFA by default even if you get a TLJ helm, so that brings about a bit of issues when its time to go for EIB and Centurion. [IE: Cods are different, forearms are different, thermal detonator is different, and probably more I dont know about] Speaking of EIB, theres this #1000 EIB thing going on in the FISD announcements that I think I want to be a part of. So I've decided instead of TLJ to go full TFA to see if I can reach this milestone before the window closes. I'm pretty new to all this but from the previous thread I've already been through the whole BBB moment and got the ball rolling with trimming stuff. I've been scratched by abs, glued my fingers together, and got pinched by neodymium magnets. I've even been burned by CA glue already and almost lit a paper towel on fire! All the great noob stuff ya'll missed! Plan is to look something like this guy by the end of everything. Not gonna have the heavy F11-D at the moment, and I may or may not have the pauldron when I go for EIB cause the window is closing pretty fast, and theres a lot to do! Also 2 rifles? Overkill maybe? Should have an SE-44C holstered I feel like. Guy is packing some serious heat and doesnt even have the ammo vest! Anyways, I'm gonna do like my other thread and list off equipment I have thus far. I'll be editing this to reflect updates on what I have and what I need to get. Parts List: -Hard Bits- TFA Helmet: Anovos (Received) Armor: KB Props (Received) Pauldron: KB Props (Received) Holster: R2Dan (Inquired) Yoke Reinforcement: Ukswrath (Received) -Soft Bits- Belt: JAFO Belts of the First Order (Need to get a bit further in fitment before I commit to a size) Pouches: TrooperBay (Received) Gloves: Endor Finders (Received) Boots: Imperial Boots (Received) Undersuit: StormtrooperUndersuit (Received) Balaclava: UnderArmor HeatGear Tactical Balaclava (Received) Rubber Gaskets: Imperial Gaskets Cloth Gaskets: Sheev's Emporium (Received) Neck Seal: Sheev's Emporium (Received) Harness: Geeky Pink -Electronics- Helmet Cooling: Ukswrath Comm System: Ukswrath Chatter Loop: Ukswrath -Weapons- Z6 Riot Baton aka "Whappity Stick": Force FX Black Series Z6 Riot Baton Hasbro (Acquired) SE-44C Pistol: Arsenal Studio (Received) F11-D Blaster: Arsenal Studio (Ordered) Heavy F11-D Blaster: Branfuhr Studios -Armor Storage- Chest: Husky 37in Rolling Tool Box Utility Cart (Acquired) As I've said in the other thread, this my first stormtrooper and this be exciting times! I hope I can pull this off in time to make it to that special EIB, if not. Oh well, it'll be fun anyway!
-

Sea_Marshall: Captain Phasma TFA
Sea_Marshall replied to Sea_Marshall's topic in Captain Phasma Build Threads
Had a solid session today and made some great progress on a few things: My wife carried on with cape progress and I sanded until I developed a blister and filed my nails to the skin lol I removed the tape from the fiberglass resizing job and was pleasantly surprised. Not bad! I just took a dremel with cutting blade and sheered off the excess and sanded it down with some 80 grit. I couldn't tell if I was dressed for the grocery store of for working fiberglass... small victory following a three day fiberglass job. This was a learning experience for sure. Confidence boost x100 This is officially the largest bondo job I've done. I've only ever spot filled in the past, but this was a good learning experience as well. Bondo's got like... 5 minutes of work time once you add hardener? You can see the left thigh is super goopy where the right side is considerably better. I found that smaller batches of bondo application is preferable. I ended up wasting materials because it would harden on my plate. Pro tip for other first timers out there. Following the literal slap-dash application of bondo, I sprayed plasti-dip over the interior work and its as if the fix never happened. I made sure to layer the fiberglass to be close to the original thickness. Pleasantly surprised. You can kind of see where the checkered cut is. Not too shabby. The whole time I was just hoping this thing would work out. No going back. Some 80 grit sand paper took the excess bondo off and a 220 grit smoothed out the rest of the thighs. In the end I sanded both thighs down to 220 because I had the clear coat already on these (before I decided to resize, which I'm SO glad I did despite dreading the work). Then a fresh coat of filler primer went down and is drying over night. 1k and 2k wet sand tomorrow. (disregard the splotchy paint job. it's getting cleaned up in the next step) I superglued the abdomen boxes down a while back, but I found that stretching the corset around my body requires some flexing of the parts, so I worried the boxes would just pop off (because super glue is brittle) so I drilled screws into them and called it good. Unfortunately, I bought those screws for my belt boxes, so I'll have to get another set. Might plasti-dip the interior again to cover up the screws. Yay, and now, cape progress! Pockets and straps cut to size. My Mrs has made some notes on her cape build (her first one) and I will add those notes to this WIP once she's done. We're using the TLJ measurements (since TFA does not mention sizes, only location) and you can see those noted on the corresponding item. And then my Mrs. mentions she can't make any additional changes to the cape until she can see me in it, with armor and boots on. So... I did my first partial suit up! This is the most I've been in costume since I've started this build. The chest was scheduled to be re-sanded, and it was done following this image. There was some misting going on from the clear coat, so it doesn't look as nice in this image. (but them shoulders! mmm hmm) Also a back image of Phasma from Disneyland for reference. Also realized the abdomen area needed to shift over a bit, so it's unaligned. Ah well. There's some work to be done on the cape. The middle panel is going to be reduced by a few inches on each side to bring the seams closer to my back. To note: The CRL (level 2) states "the cape is three panels with seams on either side of the back plate." Well... there's seams on either side of the back plate... but every reference photo I've seen is closer to the backplate than mine is, so we're going to bring it in a bit more so the pockets line up. There's also some length issues going on but we didn't hem anything until this test fit. We've found that the Geeky Pink measurements weren't quite what I needed, but it was a great help and landed us in the ball park. The cape was remeasured and will be tailored to hit the marks in another session. (More seamstress notes to come!) Lastly, the red textile paint showed up. Huzzah. That's going to be a fun session when the time comes. I think tomorrow is just surface prep on helmet, chest, and thighs. Then Unicoat can go down. Again. If the gloss coat isn't beautiful, it'll be magnified by the chrome. Like many before me, I'm stumbling through this step and any failures results in a clean sanding to try again. Cheers to a new day. -
 Garrison: Ohio Garrison TKID: 84881 Name: Bryan Labaki Profile: https://www.501st.com/members/displaymemberdetails.php?userID=32854 Armor Maker: ATA Helmet Maker: ATA Blaster Maker: Doopydoos Pipe Kit Boot Maker: Imperial Boots Canvas Belt: Imperial Issue Hand Plates: Trooperbay rubber hand plates Neck Seal: Geeky Pinks Phantastic gaskets Holster: Trooper Bay The Armor: TD: Gloves, Boots, Neck Seal: Helmet: E-11:
 -
Sea_Marshall: Captain Phasma TFA
Sea_Marshall replied to Sea_Marshall's topic in Captain Phasma Build Threads
T&A was a one stop shop for a lot of the items in the kit, including rubber gaskets. I was referred Geeky Pink on Facebook for cloth gaskets but I'm going to give what I have a go before buying into other items. T&A's is a one size fits most. I used some CA glue on the ribs and bound them together. The arms were a good fit, but the knees are a tight fit. At this point, I'm not sure about the shoulders, I need to research how they're worn. I'll be adding a strip of nylon down the seam of the gasket to help secure the bond. It's pretty solid as is, but reinforcement isn't a bad idea. The knees, when wrapped, don't fit up my knee/thigh, even though tapered. So, I'm attaching a section of black elastic to help fill the 1.5 inches I need for a good fit -- this means the gasket won't be a complete wrap as far as the ribs are concerned, but elastic at the back will be out of sight and covered by the cape. If this proves to be a CRL issue, I'll hit up Geeky Pink for a set of gaskets since she will build them to size. The Liquitex gloss gel and black paint showed up. Red for the stripe will be end of week. Here's a test swatch with the gel alone and with black paint added, with D23 references to the cape. The gel goes on white and dries clear. Not a huge difference, even when light hits the gloss coat. I'm going to go with adding black paint because there are parts of the cape where it appears glops are on the finish. Having the black color should help achieve the glops. Thinking about the size of the cape, I hope this 16 oz tub of Liquitex will get me there. I didn't need to coat it too thick for this result. -
Sea_Marshall: Captain Phasma TFA
Sea_Marshall replied to Sea_Marshall's topic in Captain Phasma Build Threads
I've enlisted my wife to take care of the captains cape, because I can't cut a straight line or spool a bobbin. We're following Geeky Pink's pattern from the Phasma's Facebook builder's group. The measurements on the diagram are a bit confusing with the lengths. I suppose so long as the left side lands near my ankles, we're good. We ordered 7 yards of fabric, about 5 was used on these three cuts with enough to rework the longest panel in case we come up short. We'll be referring to the CRL Level 2 for the construction, pocket sizes, straps... and I picked up some plasti-dip to achieve the thin rubber-like medium. I should have a test swatch up soon with fabric, coating, and red stripe. -
Sea_Marshall: Captain Phasma TFA
Sea_Marshall replied to Sea_Marshall's topic in Captain Phasma Build Threads
woo. not much to look at here, but the 2k wet sand is done for most of the kit. Gauntlets, hands, and blaster will get the 800 and 2k treatment tomorrow. I'm glad I managed to get this done in small sessions instead of entire days, as originally planned. Each session has been 4-8 hours, so that's basically a full day... it really is a marathon. On another related item, the black canvas for the Captain's cape has arrived. Same stuff as Kylo's tunic and sleeves! I'm going with this Colonial Red for the stripe, painted on and decorative stitching to be added. My wife is a seamstress wizard so I'll be following her work on the cape and will do my best to document the process here as well. I found the patterns on the Phasma builders group on Facebook via Geeky Pink. Weehoo. Getting to the fun stuff. -
 Hello FISD team! For your consideration, here is my (hopefully) Centurion-ready ANH stunt TK! This armor has gone through a heck of a lot of changes, and I couldn't be more proud of how far I've come with it. Name: Ian Malinoski Forum Name: WodiQuix Legion ID: 22418 Armor Maker: RS Props Helmet Maker: RS Props Blaster Maker: DoopyDoos Boots Maker: ImperialBoots Canvas Belt Maker: Imperial Issue Hand Plate Type: White Latex Electronics: iComm and Aker Amp/microphone Neck Seal Maker: Geeky Pink Holster Maker: TrooperBay EIB Thread: Thank you again for your consideration! I'm looking forward to hearing from the experts.
 -
Started to list my parts collection in the first post. but I will also list it here. Parts: Armor - KB Props (May the 4th A-) Helmet - Anovos Standard (FA and TLJ) {also got a KB FA helmet, but I may sell it} Gaskets - Geeky Pink’s (Then perhaps rubber ones) Neckseal - Geeky Pinks or Anovos (have both) Belt - Belts of the First Order Belt Pouches - Trooperbay Gloves - Imperial Boots Boots - Imperial Boots Metal Holster - R2Dan (order request posted, no response at the moment) F-11D - Imperial Factory and Anovos F-11D guts - BlastFX SE-44C - Imperial Factory Voice Amp - TRamp
-
Ok I have been collecting bits for several years, this part from here, that part from there. (Details later) and yesterday, my biggest box finally arrived, my KB A- FOTK kit. The build can finally begin! (I’m sure there will be things I’m missing) Next, find time to sort and label things and continue researching others KB builds to get a better feel for how these kits go together. Parts: Armor - KB Props (May the 4th A-) Helmet - Anovos Standard (FA and TLJ) {also got a KB FA helmet, but I may sell it} Gaskets - Geeky Pink’s (Then perhaps rubber ones) Neckseal - Geeky Pinks or Anovos (have both) Belt - Belts of the First Order Belt Pouches - Trooperbay Gloves - Imperial Boots Boots - Imperial Boots Metal Holster - R2Dan (order request posted, no response at the moment) F-11D - Imperial Factory printed 5th Horseman and Anovos F-11D guts - BlastFX (in the T5H at some point) SE-44C - Imperial Factory printed 5th Horseman Voice Amp - TRamp
-
 Mandatory Information Name = MisterTK ID = 42185Garrison/Squad = The Outer Rim GarrisonForum Name = Mr Fahrenheit Armor = Authentic Props Helmet = Authentic Props Blaster= 3D printed EIB submission link Optional Height = 5' 11" Weight = 205 lbs Boots = Imperial Boots Canvas belt = AP Hand Plates = Silicone AP Neck Seal = Geeky Pink Holster = AP Armour Photos Full Body Front - hand guards aren't a yellow-ish tint anymore. Right bicep was lowered so the forearms line up better. Full Body Back - filled in the gaps at the bottom of my thighs. Full Right - Dropboxes are lined up with edge of the belt Full Left Abdomen Detail - updated button paint. Removed a bunch so it's not touching the ab plate itself. Cod and Butt Plate Attachment Interior Strapping Helmet Detail Photos Front Sides Back Hovi tip detail Lens Colour - Though it's not as vibrant as the ones from Trooperbay, I used this one from amazon. It's darker, but green. Rubber S-trim Ammo belt Holster Attachment (front and back) Neckseal Blaster left side Blaster right side Blaster back (ring) Thermal detonator (all sides) Boots Ammo Rivet Sniper Knee (all sides) Gloves Shoulder Straps Chest Attachment Shoulder Straps Floating in Back and Elastic Attachment Forearms - shaved down the return edge Thanks all! Fingers crossed!
 -
Welcome to the FISD and congrats on the purchase! Where are you in Western Canada? If you are in Alberta, Sask, Manitoba, NWT, or Yukon - be sure to reach out to the Badlands Garrison. BC is the Outer Rim Garrison. Look up Geeky Pink's Phantastic Gaskets for a neck seal - she is located in western Canada (AB) and makes great stuff.
-
After pining over this character for nearly five years, I have finally committed to building my own set of armor. This will be my very first armored costume, so I’m quite nervous about it. Depending on who is measuring me, I am about 6’ tall (give or take an inch), so the prospect of portraying a tall character like Captain Phasma is something I am really looking forward to doing. I chose to do The Last Jedi version simply because I like the bright chrome look over the weathered version. Pieces of my costume: Helmet: Shawn Thorsson (first run, 2015) Armor Kit: KB Props (on order) Boots: Dr. Martens Flora Chelsea Boots Neck Seal: Geeky Pink’s Fabric Gaskets: Geeky Pink’s Rubber Gaskets (for EIB): ??? Belt: ??? Undersuit: ??? Cape: Sewn by me I’m still in the early stages of building this costume, so my first steps are to prepare the helmet, order everything else I need, and start on my cape. I do plan to eventually submit it for EIB status, so I am not cutting any corners along the way. This is going to be fun, I think. Terrifying, but fun.
-
Hi all! So I've been researching a bunch on TK neck seals and per Joseph's thread, I was able to see all the vetted vendors of neck seals. I wanted to do research on all of the seals before I buy one. Darman's and Geeky Pink have many glowing reviews but I haven't been able to find a ton of info on Trooperbay's neck seal. I assume they are good because they are on the vetted vendor's list but I figured I'd ask around here. What do you guys think? Thanks! Luke
-
I give permission for FISD to repost my photos on social media in an appropriate fashion. Troop # 1 Date: November 30, 2019 Location: Glendale, Arizona - Gila River Arena Event: Arizona Coyotes Star Wars Night This was a very exciting first troop to take part in! The Arizona Coyotes hosted a "Star Wars" night and invited the 501st Legion along with the Rebel Legion, Mandalorain Mercs, The Dark Empire, and Syndicate Saber AZ to greet and interact with the fans before the beginning of the game. All packed up ready for my first troop! Awaiting orders from Darth Vader. Lord Vader was not happy seeing San Jose Sharks fans out and about. They were detained immediately. Patrolling the plaza. Photo Credit: Any photo with "My Geeky Galley" watermark in my troop log belongs to Ray Mora Jr., My Geeky Gallery
-
 This is an All-In-One compilation of various resources for ANH Stunt Stormtrooper builds which will hopefully be helpful to prospective troopers as you get started and begin your research. Many TKs over many years have spent countless hours documenting their tips, tutorials, and builds, and this index includes posts and links which have been helpful on my own journey to the 501st. Printable PDF documents are included with select posts. This index will be updated as additional resources are created and identified by troopers helping troopers. 501st Legion Links: 501st Legion - Member Application 501st Legion - Available IDs 501st Legion - Garrison/Outpost World Map TK ANH Stunt CRL FISD Forums Getting Started - Read This First ANH (Stunt & Hero) Forum Tutotials, Tips, and How-Tos Vader's Valkyries (women of armour) [NEW ADDITION] Getting Started Forum Pinned Threads (selection) Various Types of Armor by Daetrin Common FISD Acronyms & Glossary by justjoseph63 Steps to Join the Legion by Dark CMF Cost of a Stormtrooper by Dday Imperial Attaché List by Pretzel [NEW ADDITION] Supply Lists OT TK Supply List by justjoseph63 (Print PDF) List of Soft Parts by justjoseph63 Build Tips and Resources Quick Reference Guide OT TKs by justjoseph63 (Print PDF) Armor Party 101 by justjoseph63 Return Edges 101 by justjoseph63 (Print PDF) Paint Color Guide by themaninthesuitcase Billgrams One Stop Shop (some diagrams may be outdated) Things/tips you wished you had on your build by DTKC and others [NEW ADDITION] Magnets 101 by justjoseph63 (Print PDF) Butt-joining Armor by ZacMuleer Sanding Before Gluing by Shinyarmour1 Make Heat Gun Return Edges by pandatrooper Making ABS Paste by kman (Print PDF) Resize Armor with ABS Scaps & Paste by Harbinger (Print PDF) Armor for Bigger Troopers by ELP Altering Armor for Shorter Troopers: See Cricket's builds (WTF, RS Props) ATA Armor Sizing by Thrawndike bar Armor Fitment for Skinny OTTKs by Morgi [NEW ADDITION] V-Tabs for Kidney & Butt by gmrhodes13, Cricket's implementation, Colin's implementation Kidney Plate Shimming by Bullseye Fix Back Plate Kidney Overlap by A.J. Hamler (also in his build thread) Reinforcing Super Strong Shoulder Bridges by A.J. Hamler (Print PDF) Arm Armor Assembly by pandatrooper [ARCHIVED] Forearm Alignment and Shoulder Bells by CableGuy Thighs Assembly by pandatrooper [ARCHIVED] Thigh Trimming by Cgarduc Fill Thigh Ridge Gaps with Sugru by justjoseph63 Angled Mobility Cuts Behind Knees by ABS80 Attaching Flexible Hand Guards by justjoseph63 (Print PDF) Tips for Using E-6000 by jeebus68 and others E-6000 Safety Precautions (PPE) by cm325i Cover Strips threads: gazmosis, I'm Batman, sith_241, & Falciform13 ANH & ESB Cover Strip lengths and Ends by CableGuy Scribe technique for Cover Strips by chiefbonan Bending the ABS Belt by gazmosis, Boba_Skywalker3 Attaching Belt to Abs by GnrlGrievous Holster Placement on Belt by CableGuy Current (2021) Holster Placement by gmrhodes13 (follow-up to previous thread above) Belt Assembly by ukswrath Removable Holster with Snaps by Harbinger Belt, Holster, & Drop Boxes video tutorial by RWA (youtube) Combat a Fraying Canvas Belt by CallMeMrTibbles Thigh Ammo Pack Positioning by CableGuy Armor Thickness: 1.5mm, 2mm, Capped by Jakebullet Shoe/Boot Stretchers by justjoseph63, OneStrangeCyka GO TO Resources by ukswrath Strapping Systems Rivet Setting 101 by justjoseph63 (Print PDF) Snap Setting 101 by justjoseph63 (Print PDF) Snap Setting Hardware Solutions by TheRascalKing E6000 and Snaps Discussion by Harbinger, Snap Options by ukswrath Snaps with Rivet Heads by TheSwede Split Rivet Placement by DroidHunter How to Use a Rivet Tool by huttman How to Make Snap Plates by stukatrooper Elastic ABS Reinforcement by Cricket Magnetic Shin Closures by Cricket (Print PDF) Magnetic Shin Closures (supplement) by Zugor Alternate Magnetic Shin Closures by OddViking327 Types of Inner Strapping by Shinyarmour1 Internal Strapping by justjoseph63, nrgband RascalSnaps by TheRascalKing Thigh Garter System by Pencap510 Making Thigh Garters by Spectre Bicep Hooks by Pyrates and Brent Shin stabilization by Cricket and themaninthesuitcase Helmet Assembly ATA ABS Helmet Assembly by pandatrooper (Print PDF) ATA Stunt Helmet Assembly by Ales (Print PDF) ATA Helmet Build by maxsteele ANH TE2 Helmet Build by TK-4510 Helmet Ear Tutorial by gazmosis (Print PDF) Draw No Gap Ear Line by bpoodoo (Print PDF) Ear Trimming Foil Hack by trooper96 Choose Your Brow Height by CableGuy (Print PDF) Helmet Alignment by CableGuy (Print PDF) Template Painting 101 by justjoseph63 (Print PDF) Tube Stripes by CableGuy (Print PDF) Vocoder Paint Examples by CableGuy (Print PDF) Helmet Painting Tips by CableGuy Replicate the Screen-Used Look by CableGuy Hovi Tip Found Part Groundbreaking Discovery! by Dan_O and Sly11 Helmet/Bucket/Lid Interior Attach Lenses Using Sugru by justjoseph63 (Print PDF) Mounting Lenses by Solcar23 Helmet Padding by Boba_Skywalker3 Hard Hat vs Foam Helmet Liner by han_solo1 Interior Painting #1 and #2 Post by Staffa359 Truck bed-liner vs plasti-dip by TheRascalKing Helmet Fan Placement by RLH2515 What's in Your Bucket by Ragtooth Helmet Interior Build by kamikaze Helmet Internals Purchase Options by JZYL Clean frown mesh install by Toothdoc & others TrooperTalk iOS App by BrinkHouse Voice Changer Suggestions by nick007 Voice Amp System by JFarwell iComm + Aker Volume by kaa1304 iComm Help by endy iComm 3D Box Holder by Garbz Modding an iComm with External Battery by Sly11 Video Tutorials (youtube) RS Prop Masters' series Pandatrooper's series TK-4510 (Trooperbay) Password to access scruffynerfherder CableGuy's build video series Armor Building with TK1636 (forum post here) RWA's Youtube Channel How to put on Stormtrooper Armor (dressing tips) by CableGuy Stormtrooper Series by Nairy [NEW ADDITION] Photo References FISD Gallery LFL Archive Photos: Part #1, Part #2 538 HD Screen Grabs by dashrazor (2010) 1059 frames of TKs in ANH by Jeklynhyde (2020) Armor Cleaning, Sanding, & Shining Wetsanding and Polishing by Ensi (Print PDF) Best Way to Clean Armor by Daetrin Novus Plastic Polish by Darth Aloha Armor Yellowing Yellowing Preventative Measures by Brandon Make Aged ABS White Again by dashrazor Reversing UV Damage on TK ABS (external) Trooperbay Whitening Gel (external) Password to access scruffynerfherder Additional Yellowing Discussion and Resources Combat holster staining thigh armor: suttontech post & Daetrin post Image Posting Photography Tips for Posting by CableGuy Posting Imgur Photos 101 by justjoseph63 Post images on Imgur by Ensi E-11 Blaster FISD E-11 Blaster Reference (Print PDF by Blaster Team) Rubber Blasters: Hyperfirm vs. Praetorian by kman Rubber Blasters: Hellhounds (vs. Hyperfirm & Praetorian) by MaskedVengeance Another Hellhounds Props E-11 variant review by Toothdoc Hellhounds Props E-11 Review/Experience by KaiserintheHood Completion Sets for E-11 Resin Kits by T-Jay Sterling SMG & E-11 3D Print Files by trooper96 [NEW RELEVANT POSTS] Full Aluminum Parts Kit by fieldmarshall Previously Unknown E-11 Prop Detail by Joe and gmrhodes13 TroopaCoola JMC E-11 Build by CableGuy Sterling Sub-Machine Gun Diagrams / Handbook / Images by gmrhodes13 Sterling Main Spring Forming Tool by trooper96 E-11 Suppliers 2021 by gmrhodes13 How to Smooth Out a 3D Printed E-11 by justjoseph63 Gun Rack for Blasters by T-Jay ANH E-11: Sterling vs Bapty Differences by justjoseph63 Scope / Hengstler Decals by gmrhodes13 The Leia Leveller - A Mr. No-Stripes E11 Recreation by revlimiter Armor Storage/Transport TK Storage Bin by Garrett803 Husky Cog Wheel Covers by GoofTrooper Add Shelves to Husky Bin by TK21999 Husky Bin Modification by VancouverTrooper Customizing your Transport Cases by OddViking327 FISD and Stormtrooper Supplemental Posts Armor Tree History by Locitus ATA Armor History by c6dy A Sad Day for FISD by Sly11 FISD User Ranks & Awards by Harbinger Your First Troop Tips by justjoseph63 Emergency Trooping Kit by justjoseph63 Tips for Hot Weather Trooping by justjoseph63 [NEW ADDITION] Talk Like a Stormtrooper by Thrawndike bar Christine's PVC Mannequin by Cricket Adjustable PVC Mannequin by TK4205 Terry's Duct Tape Mannequin by pandatrooper Trading Card Holster by swagger What does your TK ID Represent? by gmrhodes13 How did you choose your TK ID? by humperdingle Story Behind Your Nickname by Snaps Re-Introductions by CableGuy Differences Between OT TKs (Post #1) & (Post #2) by sharkbait Rogue One TK vs OT TK by 11b30b4 Joseph's TK Mancave by justjoseph63 Help Fix FISD Dead Links & Photos by Sly11 Using a Torch/Flashlight to Find Armor Cracks by CallMeMrTibbles FISD Memes by Morgi Recasting What is recasting and when is it bad? by Sonnenschein TM Troopermaster recast CFO by sskunky ANH Stunt Build Threads (WIPs) ukswrath (Tony) - ANOVOS (Print PDF by harris.adp) Harbinger (Brien) - ANOVOS kman (Kalani) - ANOVOS Uxorious (Fredrik) - ANOVOS Rat (Jim) - ANOVOS Blast 'Em! (Shane) - ANOVOS unfinished ukswrath (Tony) - AM 1.0 pandatrooper (Terry) - AM LTM (Lou) - AM A.J. Hamler (A.J.) - AM (Print PDF by MV) OddViking327 (Colin) - AM 4.5 AsBlondeAsLuke (Diana) - RS Props tsongololo (Jennifer) - RS Props DudeSidious (Wayne) - RS Props unfinished Cricket (Christine) - WTF, RS Props, RS #2 (Mr.) shashachu (Sha Sha) - WTF StrmTRPR85 (Jeff) - WTF LadyInWhite - AP (google doc) Pyrates (Aaron) - AP wook1138 (Greg) - AP zv288bot (Jorge) - AP Scimitar (Eric) - AP Bud Spaklur (Matt) - AP MechaPumpkin (Danny) - AP SpiceCredits (Rick) - AP batmanmike (Mike) - AP unfinished Shinyarmour1 (C) - AP unfinished (photography) rwmead10 (Ryan) - AP unfinished MightyAtom (Mark) - AP Sly11 (Andrew) - AP Dark CMF (Tim) - TR-Mod LEGOeatPokemon (Jonas) - SDS dereferenced (Brian) - T/MC unfinished Redforce (Anthony) - NE maxsteele (Ron) - NE CableGuy (Dan) - RWA CTID (Mark) - RWA NOTE: Many of the Pre-Approval, EIB, and Centurion request threads below are for ATA armor, as that is my armor type. Threads from other makers are included for their valuable content ATA Build Threads (WIPs) ukswrath (Tony) - rebuild Ensi (Daniel) DStep (D'Angelo) echo327 (Erick) StarTrooper (Jayke) TheLorelei (Lorelei) Bazz (Adi) Quixotic5891 (Antonio) RampantLion (Leo) REAPERofDAISYS (John) Zarlon (Kyle) gmrhodes13 (Glen) wingnut65 (Jeff) pandatrooper (Terry) - MEPD TD FIVE (Noel) - MEPD TD Flykiller (Jerome) - thigh question timecyspace (Clay) - unfinished MaskedVengeance (Caleb) - unfinished (Print PDF) Pre-Approval Requests Actionsdower (Jim) - RS iEmpire916 (William) - AP husky68 (Robert) - AP TKModder421 (Greg) - ANOVOS Jared (Jared) - ATA REN2100 (Ryan) - ATA Hotel (Jim) - ATA MissingNo (Peter) - ATA echo327 (Erick) - ATA 31-9 (Jayson) - ATA unfinished snipedoc2001 (Cody) - ATA Swarzo (Cory) - ATA unfinished Cesarisamisfit (Cesar) - ATA unfinished EI & Centurion Informational Threads Advanced Tactics: EIB and Centurion by justjoseph63 ANH Stunt EI Visual Checklist by Sly11 and Wingnut65 ANH Stunt EI Photo Submission Guidelines by justjoseph63 (PDF by Sly11) Multiple EIB Award Recipients by gmrhodes13 Expert Infantry Honor Gallery by gmrhodes13 ANH Stunt Centurion Visual Checklist by Sly11 and Wingnut65 ANH Stunt Centurion Photo Submission Guidelines by justjoseph63 (PDF by Sly11) EI Requests TKittell (Robert) - 100 AM Dargas (Richard) - 163 ATA gmrhodes13 (Glen) - 291 ATA Boba_Skywalker3 (Dominic) - 310 ATA TK6682 (Michael) - 337 RS Props Warwitch (Gabriel) - 340 TE2 EnemyZero (Tom) - 355 ATA ukswrath (Tony) - 435 ATA sylverbard (Mark) - 456 ATA YESSRAM (Yessid) - 465 ATA CrookKnight (Shawn) - 638 AP Cricket (Christine) - 700 RS Props TheRascalKing (Justin) - 807 ANOVOS Wargasm (Joshua) - 810 ATA lucnak (Luc) - 815 ATA Jared (Jared) - 841 ATA TK 71627 (Jose) - 850 WTF REAPERofDAISYS (John) - 944 ATA echo327 (Erick) - 948 ATA equuspolo (Ardeshir) - YR2019 ANOVOS Ruffalo - 949 RS Props husky68 (Robert) - 953 AP revlimiter (Adam) - 1037 AP benthemonkey (Ben) - 1044 RS Props Starkiller (Marek) - 1047 Anovos Nairy (Jonatan) - 1051 RS Props (also Hero) Doggydoc (Gerald) - 1052 AP MaskedVengeance (Caleb) - 1055 ATA Centurion Requests gazmosis (Steve) - 32 ATA Solcar23 (Carlos) - 52 ATA JEDISTAR (Charlie) - 60 ATA niugnep (David) - 76 AP piklz36 (David) - 86 ATA Jancelot (Chris) - 92 AP Techne (Chris) - 108 ATA RampantLion (Leonard) - 115 ATA Vader's Wingman (Jason) - 123 ATA ukswrath (Tony) - 144 ATA DarkOrder66 (Christopher) - 160 ATA YESSRAM (Yessid) - 165 ATA justjoseph63 (Joseph) - 167 AM2.0/ATA Squimspickle (Aaron) - 213 ATA Cricket (Christine) - 316 RS Props Daetrin (Paul) - 326 TM Soulart (Teresa) - 335 AP jamihal (Jim) - 344 ATA Ruthar (Taylor) - 354 ATA TheRascalKing (Justin) - 396 ANOVOS menschie (Colin) - 404 ATA Scimitar (Eric) - 425 AP (photography) Bazz (Adi) - 436 ATA MissionTrooper (Andrew) - 454 AP Ruffalo - 457 RS Props OddViking327 (Colin) - 485 AM MightyAtom (Mark) - 488 AP (photography) revlimiter (Adam) - 508 AP MaskedVengeance (Caleb) - 522 ATA Purchase Options (my build) Armor and helmet: Affordable Trooper Armor (ATA) Undersuit: Trooperbay One-Piece Double-Zipper (courtesy of a GA Garrison mate) Password to access scruffynerfherder Boots: Imperial Boots 421 (NAME CHANGE: KeepTrooping) Gloves: See hand guards below. (mine) Hand Guards: justjoseph63's kit Strapping: TheRascalKing's kit Holster: Darman's 8oz leather (tan straps) Neck Seal: Darman's Premium (zipper) Belt: TKitell's Imperial Issue TD Hooks: ukswrath's kit Mounting Hardware: justjoseph63's kit Hovi Tip Screen/Mesh: ukswrath's kit Helmet Fans: ukswrath's Cooling Kits by ukswrath (Etsy) Voice Mod/Amp: iComm + Aker amp Blaster: Hellhounds Props E-11 Alternative Accessory Options: TrooperTronix Helmet Fans Henry's Helmet Fans DIY Neck Seal by BrinkHouse Making a TK Neck Seal by Doggydoc Geeky Pink's Neck Seals Making a TK Neck Seal by Doggydoc [NEW ADDITION] Also see Joseph's Soft Parts List above Other External Resources Ukswrath's Website Less Intimidating Build by imperialbrewer TK41973 Blog Tony Barnett TK300 Website (snaps) | FISD wordmark used with Command Staff permission |
- 31 replies
-
- 26
-

-
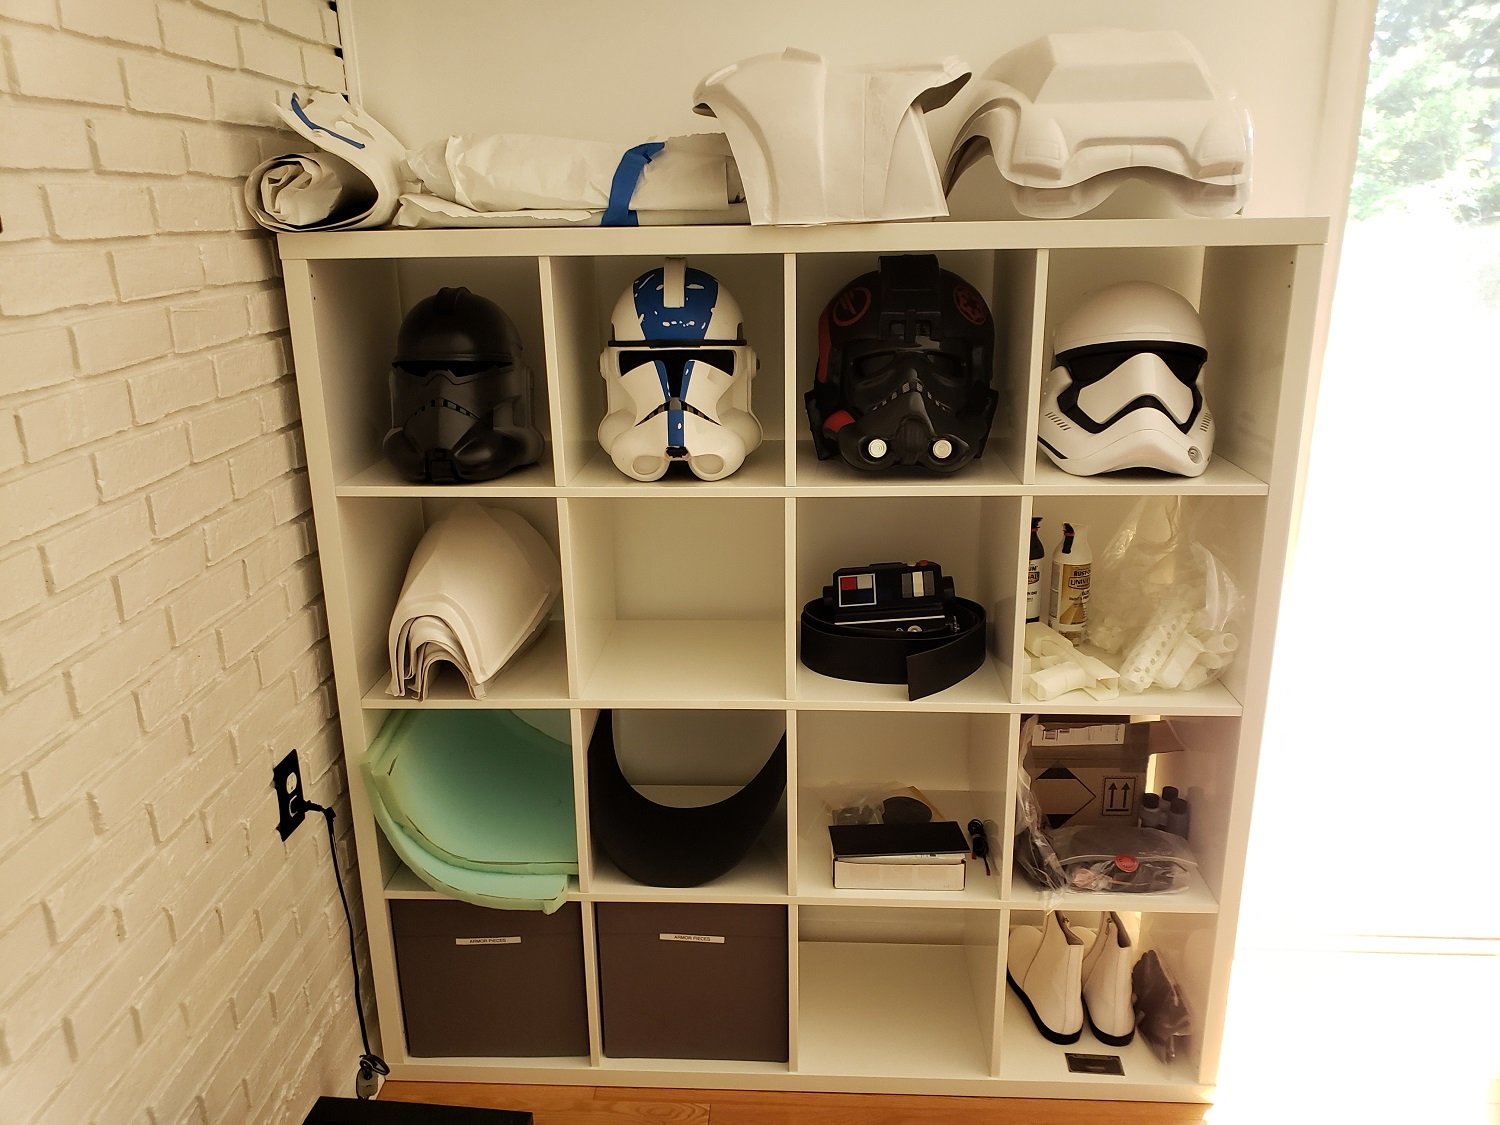
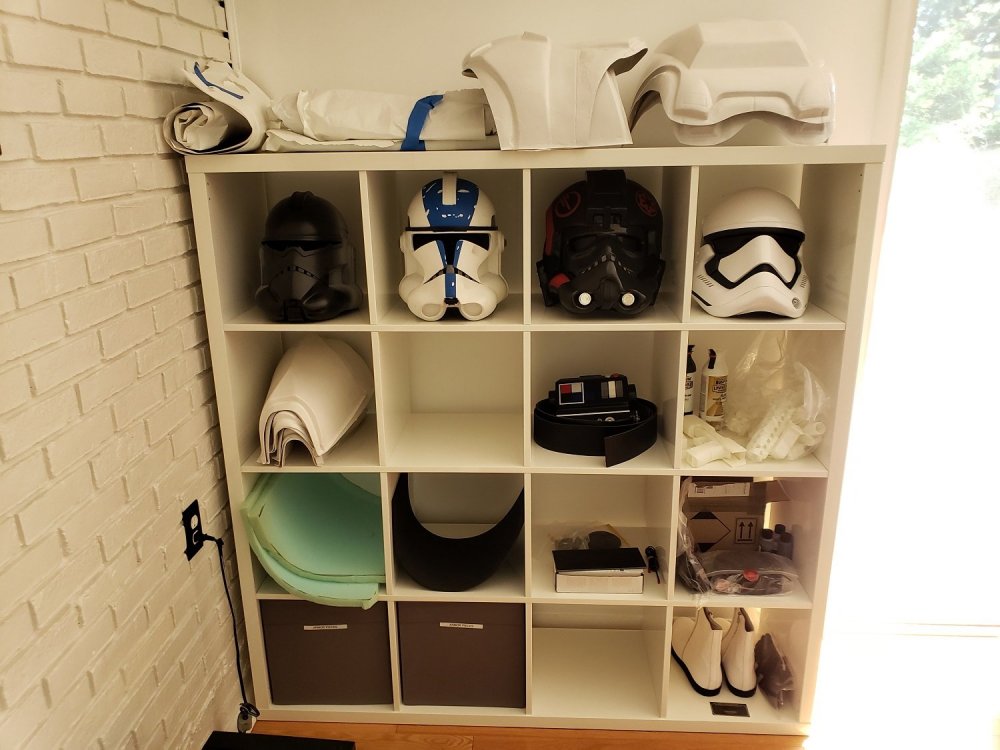
Feel like forever since I made my introduction post, but I'm finally starting my very own build thread! Been waiting for my KB armor to arrive since October and it's finally on the way, hurray! As I've done an ANH TIE Pilot and Inferno Squad build so far, this'll be my first "full armor" build. My goal is to go for Centurion level, so... that'll be fun. Pretty much have all of the accessory bits ready to roll, now just need the armor. Luckily enough my squad is doing an armor party next weekend so I am hoping to make some good progress on it there. I'm planning to document the build in detail, but we'll see how well I remember to do that as I go Parts: Armor - KB Props Helmet - Anovos Gaskets - Imperial Gaskets, Geeky Pink's, Sheev's Emporium (redundant much?) Belt - Belts of the First Order Gloves and Boots - Imperial Boots Neckseal - Anovos, Geeky Pink's, Sheev's Metal Holster - R2Dan Anything else I'm forgetting - Probably F-11D and SE-44C - Imperial Factory (updated 19 Oct 21) My collection, with all my FOTK stuff anxiously awaiting. Don't mind the clone armor still in progress
-
Teresa sells them https://www.whitearmor.net/forum/topic/40849-geeky-pinks-phantastic-gaskets-and-so-much-more/
-
Welcome to the forum! Fairly new here myself. I have a TLJ KB kit. There’s a pretty active group that have been tons of help for me. Wouldn’t be near where I am in my build without them. Just a couple of suggestions where you didn’t have a lead.. these are only my suggestions based on my recent purchases from them. Belt- Belts of the First Order (Darren is super active on here and has a really well put together kit for the belt. I also have the TrooperBay belt and did not use it due to it not being as good of quality.) Gaskets, Harness, Shiny Shorts and Neck Seal- Geeky Pink (Teresa is simply awesome. She’s very responsive via messenger and does great work. I have everything she offers for the FOTK.) Electronics for helmet: Speakers, mic and amp, shoulder bell brackets, hearing support mics- (Ukswrath on this forum who sells on eBay. Also super active on here with a detailed build thread you have to read. I have everything he offers for the FOTK. Super fast shipping and also very responsive.) Helmet- Search eBay for an Anovos helmet. Best deals you can find plus you don’t have to assemble or paint it! Sent from my iPhone using Tapatalk
-
Greetings everyone! My name is Alex and I have been a member of the 501st for about 3 years. I currently own a ROTJ stortrooper and a magmatrooper! I've been wanting to do a FOTK for a long while so when an opportunity came for me to get a kit I jumped for it! This is the first time I have started a build thread so I will do my very best to be as descriptive as I can be so my thread can be helpful for future builders! Body Stats: Height- 5'6" give or take a half-inch Weight- 166 lbs Body Style- Average I know I am bit on the shorter side so I may be looking into getting inserts for the boots. Goal: I'm just going for basic approval for this build. Parts Origin: Helmet: Still haven't obtained one (Taking suggestions) Helmet Audio: Still haven't obtained (This isn't as important as other options but I would like to speak one day) Armor: KB Props FOTK Kit Gaskets: Still haven't obtained (Thinking of Geeky Pink's as I have heard a lot of good things!) Gloves and Boots: Still haven't obtained (Pretty sure I am going to go with Imperial Boots for both) Belt: Still haven't obtained (Taking suggestions) Blaster: Still haven't obtained (Taking suggestions but would like a kit that could have electronics added) Build Chapters: (These will link to later posts.) Foreword Out of the Box 1. Trimming 2. Assembly 3. Painting 4. Strapping 5. Test Fittings I look forward to the build and for everyone's help and advice!
-
Mandatory Information Armor = AP Helmet= AP Blaster= 3D Printed Optional Height = 5' 11" Weight = 210 lbs Boots = Imperial Boots Canvas belt = AP Hand Plates = Silicone AP Neck Seal = Geeky Pink Holster = AP Armour Photos Full Body Front Full Body Back Full Right Full Left Right Side Detail Left SIde Detail Action Shot Abdomen Detail Cod and Butt Plate Attachment (edited, removed white paint on crotch rivet exterior) Interior Strapping Helmet Detail Photos Front (edited, removed paint overlapping upper gums on several teeth) Sides Back Hovi tip detail (edited, added white paint to rim of Hovi tips) Lens Colour (edited, took different photos with different lighting) Though it's not as vibrant as the ones from Trooperbay, I used this one from amazon. It's darker, but green. Ammo belt Holster Attachment (front and back) Neckseal Blaster left side Blaster right side Blaster back (ring) Thermal detonator (all sides) Boots Ammo Rivet Sniper Knee (all sides) Gloves Shoulder Straps Chest Attachment Shoulder Straps Floating in Back and Elastic Attachment (edited, added different angle to see white strapping under shoulder) Forearms (edited, added a few shots of the wrists. Wasn't sure exactly what was needed here so I took a few shots from different angles)
-

Roukies 850 Armor Works R1TK WIP
TheRascalKing replied to Roukie 1's topic in Rogue One Build Threads
My dude, it's not just a neck seal like ANH... It's a whole undersuit if you do it right. Here's a photo of mine on a mannequin from Jimmiroquai. Lotta late 90's industrial goth club vibes happening: Mesh makes it cooler and I wear a moisture wicking t-shirt underneath, but you get the idea. Jim's undersuit was excellent and only needed to be taken in a bit for me. The only people I know making them are Jimmiroquai, maybe Darkside Closet, and maybe Geeky Pinks. Ask around and let us all know! -

StarTrooper's TFA/TROS FOTK Build Thread (KB Props)
StarTrooper replied to StarTrooper's topic in TFA Build Threads
Hey! Good to hear another new FOTK! For the gaskets, I managed to pick some up at a local Joann’s which happened to have some in stock from this link: https://www.joann.com/cosplay-ribbed-pleather-fabric-black/16228017.html I’m not sure if there are any near you, but it’s definitely worth a check. Unfortunately you can’t order it online, it seems like they are no longer making it. If not, it might be a good idea to message jimmiroquai on the RPF (Replica Props Forum) or Geeky Pink here on whitearmor.net. Hope you find a solution! -
From the Phasma FB Group: an old list so prices may have increased The Kits Helmets: Jimmiroquai (Jimmi/Jim): Jim’s helmet is $175 by itself. Requires some modifications to remove the excess eye flashing. Shipping ranges in price since it’s shipping from the Philippines. PM Jim for a shipping quote. Teresa Nuthall, Jessica Bowyer, Molly Lewis, Jen Belgin and Laura Williams have Jim’s helmets. You can find his work on the RPF. http://www.therpf.com/showthread.php?t=252114&highlight=jimmiroquai How to buy: PM on the RPF or Facebook (Shipping may take a while) Construction status: Message Jim Shawn Thorsson: Resin helmet. $225 for the raw cast plus shipping. Will require some mods as well. Ingrid Moon have Shawn’s helmets. Construction status: Active Misty Melillo started out with a Curtis Hoines helmet (Phasma V1) but now she has an Anovos for her V2. Armor: Jimmiroquai (Jimmi/Jim): Jim Tripon is the maker. His armor is made out of flexible fiberglass. It has some weight to it and certain pieces will flex, like the ab and calf armor. His newer kits are extremely accurate and are a fair bit lighter than some of the earlier versions. Jessica Bowyer, Jen Belgin and Molly Lewis have Jim’s armors. Cost is laid out as follows: Full set of armor and helmet: $980usd Armor only: $880 Jim requires a 40% deposit to start casting the kit. Shipping cost ranges. Message Jim for quote. You can find his work on the RPF. http://www.therpf.com/showthread.php?t=252114&highlight=jimmiroquai (Shipping may take a while. Message Jim for construction time) Phasma extras: Yes. Message Jim for info about what this involves. Construction status: Message Jim Shawn Thorsson armor: Shawn’s armor is made of fiberglass with some of the smaller bits made out of urethane resin. A complete kit costs $1965 and gets you all of the hard parts, helmet included. Shawn says the armor is best suited for those of a medium build. 5’8” and up. Misty Melillo has Shawn’s armor. Shipping varies, depending on buyers location. Shawn is located in Northern California. PM him for quotes. Construction time is 2-3 weeks depending on backlog. His process can be seen here: https://www.flickr.com/photos/8050182@N06/sets/72157659464323179 How to buy: PM on the RPF or Facebook Phasma extras: Yes. Message Shawn for info about what this involves Construction status: Active 850 Armor Works: 850 makes a basic plastic FOTK kit. Like KB, it fits a wide range of body styles with some trimming. Cost: Base kit is $600. Phasma upgrades is $150. How to buy: PM on Facebook. Construction status: Active (Helmet is not approvable.) ****All kits come with greeblies, finger armor, holsters and foot armor. Toe plates may need to be made by builder. See page for tutorials.**** KB also makes FOTK armor and Phasma kits, should be listed with Geeky Pinks thread Soft Parts (Gaskets/Neck Seal/Belt/Boots/Cape/Belt Pouches) Gaskets and Neck Seal: Geeky Pink’s Phantastic Gaskets: Our very own Teresa Nuthall stepped in to make gaskets for our group. Her gaskets are extremely well made and made with much love. Most will require some modifications to get them to fit to your body but she provides clear instructions. Teresa has a neck seal as well that runs about $45. She will take commissions for anything you might need. She’s done gaskets for Death Troopers and Shore Troopers. If there’s anything you want, PM her and she will do what she can to help. Minimal wait time for costruction. Cost: Contact Teresa Construction status: Active Neck seal: Amazon: $12-30 eBay: $15 Trooper Bay: $55 Darman’s Neck Seals: http://www.whitearmor.net/forum/topic/21385-darmans-neck-seals/ Cost: TK with velcro: $30+shipping TK with zipper: $38+shipping Gaskets: Imperial Gaskets: They make two kinds, a rubber latex version and a fabric version. Fabric version: $150. Has the shiny look that the rubber gaskets do but is latex free. Compression shirt neck seal: $75 Rubber version $300. Movie accurate. Will require some assembly and modification on your part. Contact: ImperialGaskets@gmail.com Construction status: Extreme Waitlist FN Armour: FN Armour gaskets are pretty common but a word of caution, the FN company has had issues with recasting in the past and has been placed on various DNB lists throughout the FISD. Their gaskets aren’t very popular with many of the Phasma’s. Consider going to another maker. Construction status: Caution Jim Tripon gaskets/pouches: Jim makes gaskets for his FO armors. They’re cloth and pretty sturdy. Cost: $120+shipping Pouches: $20+shipping (Both of these can be included with the armor. Jim recommends Imperial Gaskets, for more screen accuracy.) Sister Margaret’s Gasket Emporium: Sister Margaret’s works in Waves. Which means orders will be taken until slots are full and then construction will begin. This is a group of 1-1.5 so construction runs in a limited manner and as such may take some time. According to Sister Margaret’s maker, this would make a great alternative gasket maker. Orders may take 2-4 months to complete. Cost: Monies only due at time of sale once items are shipped. Currently sets with internal ribbing is set at 255 before shipping. Without internal ribbing and instead double foam (ribs will collapse a bit but not as much) 180. Message for pictures of different styles. Larger sizes would start at that price but wouldn't move much. Shipping is through Fedex Contact: PM on Facebook Cape: Jessica Bowyer is one of our own. She makes a gorgeous cape that is screen accurate and comes in two versions. There’s the rubberized version and the canvas version, both of which can be 501st approved. Cost: Contact Jessica Construction status: Active Joanne Marriott: Joanne takes costume commissions and she does a little bit of everything. Her cape is gorgeous so if you’re interested in getting a cape made, give her a PM. Cost: Contact Joanne Construction status: Active ***Cape hint and tip*** The cape is kind of tricky, especially since many people don’t make them to sell. A lot of people make them themselves or go to a local seamstress. This might be good because it can be custom made to your measurements. There just aren’t a lot of trusted sellers out there so if you see a person selling her cape, post in the forum and the veterans may be able to give you some advice. There may be some cape patterns floating around as well, that individual makers may be willing to share with the party. Belt: Jessica Bowyer also makes a belt that can be used to attach the boxes and pouches too. It’s a ribbed rubber and attaches with velcro. Very simple to use and works great (no clips!) Cost: Contact Jessica Construction status: Active Darren Vaughan (Belts of the First Order): Darren’s belts are pretty common with the FO’s. There are three layers to the belt: the outer is ribbed rubber, the inner is sponge rubber and the inner is webbing. Buckled together and there are chicago screws included for the boxes. It all comes together to form a fitted and comfy belt. Cost: AU$70 shipped Contact: PM on Facebook or email: beltsofthefirstorder@gmail.com Construction status: Active ***Belt hint and tip*** Many people have made their belt themselves, using ribbed rubber they find at their hardware stores. That way, if you can’t get one from any of the listed makers, there are still options. Also, self-drilling screws are a great way to mount the boxes to the rubber. Then you don’t have to fiddle with gluing chicago screws and the like. Belt pouches: Phasma has two belt pouches located on her left hip. They are canvas in construction. The longest one is about the size of a Samsung cellphone and is faced with chrome. The second box is relatively squat. This one does not have to be faced with chrome. Trooperbay is kind of the only place I’ve found the belts ready-to-ship, already-constructed. If there are any independent makers, please let me know! I have these pouches and I don’t mind them at all. They’re big enough to hold my phone and Aker and some snacks, which is always a plus in my book. Where to buy: https://trooperbay.com/star-wars-stormtrooper-tfa-first-order-stormtrooper-black-canvas-ammo-pouch-set Cost: $60 Belt and pouches: KB and Shawn both make their own belts and pouches and are included with the armors. Justin Lee Morrison’s Extras (holster/greeblies/belt): Justin’s holsters and clips are very clean and well made. Fit great with the armors and he now has a way to attach blasters to the thighs, which is always handy. Justin’s easy to work with and will combine orders when needed. Turn around time is extremely quick, especially considering he’s in Ireland and shipping can be funky. Holsters (v3, now stainless steel top) with rifle bolts. Assembled £50 Aerators (aluminium) £20 (Not necessary for Phasma’s but good for FOTK’s) Clip set (6 large, 8 small) £20 Belt £25 All of the above in a set £100 plus shipping (and Justin will also add extra clips) Contact: PM on Facebook Construction status: Active Boots: Okay boots are tricky. There’s no real specific design needed (unlike the TK’s and FO’s). As long as they’re black leather or leather-like and have no pronounced heel. Because Phasma is so tall, many Legionnaires have gone with lifted boots. These can be found on Amazon or ---------------- For now I’ll just list the first pair of boots I got, so you can see a common style and maybe go from there. Jodhpur style boots (common TK style) Amazon: https://www.amazon.com/gp/product/B00CUHT46M/ref=oh_aui_detailpage_o08_s00?ie=UTF8&psc=1 Cost: Around $60 Boots don’t have to be too specific. Some have even gotten boots with lacing. The armor will cover it and the foot armor will hide a majority of the boot. It just kind of depends on comfort for you and how tall you want to be. My second pair of boots is a lifted pair of boots that I found on clearance on tallmenshoes. They give me an additional 4 inches in height with room for another inch lift insert. I’m not sure how stable they’ll be but my hope is that they’ll be comfortable enough for my armor. If anyone has boot suggestions, send them my way. I’ll add them to the list. The bits and bobs So if you’re like me and live in a small town in the middle of nowhere, this costume can be kind of tricky to put together. I got a lot of stuff on Amazon and eBay because it was cheaper than driving to a city an hour or more away and run the risk of the stores there not having what I needed. I’m just going to list some of the things I’ve had questions on over the past year and go from there! You know the drill-if you think of anything you want me to add, let me know! Or if you have any questions, ask and I’ll try to find the answers and get them here. Sound system: ------------------- I think most people go with Akers but I found this little guy for relatively cheap and it works well. I just keep it in my smaller belt pouch and it fits perfectly. Wireless mic:---------------------- I love this wireless mic. It works great and it’s one less thing I have to have on my head! Syncs up great and works perfectly with my sound system. Hearing system: Enviro Kit is a great little trick. My handlers call it the Diva Hearing Aids. Jessica Bowyer brought this to the group. What it is is a set of tiny mics that you place in your bucket and it’s connected to an audio feed that you can connect headphones too. It’s a great system and if you’re like me who is already HoH it’s a good trick to have in a visually impaired bucket. Cost: $80 +$17 shipping anywhere in US or Canada. Shawn Preston is the builder and he has everything on hand to make it. If you want to wear it with headphones he’ll give you a discounted price. How to contact: Reach out to Jessica Bowyer. She’ll get you set up. Helmet lens: I am currently using the lens that came with my Jimmi bucket. It works pretty well but it’s getting scratched up so I will eventually have to replace it. Jessica told me to get a welding mask shield. Seems like a great thing to have on hand. --------------- Extra fingers: My fingers broke the first time I wore Phasma so I needed a Plan B. I got mine from Jim Sleeth. They’re resin cast, extremely sturdy and very easy to modify. Cost: $30 plus shipping. Contact: starbuck@gate.net KB Props and Shawn make replacement fingers as well. Contact for cost and shipping estimates. Fans: Fans are pretty essential for this costume. And pretty much any helmeted costume. If you’re interested in an already assembled setup, check out Troopercoola. They make custom fan setups and have a lot of different options. Cost: Varies Contact: Troopercoola Undersuits: This is all personal preference. I did the one piece bodysuit for a while and hated it. It made going to bathroom difficult, it wasn’t comfortable and after 6 troops I couldn’t do it anymore. I’m currently wearing an underarmor compression type shirt and some high waisted yoga pants that are extremely comfy and make emergency bathroom stops easy. If you’re going for movie accuracy though, then Stormtrooper Undersuit might be for you. This is the suit that was used in the movie and it’s a thick spandex with the glossed upper thigh. It has a crotch zipper as well, which might be handy for the guys. Maybe not so much for the ladies. Cost: £49.99 Where to buy: https://www.stormtrooperundersuit.com/star-wars-first-order-stormtrooper-costume-armour-compatible-bodysuit-undersuit.html Blaster: A blaster is not required to be approved of course, but it really is cool to have when you’re in the armor. I believe most people have the Heston blaster. There’s a lot of options for this blaster and price varies depending. You will have to chrome it yourself and if you want to be extra fancy, you’ll have to tint the chrome gold. Where to buy:-------------- Cost: $175+ If you have the ability and a 3d printer, there are free stl files on whitearmor for the F-11. Will require some work on your part but could be fun! http://www.whitearmor.net/forum/topic/32544- (you’ll have to be a member of the forum to open the link) There’s a lot of other makers on etsy but I am not sure about their quality or their ship times. So proceed with caution and make sure to do your research. Spear: (TLJ) JJ Industries is currently knocking out some great spears for current and future Phasmas. Luke offers a raw kit and a polished and finished kit as well. Current pricing breakdown: Price: - £90 Raw Kit - £120 Mirror Polished Extras: - £20 Padded Case & Polishing cloth Shipping: - £25 UK - Parcelforce Express - £30 Europe - DPD Express Classic - £40 USA - DPD Air Classic pictures can be seen here: https://imgur.com/a/rm9P0do Visit his page for more info. https://www.facebook.com/JJIndustriesUK/ Did you get your kit from another maker not listed here? Be sure to let me know so that the rest of the group can find them! List is subject to change.
-
Progress report: So far I have pretty much roughed all pieces together. Going through some sizing and fitting mock-ups. I have placed my order with Geeky Pink for the harness, seals and shiny shorts. Picked up a set of gloves from Imperial Boots. Got my compression undersuit. I’ve also added fans to the helmet, and started to make the snap pieces to attach the cod and butt to the torso. I’ve constructed the belt also. Just need to find a way to keep the back part of the ribbed rubber strip attached to the belt webbing. It’s tricky because it needs to be able to be adjusted for size, so I cannot permanently affix it to the webbing around the back and side near the clip. I’ve tried Velcro but it doesn’t stay attached to the rubber. I’ll have to do some more research. Also, I’m already starting to get some cracks in the sides of the torso and the shoulder areas of the yoke. I’ll have to re-sand, fill and paint again. So far the major flaws in this kit is that the parts that will be flexing the most, from just putting the armor on, are also the parts that have been pieced together and are structurally weak points. I wish that the torso and the yoke was one single piece of material for each. I’ve still got a lot of work ahead of me.