
Parquette
-
Posts
560 -
Joined
-
Last visited
-
Days Won
1
Content Type
Profiles
Forums
Gallery
Articles
Everything posted by Parquette
-

darthcue's ROTK build (jimmiroquai)
Parquette replied to darthcue's topic in Rogue One Build Threads
The fiberglass. I put 2 part epoxy putty on it last night, and so far it seems to be doing the trick. I've done that on other parts of the armor and no further cracks have shown up. -
darthcue's ROTK build (jimmiroquai)
Parquette replied to darthcue's topic in Rogue One Build Threads
Ok, will get a family member to take a trip to Walgreens xD Yeah I those cracks aren't good. It keeps on getting me concerned honestly, I'm afraid that at the end of every troop it's going to have cracks forming. -
darthcue's ROTK build (jimmiroquai)
Parquette replied to darthcue's topic in Rogue One Build Threads
Hey this helps great! Btw, any update on the armor? And what brand was that dental putty? I'm assuming I can get it at Walgreens? I had new cracks developed at tge bottom sides of the chest armor, where I kept on velcro in and uncelcroing the side connections. How are you attaching the side connections under the arm? This industrial grade velcro is real strong, and I think it's strength coukd be contributing to the stress of seperating and unseperating. -
We can do that. I still think the external baton attachment should be an all round requirement, but that's just me. Mainly because that's a major characteristic of the R1TK baton. I do like the look of Christian's baton itself, I just feel that if it was attached exteriorly, it would look much closer. Also Daetrin, your requirements are good. Nothing need's to be changed as far as I can see.
-
Here's my button based pretty faithfully on the limited screen shots we have. It is my belief that the baton's single connection to the holster is through the same kind of hook on system the FOTK Blasters have to the thigh holsters. I don't know what the name is for those parts, but on my baton it attaches through a snap. So that, the stitching on the edge of the holster, and the shine is probably the only inaccurate things about this build. Hopefully they'll be helpful. EDIT!: Upon further inspection, it looks like there's 2 points of attachment to the holster. If you look at the shadow of the first connection, then look at the silhouette of the baton, it appears there's a darker section on it coming from attachment area. Now if you go downward, you'll find another one at the bottom of the holster on the baton. The holster is clinging to that section. I believe that is the second point of contact. This explains why the baton only budged slightly when the door exploded in the prisoner break scene. There's also a particular highlight at the bottom of the baton itself, as you can see it has a slight reflection at the bottom. I think there's a possibility it could be similar to darthcue's handle, and how it has a special grip section of sorts. I don't know though. If anything, that light reflection on that tiny part could be a handle extension. Here's what I think the CRL need's added: -Has 2 points of connection: One just below the top of the holster, and one at the very bottom of it. -Holster design is as pictured.
-
Very nice. There's only 1 thing I can see. If you watch the prisoner heist scene, when the door explodes, you can clearly see the baton moving back and forth slightly, as if it was attached in front of the holster. Which leads me to believe that the holster doesn't have any sort of "cup" or "holder" for the baton itself, but rather the baton has an attachment that goes into the holster. Mine's attached with snaps, which seems to do the trick. However it swings like crazy if I jog in the armor, and it'll hit me. I think the CRL need's to be updated, considering others might be misled by the rectangular striking section (which isn't there). Let me chat with Daetrin and see if we can get it updated a.s.a.p.
-
I don't have the backpack, but have a pretty close to accurate pauldron and almost completed armor. The only major inaccuracy with the cauldron is that the underside isn't white. however I figure that if a picture's taken, a little photoshop can make it the white color. Here's a pic. Yes the pauldron is on the wrong side. Accidental. I'll be making some accuracy adjustments in the coming days, like making the 2 middle belt boxes thinner. I should note however that I haven't submitted my costume for approval yet. I still have 1 month to go before 18. But I was planning on submitting the pics sometime halfway through the month. --------------
- 1 reply
-
- 1
-

-
Par_'s R1TK build of insanity.
Parquette replied to Parquette's topic in Build Threads Requireing Maintenance
-
Par_'s R1TK build of insanity.
Parquette replied to Parquette's topic in Build Threads Requireing Maintenance
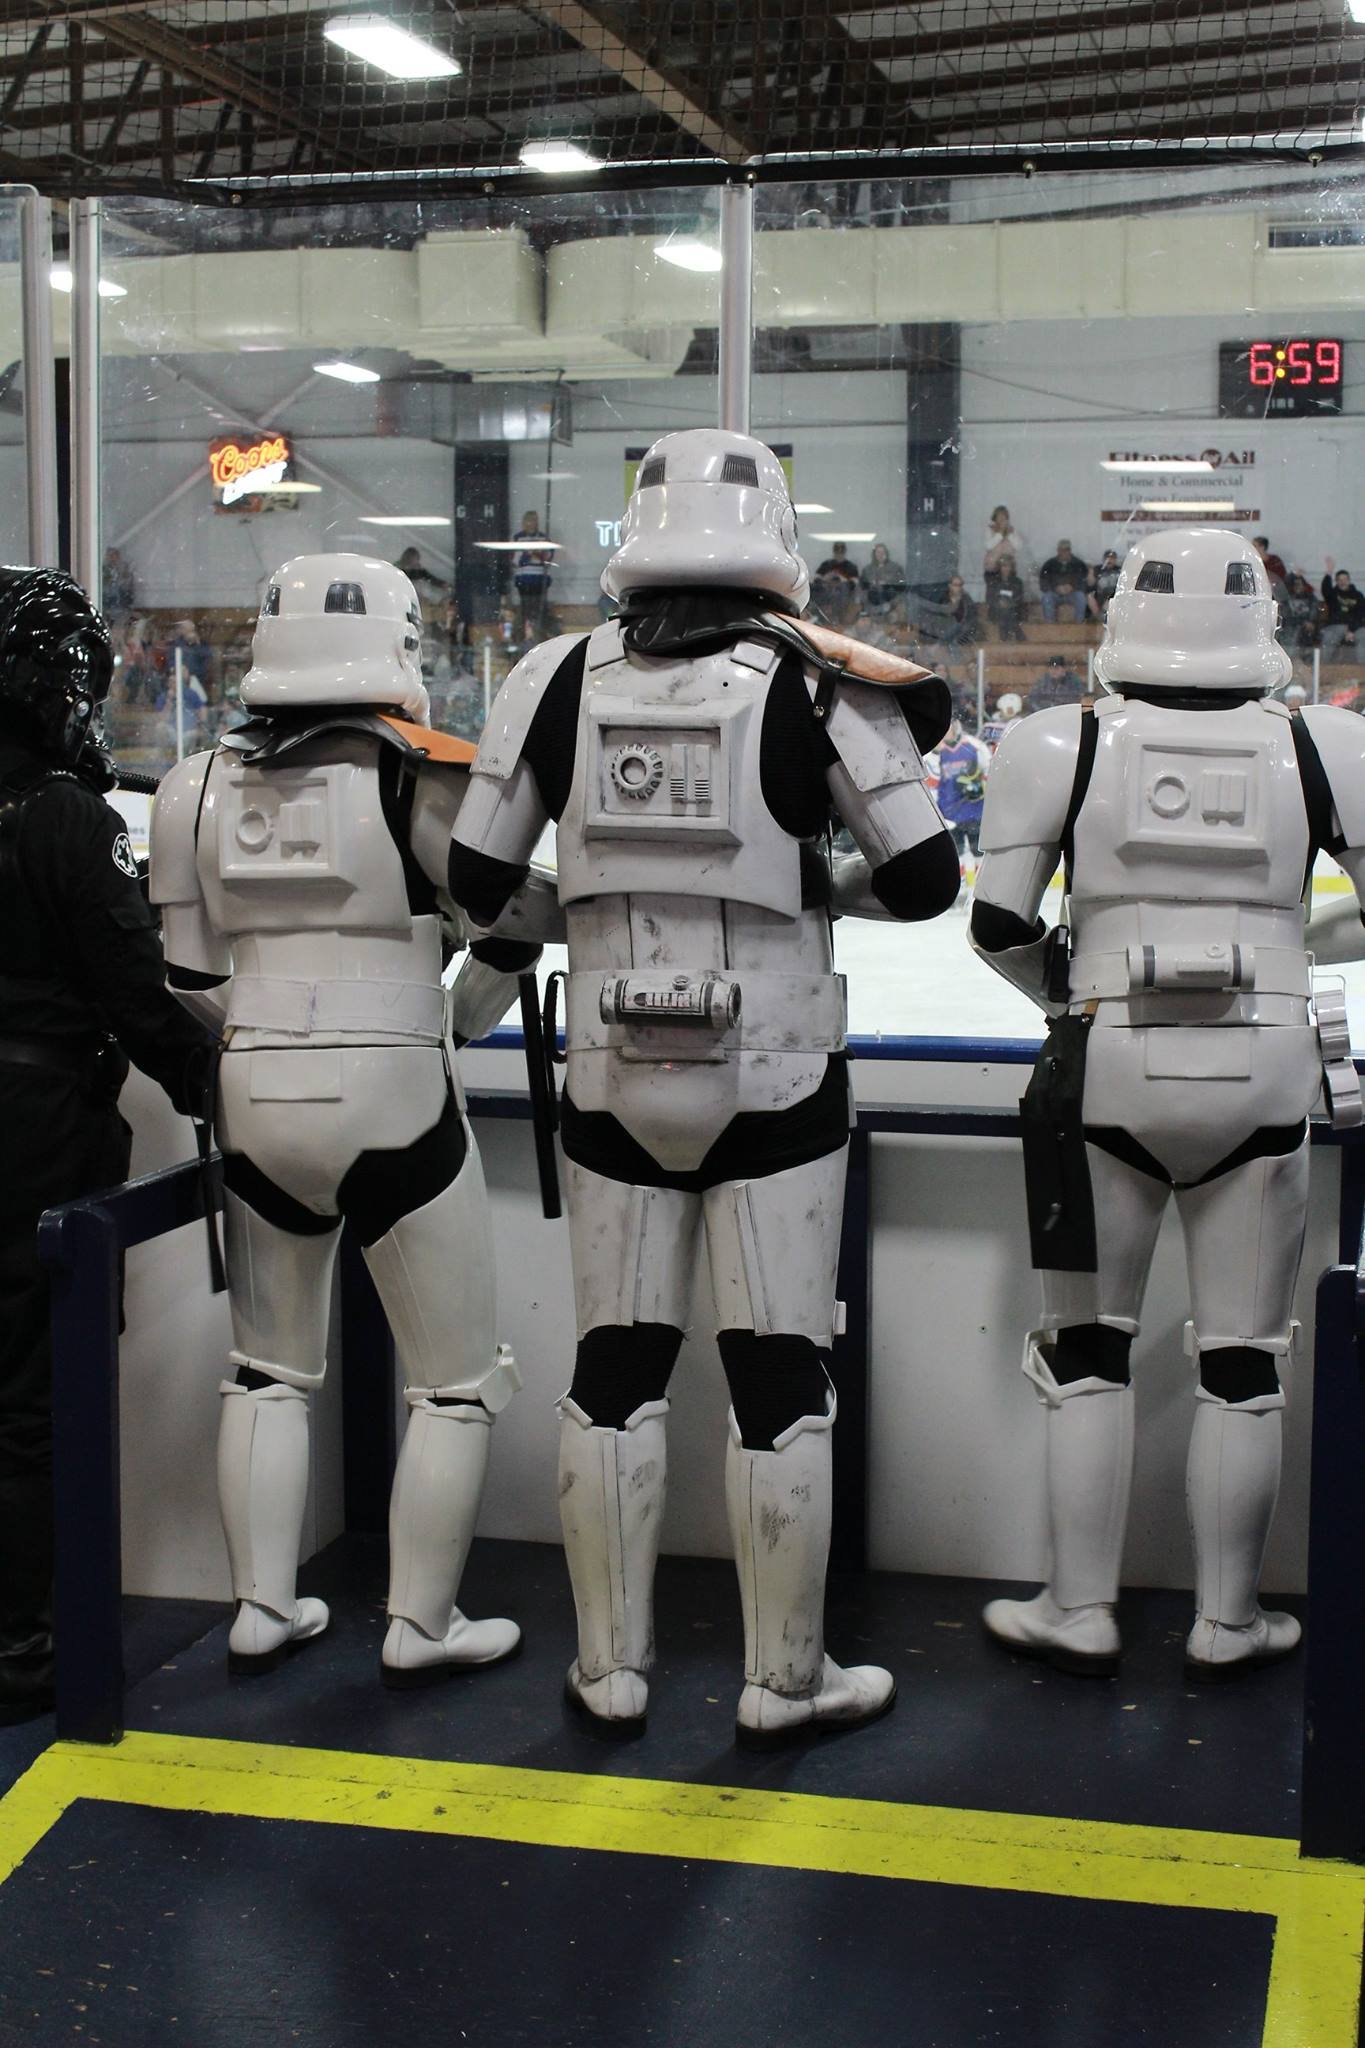
So my trooper is basically done. A few revisions here, some replacements there, but for the time being it's finally done. I'm officially the 3rd ever R1TK!!! Now after revisement, all that remains is to submit for approval I apologize for the poor lighting, I'll hopefully get some better ones this Saturday at a troop. My handplate accidentally took the fresh velcro off of one of my hands, so it looks a little bare in the below picture. Also in regards to my thigh height, here's an official picture from the visual guide to Rogue One book. The gap between the belt and the thigh's is pretty big in that one, just like mine. Hopefully this mean's I'll be ok. Also, if you look to the right of the belt, that's my Wobani Labor Camp guard baton and holster. It's pretty accurate, with maybe 2 liberties. I'll post better pics soon. The side connection isn't alligned properly in the below pic. And Gmrhodes graciously photoshopped my armor in the pic below. It was mirrored because my pauldron was on the wrong side (oops!), so the rest of the armor is on the wrong side! Oh well..... Get's the look across. Mine's the TK closest to the camera. List of things to adjust/change: -Make 2 middle belt boxes thinner. -Adjust/trim the knee/thigh area with the knee guard. Due to the non-curvature nature of my thigh armor, my thigh protruded out just enough to where it kept resting on top of it and chipped away at the paint. Have an idea on how to do this. Which leads me to the next thing: -Make thigh's less tight. The screen used assets had the thighs close in the back, and in many scenes of the movie you can see the closure seperating. I'll make a shim in the back closure to allow for the thigh's to go higher on my leg. Because they're low, that's what was causing the previous mentioned problem. -Strap replacement/additional strapping. -In near future, replace full abdomen/kidney armor. The closure to my current armor is at the sides where the slanted black lines are. I assumed in the film that that's the real closure, and figured this would be the best way to close it temporarily, until I work out more and get fitter. Didn't want to permanently e6000 something now, then try and separate and trim down later. So I used shims out of styrene plastic (for sale signs at Ace Hardware), but because of how thin and flimsy they are, I doubled the shim. However, this doesn't stop it from flexing when I slip in and out of the side closure. -Sew velcro for gaskets onto knee areas of pants. -Repaint some of the armor, and add a brown weathering onto the black weathered areas. And that's it! This'll all come soon, but in the meantime I'll provide better shots pretty soon. I may make the belt box adjustment before hand. -
Agreed. I just don't see why they would go with the block-shaped route. It just doesn't look like a riot baton aesthetically. Also, here's my updated baton if you'd like to update the CRL pic. I think this version opens up the grounds for whatever shape the real one might be. So far, we can determine that it's got a cylinder shape for the most part. This picture I think confirms the cylinder shape. Also in this shot, it looks like there's a tab protruding from the baton into the holster of the belt. You can see the shadow from the explosion. I'm wondering if the baton runs on the same 'hook on" system the FOTK blasters do (when you attach them to the thigh). Also, judging by the light reflection off of the holster, it looks like it could be made out of leather. Here's my baton.
-
Yup, it's black.
-
Hey man, where did you get that mannequin? Link?
-
Not really a requirement. As long as it has the look, it's good. The CRL only says that because it's talking about specific sections. But Jim's armor is the CRL model for it actually.
-
Another observation. I have identified a "stunt" variant in R1. Take a look at the thighs in the shots below. notice how they don't rise higher and are actually completely flat at the top? That's for the specific scenes they are in. For instance, the first shot is where K2-S0 whoops some trooper's butts in the vault. So either they did use this suit for a real stunt, or it's a recycled stunt suit from other sequences. Which leads me to the next shot. Notice how the troop next to the tank has the exact same cut thighs. Allows for greater mobility in stunts. Also notice the big black gap in between the thighs in these shots and the belt. I'm actually struggling with a problem. My thighs I think are cut a fraction of a fraction too short at the top, and the gap between them and the belt is just about as severe as the 1rst screen shot. I was wondering if this would be a problem for 501st basic? I tried raising them, but that just makes a gap in the knee (causing it to not touch the top of the shin). I'll provide a pic below, along with some references images that also suffer from the same problem Notice the low cut thighs on the front row left trooper. Also note how easily some of the drop boxes got caught behind the tops of the thighs.
-
Par_'s R1TK build of insanity.
Parquette replied to Parquette's topic in Build Threads Requireing Maintenance
Attached the thermal detonator this evening. It's scratch built from PVC, and still needs some final things added (interior walls at the ends, and the control panel). Still has yet to be weathered. Also my trooper decided to lounge around last night instead of patrol the area, soooo......... This build should be more or less finished by next Tuesday, so I'll definately post pics. -
How do you plan to set up the strap attachment to the chest to keep it from doing that? My R1TK is heavier in the back and if I move too much, the chest can ride up my neck. Do you plan on using elastic or nylon strapping for it?
-
Par_'s R1TK build of insanity.
Parquette replied to Parquette's topic in Build Threads Requireing Maintenance
The crotch is going to be slightly lowered. However, if it's regarding the height, that's kind of how it fit me. -
Par_'s R1TK build of insanity.
Parquette replied to Parquette's topic in Build Threads Requireing Maintenance
Did another test suit up of the armor, this time with some revisions. Aside from some obvious parts being misaligned, and my left shin being unvelcroed (I don't have the other side of the velcro for it to connect). I could really use some advice and assistance in determining if my suit looks ok. So the revisions and additions include the tops of the thighs are more accurately cut, and I finally added the drop boxes. however in these pics the right drop box popped off (not enough e6000). Got the rear half of the belt made, and tightened the shins to better fit me. So far, things I need to change are: Lower and trim butt armor (lower to be more visible, trim so it doesn't poke into my crotch area), Adjust the cod piece, And here's comparison shots for the gaps in the back, and the height of the thighs in the front. I know the thighs seem low, but the actual costumes have short thighs. mine might be a fraction lower than they should be, but hopefully it'll do. Gaps in the rear. The rear of my belt is angled upward because i need it to cover separation. It resembles other belts seen. Here's 1 final image showing some of the height differences under the belt and above the thighs. This was amongst the first leaked set images from Rogue One's production. If you look at the front row on the right, you'll see that that trooper has a decent gap. The drop boxes just graze the top of his thighs, versus going past the top and rests on them. -
The R1TK thighs can be just above the sniper knee guard, or slightly behind it. Just know that if it's behind it, it'll involved more risk of the guard being overlapped by the thigh. ----------
-
Great! So I'll keep the weathering at that, "tempo," if you will. In regards to the baton, I have another picture that shows the cylinder overall shape of it. You can see the holster blur, and the black silhouette of the baton.
-
Here Daetrin, I updated the mud on the trooper. How's it look?
-
Right, I'll make some updates to the weathering. I'll try to make some of the details really pop through darker weathering, but otherwise I'm going to try to keep it on the brink of just muddy, and clean. Also, baton update (and anesthetically it makes much more sense to me, as a real baton). The baton isn't squarish. I was just rewatching the scene and the square part we're seeing is in fact the holster, like another member here referred to as a possibility. Please forgive the crappy cellphone pic. See how the rectangle is off set? But also notice how the handle has a very close width to the top of the baton? This leads me to believe that it's really just a spherical baton. I'll make an updated baton to reflect this and will post updated pics for the CRL.
-
Yup, just wanted to know if the muddy weathering is official so that it can be approvable.
-
So I can, in good conciense, weather my TK to reflect the muddy transport guard and it will get approved? I've already done so, but it's not a lot. It's on the border line of clean and muddy. But not too muddy, I like the white If the above is the case, would you be willing to sometime update the current CRL to include this option?
-
Par_'s R1TK build of insanity.
Parquette replied to Parquette's topic in Build Threads Requireing Maintenance
So yesterday I decided since I already have the baton, and weathering would hide some mistakes, AND I liked the muddy dirty "sullust" look from Battlefront, I decided to make this trooper the Wobani Labor Camp transport guard. I hope someone will be able to clarify which detachment will get this trooper. I want to have my mind at ease xD Anyhow, I weathered it using black Acrylic Paint from Joanns (or Hobby Lobby), and used it to create mud smudges and spatters. I also received my mini tactical flashlight for my E-11 from Ukswrath today. Already attached it, but I'm waiting for the paint on my e11 to thoroughly dry (no, I didn't paint the light. I painted the blaster prior to attaching it).