

Mutter
-
Posts
439 -
Joined
-
Last visited
Content Type
Profiles
Forums
Gallery
Articles
Everything posted by Mutter
-
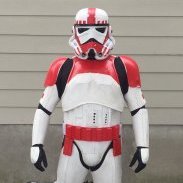
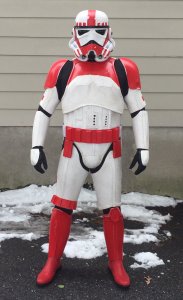
TK 66668 Requesting ANH Stunt EIB Status [AP][469]
Mutter replied to MechaPumpkin's topic in Request Expert Infantry Status
Looking good, Dan! -
AnjelRedemption's ANH stunt build (NE)
Mutter replied to AnjelRedemption's topic in Build Threads Requireing Maintenance
lol, that drove me crazy when I built mine too. I found it rather frustrating but these things happen. First off, let me say your build is coming along great! I'll try to provide more timely feedback. Here are my collective thoughts on your progress. Most are merely suggestions (probably a bit too nit picky) with at least one item that's a 501st requirement. 1 - the nut/bolts used on the belt are going to tear the hell out of your ab plate. I'd suggest replacing them with Chicago screws or at minimum, cover them so they won't gouge your ab plate. 2 - with the belt off, trim the corners to 45 degrees and remove more of the edging along the length of the belt. 3 - since you need to remove the covers to replace the screws holding your belt to the canvas, when you replace the covers, they should be at the edge. 4 - before reattaching your belt to the canvas (because you should replace the screws) heat bend the belt so it curves around your waist. It will sit better. Similar to how the ammo pack on our right knee gets curved. There are tutorials available for this. 5 - the placement of your belt on your ab is correct; just below or slightly overlapping the ab buttons plate. 6 - generally, snaps are used to hold the front of the belt to your ab so it doesn't sag. 7 - your shins look good and on the correct side. 8 - the shoulder bridges came out really nice! 9 - do you have a strap attached to the shoulder bells that wrap around the inside of the bicep? I couldn't see one from the pics. (501st requirement) 10 - I'm not sure if the pic above is correct, but it appears the bicep/forearms are either on the wrong side or the strapping is behind the elbow? 11 - you may want to think about adding a smaller band of elastic on your hand plates to go around your wrist. If you make a fist, does the hand plate stick out? if not, you're good. 12 - I didn't see any pics of how the codpiece is attached to the butt plate. Those are my thoughts. You mentioned you are comparing to EIB submissions. Do you want to obtain EIB (or even Centurion)? It helps gauge the nit pickiness of the feedback (if you wish to have it). Almost everything I mentioned is simply a suggestion (and because I'm tired and my OCD is kicking in ) You've done a great job so far! -
AP Armour with ANH Centurion as Goal - Build Thread
Mutter replied to MechaPumpkin's topic in ANH (Stunt and Hero)
Is it me or did I miss the EIB submission posting? I got 2 more congratulations coming your way! -
Congratulations!
-
You're making great progress! Keep it up! If you look at some original photos of Ab plate rivets 3,4,5, the rivets went through the plastic, then elastic and then were bent onto a washer. Nothing was glued in place. If you want to keep your build "pure", do it this way. The downside is this will be the only connection point that can't be separated. An alternative is to place the rivets through the plastic and then bend onto the washer (no elastic). Then install separate snaps like you're doing everywhere else. Outside is accurate, inside is convenient. Know what I mean? The forearms took me some time, trial and error before I got them where I wanted them to be. I'd agree that it's easier and makes a more accurate fit if the shoulder bells are attached to the shoulders. Two things to keep in mind 1) try to minimize the gap between your bicep and forearm 2) be careful of armor bites. I had glued the snaps in place and marked their location on the outside of the armor. I positioned the biceps and forearms to where I thought they should be and then measured the marks. Based on that, I made the elastic. I did have to do some tweaking but it worked out well for me. Good luck!
-
AP Armour with ANH Centurion as Goal - Build Thread
Mutter replied to MechaPumpkin's topic in ANH (Stunt and Hero)
Congratulations, Dan!!! Looking good! -
Binoculars? Where to get em?
Mutter replied to Templar726's topic in Build Threads Requireing Maintenance
sadly, it's out of stock http://www.doopydoos.com/sandtrooper--stormtrooper-electrobinocular-replica-2505-p.asp -
LiveALegacy's Jes Gistang [KWDesigns] Build thread
Mutter replied to Mutter's topic in Build Threads Requireing Maintenance
Thanks, Teaghan. A belt sander was in the plan but I was hoping a different size pipe would be the easy fix. -
LiveALegacy's Jes Gistang [KWDesigns] Build thread
Mutter replied to Mutter's topic in Build Threads Requireing Maintenance
So I'm working on the TD. I'm not sure how to put the end caps on since they are the same size as the pipe. I tried the heat gun but the plastic started to warp. How has everyone else done this? I'm wondering if there is a smaller diameter pipe I should be using. -
That may explain why it's not working for me. 29cm?! Damn! I'm 40cm
-
LiveALegacy's Jes Gistang [KWDesigns] Build thread
Mutter replied to Mutter's topic in Build Threads Requireing Maintenance
Thanks, Kevin! We haven't sized or positioned the belt yet, just threw it on for the picture. We've been following yours and others build threads too. -
LiveALegacy's Jes Gistang [KWDesigns] Build thread
Mutter replied to Mutter's topic in Build Threads Requireing Maintenance
We rough trimmed all of the armor to remove most of the excess material. For the most part, the trim lines were strong. in some areas, particularly on the thighs, the plastic was really thin near the edges and we had to use extra caution to avoid tears. The trimming bag from hell! So many small pieces that had to be trimmed! After rough trimming everything, we started on fitting the torso. Taped the kidney and ab plates together. There was quite a bit of overlap so we removed a little over an inch of plastic to move the seam closer to center on her side. Fit the back and chest plates and removed the excess material to match the ab/kidney plate joins. This is where I forgot to take more pictures. We sized the biceps, forearms, and thighs. I have to agree with others on the forearms. They're a bit of a pain since they are concave in shape. In order to get Kathi's hand through the center section, we had to keep the wrist opening a little larger. With gloves on, it should look ok. We'll probably add a little foam to the elbow end to keep everything from flapping around. The overlap join on the outer seam was relatively straight forward. We'll butt join the inside seam. I'm considering using ABS paste to hide the seam altogether. TBD. Fitting the biceps were straight forward. Butt joins on both inner and out seam. Metal ruler to cut a straight edge. The thighs were quite possibly the easiest part so far. We removed the rough trim and did a quick sizing. Everything fit perfectly! So I cleaned up the edges and now we're ready for glue. As I mentioned above, the plastic was really thin on the edges of the thighs. I'm talking I was able to push the scissors through the plastic to cut it. When scoring with a blade and ruler, on the second pass, the blade went through the plastic. I'll start gluing everything together this week. Once the shoes come in, we'll work on sizing the shins. I'm hoping to have most of the build completed by the end of next weekend. Here's how she looks so far (we need to raise your thighs). -
LiveALegacy's Jes Gistang [KWDesigns] Build thread
Mutter replied to Mutter's topic in Build Threads Requireing Maintenance
We spent a good part of this weekend trimming and fitting armor. Sadly, I got caught up in the build and didn't take as many pics as I wanted to. Sorry about the crappy pic quality. Not sure what happened on the upload. I started trimming the helmet on Friday while I was "working from home". The trim lines were very strong but I still traced the outline with a pencil. The holes align pretty perfectly to attach the faceplate to the helmet back. Great job, Kevin! Used a Dremmel to remove most of the material from the teeth. The plastic felt a little thin so I drilled a hole where the brow and ears met to avoid any tears. And here's the faceplate. I "urged" Kathi to do the painting on the helmet. Frown taped for painting, varcoder done freehand. A little cleanup to do but a great first attempt! Painting the traps on the helmet back were a real PITA. The indentations were really soft so it was difficult to gauge the outline and keep them symmetrical. I opted to use a ruler to make sure the lines were even. Did a little measuring and taped off the traps. We picked up some dark gray Testors paint and Kathi hand painted the traps. Sadly, I didn't realize it was flat paint To correct my blunder, we used the same gloss dark grey paint for the TD on the traps. The color was much better Just a little cleanup to do. Tonight I'll fit the ears, lens and screen mesh. Finishing paint touchups later this week. -
AP Armour with ANH Centurion as Goal - Build Thread
Mutter replied to MechaPumpkin's topic in ANH (Stunt and Hero)
Wow! Your armor looks awesome! I would agree the ab/kidney plates should be closer together. Perhaps you may need to add shims if your chest is too big? I couldn't tell if the elastic strap was on your shoulder bridges or not. The left bridge seemed to be lifted rather high off your shoulder. Not an issue, but it could snag on something and snap off. Looking forward to seeing your profile with a TK ID real soon! -
NE TrooperGear ANH Stunt Build (First Build)
Mutter replied to jhpeyto's topic in Build Threads Requireing Maintenance
Rub it off with your finger or use a pencil eraser, that works too. -
AP Armour with ANH Centurion as Goal - Build Thread
Mutter replied to MechaPumpkin's topic in ANH (Stunt and Hero)
Dan, as long as they fit around your thigh and are comfortable, that's the biggest challenge. My thighs are still a little too long and I need to trim some off the top. You'll be making adjustments after your first few troops. Stephane, make sure you place the shiny side of the plastic down when you score. This way if the knife slips, you scratch the side that will be glued. And when we say cut, we mean score 3-4 times and then snap. You don't need to cut all the way through the plastic. -
AP Armour with ANH Centurion as Goal - Build Thread
Mutter replied to MechaPumpkin's topic in ANH (Stunt and Hero)
Coming along nicely! -
I'm starting this build thread on behalf of Kathi (LiveALegacy). We both will be updating this thread as the build continues. Kathi ordered her armor about 2 weeks ago. Kevin was a pleasure to deal with. On Monday, a small box was received and the bigger box came yesterday. Kathi came over last night with a huge grin and 2 brown boxes in hand. Obligatory brown box and white plastic on the floor pics We'll start trimming Thursday night and hope to get a good chunk of work done over the weekend. I'm not sure who's more excited, me or her!
-
TK-JR: Astyanax's Foamtrooper Kids Armor Project
Mutter replied to Astyanax's topic in ANH Build Threads
I just came across this. Simply Awesome. Will be watching. -
Congrats! Now the fun begins!
-
Everyone's nervous their first time You're off to a good start by asking questions! You'll do fine!
-
AP Armour with ANH Centurion as Goal - Build Thread
Mutter replied to MechaPumpkin's topic in ANH (Stunt and Hero)
I was referring to the top/bottom of your thighs. Your approach to sizing and trimming for the width was correct. Usually, it's best to cut a little, do a test fit, cut a little more, another test fit and so on until they fit. You don't want them too snug. Did you do the fitting with your (compression) pants underneath? -
Stephane, you are correct. There are 6 rivets are on the left side (3 ab + 3 kidney). On the right, as you see in the picture above, is a male snap. This was used to close the "clamshell".
-
AP Armour with ANH Centurion as Goal - Build Thread
Mutter replied to MechaPumpkin's topic in ANH (Stunt and Hero)
Dan, I would agree with Tony. Wait until everything is assembled and strapped together before trimming. And it's OK to remove the trim from the back of the thighs, they did it in the movies. -
Congratulations, Ruben!!!
